
These truffles are the kind of recipe I keep in my back pocket for weeknight chocolate emergencies and last-minute gifts. They use only two pantry items and a few minutes of hands-on time. No tempering, no double boilers, no long chilling—just straightforward steps that deliver a dense, fudgy bite.
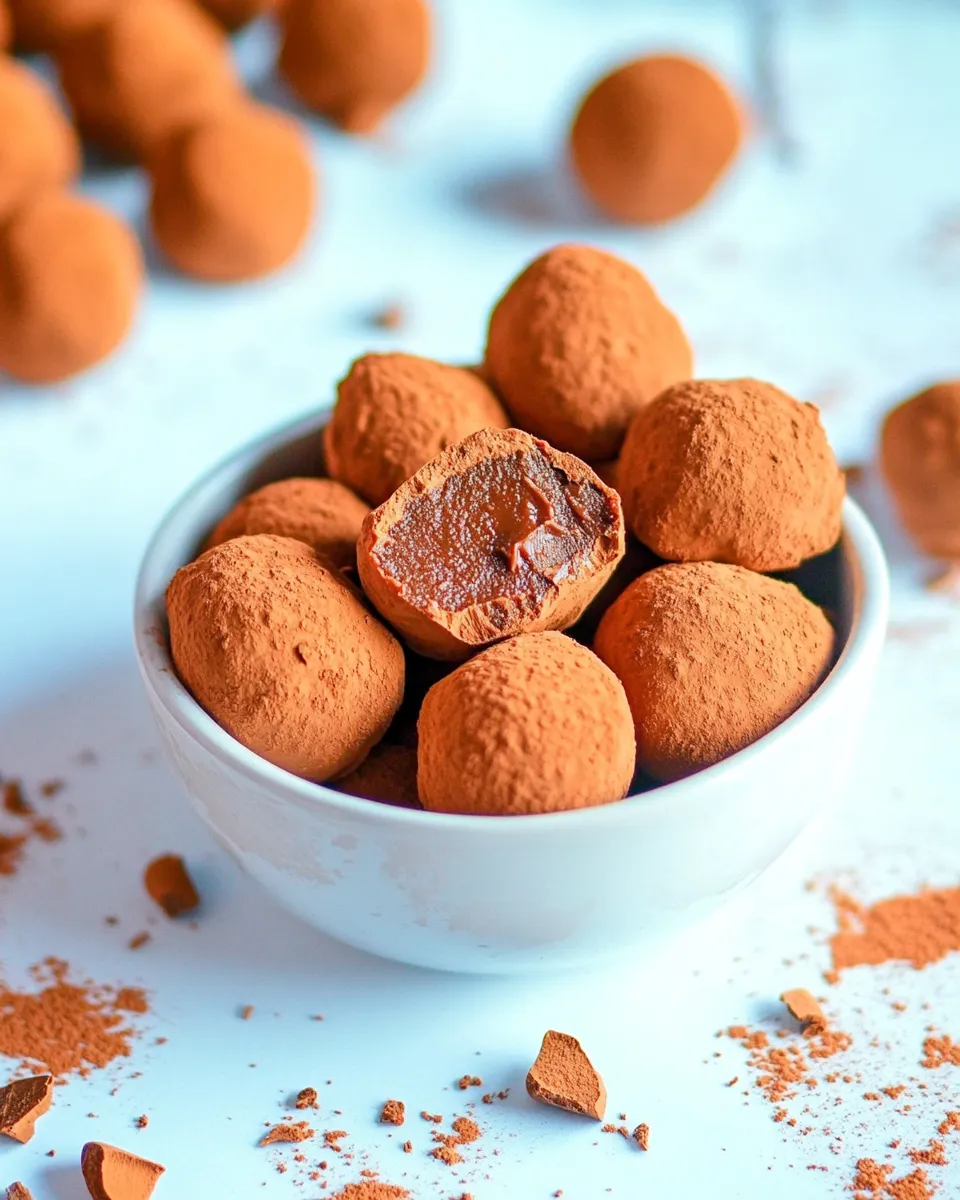
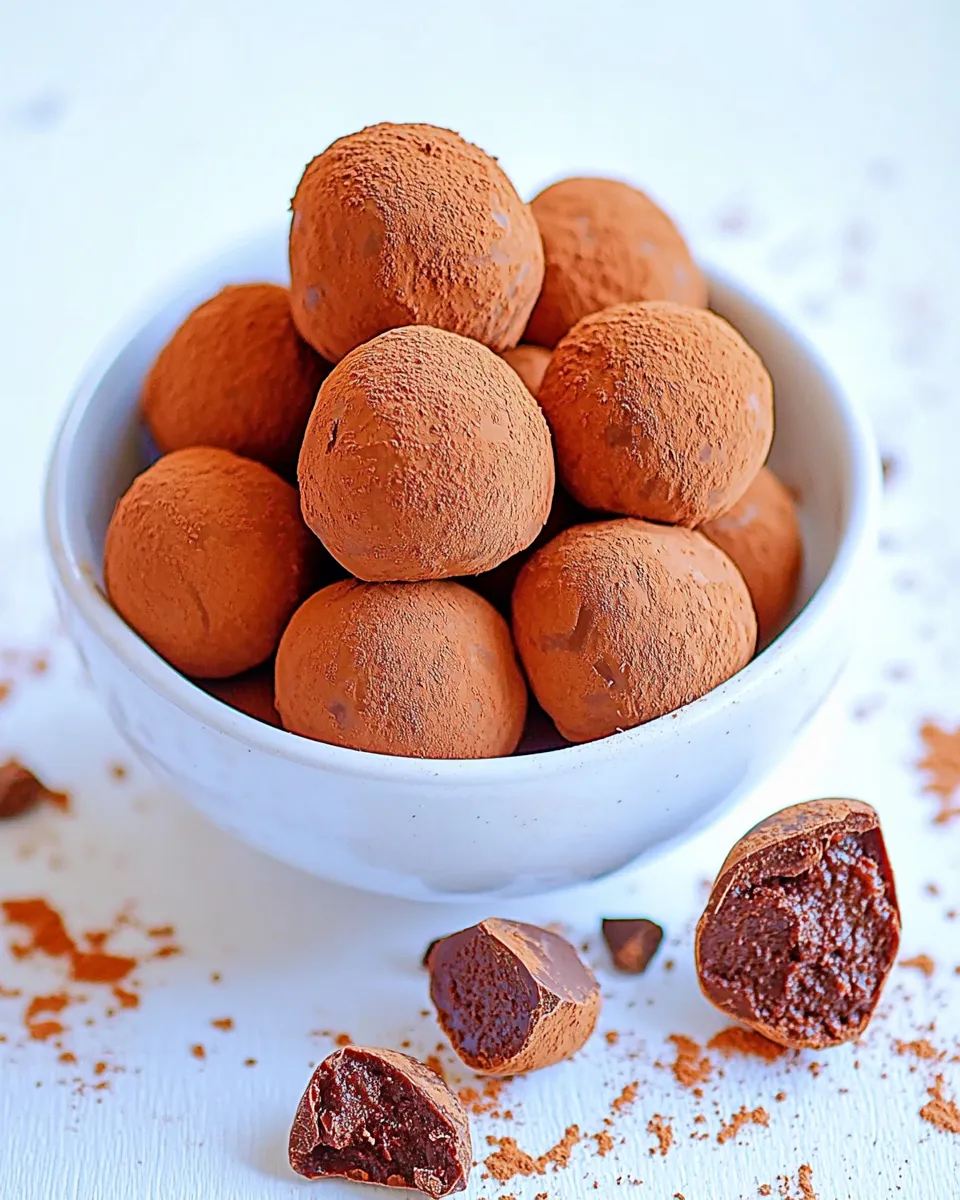
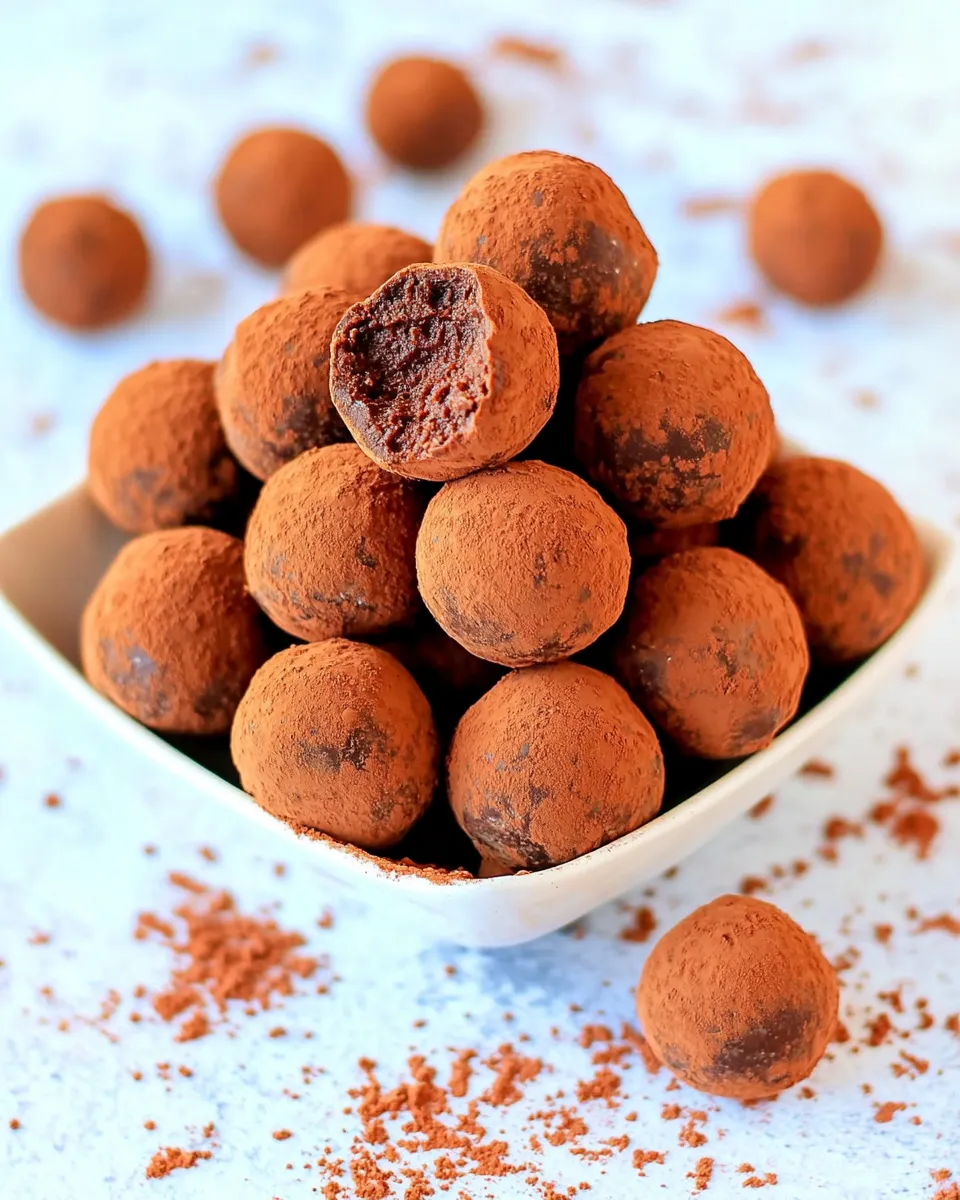
They’re forgiving, too. The texture is rich and pliable straight from the freezer, and the optional extra cocoa powder gives you a dry, classic finish if you prefer a matte, bittersweet exterior. I make a batch whenever I want something that tastes luxurious but doesn’t demand an afternoon in the kitchen.
If you’re new to homemade confections, this is a friendly place to start. Read the method once, gather the three ingredients, and you’ll have truffles ready to chill in under an hour. Below I’ll walk through the essentials, show the exact method, and share tips to avoid common mistakes.
The Essentials
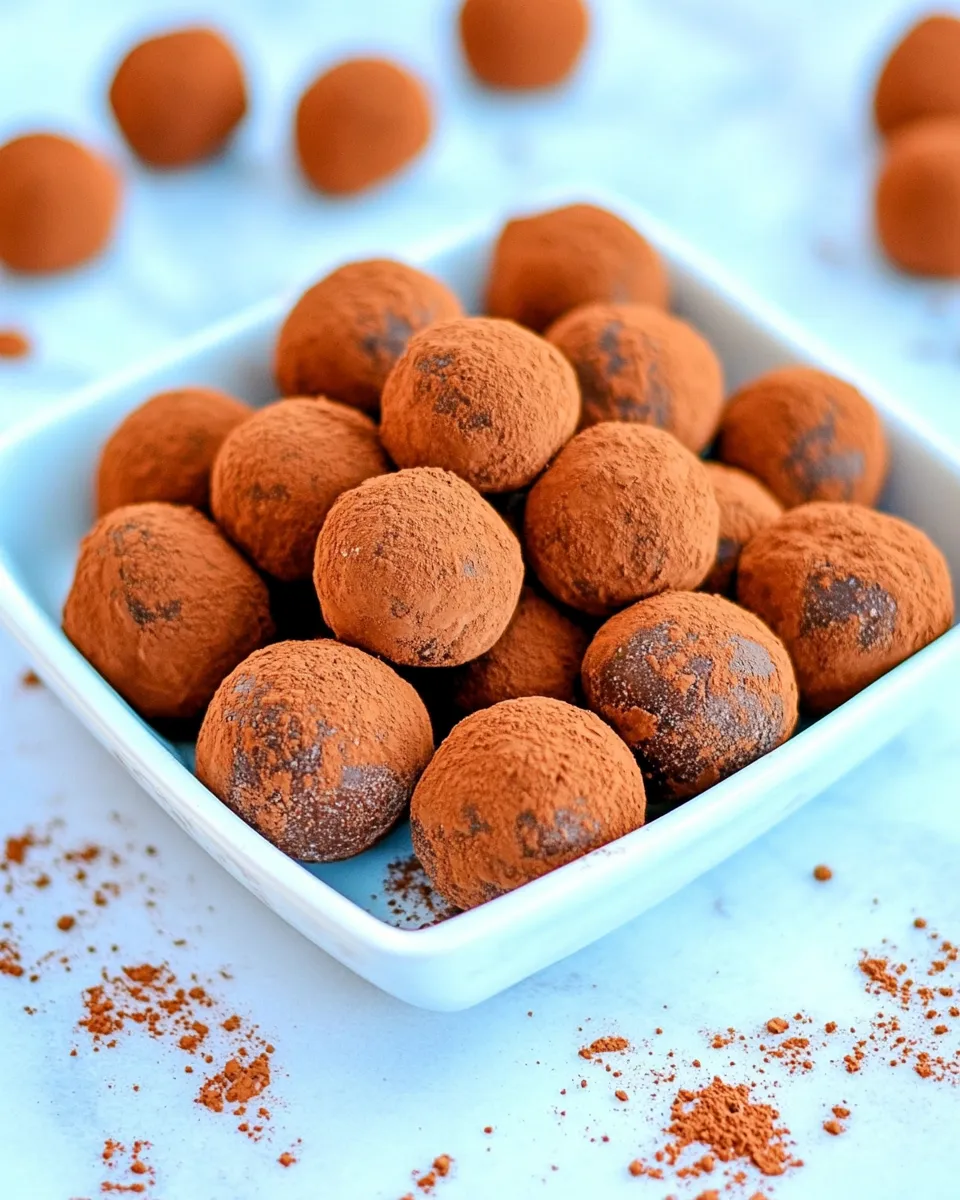
Yield and timing depend on how you cut the disc, but expect around 16–25 small truffles if you cut roughly one-inch squares. Active hands-on time is very short: warming, mixing, shaping. There’s a required chilling step in the freezer to firm the mixture so you can cut and roll cleanly, so plan for at least 30 minutes of chill time.
These truffles rely on two main elements: unsweetened cocoa powder for the structure and flavor, and sweetened condensed milk for sweetness and fat that binds the cocoa into a truffle paste. The optional extra cocoa powder is for finishing and to help reduce stickiness while rolling.
Ingredients
- 2/3 cup unsweetened cocoa powder — for the truffles; provides the chocolate flavor and structure.
- 1/4 cup cocoa powder — for rolling the truffles – optional; helps dry the surface and reduce stickiness.
- 1/3 cup sweetened condensed milk — binds the cocoa and sweetens the mixture, giving the truffles their fudgy texture.
The Method for 2 Ingredient Chocolate Truffles
- Place 1/3 cup sweetened condensed milk in a microwave-safe large bowl and microwave for 30 seconds to warm it.
- Sift 2/3 cup unsweetened cocoa powder into the warm sweetened condensed milk.
- Using a rubber spatula, stir the mixture thoroughly until fully combined, scraping the sides and bottom of the bowl.
- Transfer the chocolate mixture onto a piece of plastic wrap, press it into a flat disc with your hands, wrap it tightly, and place it in the freezer for 30 minutes to firm up. If it is still too soft or sticky after 30 minutes, freeze longer until firm enough to cut.
- Unwrap the chilled disc and set it on a cutting board. Using a pastry cutter or a sharp knife, cut the disc into equal one-inch squares.
- Take each square and roll it between your palms to form a smooth ball. If you are using the optional 1/4 cup cocoa powder, you can dust a little on your hands to reduce stickiness before rolling.
- If desired, roll each finished truffle in the optional 1/4 cup cocoa powder to coat.
- Arrange the truffles on a plate and store them in the refrigerator.
Why I Love This Recipe
It’s honest and efficient. Two pantry ingredients become something that feels special, and the outcome is reliably indulgent. No complicated steps or obscure tools, and the method scales easily: multiply everything for larger batches and chill in a wider, shallower pan to speed up firming.
Texture matters here. The balance between the dry cocoa and the sweetened condensed milk yields a fudgy center that’s not overly oily. The optional dusting of cocoa gives a pleasing contrast: the first bite has a faint dry snap from the cocoa, then a soft, melt-in-your-mouth middle.
Low-Carb/Keto Alternatives
If you’re following a low-carb or keto approach, the main challenge is replacing the sweetened condensed milk, which supplies the sugar and body. A straightforward swap is to look for commercially available sugar-free condensed milk alternatives or to use a specially prepared low-carb condensed milk—if you have one on hand. Note that these alternatives vary in thickness and sweetness, so texture and flavor will differ from the original.
Another option is to reduce the amount of added exterior cocoa dusting (if you’re watching carbs from additional coatings) and rely on smaller portions. Because the recipe yields a very concentrated chocolate bite, a smaller truffle goes a long way for satisfying a sweet craving with fewer carbs.
Essential Tools for Success
- Microwave-safe large bowl — for warming the sweetened condensed milk safely and evenly.
- Sifter or fine mesh strainer — to loosen and aerate the cocoa powder so it mixes smoothly.
- Rubber spatula — for scraping the bowl thoroughly and getting a homogeneous mixture.
- Plastic wrap — for wrapping the disc tightly and keeping the truffle mixture clean while chilling.
- Cutting board and sharp knife or pastry cutter — a clean, sharp edge gives clean one-inch cuts for uniform truffles.
- Hands — rolling between palms is the traditional finishing technique to smooth the surface.
- Freezer and refrigerator space — freezer to firm quickly, fridge to store finished truffles.
What Not to Do
Do not skip sifting the cocoa powder. Cocoa clumps easily; those lumps will leave dry pockets and a gritty texture. Sifting saves time and results in a smoother truffle.
Don’t overheat the sweetened condensed milk. Warm it just enough so the cocoa mixes in easily. Overheating can scald the milk and alter flavor and texture.
Avoid trying to cut or roll the mixture before it’s firm. If the disc is still sticky, it will smear and yield uneven pieces. Use the freezer time; it’s brief but necessary. If 30 minutes isn’t enough, freeze a little longer rather than forcing it.
Make It Your Way
Texture adjustments
If you prefer slightly softer truffles, take the disc out of the freezer just before it reaches firm cutting consistency and work quickly—then chill the shaped truffles in the refrigerator rather than the freezer. For slightly firmer, set the wrapped disc in the freezer a bit longer before cutting.
Shaping options
The instructions use one-inch squares and hand-rolling to keep things simple. If you want perfectly uniform shapes, press the mixture into a small square or silicone mold while it’s still soft, freeze, then pop out and dust. Molds give a clean aesthetic without changing the recipe.
Finishing touches
The recipe includes an optional 1/4 cup cocoa powder for rolling and dusting. Use it sparingly for a classic matte look that cuts sweetness and increases contrast. If your hands become too sticky while rolling, keep a small bowl of that cocoa nearby and lightly dust your palms between balls; it helps tremendously.
Cook’s Commentary
I make these when I want something that tastes like a bit of luxury but is fast to produce. The method is deliberately minimal to showcase the cocoa’s flavor without distraction. Because there are so few ingredients, quality matters: a good unsweetened cocoa powder makes a big difference in aroma and depth.
One small, practical note: you’ll notice the mixture becomes denser as it cools. That’s normal. The goal of the brief warming step is simply to make the condensed milk more fluid so it disperses evenly through the sifted cocoa. Once combined, you’ll see the mixture come together into a thick paste—exactly what you want.
Store, Freeze & Reheat
Store finished truffles in the refrigerator. They keep well for up to two weeks chilled. Place them in an airtight container with layers separated by parchment if stacking. The fridge maintains a pleasant firmness without making them as hard as the freezer does.
For longer storage, freeze the truffles on a tray until solid, then transfer to a sealed container or zip-top bag. Frozen truffles will keep for 2–3 months. Thaw in the refrigerator before serving—quick room-temperature thawing can make them sweat and lose the outer dusting.
There’s no reheating step for these; they’re meant to be eaten cold or at cool room temperature. If you prefer a softer mouthfeel, let them sit at room temperature for 10–15 minutes before serving, but avoid prolonged exposure to warm conditions.
Common Qs About 2 Ingredient Chocolate Truffles
Q: Why sift the cocoa powder?
A: Sifting breaks up clumps and aerates the cocoa so it blends smoothly with the warm condensed milk. Clumps create a grainy texture and can trap dry pockets that never hydrate.
Q: My mixture was still sticky after 30 minutes—what now?
A: Freeze it a bit longer. Freezers vary in temperature and the thickness of the disc affects how quickly it firms. Wrap it tightly and check at 10-minute intervals until it’s firm enough to cut cleanly.
Q: Can I make these without a microwave?
A: Yes. Warm the sweetened condensed milk gently in a small pan over low heat for a few minutes, stirring constantly until it’s warm but not boiling. Then proceed with sifting the cocoa and mixing as instructed.
Q: Can I scale the recipe up?
A: Absolutely. The method scales cleanly; mix in a larger bowl and press into a wider flattened disc to chill. Be mindful of chill time—thicker masses will need longer in the freezer.
Q: Why do some truffles crack when I roll them?
A: Cracking usually means the mixture is too dry or the cocoa content is uneven. Make sure the cocoa is well-sifted and fully incorporated with the sweetened condensed milk in step 3, and that the disc was pressed evenly so all portions have the same hydration.
Final Thoughts
This recipe is proof that simplicity can deliver something delicious and impressive. Two ingredients and a handful of tools turn into a rich, satisfying small-bite treat. Follow the method, respect the chill time, and you’ll have consistent truffles every time. Keep the optional cocoa on hand for dusting—it’s a small touch that finishes the truffles beautifully.

2 Ingredient Chocolate Truffles
Ingredients
Ingredients
- 2/3 cupunsweetened cocoa powderfor the truffles
- 1/4 cupcocoa powderfor rolling the truffles – optional
- 1/3 cupsweetened condensed milk
Instructions
Instructions
- Place 1/3 cup sweetened condensed milk in a microwave-safe large bowl and microwave for 30 seconds to warm it.
- Sift 2/3 cup unsweetened cocoa powder into the warm sweetened condensed milk.
- Using a rubber spatula, stir the mixture thoroughly until fully combined, scraping the sides and bottom of the bowl.
- Transfer the chocolate mixture onto a piece of plastic wrap, press it into a flat disc with your hands, wrap it tightly, and place it in the freezer for 30 minutes to firm up. If it is still too soft or sticky after 30 minutes, freeze longer until firm enough to cut.
- Unwrap the chilled disc and set it on a cutting board. Using a pastry cutter or a sharp knife, cut the disc into equal one-inch squares.
- Take each square and roll it between your palms to form a smooth ball. If you are using the optional 1/4 cup cocoa powder, you can dust a little on your hands to reduce stickiness before rolling.
- If desired, roll each finished truffle in the optional 1/4 cup cocoa powder to coat.
- Arrange the truffles on a plate and store them in the refrigerator.
Equipment
- Microwave-safe Bowl
- Rubber spatula
- Plastic Wrap
- Freezer
- Cutting Board
- pastry cutter or sharp knife
- Plate
- Refrigerator
Notes
I place the finished truffles on a sheet pan lined with parchment paper as I roll them so they stay neat and do not stick.
I have tried using almond or cashew milk instead of condensed milk, but I usually need to add extra sugar since they are not as sweet on their own.
If I want to make milk chocolate truffles, I use a little less cream because milk chocolate has more fat and is already quite creamy.
If I do not use the microwave, I warm the sweetened condensed milk in a heat proof bowl over a pot of simmering water until it softens.


