Tri-tip in the air fryer is one of those small, reliable wins you can count on for a weeknight dinner or a no-fuss weekend meal. It sears faster than the oven, uses less energy than a grill, and the result is a crusted outside with a tender, juicy interior. I like this approach because it’s straightforward and forgiving—especially if you keep a thermometer handy.
This recipe keeps the seasoning simple and classic: salt, oregano, garlic and onion powders, black pepper, paprika, and an optional pinch of cayenne. The olive oil does the heavy lifting for even browning and helps the rub stick. There’s no complicated marinating schedule here, just a short rest at room temperature so the meat can come together before it hits the hot air.
If you’ve been nervous about cooking a whole tri-tip at home, this method removes the guesswork without sacrificing flavor. You’ll get guidance on timing and internal temperatures, tips to avoid common mistakes, and sensible substitutions if you’re missing an ingredient. Keep your instant-read thermometer close, and you’ll slice into a great piece of meat every time.
What Goes In
Ingredients
- 2 pound tri-tip — the primary cut; pick a piece with even thickness for consistent cooking.
- 4 teaspoons olive oil — helps the rub adhere and promotes browning.
- 2 teaspoons salt — seasons the meat throughout; adjust to taste if you prefer less.
- 1/2 teaspoon dried oregano — adds a mild herbal note.
- 2 teaspoons garlic powder — gives savory depth without moisture.
- 1 1/2 teaspoons onion powder — rounds out the savory profile.
- 1 teaspoon black pepper — for bright, peppery warmth.
- 1/2 teaspoon paprika — color and a touch of sweetness.
- 1 pinch cayenne pepper (optional) — a tiny kick if you want heat; truly optional.
Air-Fryer Tri-Tip: Step-by-Step Guide
- Remove the 2-pound tri-tip from its packaging, rinse briefly if desired, and pat dry thoroughly with paper towels.
- Rub 4 teaspoons olive oil evenly over the entire surface of the tri-tip.
- In a small bowl, combine 2 teaspoons salt, 1/2 teaspoon dried oregano, 2 teaspoons garlic powder, 1 1/2 teaspoons onion powder, 1 teaspoon black pepper, 1/2 teaspoon paprika, and 1 pinch cayenne pepper (optional). Mix until uniform.
- Rub the spice mixture evenly over both sides of the tri-tip, pressing gently so the seasoning adheres.
- Let the seasoned tri-tip rest at room temperature for 30 minutes to absorb the flavors.
- Preheat the air fryer to 400°F. Place the tri-tip in the air fryer basket in a single layer (fat cap up or down as you prefer).
- Cook for 12–18 minutes, flipping once halfway through if you wish. Start checking the internal temperature with an instant-read meat thermometer toward the lower end of the time range.
- Remove the tri-tip when it reaches your desired internal temperature (for reference: about 125°F rare, 135°F medium-rare, 145°F medium).
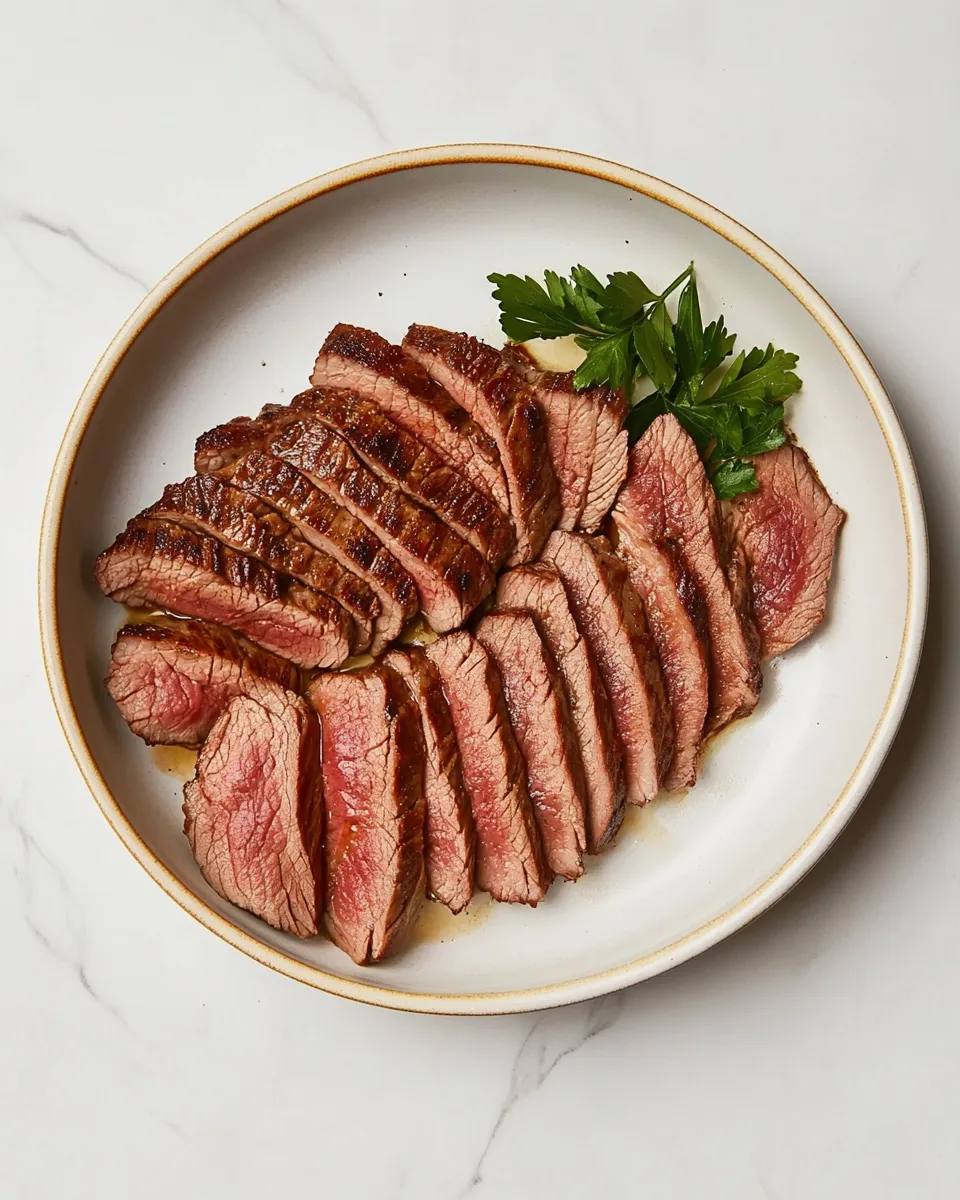
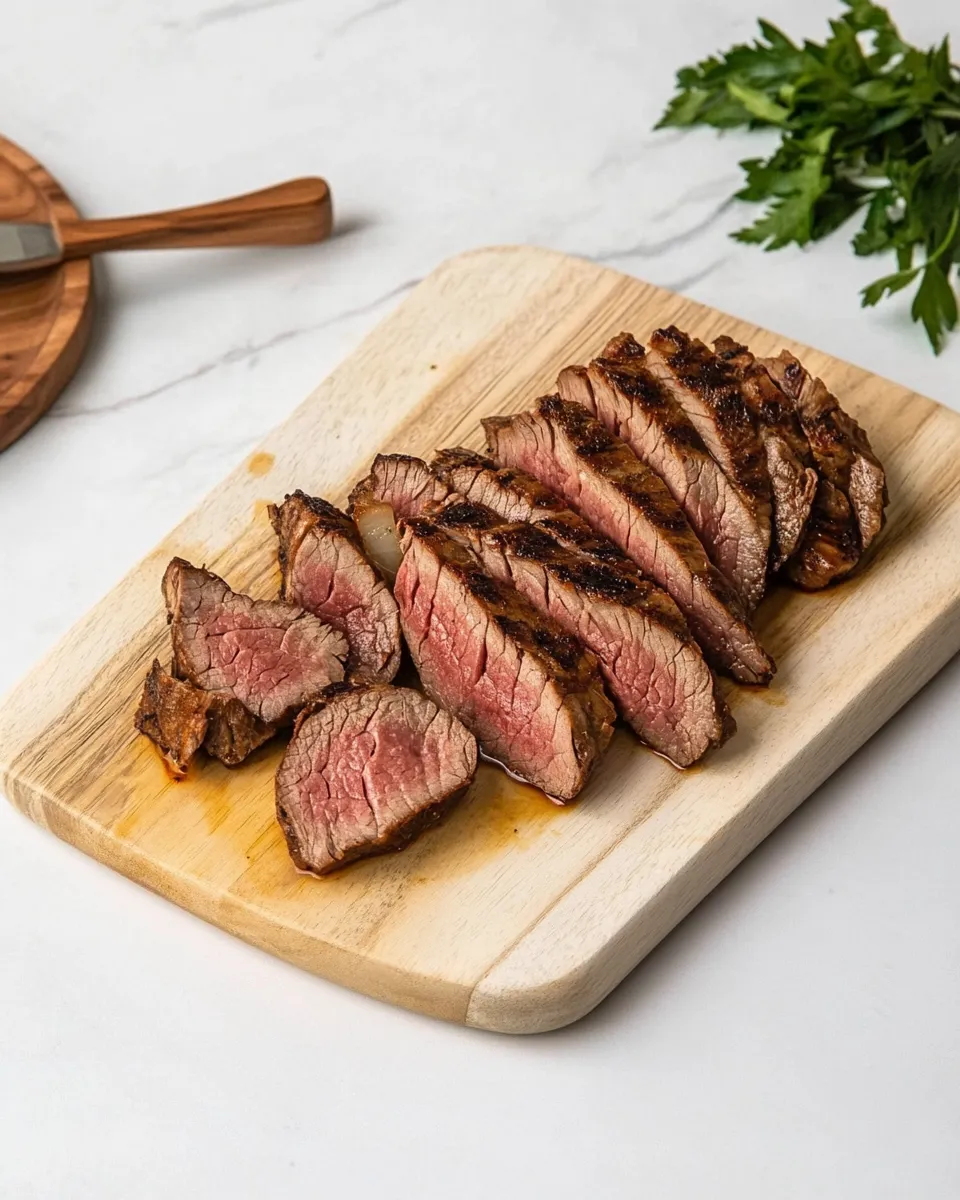
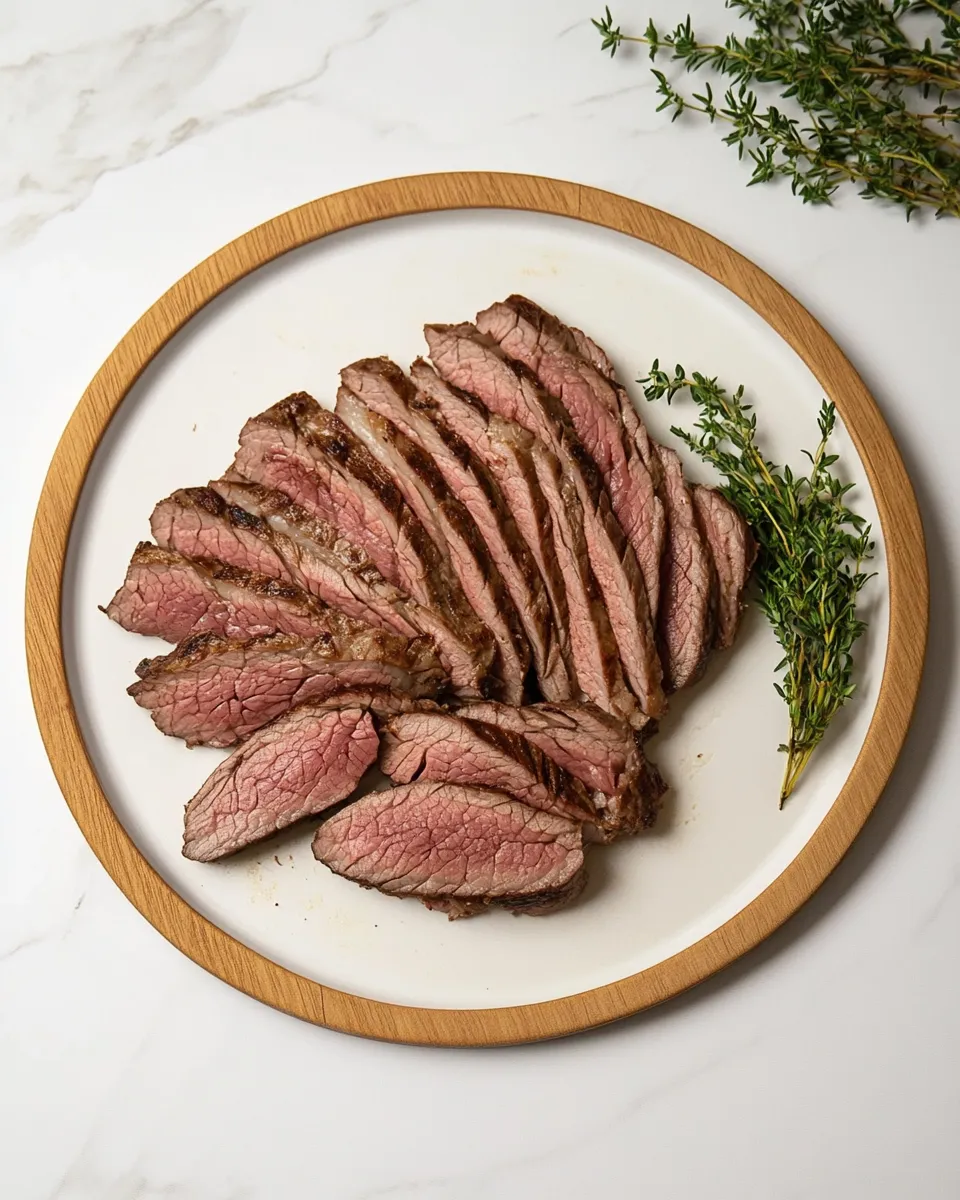
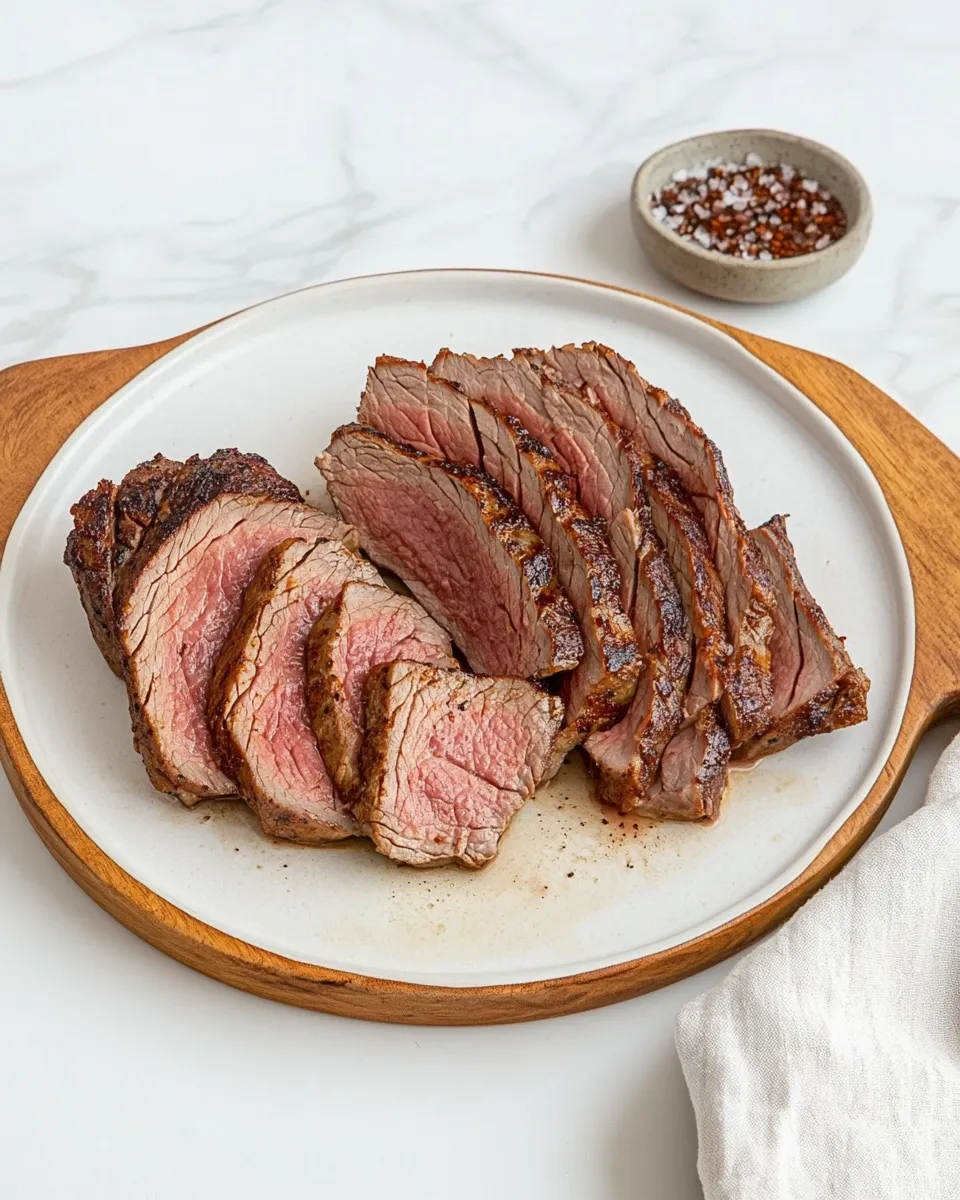
- Transfer the tri-tip to a cutting board and let it rest 5–10 minutes before slicing. Slice against the grain and serve.
Top Reasons to Make Air-Fryer Tri-Tip
Speed: The air fryer reaches high temperatures quickly and circulates heat, meaning a nicely seared crust in a fraction of the time the oven would take. If you want dinner done fast without compromising a seared exterior, this is a reliable choice.
Consistency: Air fryers are predictable. Once you know your device’s hot spots and timing, you’ll hit repeatable results. The small cooking chamber keeps the heat consistent around the meat so you don’t have to babysit a roast.
Simplicity: The seasoning list is short and pantry-friendly. There’s no complicated sauce, long brine, or intrusive steps—just a focused rub and a brief rest. That’s practical for busy cooks who still want a high-quality main dish.
Less smoke and fuss: For those who can’t grill year-round, the air fryer gives grill-like results indoors with less cleanup and no need for charcoal or propane.
Smart Substitutions
If you’re missing one of the listed spices, you can still make this work without changing the recipe’s spirit. The seasoning mix is modular: reduce or omit the dried oregano if you don’t want an herbal note; leave out the cayenne if you prefer no heat. If you lack garlic powder, you can increase onion powder slightly for savory balance, but keep quantities modest—these are concentrated flavors.
For oil, use whatever neutral cooking oil you have on hand. The oil’s job is to help the rub stick and encourage browning, so don’t skip it. If your tri-tip is well-marbled and you want to skip added fat, you can, but expect slightly less crust.
If a different size tri-tip is on hand, adjust cook time and rely on an instant-read thermometer rather than fixed timing. Thicker pieces need more time; thinner ones need less. Target temperatures are your friend.
Recommended Tools
Air fryer: Any model that fits a 2-pound tri-tip flat or angled in a single layer will work. If your basket is small, consider a vertical arrangement only if the meat can sit securely and the air can circulate.
Instant-read meat thermometer: Non-negotiable for precision. Check toward the lower end of the cook time, and again as it approaches desired temp. Pull the tri-tip out a few degrees early if you prefer medium-rare; carryover heat will raise the temperature during resting.
Tongs: For safe flipping without piercing the meat.
Cutting board and sharp knife: A thin, very sharp slicing knife and a stable cutting board make clean, against-the-grain slices that look and taste better.
Pitfalls & How to Prevent Them
Common pitfall: overcooking. Solution: check internal temperature early and often. The 12–18 minute range is broad because air fryer models and tri-tip thickness vary. Start checking around 12 minutes.
Uneven cooking if the tri-tip isn’t uniform in thickness. Solution: trim extreme thin ends or tuck them; if necessary, butterfly the thicker end slightly so the cut cooks more evenly. Alternatively, allow longer preheating and monitor temp.
Seasoning falling off during handling. Solution: press the rub into the meat after applying the oil and let it rest for the 30 minutes specified—this helps adherence.
Loss of juices when slicing too soon. Solution: rest the tri-tip 5–10 minutes on a cutting board before slicing. Resting redistributes the juices and makes a juicier slice.
Seasonal Adaptations
Spring: Keep it light—serve thin slices over a crisp salad with a bright vinegar- or citrus-based dressing. The simple seasoning will pair well with lemony or herb-forward sides.
Summer: Turn sliced tri-tip into sandwiches or tacos with fresh tomatoes and quick-pickled onions. The air fryer’s quick turnaround is perfect for outdoor gatherings where the grill is already busy.
Autumn: Pair with roasted root vegetables or a warm grain salad. The paprika and oregano in the rub stand up to heartier flavors.
Winter: Serve with a rich pan sauce or a creamy side. The bold, browned exterior holds up to heavier accompaniments and festive plates.
Method to the Madness
Why rub oil first? The olive oil helps the dry spices adhere and creates a better contact surface for browning. It also encourages even color without changing the rub’s balance.
Why rest at room temperature? Letting the tri-tip sit out for 30 minutes takes the chill off the meat and promotes a more even internal temperature during cooking. It reduces the risk of a heavily overdone outer layer and an undercooked center.
Why the high temperature? Air fryers work like very efficient convection ovens; 400°F encourages rapid Maillard reaction (browning) on the surface. That creates flavor and texture without prolonged cooking that would dry the interior.
Why slice against the grain? Tri-tip has a distinct grain that changes direction across the cut. Slicing against the grain shortens muscle fibers and makes the meat feel tenderer in your mouth. Look for the lines in the meat and slice perpendicular to them.
Storage & Reheat Guide
Store cooked tri-tip in an airtight container in the refrigerator for up to 3–4 days. Keep slices layered between pieces of parchment or wax paper if you want to preserve presentation. For longer storage, wrap tightly and freeze up to 3 months.
Reheating without drying: warm gently in a low oven (about 275–300°F) covered for 10–15 minutes until warmed through. Alternatively, reheat slices in the air fryer at 325°F for a few minutes—watch closely so you regain some crispness without overcooking. A pan with a little beef stock or water, covered, will steam gently to preserve juiciness.
If reheating from frozen, thaw overnight in the refrigerator before reheating for best texture.
Top Questions & Answers
Q: Can I put a thermometer in the meat while it cooks in the air fryer? A: If you have an oven-safe probe that fits your air fryer safely, it can be convenient. Most air fryers don’t accommodate long probes without modifications, so the simplest route is to use an instant-read thermometer toward the end of cooking.
Q: Do I need to flip the tri-tip? A: Not strictly, but flipping halfway will promote more even browning on both sides. If you prefer a one-side sear only, position fat cap up or down according to your preference and leave it be.
Q: What if my tri-tip is larger or smaller than 2 pounds? A: Adjust the cooking time and rely on internal temperature rather than the clock. A larger roast will need additional minutes; thinner pieces will cook faster.
Q: Can I use this method for other beef cuts? A: This method works best for cuts of similar thickness and fat content. For very different cuts, consult a recipe tuned to that specific meat.
In Closing
This air-fryer approach to tri-tip gives you a straightforward path to a flavorful, evenly cooked roast with minimal fuss. Keep the seasoning simple, trust the thermometer, and let the meat rest before slicing. The result is a versatile main you can dress up or keep casual—and it reliably delivers satisfying texture and rich flavor.
Make it once, learn your air fryer’s timing for your preferred doneness, and you’ll have a fast, repeatable crowd-pleaser that doesn’t require a grill. Happy cooking—and enjoy that slice against the grain.

Air-Fryer Tri-Tip
Ingredients
Ingredients
- 2 poundstri-tip
- 4 teaspoonsolive oil
- 2 teaspoonssalt
- 1/2 teaspoondried oregano
- 2 teaspoonsgarlic powder
- 1 1/2 teaspoonsonion powder
- 1 teaspoonblack pepper
- 1/2 teaspoonpaprika
- 1 pinchcayenne pepperoptional
Instructions
Instructions
- Remove the 2-pound tri-tip from its packaging, rinse briefly if desired, and pat dry thoroughly with paper towels.
- Rub 4 teaspoons olive oil evenly over the entire surface of the tri-tip.
- In a small bowl, combine 2 teaspoons salt, 1/2 teaspoon dried oregano, 2 teaspoons garlic powder, 1 1/2 teaspoons onion powder, 1 teaspoon black pepper, 1/2 teaspoon paprika, and 1 pinch cayenne pepper (optional). Mix until uniform.
- Rub the spice mixture evenly over both sides of the tri-tip, pressing gently so the seasoning adheres.
- Let the seasoned tri-tip rest at room temperature for 30 minutes to absorb the flavors.
- Preheat the air fryer to 400°F. Place the tri-tip in the air fryer basket in a single layer (fat cap up or down as you prefer).
- Cook for 12–18 minutes, flipping once halfway through if you wish. Start checking the internal temperature with an instant-read meat thermometer toward the lower end of the time range.
- Remove the tri-tip when it reaches your desired internal temperature (for reference: about 125°F rare, 135°F medium-rare, 145°F medium).
- Transfer the tri-tip to a cutting board and let it rest 5–10 minutes before slicing. Slice against the grain and serve.
Equipment
- Air Fryer
- air fryer basket
- Instant Read Meat Thermometer
- Small Bowl
- Cutting Board
- Paper Towels