
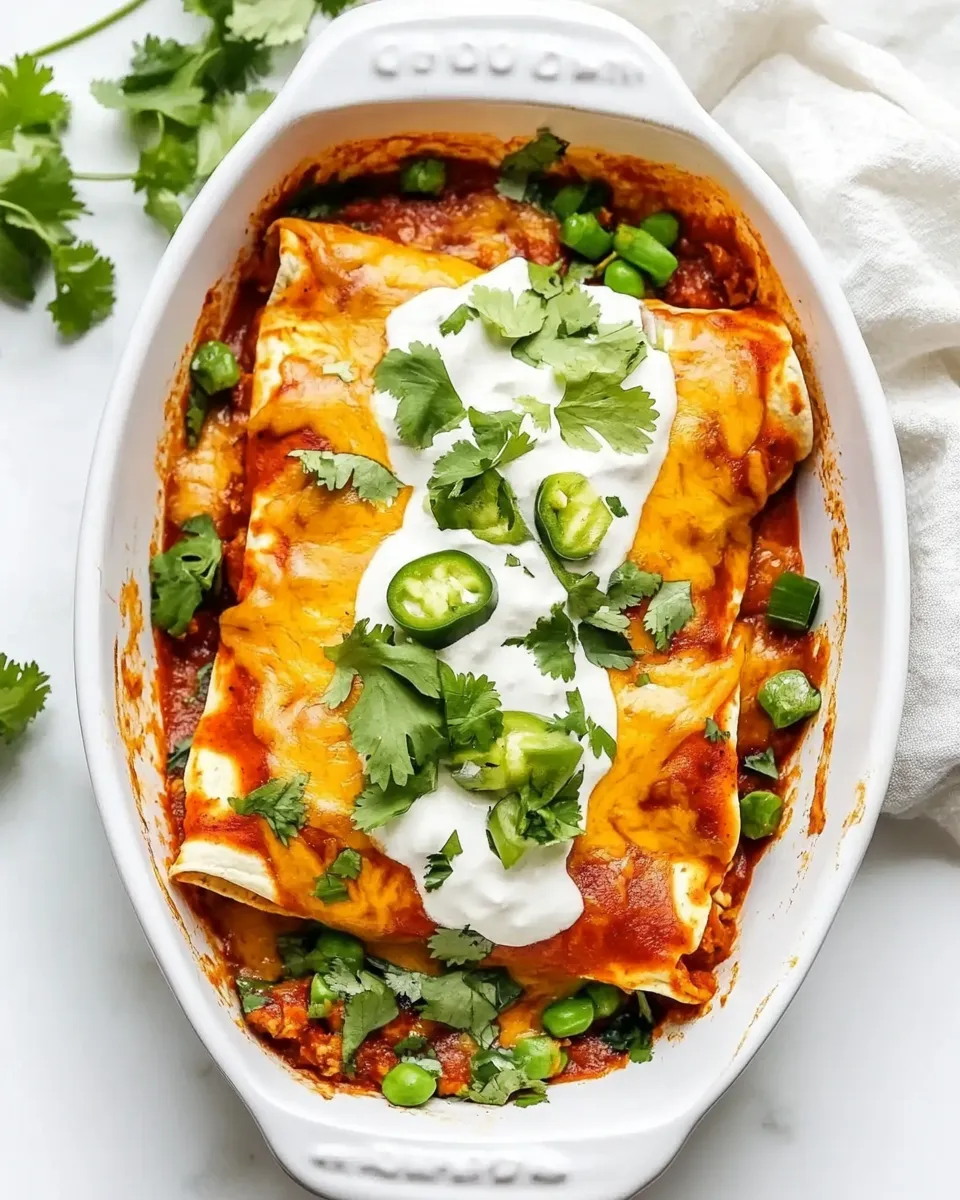
These enchiladas are the kind of weeknight meal that feels like a celebration. They’re saucy, cheesy, and forgiving — the sort of dish you can pull together from rotisserie chicken or last night’s leftovers and still end up with something that tastes like you spent all afternoon in the kitchen. The sauce here is homemade and straightforward, built from pantry staples and a quick roux that gives it body and a subtle toasted flavor.
I keep this recipe in regular rotation because it’s practical: it feeds a crowd, freezes well, and reheats without losing its charm. The instructions below are precise and easy to follow, whether you’re cooking for family, meal-prepping, or bringing something comforting to a friend. Read through, gather your ingredients, and you’ll have a tray of warm, bubbly enchiladas in about an hour.
What We’re Using
Before we roll and bake, here’s a quick overview of what shows up in the pan and why. The sauce is the backbone — olive oil, flour, chili powder, tomato sauce, and stock make a flavorful, slightly thickened covering that keeps the tortillas from drying out. Cooked diced chicken fills the tortillas; Colby Jack melts beautifully and gives you that gooey, satisfying top layer.
Ingredients
- 2 cups cooked and diced chicken — the main protein; leftover roasted or rotisserie chicken works great.
- ¼ cup olive oil — for the roux and to toast the chili powder so it releases its flavor.
- 2 tablespoons all-purpose flour — thickens the sauce into a smooth, clingy consistency.
- 3 tablespoons chili powder — builds the signature enchilada flavor and color.
- 1 (15-ounce) can tomato sauce — provides body and acidity for the sauce.
- 1 ½ cups vegetable stock — thins the sauce to the right pourable thickness and adds savory depth.
- ½ teaspoon garlic powder — for background savory flavor without pieces getting in the way.
- ½ teaspoon onion powder — rounds out the aromatics in the sauce.
- ¼ teaspoon cumin — adds warmth and a faint earthiness.
- salt and pepper — to taste; salt brightens and binds the flavors.
- 8-10 flour or corn tortillas — your choice; flour are more pliable, corn gives a traditional texture.
- 3 cups shredded Colby Jack cheese — half goes inside, half goes on top for that gooey finish.
Stepwise Method: Amazing Homemade Chicken Enchiladas
- Preheat oven to 350°F (175°C).
- In a medium skillet over medium heat, add ¼ cup olive oil, 2 tablespoons all-purpose flour, and 3 tablespoons chili powder. Whisk constantly until the mixture darkens slightly and becomes fragrant.
- Slowly whisk in 1 (15-ounce) can tomato sauce and 1 ½ cups vegetable stock. Add ½ teaspoon garlic powder, ½ teaspoon onion powder, ¼ teaspoon cumin, and salt and pepper to taste. Continue whisking until the sauce begins to thicken.
- Remove the skillet from heat and pour out and reserve 1 ½ cups of the sauce into a separate bowl.
- Return the skillet with the remaining sauce to low heat and add 2 cups cooked and diced chicken. Stir until the chicken is evenly coated and warmed through; remove from heat.
- If your tortillas are stiff, warm them briefly so they are easy to roll.
- To assemble, place 8–10 tortillas on a work surface. On each tortilla put about 2 tablespoons of shredded Colby Jack cheese and a portion of the chicken-and-sauce mixture in the center.
- Roll each filled tortilla and place seam-side down in a 9×13-inch baking dish, arranging them snugly in the dish.
- Pour the reserved 1 ½ cups sauce evenly over the rolled enchiladas, then sprinkle the top with the remaining shredded Colby Jack cheese.
- Bake in the preheated oven for 20–25 minutes, or until heated through and bubbly. Let the enchiladas rest a few minutes before serving.
Why This Amazing Homemade Chicken Enchiladas Stands Out
This recipe balances ease and flavor. The quick roux with chili powder deepens the sauce in a way that canned enchilada sauce rarely matches. You get a sauce with body and a nuanced toasted spice rather than a one-note tomato flavor. Using pre-cooked chicken keeps the bake time short, so you’re left with tender filling and perfectly melted cheese instead of dry meat.
It’s forgiving. Measures are important for the sauce to thicken properly, but the filling and tortillas tolerate small changes. Swap tortillas, use what you have for cheese, or pile on toppings — the base stays solid. This is a recipe that rewards simple, good technique and then welcomes your personal touches.
If You’re Out Of…
Short on something? Here are safe swaps that won’t derail the dish.
- Cooked chicken — use shredded rotisserie chicken or poach breasts and shred them. If all you have is raw chicken, cook it first (bake or poach), dice, then proceed.
- Olive oil — use a neutral oil like vegetable or canola if you prefer.
- Vegetable stock — chicken stock or low-sodium broth works fine and adds a little more savory depth.
- Colby Jack cheese — Monterey Jack, mild cheddar, or a Mexican blend are good alternatives. Keep the total cheese amount to about 3 cups.
- Tortillas — flour tortillas roll more easily and resist tearing; corn tortillas can be warmed and lightly fried in oil for flexibility if they’re brittle.
Must-Have Equipment
- 9×13-inch baking dish — fits 8–10 rolled enchiladas snugly for even baking.
- Medium skillet — for making the sauce and warming the chicken.
- Whisk — essential for building a smooth, lump-free sauce.
- Mixing bowl — to reserve the sauce and keep things organized while assembling.
- Oven mitts and a spatula — for safety and handling the hot dish.
Easy-to-Miss Gotchas
Small mistakes can lead to soggy or dry enchiladas. Watch for these common pitfalls so the dish finishes perfectly.
- Roux overheating: If you let the oil and flour burn while toasting the chili powder, the sauce will taste bitter. Keep the heat moderate and whisk constantly.
- Skipping the reserved sauce: Reserving 1 ½ cups of sauce is key. That pour-over step keeps the tortillas from drying out and creates the baked casserole texture we want.
- Under-warming tortillas: Rolling cold, stiff tortillas can cause tearing and loss of filling. A few seconds in a hot skillet or a 20–30 second microwave wrap in a damp towel softens them.
- Overbaking: Bake until bubbly and just heated through. Overbaking can dry out the filling and make cheese oily.
Fresh Takes Through the Year
Change up toppings and sides with the seasons to keep this dish feeling new.
- Spring: Top with quick pickled radishes, chopped cilantro, and squeezed lime for a bright finish.
- Summer: Add grilled corn kernels to the filling and serve with a cold tomato-avocado salad.
- Fall: Stir a spoonful of pumpkin puree into the sauce for subtle sweetness and an autumnal twist.
- Winter: Serve with a warm black bean and roasted pepper side and finish enchiladas with a dusting of smoked paprika.
Pro Tips & Notes
Cheese distribution and assembly
Put a little cheese inside each tortilla to help seal and bind the filling. That also prevents the tortillas from getting soggy from the sauce. Use the remaining cheese on top so everything browns and bubbles attractively.
Sauce consistency
The sauce should be pourable but not watery. If it’s too thin, return to low heat and whisk a minute or two; if it’s too thick, whisk in a splash more stock or water until it pours smoothly.
Make-ahead options
Assemble the enchiladas without the final sauce pour and cheese on top, cover, and refrigerate up to 24 hours. When ready to bake, pour the reserved sauce over the rolls, add the cheese, and bake as directed — you may need an extra 5–10 minutes if chilled.
Cooling, Storing & Rewarming
Let the baking dish cool to room temperature for about 20–30 minutes before refrigerating. This avoids trapping excessive steam, which leads to soggier enchiladas.
- Refrigerate: Store covered for up to 3 days.
- Freeze: Fully assembled and unbaked enchiladas freeze well. Wrap tightly and freeze for up to 2 months. Thaw overnight in the fridge before baking, then bake an additional 10–15 minutes if still cold.
- Reheat: Reheat single portions in a microwave until warmed through, or reheat a whole dish covered with foil at 350°F (175°C) for 15–20 minutes. Remove foil for the last few minutes to refresh the cheese topping.
Your Top Questions
Q: Can I make these vegetarian? A: Yes. Swap the chicken for sautéed mushrooms, black beans, or roasted vegetables. Increase seasoning to compensate for the loss of meat’s savory flavor.
Q: Are these spicy? A: The heat comes mainly from the chili powder. If you prefer milder flavors, reduce the chili powder slightly or choose a mild chili powder blend.
Q: Can I use a different cheese? A: Absolutely. Colby Jack melts beautifully and is what the recipe calls for, but Monterey Jack, mild cheddar, or a Mexican blend are fine substitutes.
Q: What if the sauce splits or looks oily? A: That usually indicates overheating. Whisk gently on low heat; if it looks off, a splash more stock and an extra whisk can bring it back together.
Hungry for More?
If you loved these enchiladas, try swapping the chicken for beef barbacoa or shredding pork carnitas in the same sauce. For lighter meals, serve a single enchilada with a big green salad and a squeeze of lime. If you want more hands-on comfort food from this kitchen, check the blog for casseroles, slow-cooker dinners, and quick sauces that transform store-bought ingredients into something worth writing home about.
Make a double batch of sauce and freeze half in a jar — it’s an instant shortcut for next time. Above all, remember: this is a practical, reliable recipe. Follow the steps, trust the process, and you’ll have a warm tray of Amazing Homemade Chicken Enchiladas that tastes like a warm hug at the table.

Amazing Homemade Chicken Enchiladas
Ingredients
Ingredients
- 2 cupscooked and diced chicken
- 1/4 cupolive oil
- 2 tablespoonsall-purpose flour
- 3 tablespoonschili powder
- 1 15-ouncecan tomato sauce
- 1 1/2 cupsvegetable stock
- 1/2 teaspoongarlic powder
- 1/2 teaspoononion powder
- 1/4 teaspooncumin
- salt and pepper
- 8-10 flour or corn tortillas
- 3 cupsshredded Colby Jack cheese
Instructions
Instructions
- Preheat oven to 350°F (175°C).
- In a medium skillet over medium heat, add ¼ cup olive oil, 2 tablespoons all-purpose flour, and 3 tablespoons chili powder. Whisk constantly until the mixture darkens slightly and becomes fragrant.
- Slowly whisk in 1 (15-ounce) can tomato sauce and 1 ½ cups vegetable stock. Add ½ teaspoon garlic powder, ½ teaspoon onion powder, ¼ teaspoon cumin, and salt and pepper to taste. Continue whisking until the sauce begins to thicken.
- Remove the skillet from heat and pour out and reserve 1 ½ cups of the sauce into a separate bowl.
- Return the skillet with the remaining sauce to low heat and add 2 cups cooked and diced chicken. Stir until the chicken is evenly coated and warmed through; remove from heat.
- If your tortillas are stiff, warm them briefly so they are easy to roll.
- To assemble, place 8–10 tortillas on a work surface. On each tortilla put about 2 tablespoons of shredded Colby Jack cheese and a portion of the chicken-and-sauce mixture in the center.
- Roll each filled tortilla and place seam-side down in a 9×13-inch baking dish, arranging them snugly in the dish.
- Pour the reserved 1 ½ cups sauce evenly over the rolled enchiladas, then sprinkle the top with the remaining shredded Colby Jack cheese.
- Bake in the preheated oven for 20–25 minutes, or until heated through and bubbly. Let the enchiladas rest a few minutes before serving.
Equipment
- Skillet
- Whisk
- Mixing Bowl
- 9x13 inch Baking Dish
- Oven


