
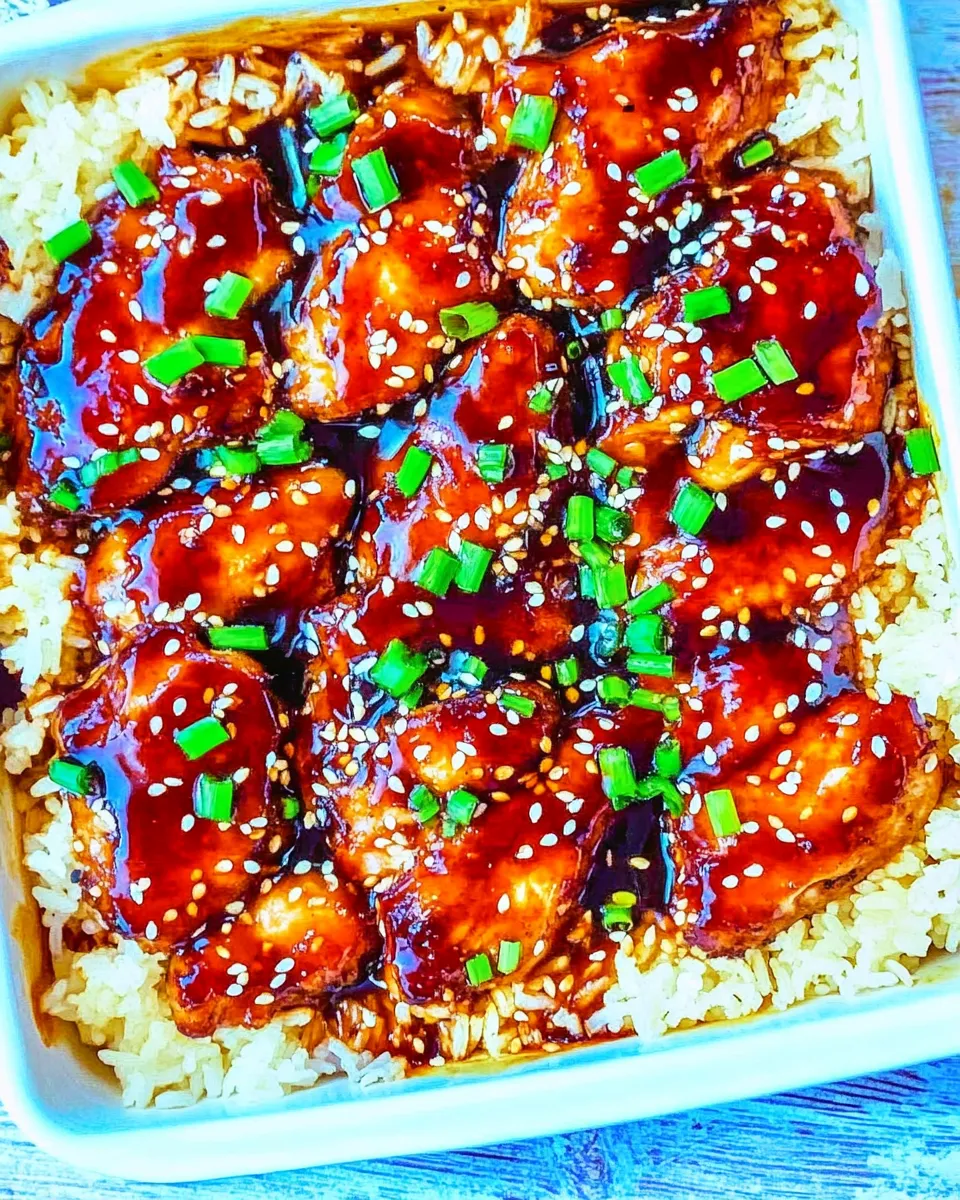
This baked teriyaki chicken and rice is my weeknight lifeline: one pan, straightforward steps, bright flavors, and minimal babysitting. It’s the kind of recipe you turn to when you want comfort without a lot of fuss — sweet-salty sauce, tender chicken, and rice that soaks up all that good flavor. I love that it’s forgiving and that it comes together with pantry-friendly ingredients.
In this post I’ll walk you through exactly what to gather, how to follow the recipe as written, and a few smart swaps and troubleshooting pointers so you won’t end up with gummy rice or dry chicken. Read through the notes, then bake. You’ll have dinner on the table with a confident, relaxed stride.
Keep the reserved teriyaki sauce handy for serving. It brightens the finished dish and keeps everything tasting fresh. Now let’s get to the practical details so your tray comes out perfect every time.
What You’ll Gather

Gather your pantry staples and a few fresh items before you start: soy sauce, brown sugar, garlic, ground ginger, and minute rice form the base. Canned pineapple and red pepper add sweetness and texture while thin-sliced chicken bakes right on top of the rice and absorbs the sauce.
Make sure your measuring tools and a heatproof bowl for reserving sauce are ready. Prep the garlic and dice the pepper so you can move quickly once the sauce comes to a boil.
Ingredients
- ⅓ cup reduced-sodium soy sauce — backbone of the teriyaki, provides salty umami without overpowering.
- ⅓ cup light brown sugar, packed — sweetens and helps the sauce caramelize slightly during cooking.
- 3 to 5 cloves garlic, finely minced or pressed — fresh garlic gives sharp aromatic depth; adjust to taste.
- 2 teaspoons ground ginger — warm, aromatic spice that balances the sugar and soy.
- ¼ to ½ teaspoon red pepper flakes, or to taste — adds a gentle heat; use less for mild, more for a kick.
- ½ cup water — used to hydrate the cornstarch slurry and thin the sauce before thickening.
- 2 tablespoons corn starch — thickens the teriyaki so it clings to the chicken and rice.
- 1 ½ cups white minute rice — quick-cooking rice so the whole dish finishes in the oven at once.
- 8 ounces canned pineapple chunks or tidbits in juice, do not drain — adds sweetness and moisture; the juice floods into the rice for flavor.
- 1 medium/large red bell pepper, diced into small pieces — color and mild crunch; dice small so it cooks through.
- 1 ¼ cups low-sodium chicken broth — the cooking liquid for the rice, choose low-sodium so the dish isn’t too salty.
- 1 to 2 tablespoons chili garlic sauce, optional and to taste — a spicy option to layer in heat without overpowering the teriyaki.
- 1 pound thin-sliced boneless skinless chicken breasts, about 4 breasts — thin slices ensure the chicken finishes at the same time as the rice.
- 2 or 3 green onions, cut into small segments on the bias — fresh garnish for brightness and a little bite.
- sesame seeds, optional for garnishing — adds nuttiness and a nice finish if you have them.
How to Prepare Baked Teriyaki Chicken and Rice
- Preheat oven to 375F. Spray a 9×13-inch baking dish with cooking spray; set aside.
- Make the teriyaki sauce: In a medium saucepan combine ⅓ cup reduced-sodium soy sauce, ⅓ cup light brown sugar (packed), 3 to 5 cloves garlic (finely minced or pressed), 2 teaspoons ground ginger, and ¼ to ½ teaspoon red pepper flakes (or to taste). Bring to a boil over medium-high heat, whisking nearly constantly.
- In a small bowl stir 2 tablespoons corn starch into ½ cup water until fully dissolved.
- Add the corn starch mixture to the boiling soy sauce mixture, stir to combine, reduce heat to a low simmer, and cook 1 to 2 minutes, stirring frequently, until the teriyaki sauce has thickened. Remove from heat. Transfer some of the sauce to a clean heatproof bowl or measuring cup and reserve it for serving so it does not get cross-contaminated with raw chicken.
- In the prepared 9×13 baking dish add 1 ½ cups white minute rice, 8 ounces canned pineapple chunks or tidbits in juice (do not drain), 1 medium/large red bell pepper (diced into small pieces), 1 ¼ cups low-sodium chicken broth, and 1 to 2 tablespoons chili garlic sauce (optional and to taste). Stir gently to combine the rice and liquids.
- Evenly lay 1 pound thin-sliced boneless skinless chicken breasts (about 4 breasts) on top of the rice mixture.
- Using a clean spoon, dollop a generous amount of the cooked teriyaki sauce on top of each piece of chicken. Do not reuse a spoon that has touched raw chicken. Reserve any remaining teriyaki sauce for serving.
- Cover the baking dish tightly with foil and bake at 375F for 30 minutes.
- Remove the foil and bake uncovered an additional 5 to 10 minutes, or until the chicken is cooked through (internal temperature 165F) and the rice is tender.
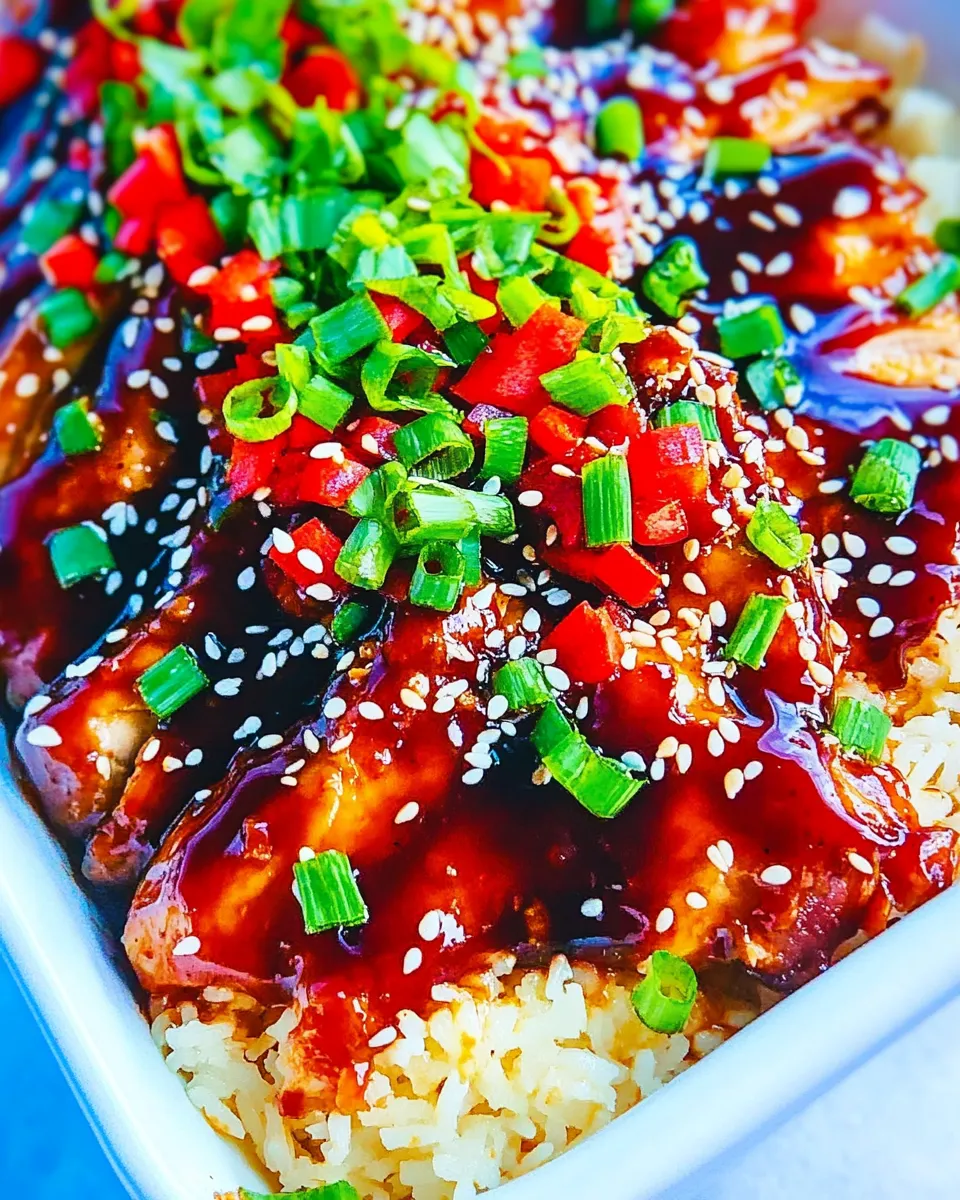
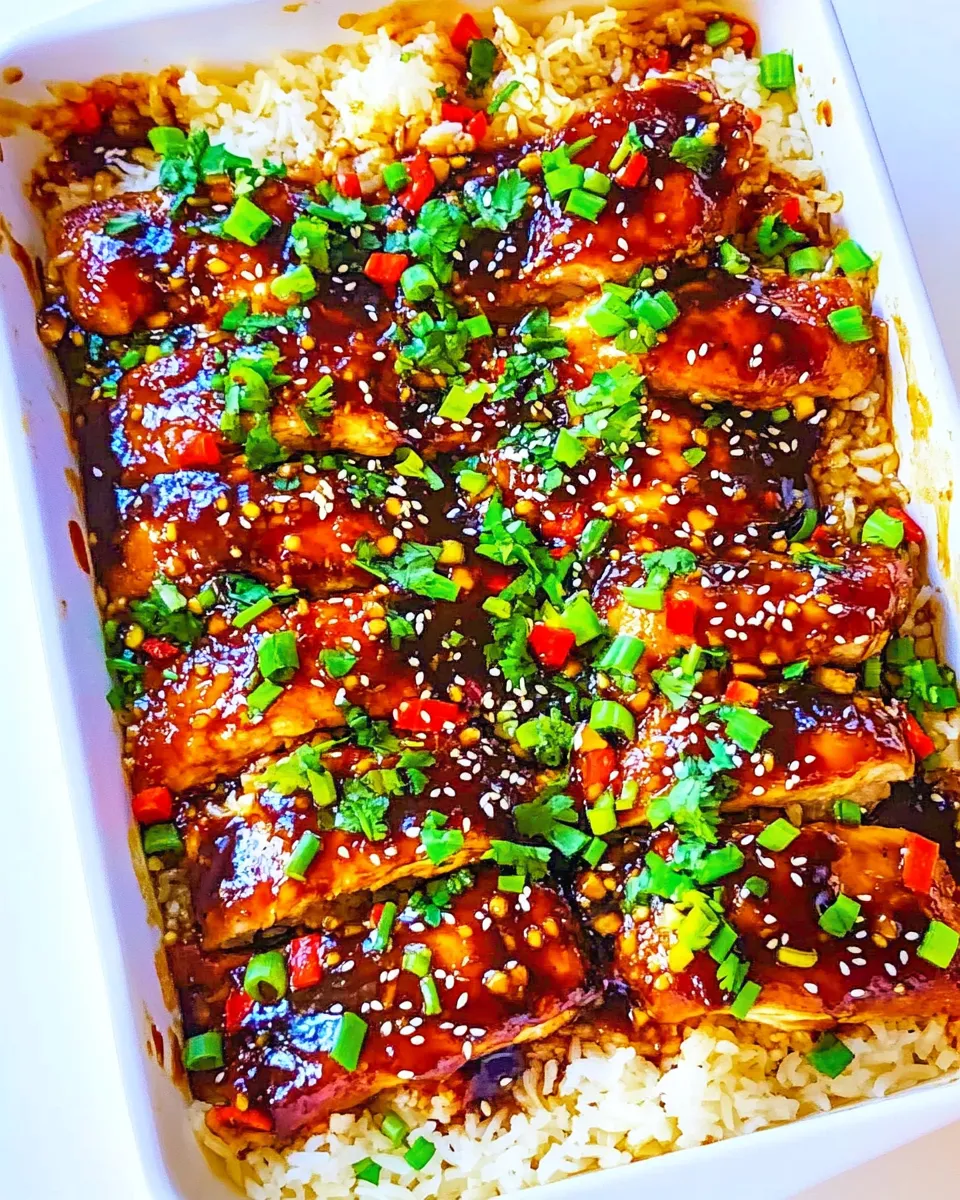
- Remove from the oven, evenly sprinkle with 2 or 3 green onions (cut into small segments on the bias) and sesame seeds if using, and serve immediately with the reserved teriyaki sauce if desired.
Why This Recipe is a Keeper
This recipe hits several practical marks: it’s mostly hands-off in the oven, uses pantry staples, and delivers consistent results. The method lets the rice cook in the same dish with the chicken so flavors mingle without extra pans. That canned pineapple juice sweetens and seasons the rice for a bright finish that feels festive but is genuinely simple.
The teriyaki sauce is made from scratch with straightforward ingredients and thickens quickly with a cornstarch slurry. Because you reserve some sauce before it touches raw chicken, you keep a clean serving sauce that tastes fresh — a small step that looks and tastes professional.
Finally, thin-sliced chicken cooks quickly and stays moist when baked over rice and liquid. If you follow the timings and check for 165F, you’ll get juicy meat and fluffy rice without babysitting the stovetop.
Dairy-Free/Gluten-Free Swaps
Dairy-free: This recipe is naturally dairy-free; no swaps are necessary.
Gluten-free: Use a certified gluten-free tamari in place of reduced-sodium soy sauce to make the dish gluten-free. Check your chili garlic sauce label, as some brands contain wheat. Replace with a gluten-free chili paste or omit if unsure.
Minute rice is fine for gluten-free diets, but always confirm your rice brand is processed in a gluten-free facility if cross-contact is a concern.
Essential Tools for Success
- 9×13-inch baking dish — the specified size ensures the rice-to-liquid ratio cooks correctly.
- Medium saucepan — to make and thicken the teriyaki sauce.
- Small bowl or measuring cup — for stirring the cornstarch into water.
- Heatproof bowl or measuring cup — to reserve sauce away from raw chicken.
- Sharp knife and cutting board — for dicing the bell pepper and slicing green onions on the bias.
- Meat thermometer — the safest way to confirm chicken is at 165F without overcooking.
- Aluminum foil — to cover the dish tightly while it bakes and traps steam to cook the rice evenly.
Mistakes That Ruin Baked Teriyaki Chicken and Rice
- Using a different pan size — a smaller pan can trap too much liquid and make the rice mushy; larger will dry it out. Stick with 9×13-inch.
- Not reserving sauce before it touches raw chicken — reusing a spoon that touched raw chicken contaminates the flavor and risks food safety.
- Draining the pineapple — the juice contributes essential moisture and sweetness to the rice.
- Overbaking after removing the foil — the uncovered finish time is short; leaving it in too long dries the chicken.
- Skipping the cornstarch slurry or mismeasuring — under-thickened sauce won’t cling to the chicken; too much cornstarch can make it gummy.
- Using thick, bone-in chicken — this recipe is scaled for thin-sliced boneless breasts; thicker cuts will not finish at the same time as the rice.
Better-for-You Options
If you want to lighten the dish slightly, use less brown sugar in the sauce (try ¼ cup instead of ⅓ cup) and increase the garlic for flavor. Swap white minute rice for a quick-cooking brown rice blend if you prefer whole grains, but be aware brown rice often needs more liquid and longer bake time; adjust accordingly and expect different texture.
Trim any visible fat from the chicken and use low-sodium soy sauce and low-sodium chicken broth (the recipe already calls for low-sodium broth) to control salt intake. Add more vegetables — a cup of mushrooms or a handful of snap peas added with the pineapple can boost nutrients without adding many calories.
What Could Go Wrong
If the rice is still firm after the full bake time, your oven might run cool or the rice absorbed less liquid than expected. Recover by adding 2 to 4 tablespoons of hot broth, re-covering tightly with foil, and baking for another 5–8 minutes. Check again with a fork.
If the chicken is dry, it likely overcooked during the uncovered finish. Thin-sliced chicken needs only the short uncovered period; pull it at 165F and rest for a few minutes under the foil to allow juices to redistribute.
If the sauce separates or looks thin after baking, it may have thinned from the rice juices. Spoon some of the reserved sauce over individual portions at serving to restore the glossy teriyaki finish.
Storage & Reheat Guide
Cool leftovers within two hours and store in an airtight container for up to 3–4 days in the refrigerator. The rice will firm up and absorb sauce; that’s normal.
Reheat in a covered oven-safe dish at 350F for 10–15 minutes, or until heated through. For single portions, microwave on medium power with a splash of broth or the reserved teriyaki sauce to revive moisture, heating in 30–45 second increments until hot.
Do not freeze the assembled dish before baking; pineapple and rice textures change unfavorably. You can freeze cooked portions, but expect some textural changes with thawing and reheating.
Troubleshooting Q&A
Q: My rice is gummy—what happened?
A: Gummy minute rice usually means too much liquid or over-stirring before baking. Make sure you used the specified 1 ¼ cups chicken broth and 1 ½ cups minute rice, and stir gently just to combine. If gummy already, spread the mixture in a single layer, poke air holes and bake uncovered for a few minutes to drive off excess moisture.
Q: The sauce tasted salty—how can I fix it?
A: Use low-sodium soy sauce and low-sodium chicken broth, as the recipe recommends. If it’s already too salty, add a little more rice (if you have a spare ½ cup cooked rice) or serve with a squeeze of fresh citrus on the plated portion to balance saltiness.
Q: The chicken isn’t cooked through but the rice is done—now what?
A: Thin-sliced breasts should cook evenly, but if pockets of thicker meat remain, tent the dish with foil and return to the oven until all pieces reach 165F. Alternatively, remove cooked rice portions and finish thicker chicken pieces under the broiler briefly, watching carefully.
Q: Can I make the sauce ahead?
A: Yes. Make the teriyaki, cool it, and refrigerate for up to 3 days in an airtight container. Rewarm gently before using and reserve a portion separately before it touches raw chicken.
Time to Try It
Set aside about 10–15 minutes for prep and 35–40 minutes for baking, and you’ll have a meal that feels thoughtful but barely interrupts your evening. Line up your mise en place, make the sauce, mix the rice and liquids into the dish, top with thin-sliced chicken, and let the oven do the rest.
When you lift the foil and see glossy, caramelized chicken with pineapple-tinted rice, you’ll know it was worth the 45 minutes. Serve with the reserved teriyaki sauce and a sprinkle of green onion and sesame seeds. Enjoy.

Baked Teriyaki Chicken and Rice
Ingredients
Ingredients
- 1/3 cupreduced-sodium soy sauce
- 1/3 cuplight brown sugar packed
- 3 to 5 clovesgarlic finely minced or pressed
- 2 teaspoonsground ginger
- 1/4 to 1/2 teaspoonred pepper flakes or to taste
- 1/2 cupwater
- 2 tablespoonscorn starch
- 1 1/2 cupswhite minute rice
- 8 ouncescanned pineapple chunks or tidbits in juice do not drain
- 1 medium/large red bell pepper diced into small pieces
- 1 1/4 cupslow-sodium chicken broth
- 1 to 2 tablespoonschili garlic sauce optional and to taste
- 1 poundthin-sliced boneless skinless chicken breasts about 4 breasts
- 2 or 3 green onions cut into small segments on the bias
- sesame seeds optional for garnishing
Instructions
Instructions
- Preheat oven to 375F. Spray a 9×13-inch baking dish with cooking spray; set aside.
- Make the teriyaki sauce: In a medium saucepan combine ⅓ cup reduced-sodium soy sauce, ⅓ cup light brown sugar (packed), 3 to 5 cloves garlic (finely minced or pressed), 2 teaspoons ground ginger, and ¼ to ½ teaspoon red pepper flakes (or to taste). Bring to a boil over medium-high heat, whisking nearly constantly.
- In a small bowl stir 2 tablespoons corn starch into ½ cup water until fully dissolved.
- Add the corn starch mixture to the boiling soy sauce mixture, stir to combine, reduce heat to a low simmer, and cook 1 to 2 minutes, stirring frequently, until the teriyaki sauce has thickened. Remove from heat. Transfer some of the sauce to a clean heatproof bowl or measuring cup and reserve it for serving so it does not get cross-contaminated with raw chicken.
- In the prepared 9×13 baking dish add 1 ½ cups white minute rice, 8 ounces canned pineapple chunks or tidbits in juice (do not drain), 1 medium/large red bell pepper (diced into small pieces), 1 ¼ cups low-sodium chicken broth, and 1 to 2 tablespoons chili garlic sauce (optional and to taste). Stir gently to combine the rice and liquids.
- Evenly lay 1 pound thin-sliced boneless skinless chicken breasts (about 4 breasts) on top of the rice mixture.
- Using a clean spoon, dollop a generous amount of the cooked teriyaki sauce on top of each piece of chicken. Do not reuse a spoon that has touched raw chicken. Reserve any remaining teriyaki sauce for serving.
- Cover the baking dish tightly with foil and bake at 375F for 30 minutes.
- Remove the foil and bake uncovered an additional 5 to 10 minutes, or until the chicken is cooked through (internal temperature 165F) and the rice is tender.
- Remove from the oven, evenly sprinkle with 2 or 3 green onions (cut into small segments on the bias) and sesame seeds if using, and serve immediately with the reserved teriyaki sauce if desired.
Equipment
- 9x13 inch Baking Dish
- Medium Saucepan
- Small Bowl
- Measuring cups and spoons
- Mixing spoon
- Foil
- Cooking spray
Notes
Storage:
Leftovers
will keep airtight in the fridge for up to 5 days or in the freezer for 3-4 months.
Recipe adapted from
Betty Crocker


