
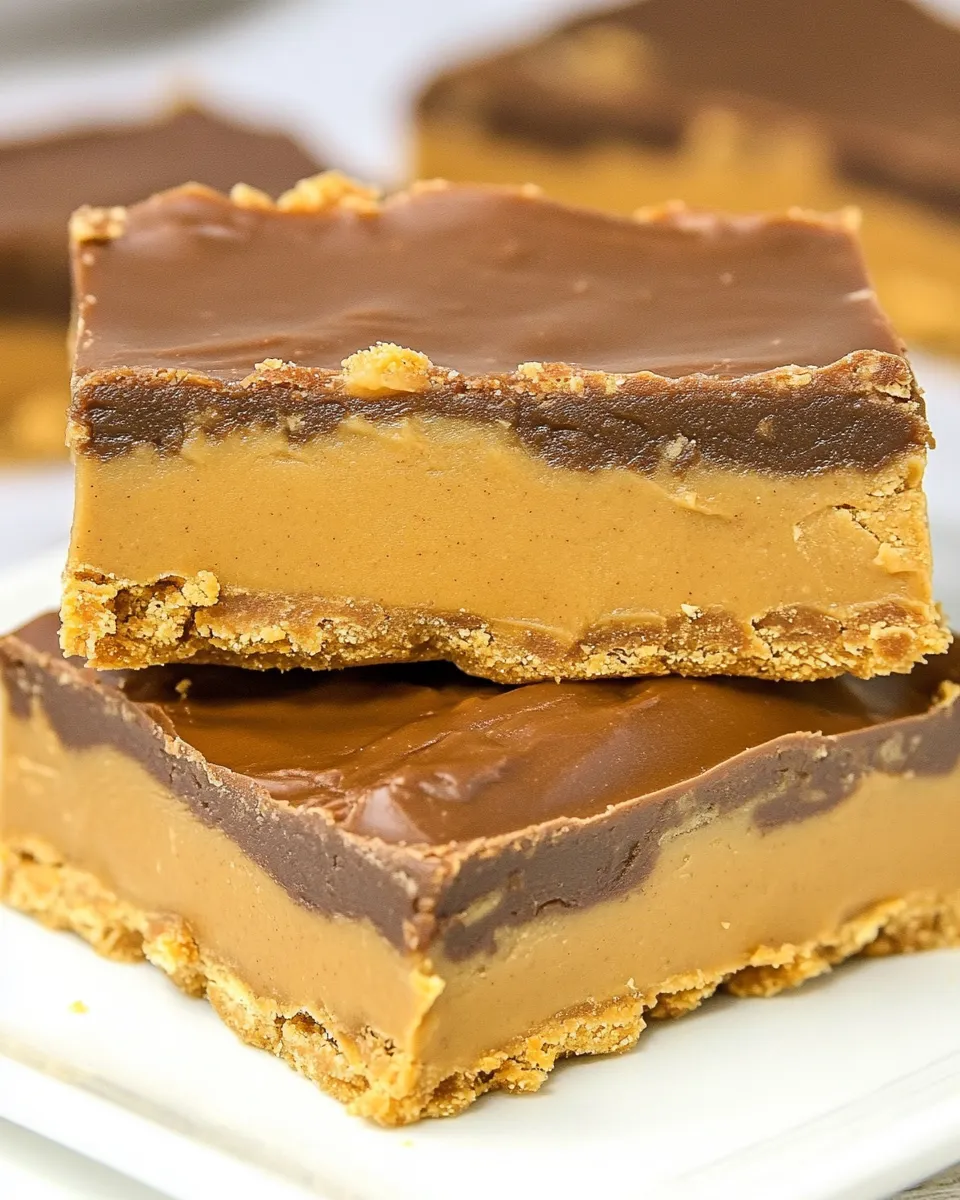
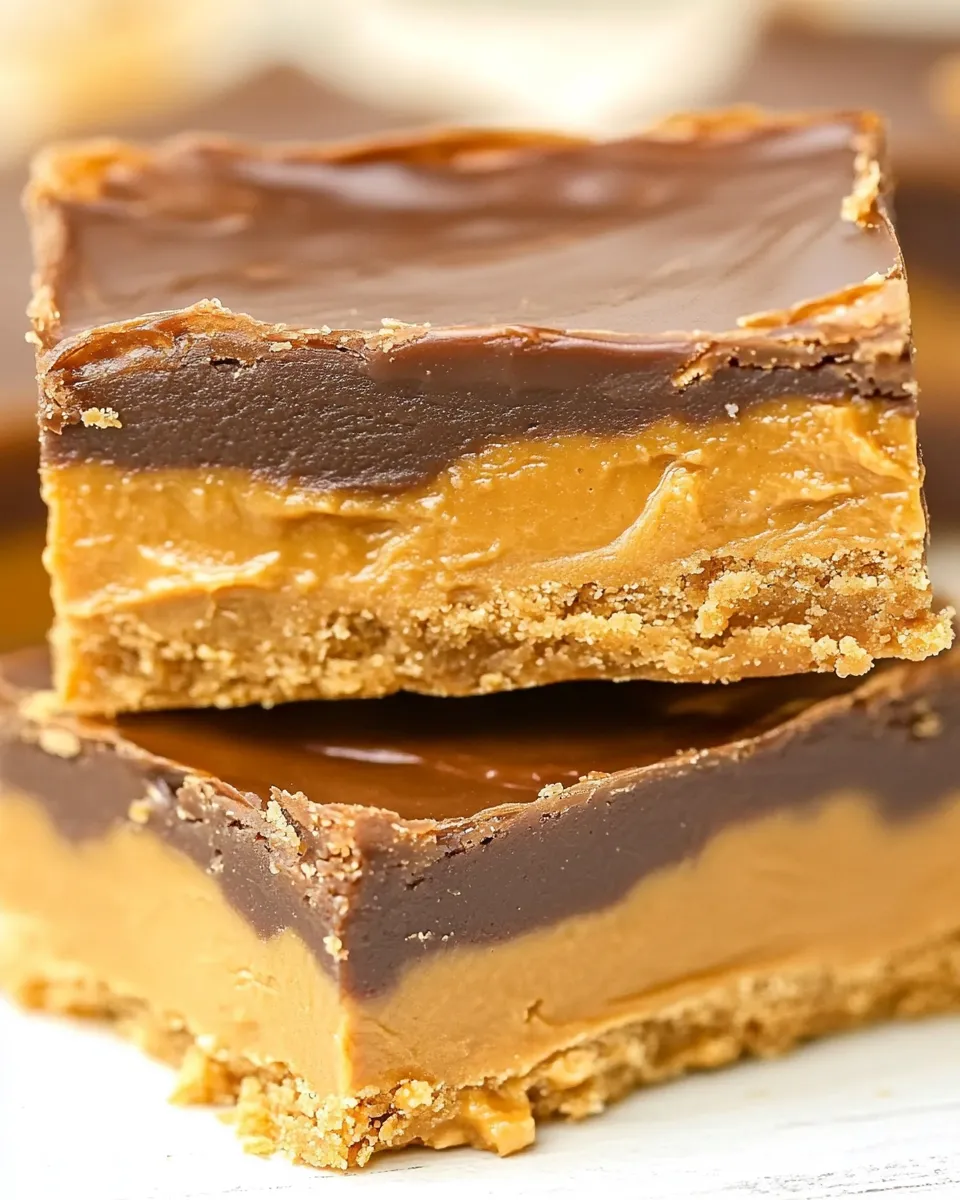
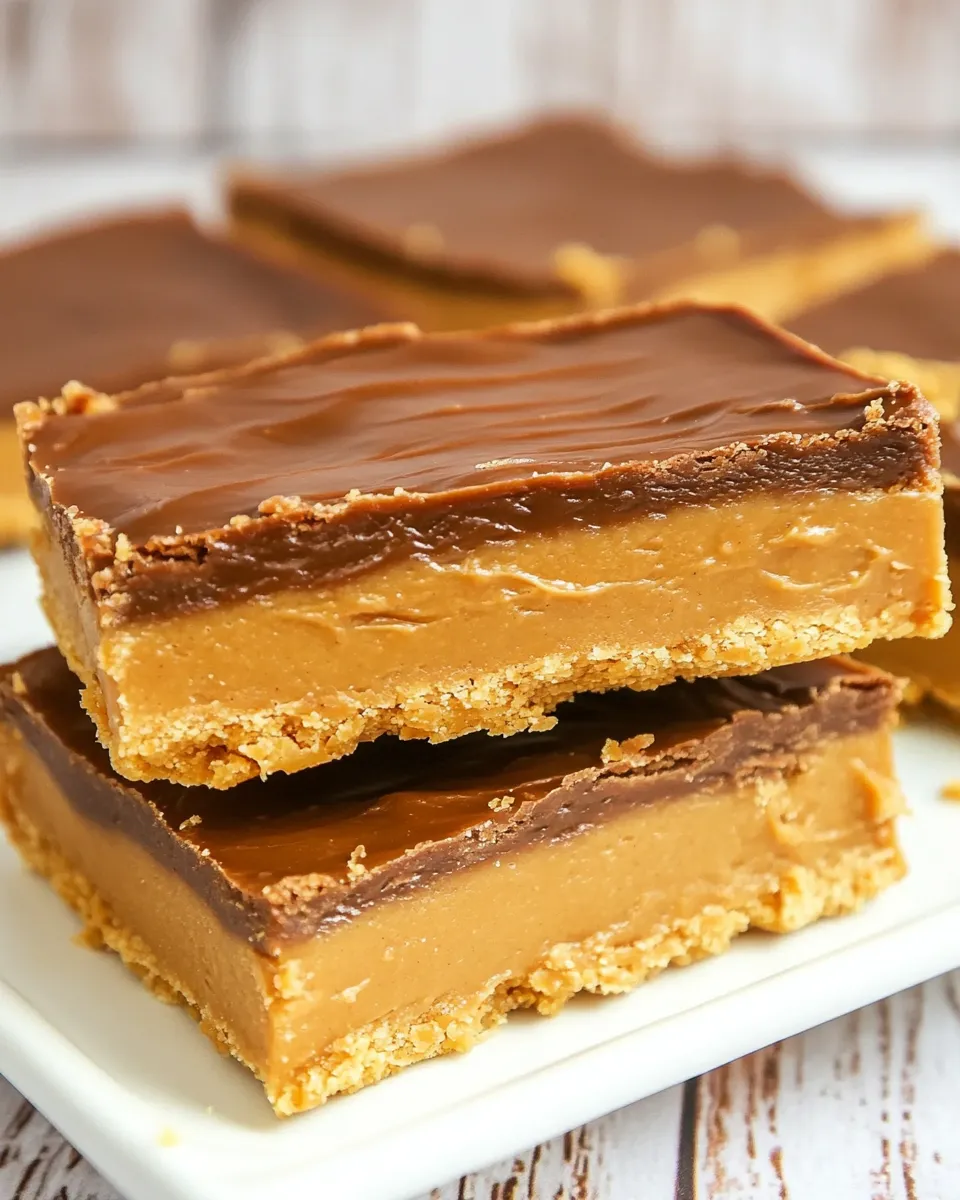
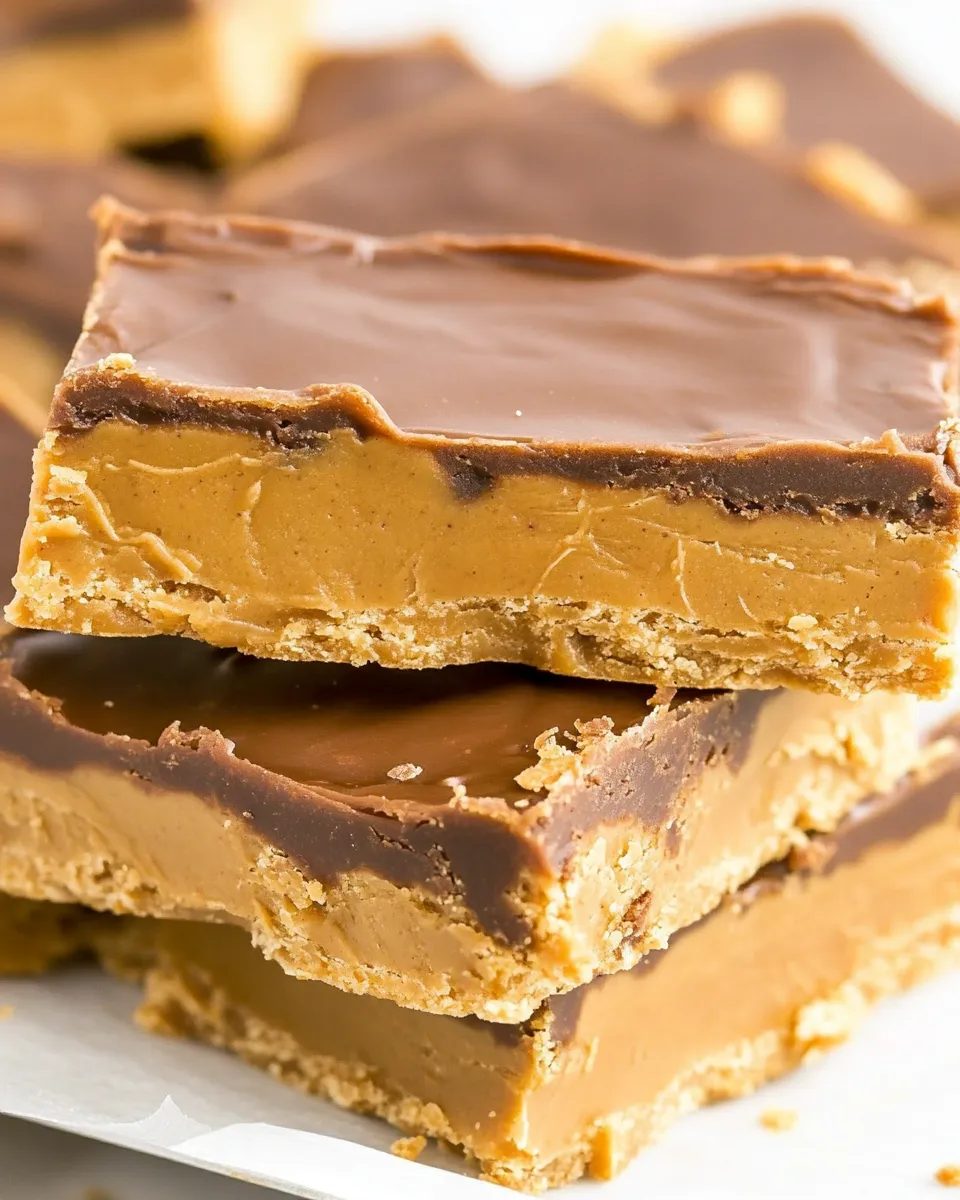
These peanut butter bars are the kind of recipe I reach for when I want something that’s unfussy, fast, and reliably delicious. They’re a two-layer wonder: a buttery, slightly salty cracker crumb base that holds together like a dream, topped with a glossy chocolate-peanut butter layer that sets firm. No baking required, other than melting chocolate and butter, which keeps the kitchen cool and the timing predictable.
I test desserts until they behave — they must be easy to press into a pan, slice cleanly, and travel well. These bars tick every box. The texture contrast between the crisp, compacted Ritz crumb crust and the silky chocolate topping is the reason friends ask for the recipe again and again. They also store well and behave differently at room temperature versus chilled, so you can tune them to your preference.
Below you’ll find the exact ingredients and step-by-step method I use, plus practical notes on gear, troubleshooting, substitutions, and storage. Follow the directions as written the first time; small, exact measurements here matter for that compact crust and steady cutting. Once you’ve made them, you’ll see how forgiving and adaptable they are.
What You’ll Gather
Ingredients
- 8 tablespoons (113 g) unsalted butter, melted — provides richness and helps the cracker crumbs bind into a compact crust.
- 2 cups Ritz cracker crumbs (about 60 crackers or about 194 g) — the base; finely crushed for even texture and a slightly salty, buttery backbone.
- 1 ¼ cups (142 g) powdered sugar — sweetens and helps the crust hold together; sift first if clumpy.
- ¾ cup (+ 2 tablespoons) creamy peanut butter, divided — split between the crust and the chocolate layer for consistent peanut flavor and structure.
- 1 cup (170 g) chocolate chips — melts to create the top layer; yields a glossy, sliceable finish when combined with the extra peanut butter.
Peanut Butter Bars: How It’s Done
- Line a 9×9-inch or 9×13-inch pan with foil, leaving an overhang on two sides for easy removal, and spray the foil lightly with cooking spray. (You may use any pan size between these—larger pans will produce thinner bars.)
- Measure 8 tablespoons (113 g) unsalted butter and melt it (microwave in short bursts or melt on the stovetop).
- In a large bowl combine the melted butter, 2 cups Ritz cracker crumbs (about 60 crackers or 194 g), 1 1/4 cups (142 g) powdered sugar, and 3/4 cup creamy peanut butter. Mix with a spoon or by hand until the crumbs are evenly coated and the mixture holds together when pressed.
- Transfer the crumb mixture to the prepared pan. Press it firmly and evenly into the bottom of the pan (use the back of a measuring cup or a spatula to compact it).
- Place 1 cup (170 g) chocolate chips and the remaining 2 tablespoons creamy peanut butter in a microwave-safe bowl.
- Melt the chocolate mixture on 50% power in 30-second increments, stirring well between each increment, until smooth and fully combined. (Stop heating as soon as the mixture is smooth to avoid scorching.)
- Pour the melted chocolate-peanut butter mixture over the pressed crust and spread it evenly with an offset spatula or the back of a spoon.
- Chill the pan in the refrigerator for at least 1 hour, or until the topping is set.
- Use the foil overhang to lift the slab from the pan and place it on a cutting board. For cleaner cuts and to avoid the chocolate shattering, let the bars sit at room temperature briefly before slicing into bars.
- Store the bars in an airtight container at room temperature or in the refrigerator, depending on how warm your house is—the chocolate will get melty if it’s too hot.
Why You’ll Keep Making It
These bars are a reliable no-fail crowd pleaser. The method is straightforward, but the result feels elevated: salty, sweet, crunchy, and smooth in each bite. They require no oven, so they’re perfect in summer or when you want a dessert to bring to a party without timing a bake.
The crust’s use of Ritz crumbs plus powdered sugar is a genius shortcut for a press-in base that doesn’t crumble apart. Meanwhile, the chocolate layer is forgiving — melt carefully and it sets firm enough to slice cleanly after chilling. Make them for potlucks, lunchboxes, or to keep on hand when you need something homemade in a hurry.
Substitutions by Category
- Crust base: If you don’t have Ritz, use a similarly buttery, salted cracker crushed finely. The key is a salty, buttery flavor in a finely ground form so it compacts well.
- Sweetener in crust: Stick with a superfine powdered sugar for the best texture — it dissolves into the crumbs and keeps the base cohesive.
- Peanut butter: Use creamy style as written for binding and smooth texture. Switching to crunchy will add texture; expect a slightly looser spread in the chocolate layer.
- Chocolate: Chocolate chips melt well and give a predictable set. Different chocolate chip varieties (milk or dark) change the sweetness level; use what you prefer.
What’s in the Gear List
- 9×9-inch or 9×13-inch pan — either works; smaller pan makes thicker bars, larger pan makes thinner bars.
- Aluminum foil — for lining the pan and creating overhang to lift the slab out easily.
- Cooking spray — to prevent sticking to the foil.
- Large mixing bowl — to combine crumbs, butter, sugar, and peanut butter.
- Measuring cups and spoons, kitchen scale (optional) — measure precisely for the best texture.
- Microwave-safe bowl — for melting chocolate and peanut butter together.
- Offset spatula or back of a spoon — to spread the topping evenly.
- Cutting board and sharp knife — for slicing neat bars; warming the knife slightly or wiping it between cuts helps.
Common Errors (and Fixes)
- Crust too crumbly: Probably not packed firmly enough or the butter amount was mismeasured. Press the mixture more firmly into the pan; use the back of a measuring cup to compact it tightly.
- Chocolate topping seizing or grainy: Overheating chocolate causes it to seize. Melt at 50% power in short intervals and stir between bursts; stop heating as soon as it’s glossy and smooth.
- Topping won’t set: If your house is warm, the bars may remain soft. Chill in the refrigerator for longer than an hour and make sure the chocolate cooled before slicing.
- Bars stick to foil: Use a light spray of cooking oil on the foil before pressing in the crust, and make sure there’s an overhang to lift the slab cleanly out.
- Messy cutting: Wipe the knife clean between cuts or run it briefly under hot water, dry it, and cut; a slightly warm blade slices the chocolate more cleanly.
Dietary Swaps & Alternatives
- Lower sugar option: This recipe depends on powdered sugar in the crust for structure. If you need less sweetness, reduce the crust sweetness slightly but press the crust extra firmly to maintain structure.
- Texture changes: Using crunchy peanut butter will add pleasant bits inside both layers; expect a firmer crust if the peanut butter is drier.
- Keep it cool: If you plan to serve bars at a warm event, refrigerate until just before serving so the chocolate holds shape.
Chef’s Notes
Small techniques make a big difference here. Crush the crackers uniformly — use a food processor for quick, even crumbs, or place crackers in a zip-top bag and roll with a rolling pin. When pressing the crust, compact it well; you want a slab that won’t fall apart when sliced. That’s what the powdered sugar and melted butter do together: they form a lightly sweet, cohesive matrix around the crumbs.
When melting the chocolate with the 2 tablespoons of peanut butter, keep the heat low. Chocolate will look done before it scorches. Stir until it’s just smooth and glossy, then stop. Spread it carefully and set it flat — an offset spatula is worth the small purchase for this kind of work because it creates a professional top.
Prep Ahead & Store
You can complete these bars up to the end of step 7 and chill them, wrapped, for 24 hours before slicing. That makes them excellent for prepping a day ahead for a party. If you need more lead time, make them and store whole in an airtight container in the refrigerator for up to one week.
For room-temperature storage, keep them in a cool place in an airtight box; if your home is warmer than about 70°F (21°C), refrigerate to avoid a melty top. Slicing straight from the fridge can cause slight cracking in the chocolate; let the slab sit at room temperature a few minutes before cutting for cleaner edges.
FAQ
- Can I use a different cracker? Yes — use a similar buttery, salted cracker crushed finely. The flavor and salt level of the cracker influence the final taste, so choose accordingly.
- Can I melt on the stovetop instead of microwave? Yes. Use a double boiler: place the bowl over gently simmering water, stirring until smooth. Remove promptly to prevent overheating.
- Why powdered sugar and not granulated? Powdered sugar blends smoothly into the crumbs and helps the crust bind. Granulated sugar would leave a grittier texture and won’t give the same cohesion.
- How thick should I press the crust? Press it firmly and evenly. The recipe covers a range of pan sizes; a smaller pan makes thicker bars. Use the back of a measuring cup to pack it down uniformly.
Final Bite
These Peanut Butter Bars are a dependable make-ahead treat: buttery, slightly salty crust, a perfectly smooth chocolate-peanut butter top, and a texture that makes you want one more. The method is straightforward, and the tweaks are simple — press, melt gently, chill, slice. Once you get the hang of the compacting and the gentle melting, you’ll have a dessert that travels well, stores well, and vanishes fast. Make a batch; hide one for yourself.

BEST Peanut Butter Bars
Ingredients
Ingredients
- 8 tablespoons 113 g unsalted butter, melted
- 2 cupsRitz cracker crumbs about 60 crackers or about 194 g
- 1 1/4 cups 142 g powdered sugar
- 3/4 cup + 2 tablespoons creamy peanut butter, divided
- 1 cup 170 g chocolate chips
Instructions
Instructions
- Line a 9×9-inch or 9×13-inch pan with foil, leaving an overhang on two sides for easy removal, and spray the foil lightly with cooking spray. (You may use any pan size between these—larger pans will produce thinner bars.)
- Measure 8 tablespoons (113 g) unsalted butter and melt it (microwave in short bursts or melt on the stovetop).
- In a large bowl combine the melted butter, 2 cups Ritz cracker crumbs (about 60 crackers or 194 g), 1 1/4 cups (142 g) powdered sugar, and 3/4 cup creamy peanut butter. Mix with a spoon or by hand until the crumbs are evenly coated and the mixture holds together when pressed.
- Transfer the crumb mixture to the prepared pan. Press it firmly and evenly into the bottom of the pan (use the back of a measuring cup or a spatula to compact it).
- Place 1 cup (170 g) chocolate chips and the remaining 2 tablespoons creamy peanut butter in a microwave-safe bowl.
- Melt the chocolate mixture on 50% power in 30-second increments, stirring well between each increment, until smooth and fully combined. (Stop heating as soon as the mixture is smooth to avoid scorching.)
- Pour the melted chocolate-peanut butter mixture over the pressed crust and spread it evenly with an offset spatula or the back of a spoon.
- Chill the pan in the refrigerator for at least 1 hour, or until the topping is set.
- Use the foil overhang to lift the slab from the pan and place it on a cutting board. For cleaner cuts and to avoid the chocolate shattering, let the bars sit at room temperature briefly before slicing into bars.
- Store the bars in an airtight container at room temperature or in the refrigerator, depending on how warm your house is—the chocolate will get melty if it’s too hot.
Equipment
- 9x9-inch or 9x13-inch pan
- Foil
- Cooking spray
- Large Bowl
- Measuring Cup
- Spatula
- Microwave-safe Bowl
- offset spatula (optional)
Notes
I have not tried this with natural peanut butter, so I suggest using a traditional kind.
It’s best to slice these peanut butter squares at room temperature so your chocolate doesn’t shatter.


