
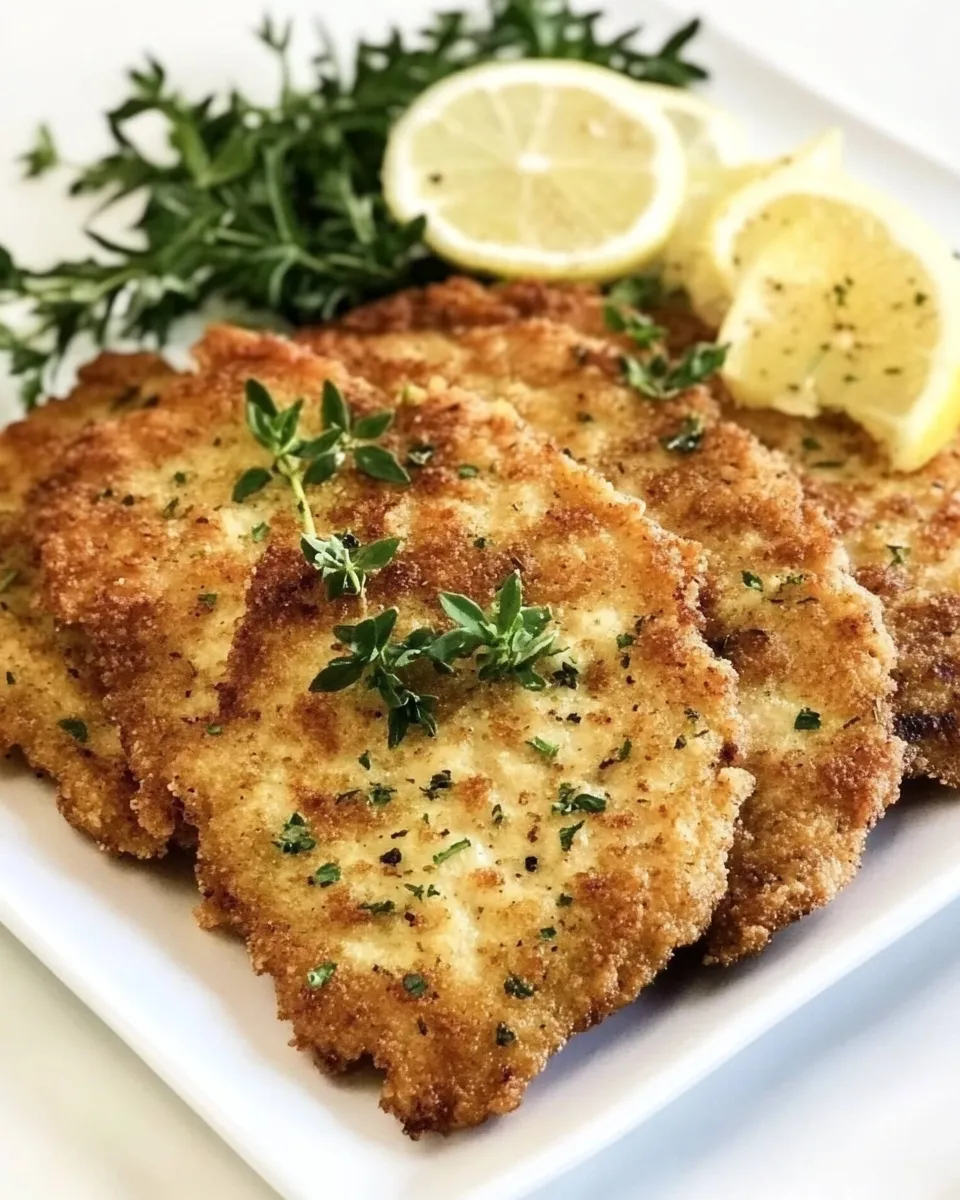
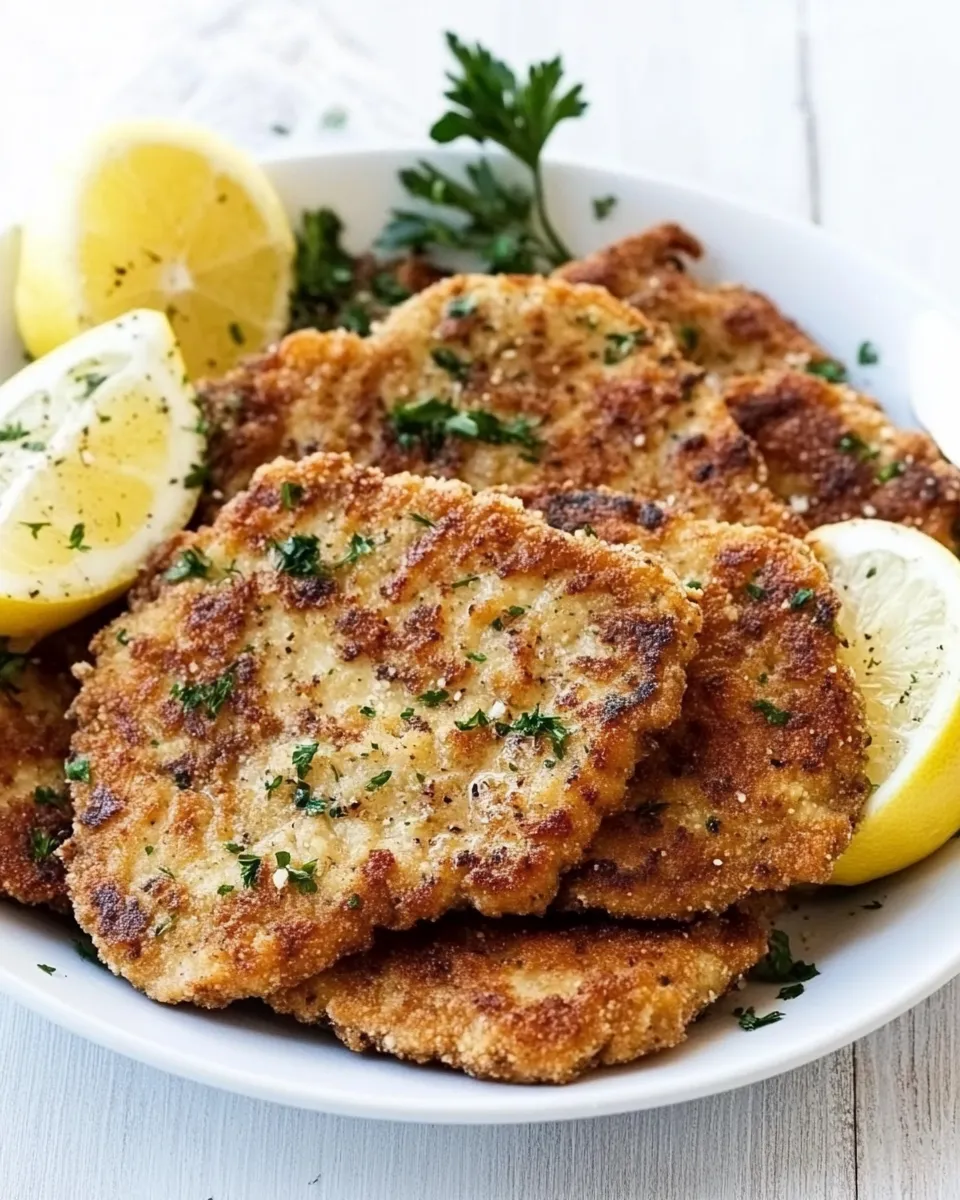
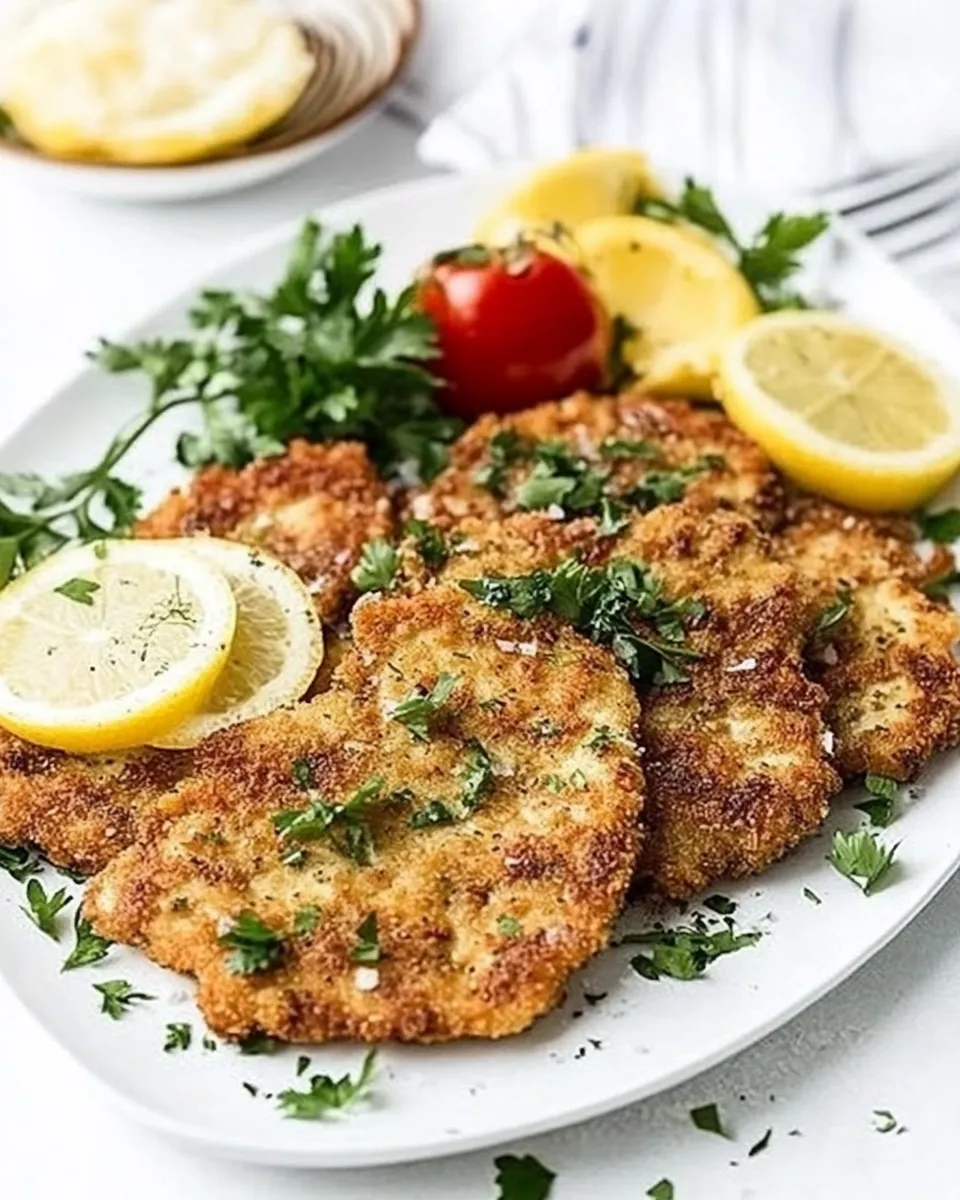
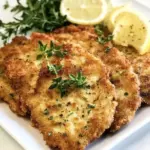
I love a recipe that delivers crisp edges, tender meat, and a quick win for busy dinners. These chicken cutlets do exactly that—simple prep, familiar pantry ingredients, and a golden result that everyone at the table will reach for first. No complicated brines, no long waits. Just careful pounding, proper dredging, and a hot pan.
There’s comfort in technique. Pound the breasts evenly, set up three shallow dishes, and work one cutlet at a time. The routine becomes meditative and it guarantees consistent results: thin, fast-cooking pieces with a crunchy, seasoned crust.
I’ll walk you through the ingredients, the exact steps, options for swaps, troubleshooting, and how to store and reheat the leftovers so they stay crisp. Read through once, then get going—this one is a reliable weeknight champion.
What’s in the Bowl
Ingredients
- 4 boneless skinless chicken breasts, 7 to 9 ounces each — the base of the recipe; slice each breast in half widthwise to make 8 cutlets for even cooking.
- 1 1/2 cups all-purpose flour — helps the egg adhere and creates the first dry layer; season it well.
- 5 large eggs — beaten as the binding layer so breadcrumbs cling and form a uniform crust.
- 3 cups regular or Italian bread crumbs — the main crunchy coating; Italian-style adds instant seasoning.
- Coarse salt and freshly cracked pepper to taste — seasoning for the flour and breadcrumbs; key to flavorful crust.
- Avocado or olive oil for frying — enough to come about 1/8–1/4 inch up the pan; choose an oil with a high smoke point like avocado if you like a slightly higher temperature.
Stepwise Method: Chicken Cutlets Recipe
- Place 4 boneless skinless chicken breasts on a cutting board. Slice each breast in half widthwise to make 8 cutlets.
- Put one cutlet at a time between two pieces of parchment paper, plastic wrap, or a cut-open plastic bag. Gently pound each cutlet with a meat mallet or tenderizer until it is no thicker than 1/4 inch. Repeat for all cutlets.
- Pat the pounded cutlets dry with paper towels and set them on a plate or tray.
- Prepare three shallow dishes for dredging: in the first dish combine 1 1/2 cups all-purpose flour with coarse salt and freshly cracked pepper to taste; in the second dish whisk 5 large eggs with a pinch of salt and pepper; in the third dish combine 3 cups regular or Italian bread crumbs with coarse salt and freshly cracked pepper to taste.
- Working one cutlet at a time, dredge a cutlet in the seasoned flour, coating both sides and shaking off excess.
- Transfer the floured cutlet to the egg mixture and fully coat it, letting excess egg drip off.
- Press the egg-coated cutlet into the bread crumbs, turning and pressing so the crumbs adhere evenly. Place the breaded cutlet on a sheet tray lined with parchment paper or on a platter. Repeat steps 5–7 until all cutlets are breaded.
- Pour enough avocado or olive oil into a large frying pan to come about 1/8–1/4 inch up the sides. Heat the oil over medium to medium-high heat until it is shimmering and hot (about 350–375°F if using a thermometer).
- Add 2 cutlets at a time to the hot oil without overcrowding. Fry 2 to 3 minutes per side, turning once, until both sides are golden brown and the cutlets are cooked through (internal temperature 165°F or no pink in the center).
- Transfer cooked cutlets to a wire rack set over a sheet tray to drain while you fry the remaining cutlets. Repeat step 9 until all cutlets are cooked.
- Let the cutlets rest 1–2 minutes before serving.
Why Chicken Cutlets Recipe is Worth Your Time
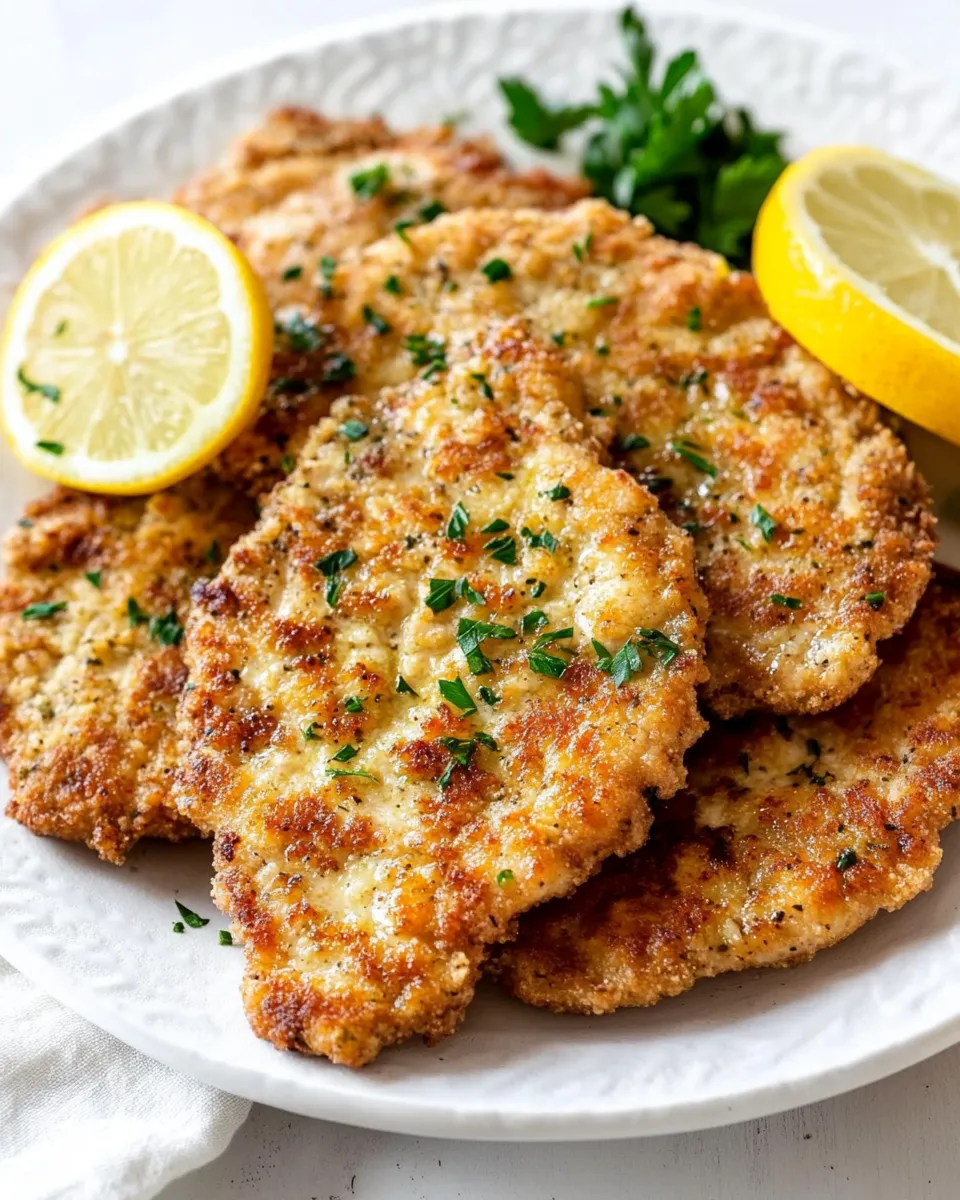
Thin chicken cutlets transform dinner in under 20 minutes once they’re prepped. Because the breasts are pounded to 1/4 inch, they sear quickly and evenly. That short cook time keeps the meat juicy and lets the crust stay crisp without burning.
This method is forgiving. The three-step dredge—flour, egg, crumbs—creates a dependable coating. Salt in the flour and crumbs seasons the crust through and through. The payoff is consistent: golden exterior, tender interior, and a texture that works alone or topped with a squeeze of lemon, a simple pan sauce, or a light salad.
Swap Guide
- Panko breadcrumbs — use in place of regular crumbs for an airier, crunchier crust.
- Gluten-free flour and breadcrumbs — swap 1:1 if you need gluten-free; use a sturdy gluten-free flour for dredging.
- Cook spray or clarified butter — for lower oil pan-frying or a slightly richer flavor; watch heat closely if using butter.
- Seasoned crumbs vs. plain — Italian breadcrumbs add herbs and garlic so you can trim added seasonings in the flour or egg.
- Oil choices — avocado oil tolerates higher heat; extra-virgin olive oil is fine at medium, but avoid smoking the oil.
Gear Checklist
- Cutting board — to halve and pound the breasts.
- Meat mallet or tenderizer — essential for even thickness.
- Three shallow dishes or pie plates — for flour, beaten eggs, and breadcrumbs.
- Large frying pan — wide enough to fit two cutlets without crowding.
- Instant-read thermometer — handy to confirm 165°F internal temperature.
- Wire rack and sheet tray — for draining so cutlets stay crisp and not soggy.
- Parchment paper or plastic wrap — protects the meat while pounding and lines the tray for easy cleanup.
Troubles You Can Avoid
Cutlets Getting Soggy
If cutlets turn soggy after frying, they likely sat directly on a plate or on paper towels. Transfer them to a wire rack over a tray so air circulates beneath. This keeps the crust crisp while excess oil drains away.
Uneven Cooking or Tough Texture
If the middle is undercooked but the edges are overdone, the cutlets weren’t even thickness. Re-pounding to a consistent 1/4 inch before dredging prevents that. Also, avoid overcrowding the pan—too many cutlets drops the oil temperature and leads to uneven cooking.
Too Dark on the Outside, Raw Inside
This happens when oil is too hot. Use medium to medium-high heat and aim for a surface temperature around 350–375°F. The outside will brown more slowly and the inside will cook through without burning the crust.
Seasonal Ingredient Swaps
Seasonal swaps keep the plate interesting without changing the method. In spring, serve the cutlets with a lemony arugula salad and shaved radishes. Summer calls for a quick tomato basil salad or corn succotash on the side. In autumn, braised greens and roasted root vegetables make a hearty pairing. Winter welcomes a warm chimichurri, sautéed mushrooms, or creamy polenta.
If You’re Curious
Yes, you can skip pounding if you slice the breasts thinly across the width, but pounding is faster and more forgiving. If you’re breading ahead, keep breaded cutlets on a parchment-lined tray in the fridge for up to an hour before frying; chilling firms the coating so it holds up better when it hits the oil.
Storage & Reheat Guide
Store cooled cutlets in an airtight container in the refrigerator for up to 3–4 days. For longer storage, layer with parchment or paper towels and freeze for up to 3 months. To reheat from refrigerated, preheat your oven to 350°F and place cutlets on a wire rack over a sheet tray. Heat for 10–12 minutes, flipping once if needed, until warmed through and crisp.
For a faster reheat and great crisping, a hot skillet over medium heat with a teaspoon of oil will bring the cutlet back to life in 2–3 minutes per side. An air fryer at 350°F for 3–5 minutes also works well from chilled—check for even warming.
Reader Q&A
Q: Can I use chicken thighs instead of breasts?
A: Yes. Boneless, skinless thighs will need less pounding and cook slightly differently. Because they’re thicker in spots, check internal temperature and adjust frying time.
Q: Do I have to use three dishes for dredging?
A: The three-dish system keeps the coating tidy and efficient, but you can use one shallow tray for flour and bread crumbs and a bowl for eggs. The separate dishes cut down on double-dipping and make the process smoother.
Q: What if I don’t have a thermometer?
A: Cook until the crust is golden brown and the center has no pink. Slice one cutlet to check doneness. For safety, ensure the juices run clear and the meat is opaque throughout.
The Last Word
These chicken cutlets are a small, dependable technique that elevates weeknight dinners. The steps are straightforward, the ingredients are simple, and the result is consistently satisfying. Keep your setup organized—flour, egg, crumbs—and don’t rush the heat. With a little care, you’ll have a crisp, golden cutlet every time.
Chicken Cutlets Recipe
Ingredients
Ingredients
- 4 boneless skinless chicken breasts 7 to 9 ounces each
- 1 1/2 cupsall-purpose flour
- 5 large eggs
- 3 cupsof regular or Italian bread crumbs
- coarse salt and freshly cracked pepper to taste
- avocado or olive oil for frying
Instructions
Instructions
- Place 4 boneless skinless chicken breasts on a cutting board. Slice each breast in half widthwise to make 8 cutlets.
- Put one cutlet at a time between two pieces of parchment paper, plastic wrap, or a cut-open plastic bag. Gently pound each cutlet with a meat mallet or tenderizer until it is no thicker than 1/4 inch. Repeat for all cutlets.
- Pat the pounded cutlets dry with paper towels and set them on a plate or tray.
- Prepare three shallow dishes for dredging: in the first dish combine 1 1/2 cups all-purpose flour with coarse salt and freshly cracked pepper to taste; in the second dish whisk 5 large eggs with a pinch of salt and pepper; in the third dish combine 3 cups regular or Italian bread crumbs with coarse salt and freshly cracked pepper to taste.
- Working one cutlet at a time, dredge a cutlet in the seasoned flour, coating both sides and shaking off excess.
- Transfer the floured cutlet to the egg mixture and fully coat it, letting excess egg drip off.
- Press the egg-coated cutlet into the bread crumbs, turning and pressing so the crumbs adhere evenly. Place the breaded cutlet on a sheet tray lined with parchment paper or on a platter. Repeat steps 5–7 until all cutlets are breaded.
- Pour enough avocado or olive oil into a large frying pan to come about 1/8–1/4 inch up the sides. Heat the oil over medium to medium-high heat until it is shimmering and hot (about 350–375°F if using a thermometer).
- Add 2 cutlets at a time to the hot oil without overcrowding. Fry 2 to 3 minutes per side, turning once, until both sides are golden brown and the cutlets are cooked through (internal temperature 165°F or no pink in the center).
- Transfer cooked cutlets to a wire rack set over a sheet tray to drain while you fry the remaining cutlets. Repeat step 9 until all cutlets are cooked.
- Let the cutlets rest 1–2 minutes before serving.
Equipment
- Cutting Board
- meat mallet or tenderizer
- parchment paper or plastic wrap
- Three Shallow Dishes
- Large frying pan
- Wire Rack
- sheet tray
- Paper Towels
Notes
Make-Ahead:
These chicken cutlets are meant to be eaten as soon as they’re done cooking. You can keep them warm over a rack on a sheet tray and in the oven at low temperatures (<200°) for up to 30 minutes. How to Store: Store it in plastic in the refrigerator for up to 3 days. It freezes well, covered individually in plastic for up to 3 months. How to Reheat: Add the desired number of chicken cutlets to a sheet tray lined with parchment paper and bake in the oven at 350° for 8 to 10 minutes or until hot. If the chicken breast is thicker and bigger than normal, you may be able to get three cutlets from it. You may need to drain and change the oil if it gets too dark from the bread crumbs. There should be enough oil in the pan that comes up to the halfway mark on the chicken cutlet.


