
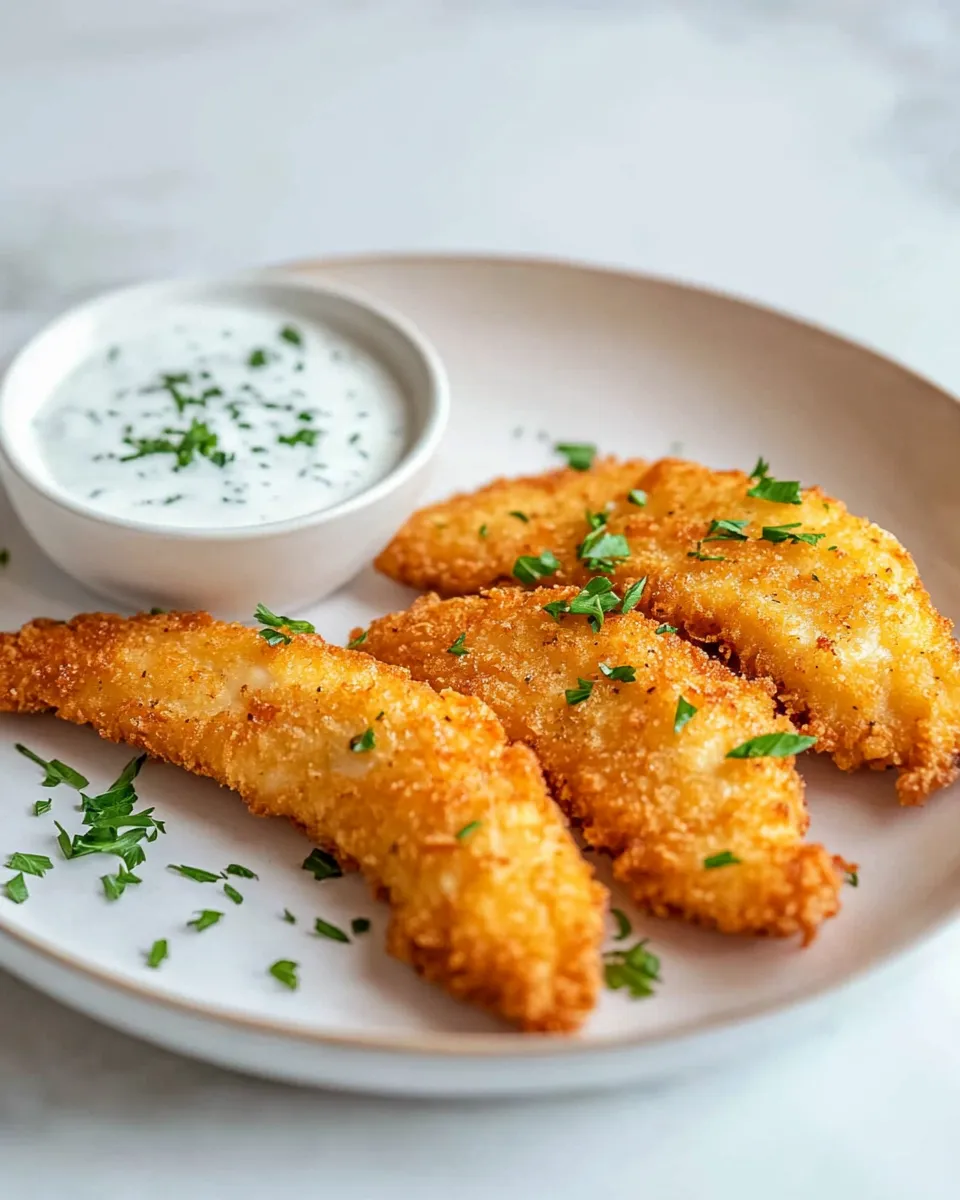
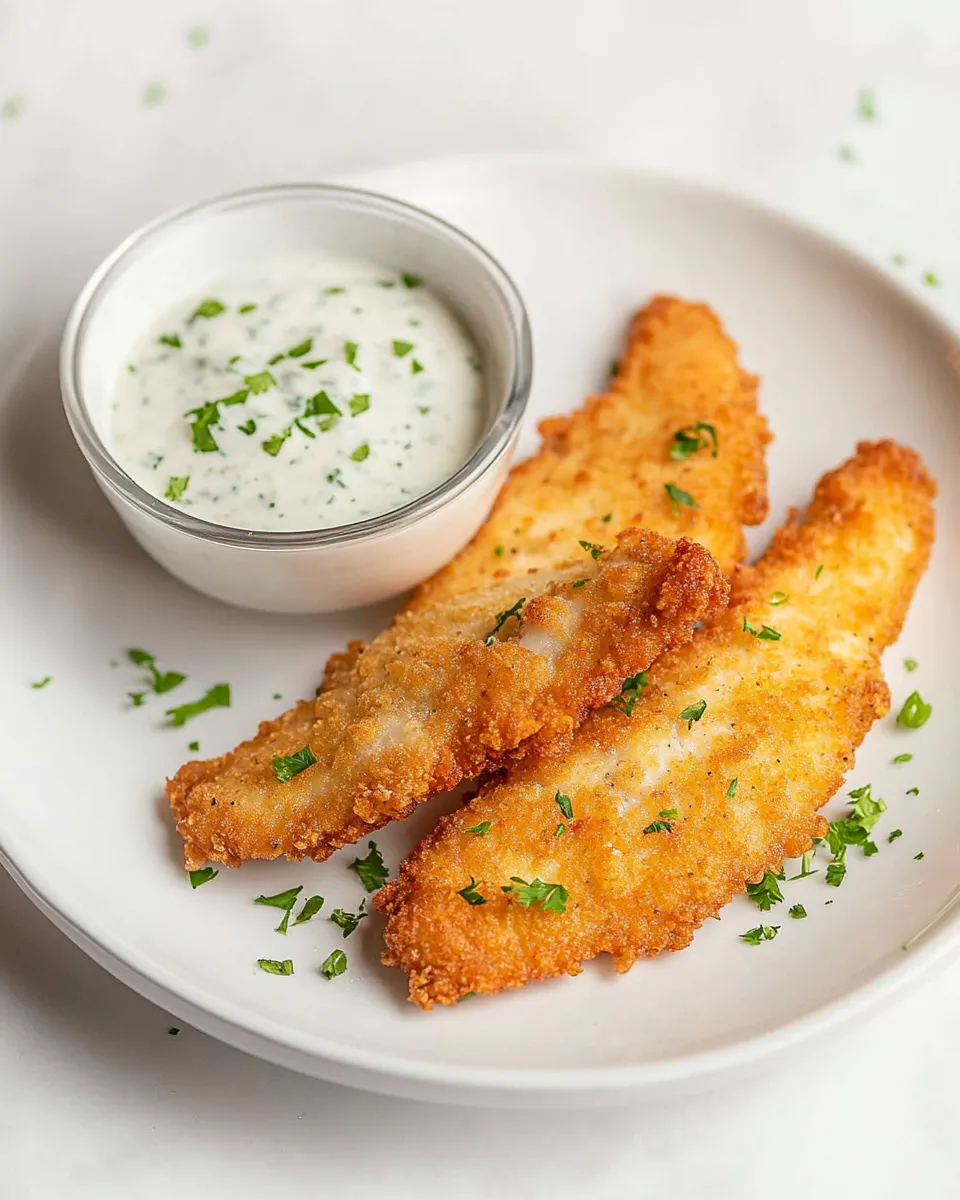
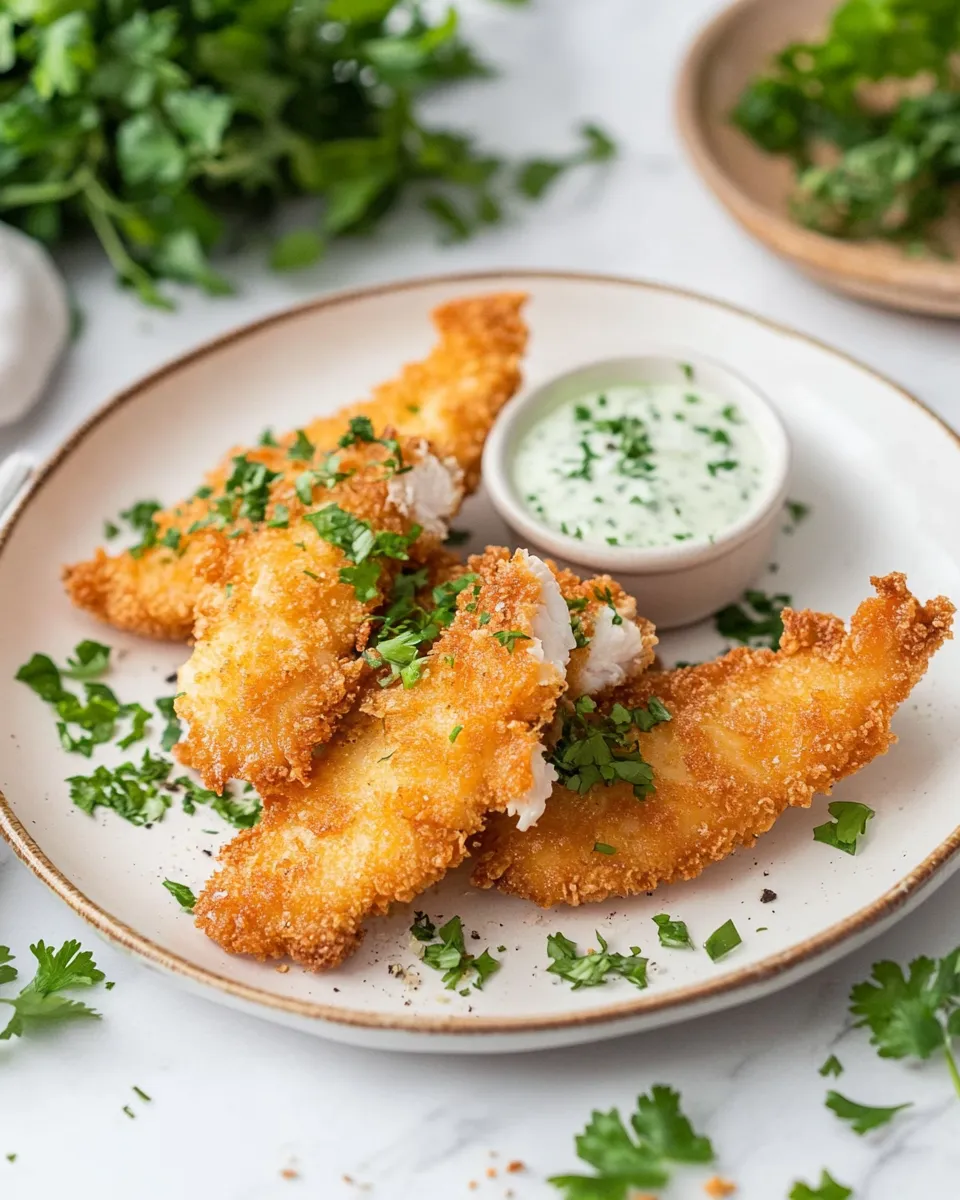
I love a recipe that feels like comfort food and actually fits into a busy week. These chicken fingers deliver exactly that: tender, buttermilk-brined chicken with a crunchy panko crust. They come together with pantry-friendly ingredients and a straightforward frying technique that gives reliably golden results.
This recipe is practical. You can marinate the chicken ahead, set up a simple dredging station, and fry in batches while keeping everything warm. The result is crisp on the outside, juicy on the inside—perfect for a quick family dinner, a game-night platter, or a weekday treat.
Below you’ll find the ingredients, a step-by-step method you can follow without guessing, and extras like equipment, common mistakes, low-carb swaps, and freezer-friendly notes. Read through, then get cooking; these chicken fingers are worth the small lift in effort.
Ingredients
- 1 lb chicken tenderloins — the main protein; tenderloins cook quickly and stay juicy.
- 1 cup buttermilk — acids and enzymes in the buttermilk tenderize and add tang.
- 1 cup all-purpose flour — gives the first dry layer for the crust to cling to.
- 2 large eggs, beaten — bind the panko to the chicken; beaten ensures even coating.
- 1 cup panko breadcrumbs — creates the light, extra-crispy outer texture.
- 1 teaspoon salt — seasons the flour; essential for flavor in the crust.
- 1/2 teaspoon black pepper — adds mild heat and background spice.
- 1/4 teaspoon garlic powder — boosts savory notes without fresh garlic’s moisture.
- 1/4 teaspoon paprika — adds subtle color and an earthy sweetness.
- Vegetable oil for frying — neutral oil with a high smoke point is best for even frying.
Shopping List
- Chicken: 1 lb chicken tenderloins (or use chicken breast cut into finger-sized strips if needed).
- Dairy: 1 cup buttermilk.
- Pantry: 1 cup all-purpose flour, 1 cup panko breadcrumbs, vegetable oil for frying.
- Eggs & seasonings: 2 large eggs, 1 teaspoon salt, 1/2 teaspoon black pepper, 1/4 teaspoon garlic powder, 1/4 teaspoon paprika.
Stepwise Method: Chicken Fingers
- Place 1 lb chicken tenderloins in a bowl and pour 1 cup buttermilk over them. Cover and refrigerate to marinate for at least 1 hour.
- Prepare three shallow dishes: in the first combine 1 cup all-purpose flour, 1 teaspoon salt, 1/2 teaspoon black pepper, 1/4 teaspoon garlic powder, and 1/4 teaspoon paprika; in the second beat the 2 large eggs; in the third place 1 cup panko breadcrumbs.
- Remove the chicken from the fridge and gently shake off excess buttermilk; pat lightly with paper towels if very wet (do not remove all moisture).
- Working one piece at a time, dredge a chicken strip in the seasoned flour, shake off excess, dip into the beaten eggs letting excess drip off, then press and roll in the panko breadcrumbs until evenly coated. Place coated strips on a plate or wire rack. Repeat with remaining strips.
- Pour vegetable oil for frying into a deep fryer or large, heavy skillet to a depth that will allow frying (enough to partially or fully submerge the strips). Heat the oil to 350°F (175°C). If you do not have a thermometer, heat until the oil is shimmering and a small pinch of flour sizzles on contact.
- Fry the chicken in batches without crowding the pan, turning once, until the coating is golden brown and the internal temperature of the thickest piece reaches 165°F, about 3–4 minutes per side depending on thickness. Adjust heat as needed to maintain ~350°F.
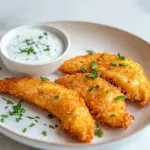
- Transfer cooked chicken fingers to a paper towel–lined plate or wire rack to drain briefly. Serve hot.
Why This Recipe Works
Three things make these chicken fingers reliably good: the buttermilk brine, the flour-egg-panko assembly, and the frying temperature. The buttermilk tenderizes while adding a subtle tang that cuts through the fried crust. The three-part dredge—flour, egg, panko—creates a solid adhesion that yields an even, crispy shell without becoming greasy.
Temperature control matters. Around 350°F keeps the crust from darkening too quickly while allowing the interior to reach a safe 165°F. Frying in batches prevents the oil temperature from plunging, which would make the crust soggy. The end result is a balance of textures: crisp exterior, juicy center.
Low-Carb/Keto Alternatives
If you want to lower carbs without losing crunch, swap the panko for crushed pork rinds or almond flour mixed with grated Parmesan. Use almond flour in place of all-purpose flour in the first dredge, and beat the eggs as usual. The flavor will shift — a cheesy, nuttier profile — but you’ll keep a satisfying crispy coating.
For a complete keto approach, keep the buttermilk (or use a full-fat sour cream thinned with a splash of water) for the brine, and fry in a generous amount of oil. Watch the coating closely; almond-based crusts brown faster than panko, so adjust frying time accordingly.
Setup & Equipment
Use a wide, shallow skillet or a deep fryer. A heavy-bottomed pan (cast iron or stainless steel) holds temperature well. You’ll also want:
- Digital thermometer — for both oil (to maintain ~350°F) and chicken (target 165°F internal).
- Three shallow dishes or pie plates — one for flour, one for eggs, one for panko.
- Tongs or a slotted spoon — for safe turning and removing chicken from hot oil.
- Wire rack and baking sheet or paper towels — for draining without steaming the crust.
Line a tray with a wire rack rather than stacking directly onto paper towels; the rack preserves crispness while the chicken rests briefly.
Mistakes Even Pros Make
Overcrowding the Pan
Putting too many strips in at once drops the oil temperature and causes soggy, greasy crusts. Fry in small batches and keep an eye on your thermometer.
Skipping the Flour Layer
Some folks try to jump straight from wet to panko. The light flour layer is the anchor that helps the egg and panko cling evenly. Skip it and the crumbs fall off.
Removing All Moisture
Patting completely dry removes the buttermilk’s tenderizing benefits and makes the crust less flavorful. Shake off excess, but leave a touch of moisture to help the coatings bond.
Not Testing Oil Temperature
Estimating by sight alone can lead to under- or overcooking. A small pinch of flour sizzling is a helpful trick if you don’t have a thermometer, but the thermometer is the best tool.
Seasonal Spins
Change the seasoning blend with the seasons. In spring and summer, add lemon zest to the flour mix and serve with a herby yogurt dip. In fall, mix a pinch of ground mustard and smoked paprika into the breadcrumbs for a deeper, warming flavor. During winter, add a little cayenne for heat and serve with a tangy cranberry-mayo dip for a festive touch.
For a lighter summer version, you can finish the strips in a very hot oven (425°F) for a few minutes after a quick shallow fry to reduce oil content while keeping crunch. The initial fry still sets the crust, then the oven crisps without extra oil absorption.
Behind the Recipe
I developed this method to hit two goals: easy prep and consistent texture. Buttermilk brining is an old trick that reliably tenderizes, so I kept it. Panko gives a lighter, airier crunch than regular breadcrumbs, especially when pressed on firmly. Keeping the three-step dredge means anyone—rookie or seasoned cook—can replicate the same result at home.
I also prefer frying in a wide skillet rather than a deep fryer because it’s more versatile for home cooks and it uses less oil overall. You still get a deep-fried result with less fuss. The timing here reflects practical home-kitchen thicknesses of tenderloins, so adjust slightly for extra-thick pieces.
Freezer-Friendly Notes
To freeze before frying: coat the strips completely, lay them on a parchment-lined baking sheet with space between, and freeze until solid (about 1–2 hours). Once firm, transfer to a freezer-safe bag or container. Fry from frozen; just add an extra minute or two per side and monitor internal temperature closely.
To freeze after frying: cool the cooked chicken fingers to room temperature on a rack, flash-freeze on a tray, then transfer to bags. Reheat in a 400°F oven on a rack for 10–12 minutes to restore crispiness, flipping once. Avoid the microwave; it softens the crust.
Ask & Learn
Common questions: Can you bake these? Yes—bake at 425°F on a wire rack for about 12–18 minutes, flipping halfway, though the crust will be slightly less crunchy than panko fried. Can you double the recipe? Absolutely—work in batches through the dredging and frying steps and keep cooked strips warm in a 200°F oven.
If you wonder about oil choice: I use a neutral vegetable oil for its high smoke point and clean flavor. Peanut or canola work well too. And if you don’t have buttermilk, a quick substitute is 1 cup milk plus 1 tablespoon vinegar or lemon juice—let it sit 5–10 minutes to thicken slightly. That said, the recipe above lists buttermilk specifically because it performs best.
Bring It Home
Serve these chicken fingers hot with a few dipping sauces: classic ketchup, honey mustard, ranch, or a sharp barbecue sauce. Add a crunchy slaw and crisp fries or a simple salad for a complete plate. Leftovers reheat well in the oven on a wire rack to maintain crispness.
These chicken fingers are simple, practical, and forgiving. Follow the method, mind the oil temperature, and you’ll have a go-to recipe that works any night of the week. Enjoy—this one gets requested again and again in my house.
Chicken Fingers Recipe
Ingredients
Ingredients
- 1 lbchicken tenderloins
- 1 cupbuttermilk
- 1 cupall-purpose flour
- 2 large eggsbeaten
- 1 cuppanko breadcrumbs
- 1 teaspoonsalt
- 1/2 teaspoonblack pepper
- 1/4 teaspoongarlic powder
- 1/4 teaspoonpaprika
- Vegetable oil for frying
Instructions
Instructions
- Place 1 lb chicken tenderloins in a bowl and pour 1 cup buttermilk over them. Cover and refrigerate to marinate for at least 1 hour.
- Prepare three shallow dishes: in the first combine 1 cup all-purpose flour, 1 teaspoon salt, 1/2 teaspoon black pepper, 1/4 teaspoon garlic powder, and 1/4 teaspoon paprika; in the second beat the 2 large eggs; in the third place 1 cup panko breadcrumbs.
- Remove the chicken from the fridge and gently shake off excess buttermilk; pat lightly with paper towels if very wet (do not remove all moisture).
- Working one piece at a time, dredge a chicken strip in the seasoned flour, shake off excess, dip into the beaten eggs letting excess drip off, then press and roll in the panko breadcrumbs until evenly coated. Place coated strips on a plate or wire rack. Repeat with remaining strips.
- Pour vegetable oil for frying into a deep fryer or large, heavy skillet to a depth that will allow frying (enough to partially or fully submerge the strips). Heat the oil to 350°F (175°C). If you do not have a thermometer, heat until the oil is shimmering and a small pinch of flour sizzles on contact.
- Fry the chicken in batches without crowding the pan, turning once, until the coating is golden brown and the internal temperature of the thickest piece reaches 165°F, about 3–4 minutes per side depending on thickness. Adjust heat as needed to maintain ~350°F.
- Transfer cooked chicken fingers to a paper towel–lined plate or wire rack to drain briefly. Serve hot.
Equipment
- Bowl
- Three Shallow Dishes
- deep fryer or large heavy skillet
- Meat Thermometer
- Paper Towels
- Wire Rack
- Plate


