I make this Chocolate Banana Smoothie Bowl on busy mornings, after afternoon workouts, or whenever I need something that feels like a treat and behaves like breakfast. It’s fast, forgiving, and just chocolatey enough to feel indulgent without derailing a sensible day. Two ingredients do the heavy lifting: frozen bananas for texture and sweetness, and cocoa for the chocolate hit. A little peanut butter pulls it all together into something rich and satisfying.
What I love most is how reliable the recipe is. It comes together in minutes in a high-speed blender, and the results are always a thick, spoonable bowl rather than a drink. Top it however you like — granola, sliced fruit, seeds, or a smear more peanut butter — and you have a balanced, portable meal or a nourishing dessert. Below I’ll share the exact ingredients and the step-by-step directions I follow every time, plus troubleshooting tips and sensible swaps.
What We’re Using
This bowl relies on a small set of pantry staples and one appliance: a blender that can handle frozen fruit. The ingredients list is intentionally short. Keep ripe bananas on hand and a jar of peanut butter in the pantry, and you’re minutes away from a delicious bowl.
Ingredients
- 1/3 cup milk — dairy free milk options can be used.
- 1 1/2 teaspoons cocoa powder — provides the chocolate flavor.
- 2 tablespoons peanut butter — adds creaminess and a hit of protein.
- 2 large frozen bananas — ripe bananas are best for sweetness.
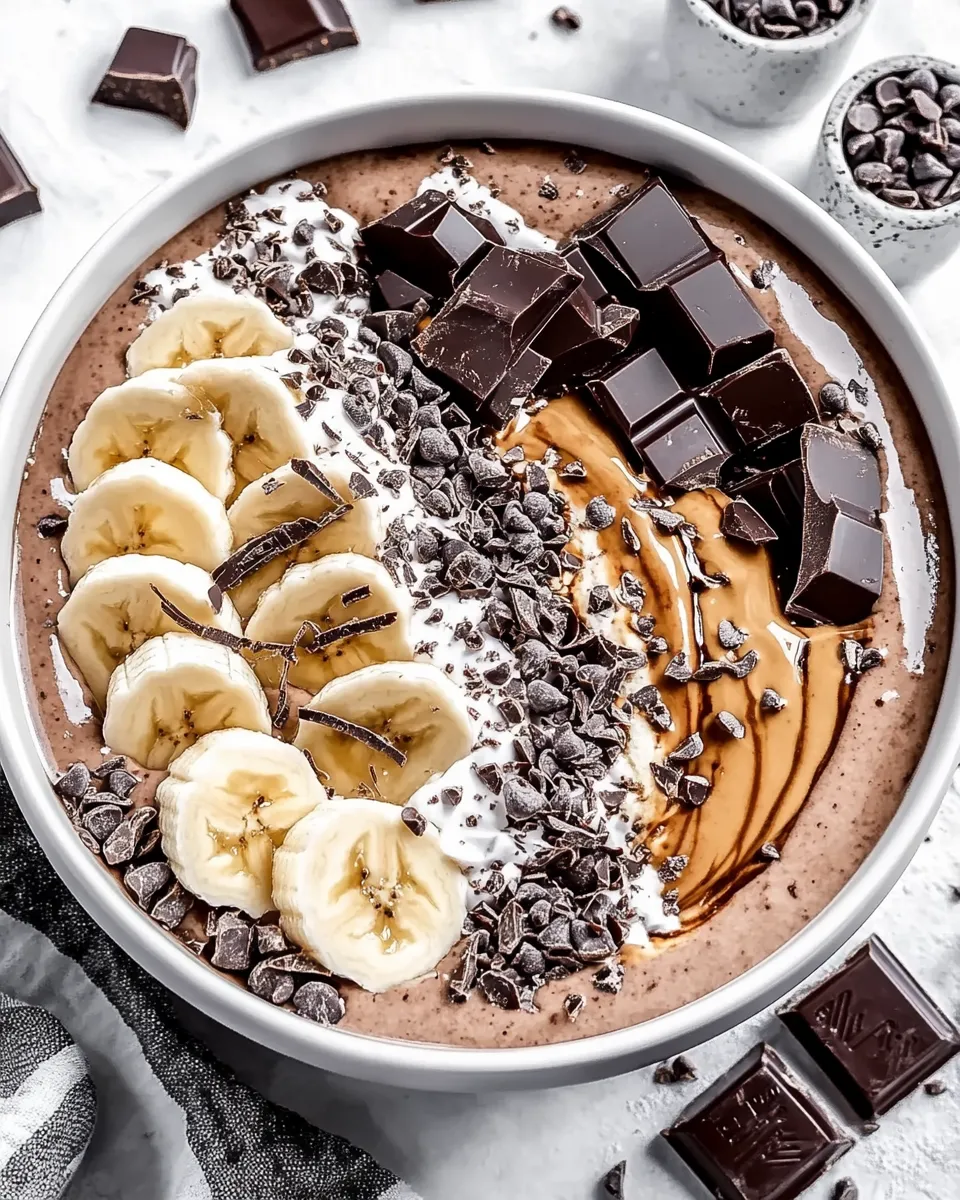
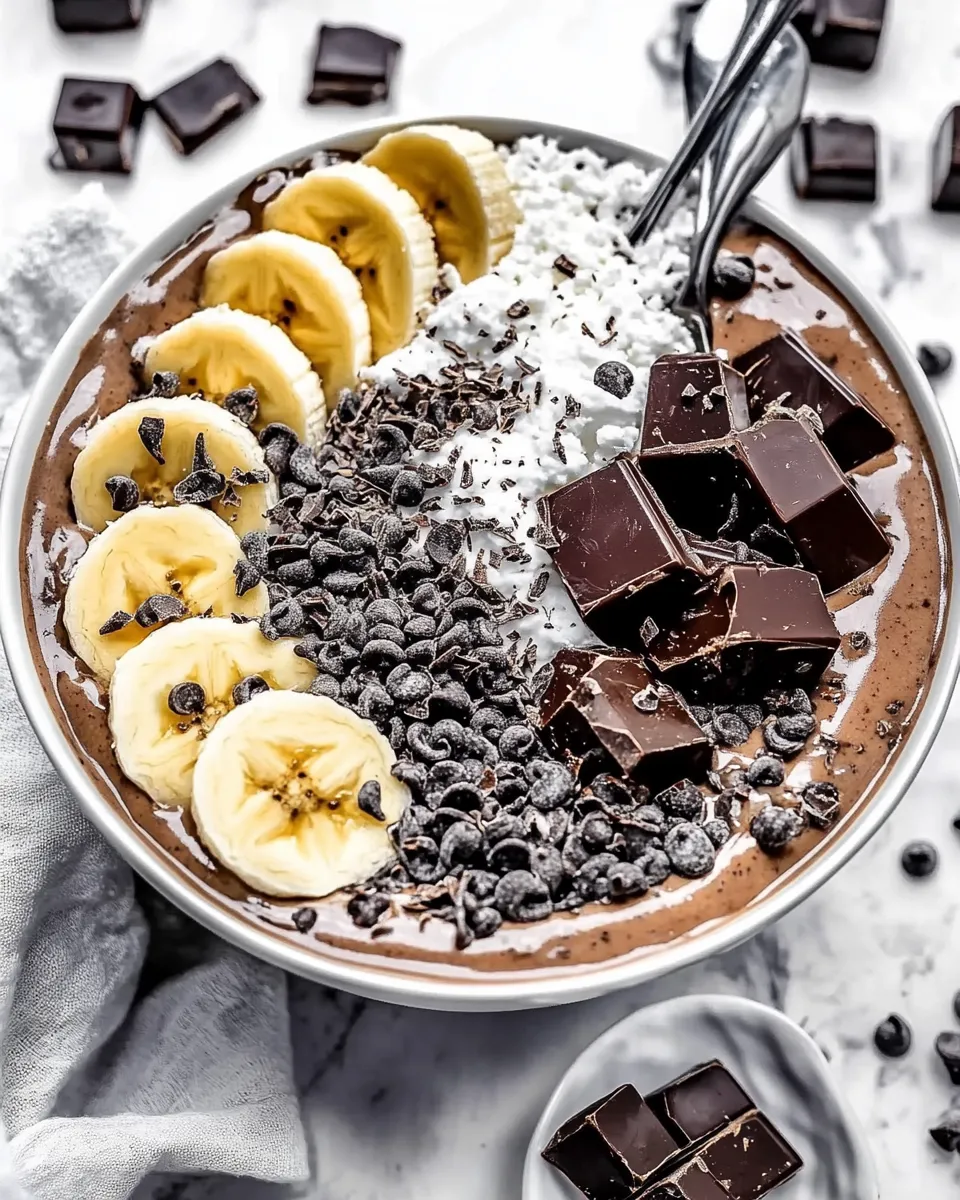
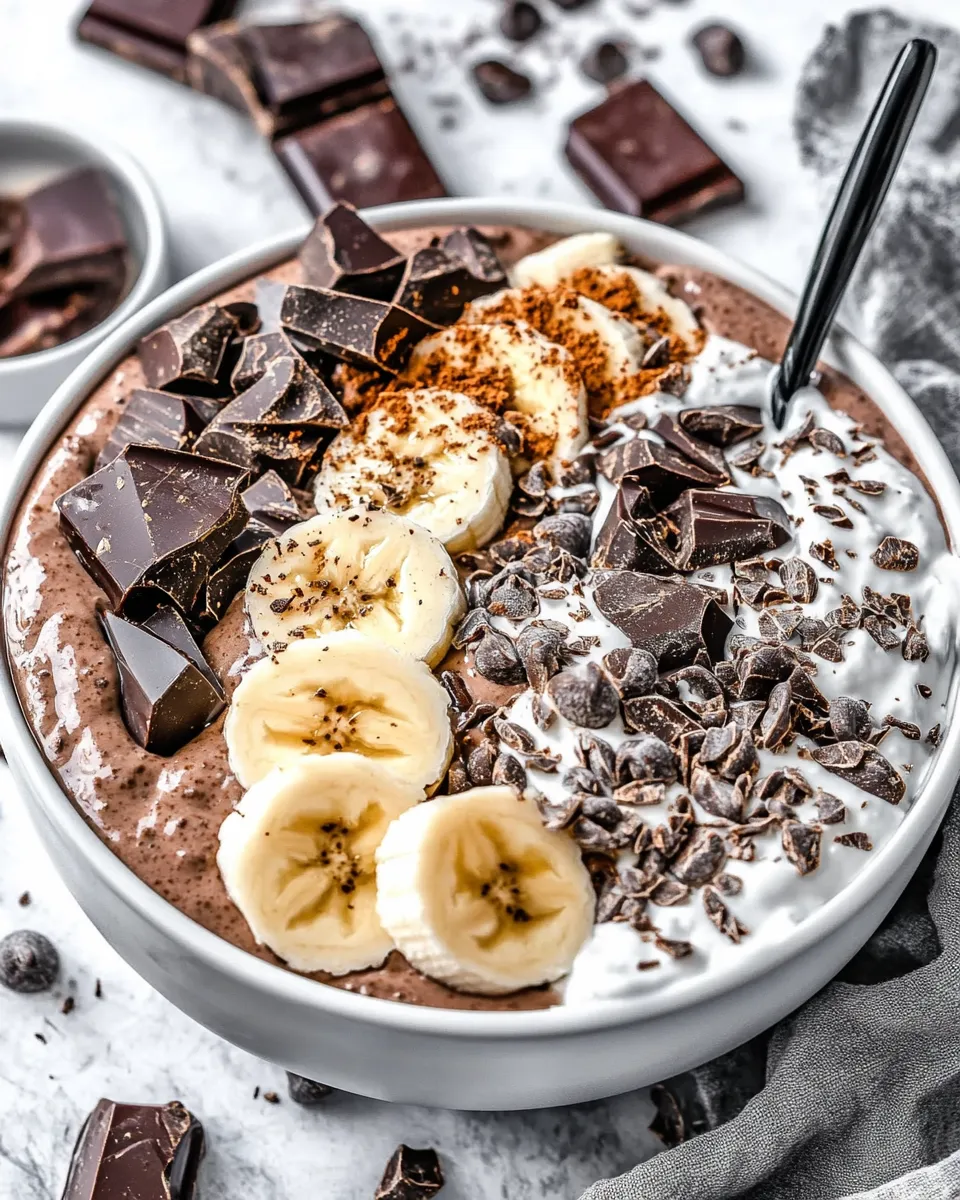
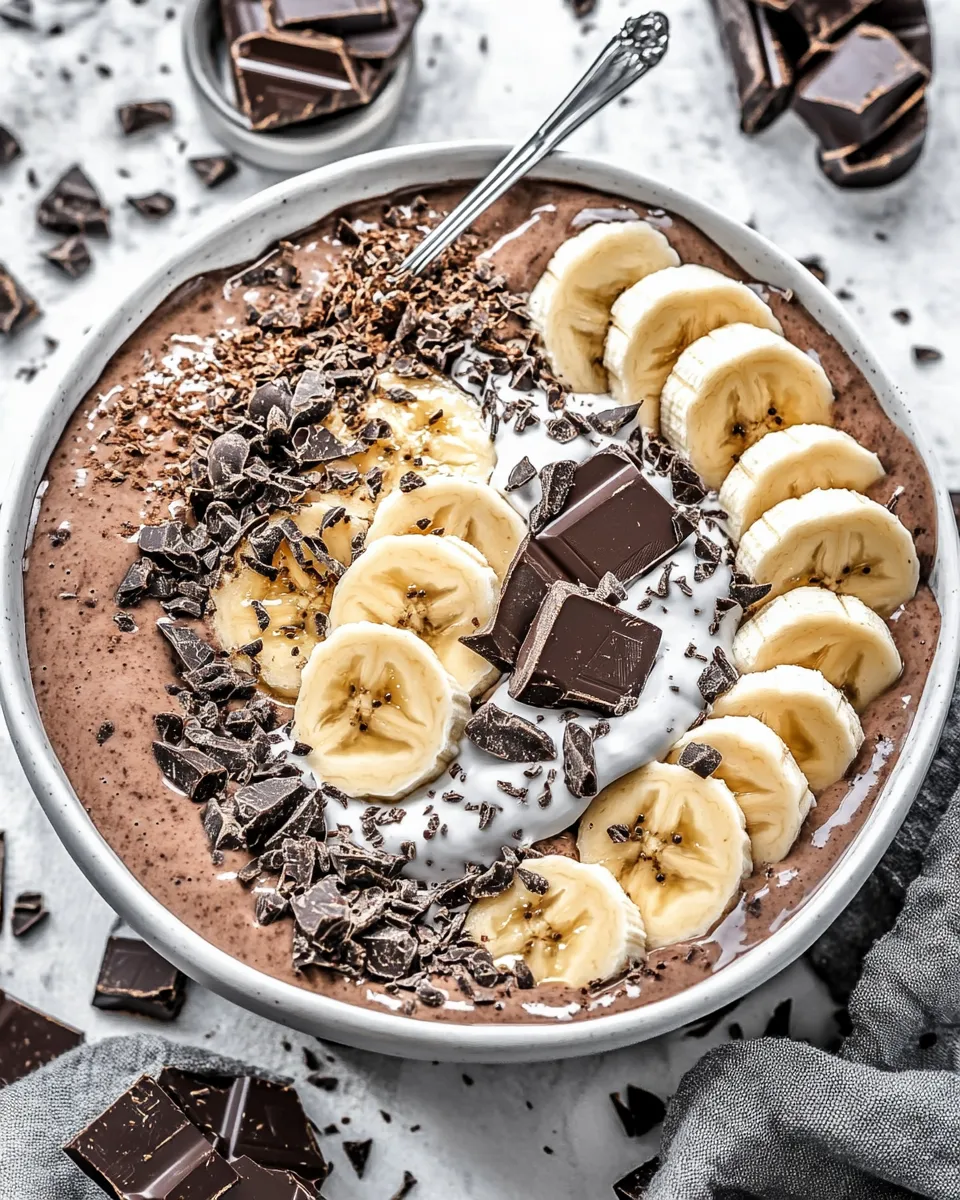
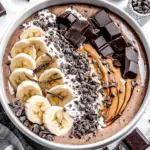
- optional toppings — add texture and extra flavor as desired.
Chocolate Banana Smoothie Bowl in Steps
Follow these directions exactly for the best texture. If your blender is less powerful, read the troubleshooting tips below before you start.
- Break the 2 large frozen bananas into chunks and place them in a high-speed blender.
- Add 1/3 cup milk, 1 1/2 teaspoons cocoa powder, and 2 tablespoons peanut butter to the blender.
- Secure the lid and blend on high until the mixture is smooth, stopping once or twice to scrape down the sides and push any banana toward the blades.
- If the blender stalls or the mixture is too thick to blend smoothly, add a small amount of the milk from the ingredient list and blend again until smooth.
- Spoon the smoothie into a bowl, add optional toppings as desired, and serve immediately or freeze briefly to firm before serving.
Why You’ll Keep Making It
This bowl checks a lot of boxes: it’s fast, requires minimal clean-up, and tastes like a treat while delivering real food. The frozen bananas create a creamy, almost ice-cream-like base without any added sugar. Cocoa powder gives a genuine chocolate note without the extra calories of chocolate sauce. Peanut butter brings texture and keeps you full longer.
It’s also very flexible. If you crave something more substantial, add a scoop of yogurt or a bit more peanut butter. If you want it lighter, use less peanut butter or a lower-fat milk. The core method — frozen banana + small splash of milk + flavorings — is forgiving. You’ll find yourself reaching for it when you want comfort and quick nourishment.
Low-Carb/Keto Alternatives
Traditional smoothie bowls rely on fruit for sweetness, so they’re not naturally low-carb. If you want a lower-carb version while preserving the thick, spoonable texture, try these ideas.
- Replace one frozen banana with 1/4 cup silken tofu and a small handful of frozen cauliflower florets to maintain body without as many carbs.
- Use unsweetened almond milk or another very low-carb milk to cut carbs from the liquid portion.
- Skip the peanut butter or switch to a seed butter (like sunflower seed butter) in smaller quantities to slightly reduce carbs while keeping creaminess.
- Sweeten sparingly with a keto-friendly sweetener (erythritol or stevia) if you need extra sweetness after reducing banana.
Prep & Cook Tools
Minimal tools make this an easy go-to. Use what delivers the smoothest texture for frozen fruit.
- High-speed blender — ideal for fully breaking down frozen bananas and creating that thick, spoonable consistency.
- Spatula — to scrape down the sides and get every last bit into the bowl.
- Spoon and serving bowls — a shallow bowl works best so toppings sit on the surface instead of sinking in.
- Air-tight container (optional) — if you plan to store leftovers or freeze briefly to firm up the bowl before serving.
Learn from These Mistakes
Here are the common errors I see and how to fix them quickly.
Too Thin
If your bowl turns out runny, it likely had too much liquid or the bananas weren’t fully frozen. Add more frozen banana chunks and blend again, or freeze the blended mixture for 10–20 minutes to firm it up.
Blender Stalls
Blenders stall when the mixture is too thick or when large frozen chunks jam the blades. Stop, remove the lid, and use a spatula to push the fruit toward the blades. Add a tablespoon or two of milk, then start on low and increase speed. If you keep having trouble, pulse a few times and then blend on high.
Grainy or Not Smooth
Low-powered blenders may leave tiny bits of banana. Let the mixture sit for a minute after blending; residual heat from the motor can help smooth it. Alternatively, use slightly smaller banana pieces when freezing, or thaw the frozen banana for 1–2 minutes before blending.
Too Sweet or Not Sweet Enough
Banana sweetness depends on ripeness. If your bananas weren’t ripe before freezing, the bowl will be less sweet; stir in a small touch of honey, maple, or a sprinkle of sugar if you want more sweetness. If it’s too sweet, add a little unsweetened cocoa powder or a splash more milk to dilute without adding sugar.
Nutrition-Minded Tweaks
If you’re tracking calories, protein, or fiber, small swaps make a big difference.
- Increase protein: add a tablespoon of powdered protein or a dollop of Greek yogurt to boost protein without too much volume.
- Add fiber: sprinkle in a teaspoon of chia seeds or ground flaxseed; they thicken the bowl and add fiber and omega-3s.
- Lower fat: reduce the peanut butter to 1 tablespoon or swap for powdered peanut butter reconstituted with water.
- Increase healthy fats: top with chopped nuts or a spoonful of coconut flakes for satiety and texture.
Behind the Recipe
Recipe bowls like this evolved from the simple idea of turning frozen bananas into an ice-cream-like base. People began adding cocoa, nut butters, and toppings to create satisfying breakfast bowls that felt like dessert. This version lands on the classic side: banana for creaminess and natural sweetness, cocoa for chocolate depth, and peanut butter for richness and protein.
It’s one of those recipes that grew out of practicality. When I travel or when fresh fruit runs out, I always freeze extra ripe bananas. They transform into a reliable base, and with the addition of pantry staples, I can make something impressive-looking and nourishing in under ten minutes.
Keep It Fresh: Storage Guide
Because this is best eaten fresh, I don’t recommend making a large batch and storing it as-is for days. Still, here are safe ways to handle leftovers and make-ahead prep.
- Fully assembled bowl: store in an airtight container in the fridge for up to 24 hours. Texture will soften; stir before eating and add a few frozen banana chunks if you want it firmer.
- Bowl base only (un-topped): you can freeze the blended base in small portions for up to 1 month. Thaw in the fridge or at room temperature for 10–15 minutes and re-blend briefly to refresh texture.
- Toppings: keep wet toppings (yogurt, nut butter) separate and crunchy toppings (granola, seeds) in an airtight container to preserve texture.
Your Top Questions
Can I use fresh bananas instead of frozen?
Fresh bananas will make a runnier smoothie rather than a spoonable bowl. Use frozen for the signature thick texture. If you only have fresh, add ice or freeze banana slices for at least 2 hours first.
Is peanut butter required?
No. Peanut butter adds creaminess and a savory balance, but you can swap almond butter, cashew butter, or sunflower seed butter. For a nut-free option, use tahini or leave it out entirely; just expect a slightly thinner texture.
Can I make this without a high-speed blender?
Yes, though texture may vary. Chop the frozen bananas into smaller pieces before blending and use the pulse function. Add liquid sparingly to avoid turning it into a drink. You may need to scrape the jar more often.
How do I get a deeper chocolate flavor?
Increase the cocoa powder slightly or use a mix of cocoa and a small piece of dark chocolate. Taste as you go; cocoa can be bitter if overused.
Make It Tonight
This bowl is perfect for an evening treat that doesn’t derail sleep or digestion. To make it tonight, pull two ripe bananas from the counter, slice and freeze them now. Tomorrow morning, follow the steps above — 5 minutes in the blender, 2 minutes to dress it up, and you’ve got a bowl that tastes like indulgence but behaves like breakfast.
If you’re stocking your pantry: keep cocoa powder, a jar of nut butter, and a nondairy milk option on hand. They’ll turn frozen bananas into a reliable chocolate banana smoothie bowl any time of day.
Chocolate Banana Smoothie Bowl
Ingredients
Ingredients
- 1/3 cupmilkdairy free milk options can be used
- 1 1/2 teaspoonscocoa powder
- 2 tablespoonspeanut butter
- 2 large frozen bananasripe bananas are best for sweetness
- optional toppings as desired
Instructions
Instructions
- Break the 2 large frozen bananas into chunks and place them in a high-speed blender.
- Add 1/3 cup milk, 1 1/2 teaspoons cocoa powder, and 2 tablespoons peanut butter to the blender.
- Secure the lid and blend on high until the mixture is smooth, stopping once or twice to scrape down the sides and push any banana toward the blades.
- If the blender stalls or the mixture is too thick to blend smoothly, add a small amount of the milk from the ingredient list and blend again until smooth.
- Spoon the smoothie into a bowl, add optional toppings as desired, and serve immediately or freeze briefly to firm before serving.
Equipment
- ▢High speed blender or food processor
Notes
Always add milk first then other ingredients.
Prepare your toppings first then blend smoothie.
Storage:
You can make ahead of time, then keep in the freezer if desired. Remove 5 minutes from the freezer before serving. You can also add all ingredients except the milk in a ziplock plastic bag and store in the freezer to make at another time.