

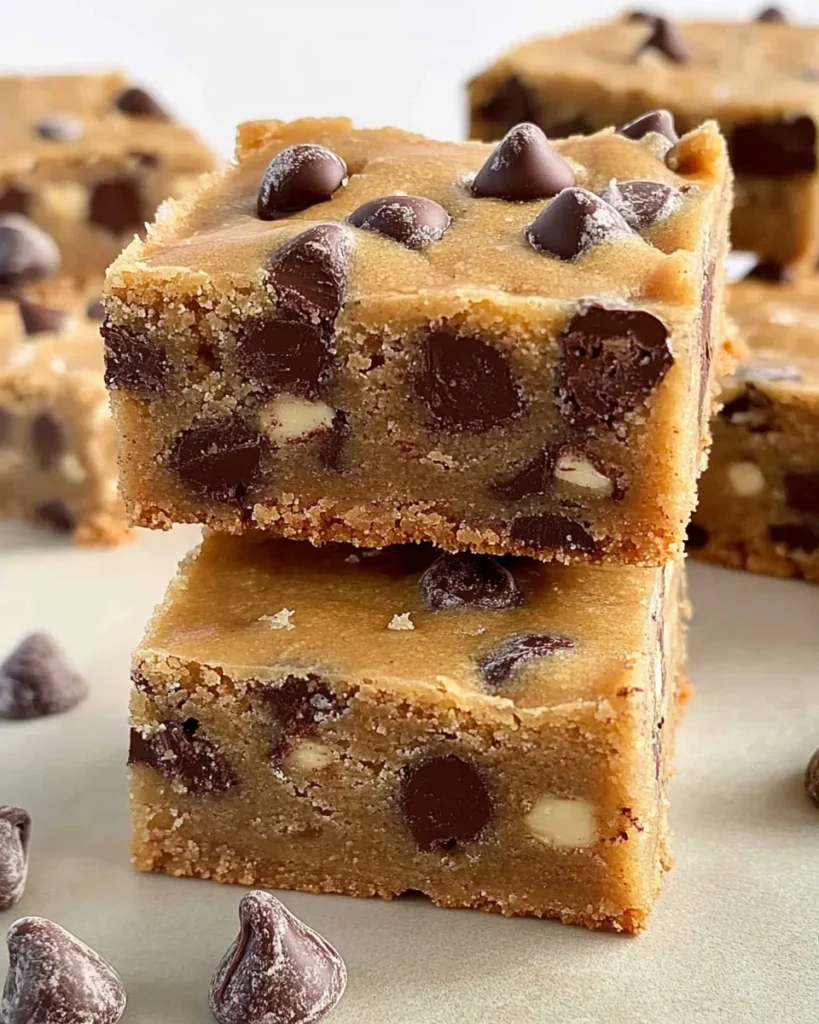
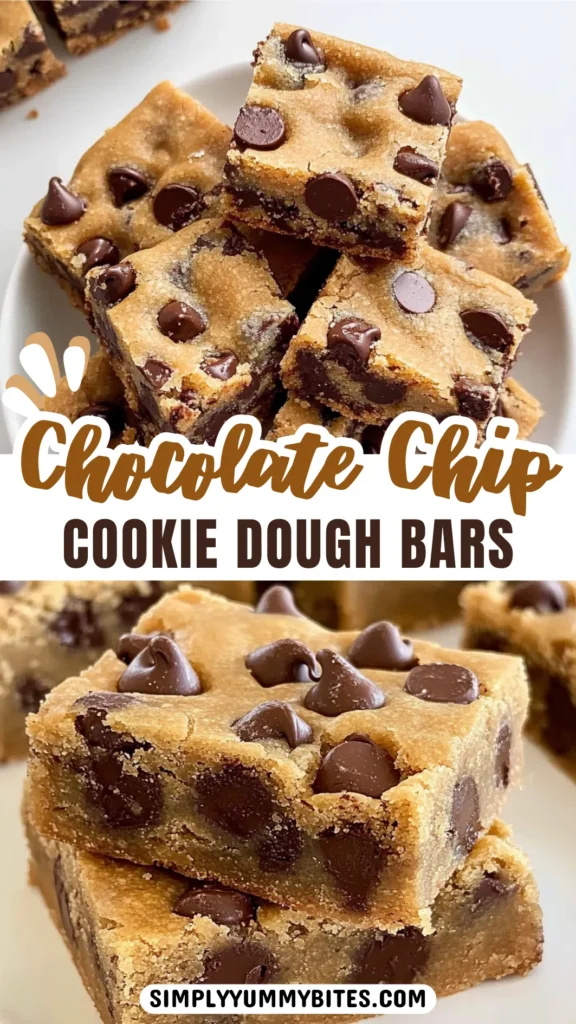
I make these Chocolate Chip Cookie Dough Bars on nights when I want something utterly satisfying but not fussy. The base is a safe, no-egg cookie dough made sturdy by sweetened condensed milk and a good hit of brown sugar. It presses into an 8×8 pan, chills until firm, and then gets a glossy peanut butter–chocolate topping that sets into a sliceable bar.
They’re great for a potluck because they hold their shape and travel well. You don’t need special equipment beyond a mixer and an 8×8 pan, and the steps are straightforward. If you’ve ever loved cookie dough straight from the bowl, these bars are a calmer, more presentable version of that guilty pleasure.
Below I’ll lay out exactly what you need and how to make them, step by step. I’ll also cover common mistakes people make, quick fixes, and a few ways to adapt the bars if you have dietary constraints or want to change the flavor profile a bit.
What You’ll Need
This recipe leans on a handful of pantry staples and two types of chips. Read through the ingredients once before starting so your butter can soften and the pan can be prepped. The process is mostly mixing, pressing, chilling, and topping—no baking required for the dough layer.
Ingredients
- 1/2 cup Unsalted Butter — softened; provides richness and helps the dough press evenly.
- 3/4 cup Light Brown Sugar — packed; adds moisture and that toffee-like flavor.
- 1 tsp. Vanilla Extract — brings the components together and lifts the chocolate.
- 2 cup All-Purpose Flour — the dry structure; whisk or sift if lumpy.
- 1 can Sweetened Condensed Milk (14 oz.) — binds the dough and gives chew without eggs.
- 2 cups Mini Chocolate Chips — folded into the dough for chocolate throughout.
- 1/2 cup Creamy Peanut Butter — used for the topping; helps the chocolate set with a nutty layer.
- 1/2 cup Milk Chocolate Chips — melted with the peanut butter to form the finishing glaze.
Chocolate Chip Cookie Dough Bars Made Stepwise

- Line an 8×8-inch pan with parchment paper or aluminum foil, leaving an overhang on two sides for easy removal; set the pan aside.
- In a large mixing bowl, beat the softened unsalted butter and packed light brown sugar together on medium speed until light and fluffy, about 3 minutes.
- Add the vanilla extract and beat until incorporated, scraping down the bowl as needed.
- Reduce the mixer speed to low. Add the all-purpose flour and the sweetened condensed milk alternately in batches, mixing after each addition just until combined and no large streaks remain.
- Gently fold in the mini chocolate chips with a spatula until evenly distributed.
- Transfer the dough to the prepared pan. Press it evenly into the bottom of the pan (the dough will be sticky—lightly flour your hands or use a piece of parchment or an offset spatula to press it down).
- Cover the pan with plastic wrap and refrigerate until firm, about 3 hours or overnight.
- To make the topping, place the creamy peanut butter and the milk chocolate chips in a microwave-safe bowl. Microwave in 20–30 second intervals, stirring between intervals, until the mixture is smooth and pourable.
- Pour and evenly spread the peanut butter–chocolate mixture over the chilled cookie dough.
- Return the pan to the refrigerator and chill until the topping is set, at least 1 hour.
- Use the parchment or foil overhang to lift the block from the pan, place on a cutting board, and cut into bars.
Why Cooks Rave About It

These bars hit a few winning notes: a soft, chewy, safe-to-eat cookie dough base and a familiar chocolate-peanut butter finish. That contrast—dense dough against a glossy, slightly firm topping—makes every bite interesting. There’s no baking required for the dough, which saves oven time and keeps kitchens cooler in warm weather.
They’re also forgiving: the dough is tolerant of small timing shifts (a little extra chill time only helps), and the peanut butter–chocolate topper smooths over any minor irregularities in the pressed dough. Folks who like classic cookie flavors tend to love these, and they’re a hit with kids and adults alike.
International Equivalents
Equivalent names and pantry options vary, but the idea is universal: an unbaked cookie dough layer finished with a chocolate coating. In the U.K. and Australia, sweetened condensed milk and brown sugar are common, so the recipe translates directly. Use “plain flour” instead of “all-purpose flour” where that term is used.
If you’re in regions that use grams, approximate conversions: 1/2 cup butter ≈ 113 g, 3/4 cup brown sugar ≈ 150 g packed, 2 cups flour ≈ 240 g, and a 14 oz. can of sweetened condensed milk ≈ 396 g. Stick to volume measures if that’s your normal practice—this recipe is forgiving enough to be mixed by feel.
Equipment & Tools
- 8×8-inch pan — for the proper thickness and chilling time.
- Stand mixer or hand mixer — helps cream butter and sugar to the right texture.
- Mixing bowls — one large is enough, plus a microwave-safe bowl for the topping.
- Parchment paper or foil — for easy lift-out and clean cuts.
- Offset spatula or bench scraper — for pressing dough evenly and spreading the topping.
- Measuring cups and spoons — accurate measures keep the balance of dry and wet right.
Missteps & Fixes
If the dough is too sticky to press: chill it longer. The dough firms significantly after refrigeration; if you try to cut or handle it warm it will smear. Lightly flouring your hands or using a piece of parchment to press will prevent sticking without altering the texture.
If the topping separates or is grainy after microwaving: stir thoroughly between short intervals in the microwave. Chocolate chips and peanut butter can seize if overheated; use 20–30 second bursts and stir fully until smooth. If it’s too thick to spread, warm it for a few more seconds and stir.
If bars are crumbly when cut: they likely need more chill time. Return the block to the fridge for another 30–60 minutes before slicing. Cutting with a sharp knife warmed briefly under hot water and wiped dry between passes gives cleaner edges.
Adaptations for Special Diets
Gluten-free: swap the all-purpose flour for a 1:1 gluten-free flour blend that contains xanthan gum. The texture can be slightly more crumbly but will still hold when chilled.
Dairy-free / vegan: this recipe depends on sweetened condensed milk and butter, which are dairy. There are evaporated sweetened condensed milk alternatives made from coconut milk available commercially; use one specifically labeled sweetened condensed coconut milk and a vegan butter substitute. Note the flavor will shift toward coconut.
Nuts: the topping uses peanut butter. If you need nut-free, replace the peanut butter with sunflower seed butter—tap into a neutral-flavored seed butter to keep the set and consistency similar.
Behind-the-Scenes Notes
Why sweetened condensed milk? It acts as both binder and sweetener while contributing chew without needing eggs. Its viscosity keeps the dough together so the bars cut cleanly after chilling. Brown sugar gives a softer, slightly caramelized depth compared with white sugar.
The dual use of mini chips in the dough and milk chocolate chips in the topping balances texture and flavor. Minis distribute evenly and make every bite chocolatey, while the milk chocolate in the topping creates that glossy, sliceable layer that contrasts the base.
Meal Prep & Storage Notes
Once set and cut, store the bars in an airtight container. They keep at room temperature for a day or two in cool conditions, but I recommend refrigeration if your kitchen is warm or you prefer firmer bars. Refrigerated bars will keep well for up to 1 week.
For longer storage, freeze individual bars between sheets of parchment in a sealed container for up to 2 months. Thaw in the refrigerator for several hours before serving to avoid condensation on the chocolate topping.
Quick Q&A
Q: Can I use crunchy peanut butter instead of creamy?
A: You can, but crunchy will add texture to the topping and might not spread as smoothly. If you like the crunch, go for it.
Q: Can I substitute almond butter?
A: Yes; almond butter will change the flavor but still produce a settable topping when melted with chocolate. Taste first—some nut butters are saltier or thinner.
Q: Do I have to chill overnight?
A: Not necessary. Chilling about 3 hours for the base and an additional hour for the topping is usually enough. Overnight just makes slicing easier and the flavors meld better.
Serve & Enjoy
Cut into squares or rectangles depending on how rich you want each portion to feel. Serve chilled or just off the fridge—both work. A small dusting of flaky salt over the chocolate topping before it fully sets is optional but very nice if you like contrast.
These bars make a reliable dessert for a casual gathering, a packed lunch treat, or a quick gift when wrapped nicely. They’re simple, comforting, and immediately recognizable—exactly the kind of recipe I keep coming back to.
Chocolate Chip Cookie Dough Bars
Ingredients
Ingredients
- 1/2 cupUnsalted Buttersoftened
- 3/4 cupLight Brown Sugarpacked
- 1 tsp.Vanilla Extract
- 2 cupAll-Purpose Flour
- 1 canSweetened Condensed Milk14 oz.
- 2 cupsMini Chocolate Chips
- 1/2 cupCreamy Peanut Butter
- 1/2 cupMilk Chocolate Chips
Instructions
Instructions
- Line an 8×8-inch pan with parchment paper or aluminum foil, leaving an overhang on two sides for easy removal; set the pan aside.
- In a large mixing bowl, beat the softened unsalted butter and packed light brown sugar together on medium speed until light and fluffy, about 3 minutes.
- Add the vanilla extract and beat until incorporated, scraping down the bowl as needed.
- Reduce the mixer speed to low. Add the all-purpose flour and the sweetened condensed milk alternately in batches, mixing after each addition just until combined and no large streaks remain.
- Gently fold in the mini chocolate chips with a spatula until evenly distributed.
- Transfer the dough to the prepared pan. Press it evenly into the bottom of the pan (the dough will be sticky—lightly flour your hands or use a piece of parchment or an offset spatula to press it down).
- Cover the pan with plastic wrap and refrigerate until firm, about 3 hours or overnight.
- To make the topping, place the creamy peanut butter and the milk chocolate chips in a microwave-safe bowl. Microwave in 20–30 second intervals, stirring between intervals, until the mixture is smooth and pourable.
- Pour and evenly spread the peanut butter–chocolate mixture over the chilled cookie dough.
- Return the pan to the refrigerator and chill until the topping is set, at least 1 hour.
- Use the parchment or foil overhang to lift the block from the pan, place on a cutting board, and cut into bars.
Equipment
- 8x8-inch Pan
- Parchment paper or aluminum foil
- Large Mixing Bowl
- Electric Mixer
- Spatula
- Microwave-safe Bowl
- Plastic Wrap
- Cutting Board
Notes
Originally Posted September 1, 2019
Updated on May 20, 2022


