
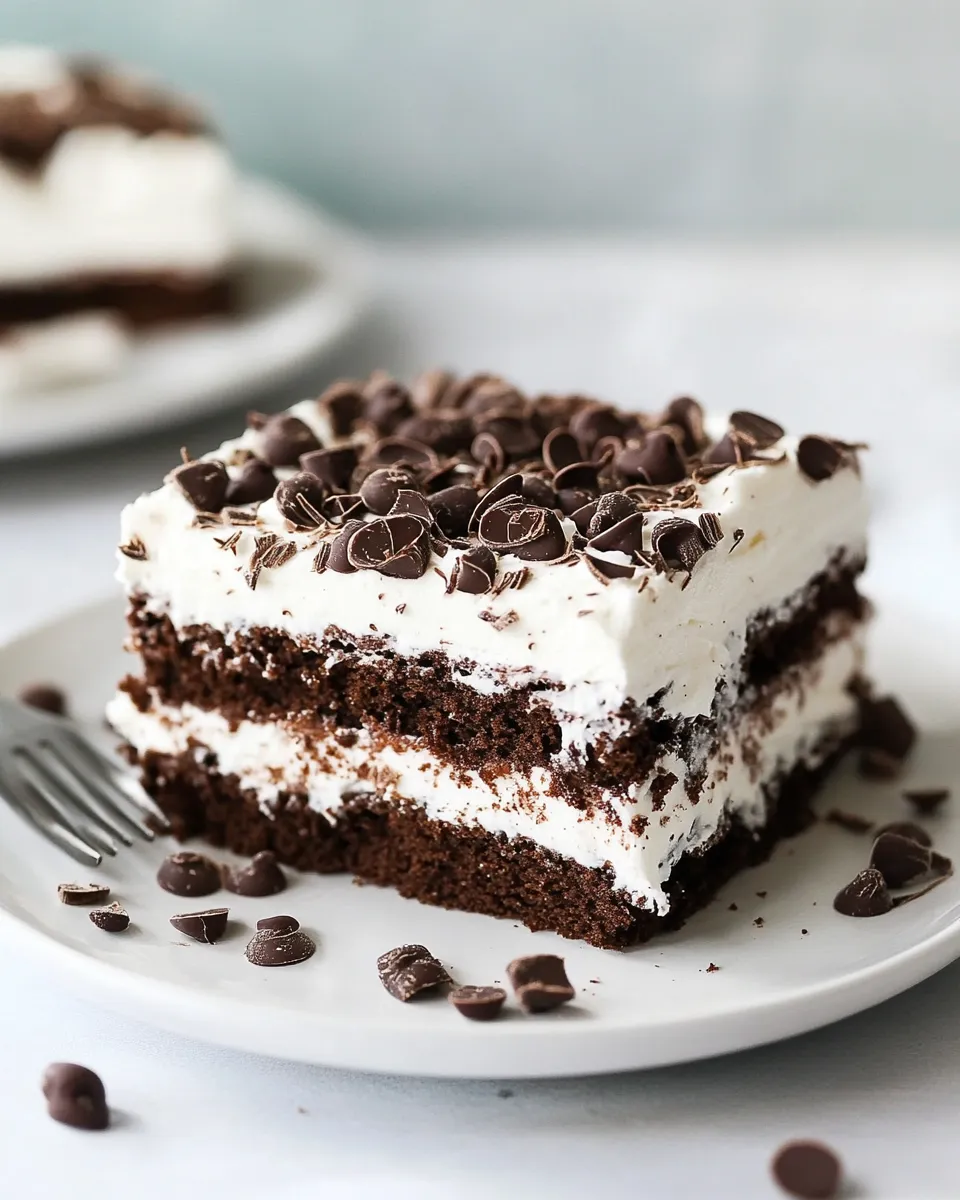
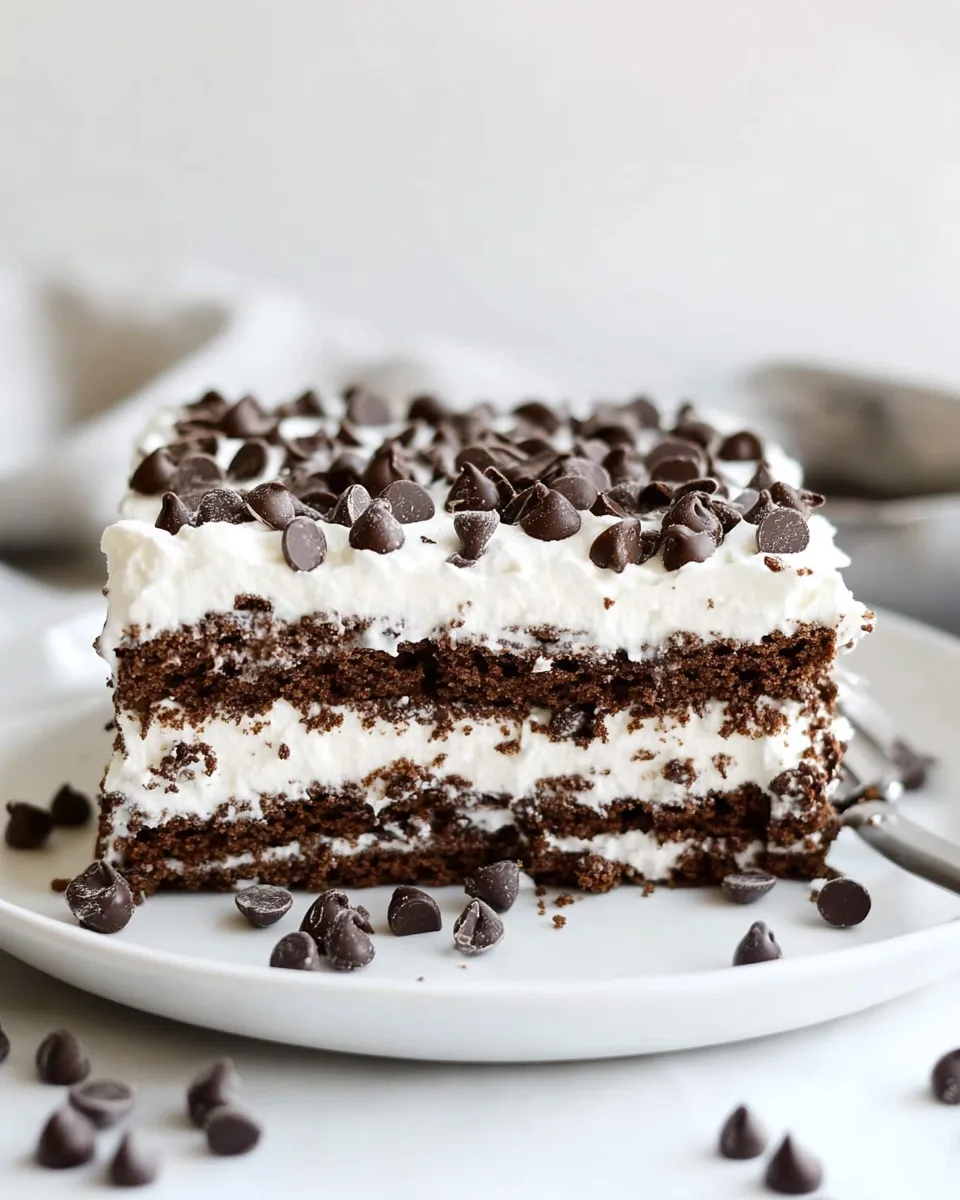
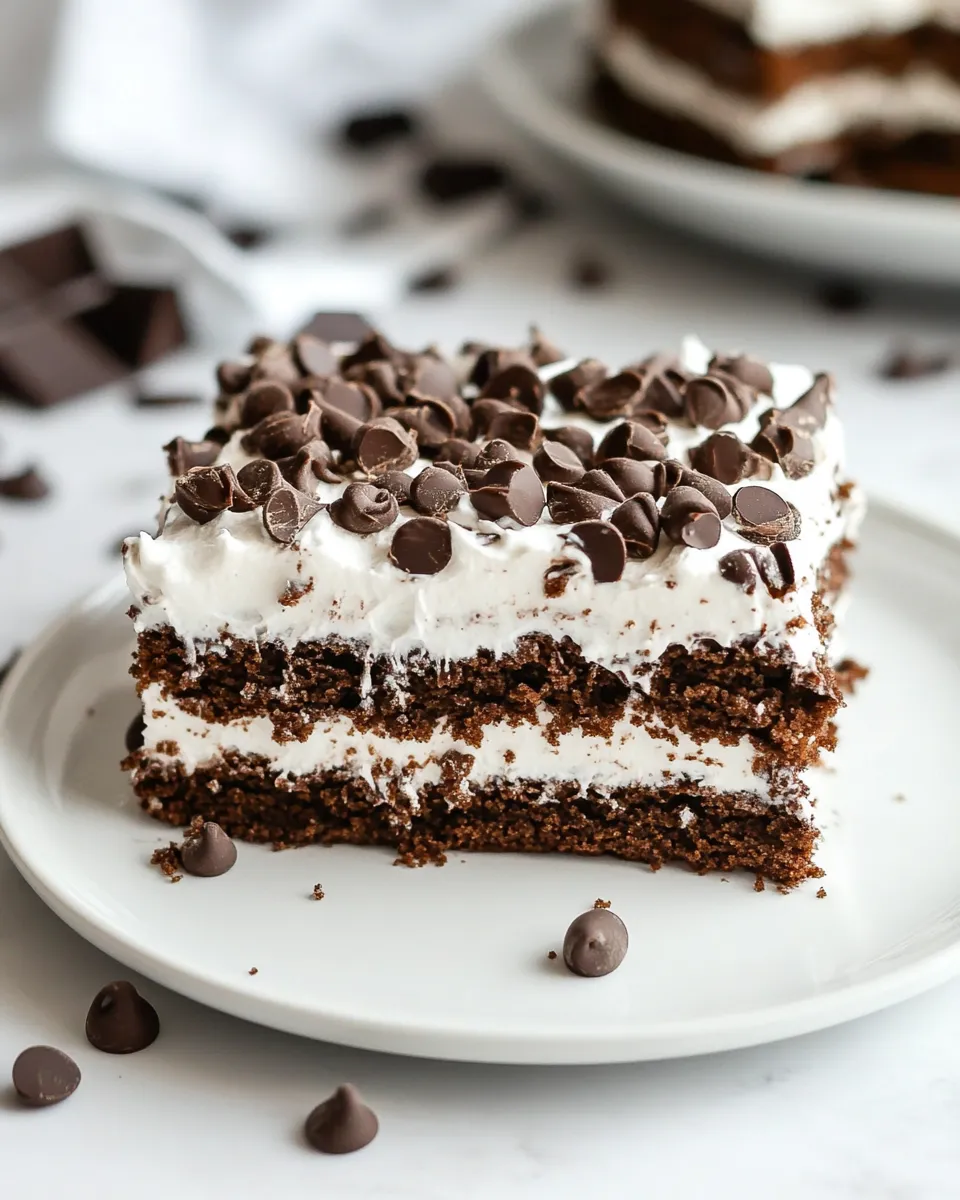
This Chocolate Icebox Cake is one of those desserts that looks impressive but doesn’t demand hours in the kitchen. It relies on layers of chocolate graham crackers, whipped cream, and a simple chocolate ganache that sets into a cool, sliceable dessert after a long chill. The result is a neat balance of crunchy cookie, silky ganache, and pillowy whipped cream — a crowd-pleaser any time of year.
I make this when I want something that travels well and serves a group without any last-minute fuss. Assemble it in a 9×13-inch pan, refrigerate, and it’s party-ready the next day. There’s no baking, and the technique is straightforward, so it’s a reliable go-to for weeknight dinners, potlucks, and casual dinner parties.
Below you’ll find the exact ingredients and step-by-step method I follow, plus practical tips, likely pitfalls, and storage advice so your Chocolate Icebox Cake comes out perfect every time. Read through once, gather your ingredients and tools, and you’ll be set.
Ingredients at a Glance
- 1 (14.4 ounce box) chocolate graham crackers — the structure and crunch; break to fit the pan and cover evenly.
- 2 cups semi Sweet Chocolate Chips — the base for the ganache; melts smoothly for a shiny chocolate layer.
- 2/3 cups heavy whipping cream — heated and poured over the chocolate chips to make the ganache; use full-fat for best texture.
- 3 ½ cup heavy whipping cream — whipped with powdered sugar and vanilla to make the cake’s creamy layers; whip to medium peaks.
- ½ cup powdered sugar — sweetens the whipped cream and helps stabilize it a bit; sift if it’s lumpy.
- 1 teaspoon vanilla extract — adds depth to the whipped cream; measure carefully for balanced flavor.
Stepwise Method: Chocolate Icebox Cake
- Place 2 cups semi-sweet chocolate chips in a heatproof bowl. Heat 2/3 cup heavy whipping cream in the microwave until steaming (about 45 seconds). Pour the hot cream over the chocolate chips, let sit 1 minute, then whisk until smooth to make the ganache. Set the ganache aside to cool until slightly thickened.
- In the bowl of a stand mixer or with a hand mixer, combine 3 1/2 cups heavy whipping cream, 1/2 cup powdered sugar, and 1 teaspoon vanilla extract. Whip until medium peaks form.
- Spread a thin, even layer of the whipped cream across the bottom of a 9×13-inch pan.
- After spreading the thin base layer, divide the remaining whipped cream into three equal portions. Also divide the cooled ganache into three equal portions.
- Arrange a single layer of chocolate graham crackers over the whipped-cream-lined bottom of the pan, breaking crackers as needed to cover the surface evenly.
- Spread one third of the ganache evenly over the cracker layer. Then spread one third of the remaining whipped cream evenly over the ganache.
- Repeat the layering two more times: a layer of graham crackers, one third of the ganache, and one third of the remaining whipped cream. You should have three cracker layers total.
- Cover the pan with plastic wrap and chill in the refrigerator for at least 4 hours, or overnight, before serving.
Why This Recipe is a Keeper
This cake is dependable. The technique is forgiving: the crackers soften as they chill and meld with the cream and ganache into something sliceable and elegant. You don’t need tempering skills, long bake times, or delicate timing. Assemble and chill — that’s the hard part.
It’s also versatile. The components are straightforward, which means the cake adapts if you want to dress it up with toasted nuts, a drizzle of salted caramel at the table, or a dusting of cocoa before serving. Because it holds up well, you can make it a day ahead, freeing you up on the day of your event.
International Equivalents

Measurements converted for easier use outside the U.S.:
- 1 (14.4 ounce box) chocolate graham crackers ≈ 408 g box.
- 2 cups semi-sweet chocolate chips ≈ 340 g.
- 2/3 cup heavy whipping cream ≈ 160 ml.
- 3 1/2 cups heavy whipping cream ≈ 840 ml.
- 1/2 cup powdered sugar ≈ 60 g.
- 1 teaspoon vanilla extract ≈ 5 ml.
If your region doesn’t carry chocolate graham crackers, you can usually find an equivalent chocolate tea biscuit or plain graham-style biscuit — just make sure the cookies are sturdy enough to form layers and will soften during chilling.
Tools & Equipment Needed
- 9×13-inch pan — the recipe is designed around this pan size for layer fit.
- Heatproof mixing bowl — for melting chocolate and making ganache.
- Microwave or small saucepan — to heat the cream for the ganache.
- Stand mixer with whisk attachment or hand mixer — for whipping the cream to medium peaks.
- Spatula — for spreading ganache and whipped cream evenly across layers.
- Plastic wrap — to cover the pan while chilling.
Mistakes That Ruin Chocolate Icebox Cake
- Underwhipping or overwhipping the cream — underwhipped cream won’t hold structure and the layers will slough; overwhipped cream turns grainy and can separate. Aim for medium peaks: soft but stable.
- Using ganache that’s too hot — pouring hot ganache onto whipped cream or crackers will melt the cream and make layers weep. Let it cool until slightly thickened, but still spreadable.
- Skimping on chill time — this cake needs at least 4 hours to let the crackers soften and the ganache set. Cutting too soon results in messy slices.
- Layering unevenly — thick or thin layers create texture imbalance. Divide the whipped cream and ganache as instructed so each layer is consistent.
- Not covering while chilling — uncovered cake will absorb fridge odors and can dry out at the edges. Keep it wrapped until ready to serve.
Variations for Dietary Needs
Adaptations are simple but require good swaps:
- Dairy-free: use a full-fat coconut cream for whipping (chilled well) and dairy-free chocolate for the ganache. Texture will differ slightly, but the concept remains the same.
- Lower sugar: choose a dark chocolate with higher cocoa and less sugar for the ganache, and reduce powdered sugar in the whipped cream to taste. Note: texture can change when sugar is reduced significantly.
- Gluten-free: look for gluten-free chocolate sandwich-style biscuits that mirror the thickness of graham crackers. Ensure all other components are certified gluten-free.
Pro Perspective
From a pastry perspective, balance and timing are key. The ganache should be glossy and pourable when mixed, but you want it to hold in layers rather than soak everything immediately. Cooling it to a slightly thickened state gives you control during assembly. For whipped cream, chill your bowl and beaters for best volume and stability.
When you press the crackers into place, avoid compressing the layers too hard. Gentle, even pressure lets the crackers make contact with the cream without turning the whole cake into a compact slab. Finally, slice chilled slices with a long, sharp knife; wipe the blade between cuts for clean portions.
Shelf Life & Storage
Store the assembled cake covered in the refrigerator. It keeps best for up to 3 days; after that, the texture of the crackers will continue to soften and the whipped cream may weep slightly. For best presentation, make the cake the day before serving and keep it well covered to prevent drying and odor absorption.
If you need to freeze: wrap tightly and freeze for up to one month. Thaw in the refrigerator overnight before serving. Note that freezing can slightly change the texture of whipped cream and the crackers.
Your Questions, Answered
How firm should the ganache be when I spread it? Slightly thickened but still spreadable. If it’s too runny it will soak the crackers; too firm and it won’t spread nicely. When it holds shape on a spatula but still moves, that’s ideal.
Can I use store-bought whipped topping? You can, but fresh whipped cream gives a fresher flavor and lighter texture. If using a stabilized or non-dairy topping, be aware the mouthfeel may differ.
What if my whipped cream softens after layering? Chill the pan while you prepare any remaining layers to keep the cream firm. If it’s already softened, a quick 30–60 minute chill before adding the next component helps reset things.
The Last Word
Chocolate Icebox Cake is an accessible dessert that looks like effort but rewards you with a polished result and minimal active work. Follow the steps, respect chill times, and you’ll have a dessert that’s both elegant and comforting. Make it ahead, bring it to gatherings, and enjoy how something so simple can feel special.
Chocolate Icebox Cake
Ingredients
Ingredients
- 1 14.4 ounce boxchocolate graham crackers
- 2 cupssemi Sweet Chocolate Chips
- 2/3 cupsheavy whipping cream
- 3 1/2 cupheavy whipping cream
- 1/2 cuppowdered sugar
- 1 teaspoonvanilla extract
Instructions
Instructions
- Place 2 cups semi-sweet chocolate chips in a heatproof bowl. Heat 2/3 cup heavy whipping cream in the microwave until steaming (about 45 seconds). Pour the hot cream over the chocolate chips, let sit 1 minute, then whisk until smooth to make the ganache. Set the ganache aside to cool until slightly thickened.
- In the bowl of a stand mixer or with a hand mixer, combine 3 1/2 cups heavy whipping cream, 1/2 cup powdered sugar, and 1 teaspoon vanilla extract. Whip until medium peaks form.
- Spread a thin, even layer of the whipped cream across the bottom of a 9x13-inch pan.
- After spreading the thin base layer, divide the remaining whipped cream into three equal portions. Also divide the cooled ganache into three equal portions.
- Arrange a single layer of chocolate graham crackers over the whipped-cream-lined bottom of the pan, breaking crackers as needed to cover the surface evenly.
- Spread one third of the ganache evenly over the cracker layer. Then spread one third of the remaining whipped cream evenly over the ganache.
- Repeat the layering two more times: a layer of graham crackers, one third of the ganache, and one third of the remaining whipped cream. You should have three cracker layers total.
- Cover the pan with plastic wrap and chill in the refrigerator for at least 4 hours, or overnight, before serving.
Equipment
- Heatproof bowl
- Microwave
- Stand Mixer or Hand Mixer
- Whisk
- 9x13-inch pan
- Plastic Wrap
- Refrigerator


