
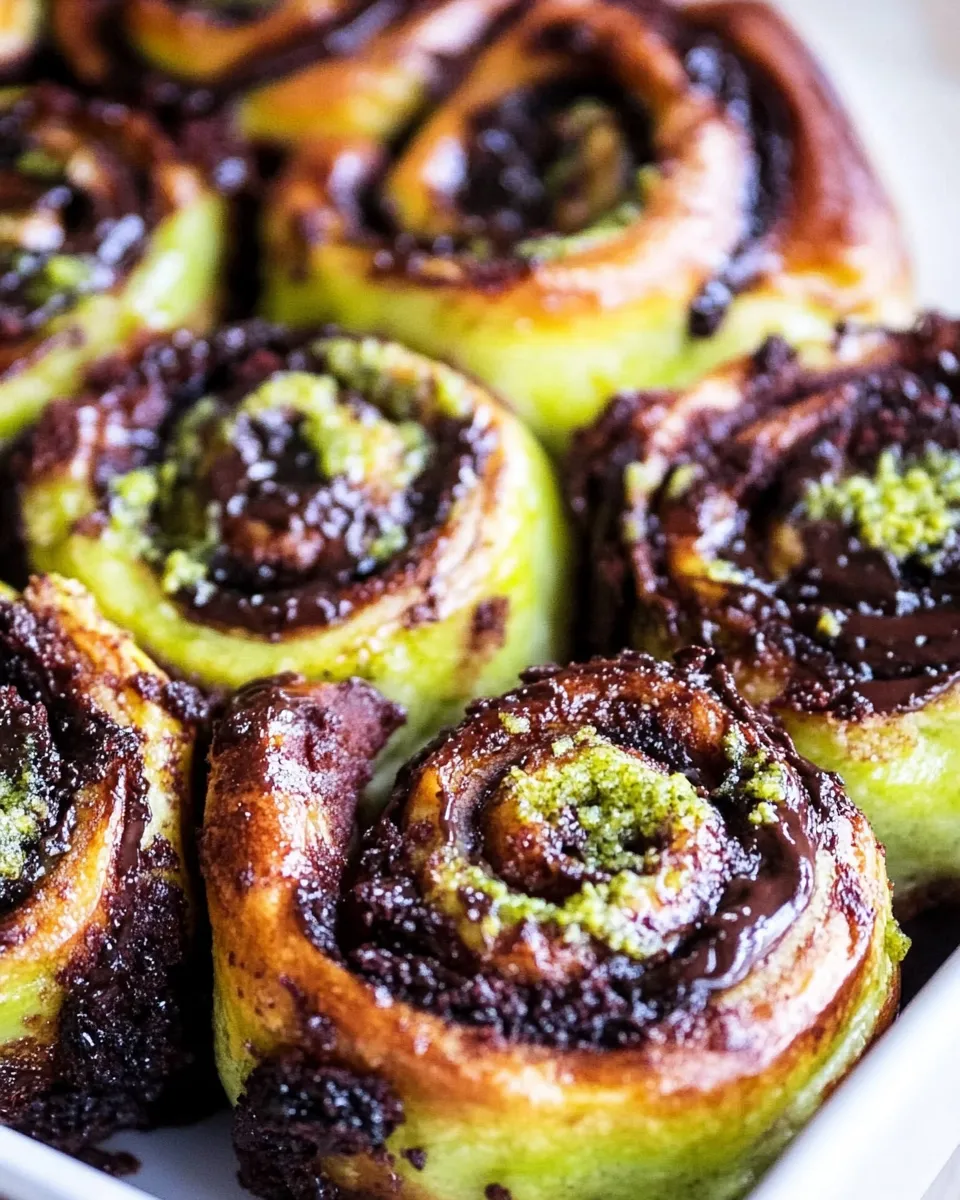
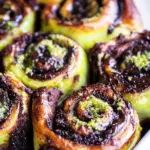
I love a recipe that feels a little fancy but is actually straightforward. These chocolate matcha sticky buns are exactly that: soft, lightly green rolls scented with matcha, a chocolatey ribbon inside, and a bright matcha icing on top. They make the kitchen smell like a bakery and come together with pantry-forward ingredients.
This version is vegan and forgiving. The dough is enriched with vegan butter and plant milk for a tender crumb, while the matcha in the dough and icing keeps the flavor focused and not overly sweet. Follow the steps in order and you’ll get consistent, lovely buns—perfect for a weekend breakfast or a treat to share.
What to Buy
Think about quality where it counts. A good ceremonial or high-grade culinary matcha will make the matcha notes clean and not bitter; if you’re unsure, choose a culinary-grade matcha for baking. Buy a block of vegan baking chocolate you like—it melts differently than chips but gives a richer chocolate patch inside each roll. Choose plain, unsweetened plant milk (oat, soy, or almond all work) and a reliable brand of vegan butter. For the flour, unbleached all-purpose is the specified choice—no need to overcomplicate it.
If you don’t bake often, pick up a packet of active dry yeast (or instant yeast if you prefer the convenience). A small bag of powdered sugar and an extra teaspoon or two of matcha for the icing round out the shopping list. Finally, a 10×10-inch cast iron skillet or an equivalent-sized baking pan will serve you best for even baking and presentation.
Ingredients
- 1 cup plant milk, unsweetened plain — heats with the butter to create a warm, enriched liquid that activates the yeast.
- 3 tbsp vegan butter — melts into the warm milk to tenderize the dough and add richness.
- 1 packet active dry yeast, or other instant yeast — the leavening; use instant yeast if you want to skip the proofing step noted below.
- 1 tbsp cane sugar — feeds the yeast and adds a touch of sweetness to the dough.
- 1/4 tsp salt — balances flavor and strengthens gluten structure.
- 3 cups unbleached all-purpose flour — the base of the dough; unbleached gives a better texture than bleached.
- 1 tbsp matcha powder — folded into the flour to tint and flavor the dough gently.
- 1/4 cup vegan butter, melted — used to brush the rolled dough before adding the filling so the sugar-cocoa adheres and melts in.
- 1/4 cup cane sugar — the filling’s sweet layer; pairs with cocoa for a chocolate ribbon.
- 1 tbsp cocoa powder — adds chocolate depth to the filling without overpowering the matcha.
- 2 ounces vegan baking chocolate, finely chopped (I use Guittard Bittersweet Baking Bars) — scattered over the sugar-cocoa to give pockets of melted chocolate inside each bun.
- 1 cup powdered sugar — the base of the matcha icing for a smooth glaze.
- 2 tsp matcha powder — provides that bright, grassy matcha flavor in the icing.
- 2–4 tbsp plain unsweetened plant milk, start with 2 tbsp and add a little at a time to thin while you whisk — thins the icing to your preferred consistency for drizzling or spreading.
Step-by-Step: Chocolate Matcha Sticky Buns
- Warm 1 cup unsweetened plain plant milk with 3 tbsp vegan butter in a small saucepan over low heat or in the microwave until the butter is melted and the liquid reaches 100–110°F (use a kitchen thermometer). Do not exceed 110°F.
- If using active dry yeast: sprinkle 1 packet yeast over the warm liquid, stir gently, and let sit 10 minutes until foamy. If using instant yeast, you may skip this proofing step and add the yeast directly to the dry ingredients in step 5.
- Transfer the foamy yeast mixture to a large mixing bowl or the bowl of a stand mixer. Stir in 1 tbsp cane sugar and 1/4 tsp salt.
- In a separate bowl, whisk together 3 cups unbleached all-purpose flour and 1 tbsp matcha powder; sift the matcha into the flour if it is clumpy.
- Add the flour mixture to the wet ingredients in 1/2-cup increments, stirring with a wooden spoon or mixing on low with the stand mixer (use the dough hook). Continue adding and mixing until the dough comes together and pulls away from the sides of the bowl.
- Turn the dough out onto a lightly floured surface and knead by hand until smooth and elastic, about 5–8 minutes. If using a stand mixer, continue kneading with the dough hook until the dough is smooth and forms a ball (no additional hand kneading needed).
- Place the dough ball in a lightly greased bowl, cover with plastic wrap or a clean kitchen towel, and let rise in a warm, draft-free spot until doubled in size, about 1 hour.
- While the dough rises, mix the filling: combine 1/4 cup cane sugar and 1 tbsp cocoa powder in a small bowl. Finely chop 2 ounces vegan baking chocolate and set aside. Also melt 1/4 cup vegan butter and keep it ready for spreading.
- Preheat the oven to 350°F. Grease a 10×10-inch cast iron skillet or baking pan.
- When the dough has doubled, punch it down to release the air and turn it out onto a floured work surface. Roll the dough into a rectangle about 12 x 16 inches and approximately 1/6 inch thick.
- Brush the rolled dough evenly with the 1/4 cup melted vegan butter. Sprinkle the sugar–cocoa mixture evenly over the buttered surface, then scatter the chopped vegan chocolate on top.
- Starting at one long edge, roll the dough tightly into a log. Pinch the seam to seal. Using a serrated knife, cut the log into 1-inch slices (you should get about 12 slices; cut thicker if you prefer 8 larger rolls).
- Arrange the slices cut-side up in the prepared 10×10-inch skillet or baking pan, leaving a little space between them for expansion.
- Bake for 30 minutes, until the buns are puffed and slightly golden on top.
- Meanwhile, make the matcha icing: in a bowl, whisk together 1 cup powdered sugar and 2 tsp matcha powder. Add 2 tbsp plain unsweetened plant milk and whisk until smooth; add more plant milk, 1 tbsp at a time, up to 4 tbsp total to reach your desired consistency.
- Remove the buns from the oven and let them cool for 5–10 minutes. Drizzle or spread the matcha icing over the warm buns and serve immediately.
Why This Recipe Belongs in Your Rotation
This recipe pairs an unexpected matcha brightness with comforting chocolate and the pull-apart pleasure of sticky buns. It’s impressive for guests but manageable for a home baker—no laminating, no specialty equipment required. The dough is forgiving and can be scaled up for a larger crowd or portioned into fewer, thicker rolls if you want more of a centerpiece bun.
It’s also vegan and uses pantry-friendly ingredients, which makes it easy to slot into regular meal planning. The matcha icing keeps the sweetness in check, so these don’t feel cloying. They’re a great weekend project with payoff that lasts a couple of breakfasts.
Budget & Availability Swaps
– Yeast: If you only have instant yeast, add it directly to the dry ingredients and skip proofing; the dough will behave the same but proofing time may be shorter.
– Matcha: Use culinary-grade matcha for baking if ceremonial is pricey—culinary is designed for robust flavors and works well in dough and icing.
– Chocolate: If you can’t find a vegan baking bar, choose a firm vegan dark chocolate you enjoy; chop it finely so it melts evenly.
– Plant milk: Any plain unsweetened plant milk (oat, soy, almond) will work. Use what you usually bake with for best flavor compatibility.
Tools of the Trade
- Stand mixer with dough hook (optional but speeds kneading) or a sturdy wooden spoon for mixing.
- Kitchen thermometer to check that the milk-butter mixture stays between 100–110°F.
- 10×10-inch cast iron skillet or equivalent baking pan (for best fit and browning).
- Serrated knife or dental floss for cleanly slicing the rolled log into even buns.
- Rolling pin and a lightly floured work surface.
Mistakes That Ruin Chocolate Matcha Sticky Buns
– Overheating the milk: If the liquid exceeds 110°F you can kill the yeast. Keep it below 110°F for a proper rise.
– Skipping the melt-and-spread step: The melted vegan butter in the filling is what helps the sugar–cocoa meld with the dough and produce that sticky interior. Don’t skimp on it.
– Cutting slices too thin or too thick: Too thin and the buns bake dry; too thick and the center may remain underbaked. Cutting into roughly 1-inch slices yields about 12 rolls—adjust and bake time accordingly if you prefer larger rolls.
– Ignoring the proof: Let the dough double in size. Rushing this step gives dense buns. Proof in a warm, draft-free spot and be patient.
In-Season Flavor Ideas
– Spring: Add a handful of fresh berries on the side for brightness; their tartness contrasts the sweet buns.
– Fall: Serve with a cup of spiced coffee or add a pinch of cinnamon to the cocoa filling for warmth.
– Winter: Pair the buns with poached pears or a citrus salad to cut through the richness.
– Summer: Keep it light—serve the buns at room temperature with fresh stone fruit or a simple fruit compote.
If You’re Curious
Q: Can I make the dough the night before?
A: Yes. After step 6, refrigerate the kneaded dough in a greased bowl, covered, and let it rise slowly overnight. Remove it in the morning to come to room temperature and finish the recipe from step 7 onward.
Q: Can I substitute regular dairy butter and milk?
A: Technically yes, but this recipe is written vegan. If you use dairy, expect slightly different flavor and texture; the method and amounts remain the same.
Q: My icing is lumpy—what happened?
A: Whisk the powdered sugar and matcha together first to break any clumps, then add the plant milk gradually. Sifting the matcha into the powdered sugar can help if your matcha tends to clump.
How to Store & Reheat
Store leftover buns tightly covered at room temperature for up to 2 days. For longer storage, keep them in an airtight container in the refrigerator for up to 5 days. Reheat covered in a 300°F oven for 8–10 minutes or microwave individual slices for 12–20 seconds until warm. If you baked a whole tray and want to refresh the glaze, warm slightly and add a thin extra drizzle of matcha icing before serving.
Reader Q&A
Q: Can I freeze these?
A: Yes—freeze baked buns wrapped tightly for up to 2 months. Thaw at room temperature and warm in the oven before serving. You can also freeze the unbaked, cut rolls arranged in the pan; thaw and allow a full proof before baking.
Q: What if my dough is sticky after kneading?
A: Add small pinches of flour while kneading, a tablespoon at a time, until it’s tacky but manageable. Avoid adding too much flour—too dry dough yields a dense roll.
Q: How do I prevent the matcha from tasting bitter?
A: Use the correct amounts provided and choose a culinary-grade matcha for baking. Bitter matcha often comes from poor-quality or overused matcha in an already bitter preparation; measured amounts keep flavors balanced.
Ready to Cook?
Gather your ingredients and tools, preheat your mindset to patient and methodical, and you’ll have warm, impressive Chocolate Matcha Sticky Buns before you know it. Follow the steps in order, pay attention to temperatures and proofing times, and enjoy the rewards: tender, chocolatey spirals with a bright matcha finish. Happy baking.
Chocolate Matcha Sticky Buns
Ingredients
Ingredients
- 1 cupplant milk unsweetened plain
- 3 tbspvegan butter
- 1 packet active dry yeast or other instant yeast
- 1 tbspcane sugar
- 1/4 tspsalt
- 3 cupsunbleached all-purpose flour
- 1 tbspmatcha powder
- 1/4 cupvegan butter melted
- 1/4 cupcane sugar
- 1 tbspcocoa powder
- 2 ouncesvegan baking chocolate finely chopped (I useGuittard Bittersweet Baking Bars)
- 1 cuppowdered sugar
- 2 tspmatcha powder
- 2-4 tbspplain unsweetened plant milk start with 2 tbsp and add a little at a time to thin while you whisk
Instructions
Instructions
- Warm 1 cup unsweetened plain plant milk with 3 tbsp vegan butter in a small saucepan over low heat or in the microwave until the butter is melted and the liquid reaches 100–110°F (use a kitchen thermometer). Do not exceed 110°F.
- If using active dry yeast: sprinkle 1 packet yeast over the warm liquid, stir gently, and let sit 10 minutes until foamy. If using instant yeast, you may skip this proofing step and add the yeast directly to the dry ingredients in step 5.
- Transfer the foamy yeast mixture to a large mixing bowl or the bowl of a stand mixer. Stir in 1 tbsp cane sugar and 1/4 tsp salt.
- In a separate bowl, whisk together 3 cups unbleached all-purpose flour and 1 tbsp matcha powder; sift the matcha into the flour if it is clumpy.
- Add the flour mixture to the wet ingredients in 1/2-cup increments, stirring with a wooden spoon or mixing on low with the stand mixer (use the dough hook). Continue adding and mixing until the dough comes together and pulls away from the sides of the bowl.
- Turn the dough out onto a lightly floured surface and knead by hand until smooth and elastic, about 5–8 minutes. If using a stand mixer, continue kneading with the dough hook until the dough is smooth and forms a ball (no additional hand kneading needed).
- Place the dough ball in a lightly greased bowl, cover with plastic wrap or a clean kitchen towel, and let rise in a warm, draft-free spot until doubled in size, about 1 hour.
- While the dough rises, mix the filling: combine 1/4 cup cane sugar and 1 tbsp cocoa powder in a small bowl. Finely chop 2 ounces vegan baking chocolate and set aside. Also melt 1/4 cup vegan butter and keep it ready for spreading.
- Preheat the oven to 350°F. Grease a 10x10-inch cast iron skillet or baking pan.
- When the dough has doubled, punch it down to release the air and turn it out onto a floured work surface. Roll the dough into a rectangle about 12 x 16 inches and approximately 1/6 inch thick.
- Brush the rolled dough evenly with the 1/4 cup melted vegan butter. Sprinkle the sugar–cocoa mixture evenly over the buttered surface, then scatter the chopped vegan chocolate on top.
- Starting at one long edge, roll the dough tightly into a log. Pinch the seam to seal. Using a serrated knife, cut the log into 1-inch slices (you should get about 12 slices; cut thicker if you prefer 8 larger rolls).
- Arrange the slices cut-side up in the prepared 10x10-inch skillet or baking pan, leaving a little space between them for expansion.
- Bake for 30 minutes, until the buns are puffed and slightly golden on top.
- Meanwhile, make the matcha icing: in a bowl, whisk together 1 cup powdered sugar and 2 tsp matcha powder. Add 2 tbsp plain unsweetened plant milk and whisk until smooth; add more plant milk, 1 tbsp at a time, up to 4 tbsp total to reach your desired consistency.
- Remove the buns from the oven and let them cool for 5–10 minutes. Drizzle or spread the matcha icing over the warm buns and serve immediately.
Equipment
- Small Saucepan
- Microwave (optional)
- Kitchen thermometer
- Large Mixing Bowl
- stand mixer (optional)
- dough hook (if using stand mixer)
- Wooden Spoon
- Rolling Pin
- 10x10-inch cast iron skillet or baking pan
- serrated knife
- Whisk


