
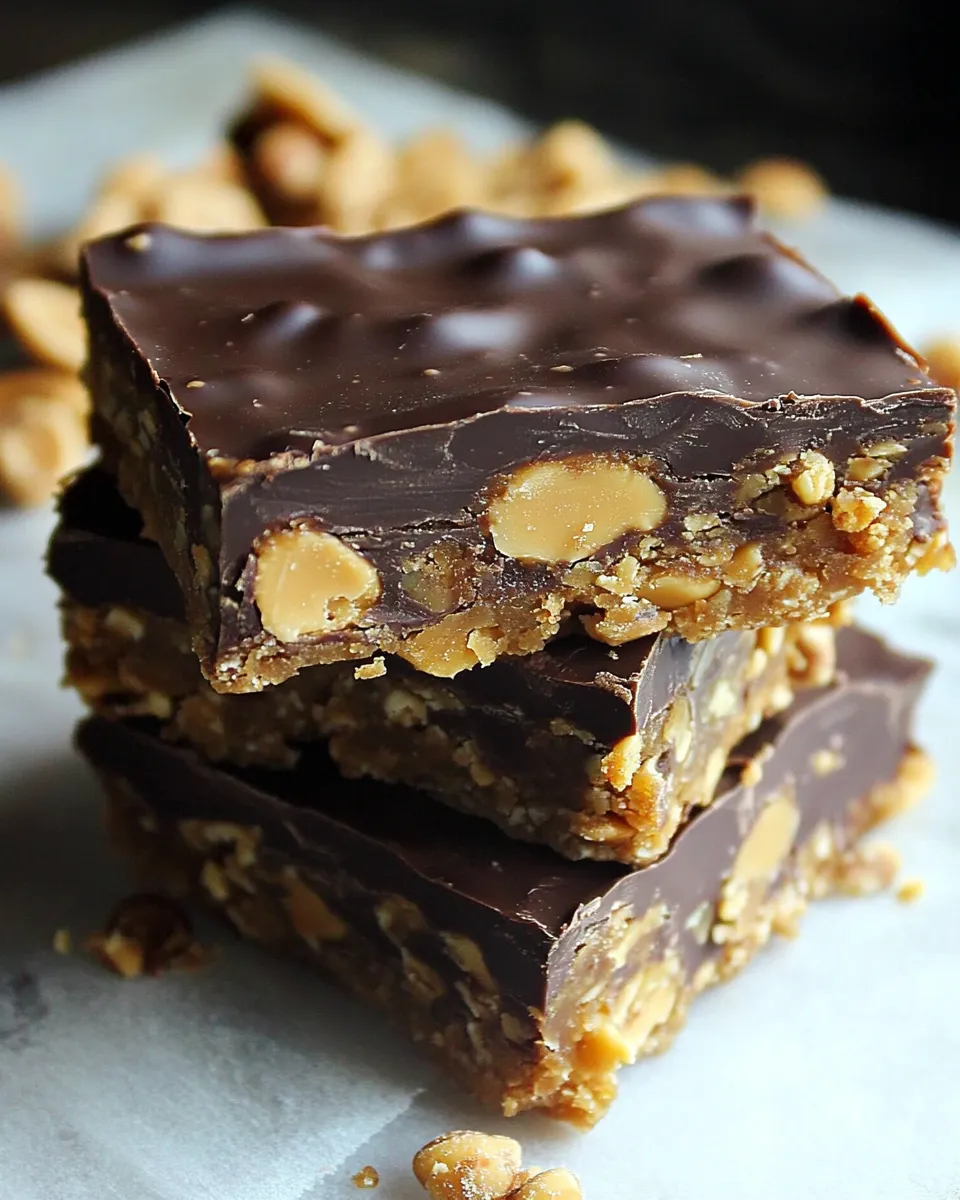
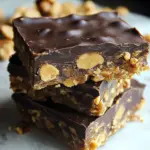
These bars are exactly what the title promises: crunchy, chocolatey, and peanut buttery, with zero oven time. They come together quickly, chill in the fridge, and cut into tidy squares that hold up in a lunchbox or on a dessert tray. I make them when I want something homemade but fuss-free.
The recipe relies on pantry-friendly staples and a single bowl. The texture comes from cornflakes — not cereal you crush into dust, but whole flakes folded in gently so each bite snaps. The chocolate-peanut butter mixture binds everything and sets firm in the refrigerator.
I’ll walk you through the method step by step, note the little choices that affect texture, and cover storage and troubleshooting so you get perfect bars the first time. No fluff. Just practical, friendly guidance that treats the recipe like a real weekday weapon.
What You’ll Need
Ingredients
- 1½ cups semi-sweet chocolate chips — provides the chocolate base and sweetness; melts smoothly with the butter and honey.
- 1 cup creamy peanut butter — gives the bars their peanut flavor and helps bind the cereal.
- ½ cup honey — sweetener and binder; also keeps the bars pliable.
- ¼ cup unsalted butter — enriches the chocolate and helps create a glossy, set topping.
- 3 cups cornflakes — the source of crunch; fold gently to keep flakes intact.
Method: Crunchy No-Bake Chocolate Peanut Butter Bars
- Place 1½ cups semi-sweet chocolate chips, 1 cup creamy peanut butter, ½ cup honey, and ¼ cup unsalted butter in a large microwave-safe glass mixing bowl.
- Microwave on high in 30-second intervals, stirring well after each interval, until the mixture is completely melted and smooth (about 1½–2 minutes total).
- Stir the melted mixture until fully combined and uniform in texture.
- Gently fold in 3 cups cornflakes, stirring just until the cornflakes are evenly coated; take care not to crush them.
- Transfer the mixture into an 8×8-inch square baking pan and spread it evenly, pressing lightly to compact.
- Refrigerate the pan until the bars are firm, at least 2 hours and up to about 4 hours.
- Use a sharp knife to slice into bars and store chilled in the refrigerator for up to 2 weeks.
What Makes This Recipe Special
It’s the contrast of textures. The chocolate and peanut butter form a smooth, holdable coating while the cornflakes provide a satisfying snap. There’s no baking required, so you get a reliable result without a hot kitchen or a long wait. The honey and butter melt into the chocolate and peanut butter to create a shiny, set finish that slices cleanly when cold.
Another advantage is portability. These bars stay firm in the refrigerator and travel well in a lunchbox or picnic container. They’re an easy make-ahead treat for unexpected guests or a quick dessert after dinner. And because the method is straightforward, you can double the batch without much extra work.
No-Store Runs Needed
This recipe was built for pantry rescues. Semi-sweet chocolate chips and cornflakes are common staples, and peanut butter and honey are fixture items for many kitchens. If you already keep those basics on hand, you’re ready to go right now. No special chocolate bars, crumbs, or fancy add-ins required.
If you have different chocolate on hand (a bar instead of chips), you can chop it, but that’s an optional tweak — not necessary. The original ingredient list keeps things simple: chips melt evenly and predictably in a microwave.
Before You Start: Equipment
There’s very little equipment needed. Use a large microwave-safe glass mixing bowl — glass heats evenly and makes stirring easier. An 8×8-inch square baking pan gives the bars the proper thickness; lined with parchment, it makes removal and slicing neater. You’ll also want a sharp knife for clean cuts and a rubber spatula for folding.
Microwave timings are given because they’re fast, but if you prefer, a double boiler works, too. If you use a double boiler, keep the water at a simmer and stir until the mixture is smooth. Just be sure the bowl isn’t touching the water.
Mistakes Even Pros Make
- Over-stirring the cornflakes — crush them and you lose the crunch. Stir just until evenly coated.
- Rushing the chill time — bars need at least 2 hours to set properly. Cutting too soon results in sticky, uneven slices.
- Using a wet or warm pan — that can steam the mixture and make the surface dull. Use a dry, room-temperature pan lined with parchment for best results.
- Applying too much pressure when compacting — press lightly. Over-pressing compacts and breaks the flakes, making bars dense instead of crispy.
Warm & Cool Weather Spins
In warm weather, the bars will soften faster. Keep them refrigerated until serving and transport them in an insulated cooler if you’re taking them outside. If you expect prolonged heat, pack them between layers of parchment so they don’t stick together.
In cool months the bars set more quickly and hold their shape well. You can shorten chilling time slightly if your refrigerator runs cold, but adhere to at least the minimum two hours to ensure firm texture.
Minor variation ideas without changing the ingredient list: serve chilled for snap, slightly cooled but not fridge-cold for a silkier mouthfeel. Both work well; it’s a matter of preference.
Chef’s Rationale
This recipe balances three functions: bind, sweeten, and provide texture. The chocolate chips, peanut butter, honey, and butter melt together to form a homogenous binder and flavor base. Cornflakes act as a neutral, crunchy filler that doesn’t compete with the chocolate-peanut butter flavor but gives the bar structure and bite.
I chose honey over corn syrup or granulated sugar because it blends smoothly and keeps the bars tender. The unsalted butter enriches the chocolate and helps the set be shiny and cohesive when chilled. Using semi-sweet chips gives the bars a pleasant contrast to the honeyed sweetness and peanut butter richness.
Leftovers & Meal Prep
Store the bars chilled in an airtight container. They’ll keep up to two weeks in the refrigerator. For longer storage, you can freeze them flat in a single layer for up to two months; thaw in the refrigerator before slicing if needed.
For portioning, cut into squares right before serving if you want clean edges. If you need grab-and-go snacks, cut into bars and separate with small pieces of parchment to prevent sticking. They make a great addition to a weekly snack prep box.
Troubleshooting Q&A
Why did my mixture seize or become grainy?
If chocolate becomes grainy or seizes, it usually means water got into the chocolate or it was overheated. Use a clean, dry bowl and microwave in short intervals, stirring between each. If graininess appears, continue stirring off-heat; sometimes the texture smooths out as temperatures equalize.
Why are my cornflakes soggy?
Sogginess happens when flakes are crushed or too much pressure is applied when packing into the pan. Fold gently to coat; press the mixture lightly into the pan. Also, ensure the chocolate-peanut butter mixture isn’t too hot when you add the flakes — allow a brief cool-down if necessary so you’re not steaming the cereal.
My bars are too soft at room temperature. What should I do?
These bars are designed to be refrigerated. If you want a firmer bar at room temperature, reduce the amount of peanut butter slightly or add a scant cup of a drier cereal substitute — but that would change the ingredient set. Practically, keep them chilled until serving or transfer to a cooler for transport.
How do I get neat slices?
Chill the pan thoroughly, lift the set block out using parchment, and use a very sharp knife. Wiping the knife between cuts helps. You can also warm the knife briefly under hot water, dry it, and slice in a single clean motion for glossier edges.
Let’s Eat
Slice these bars into small squares for a bite-sized treat or larger rectangles for a more satisfying snack. Serve cold for the cleanest texture and crunch, or let them warm for a moment if you prefer a softer bite. They pair well with a cup of coffee, plain yogurt, or fruit for a quick afternoon pick-me-up.
Make a batch, chill, and keep a stashed container in the fridge for those times you need an instant, homemade dessert. They’re simple to make, easy to store, and reliably delicious. Enjoy.
Crunchy No-Bake Chocolate Peanut Butter Bars
Ingredients
Ingredients
- 1 1/2 cupssemi-sweet chocolate chips
- 1 cupcreamy peanut butter
- 1/2 cuphoney
- 1/4 cupunsalted butter
- 3 cupscornflakes
Instructions
Instructions
- Place 1½ cups semi-sweet chocolate chips, 1 cup creamy peanut butter, ½ cup honey, and ¼ cup unsalted butter in a large microwave-safe glass mixing bowl.
- Microwave on high in 30-second intervals, stirring well after each interval, until the mixture is completely melted and smooth (about 1½–2 minutes total).
- Stir the melted mixture until fully combined and uniform in texture.
- Gently fold in 3 cups cornflakes, stirring just until the cornflakes are evenly coated; take care not to crush them.
- Transfer the mixture into an 8×8-inch square baking pan and spread it evenly, pressing lightly to compact.
- Refrigerate the pan until the bars are firm, at least 2 hours and up to about 4 hours.
- Use a sharp knife to slice into bars and store chilled in the refrigerator for up to 2 weeks.
Equipment
- large microwave-safe glass mixing bowl
- Microwave
- Spatula or wooden spoon
- 8x8-inch square baking pan
- Sharp Knife
- Refrigerator
Notes
You can substitute crisp rice cereal for the cornflakes if you wish.


