
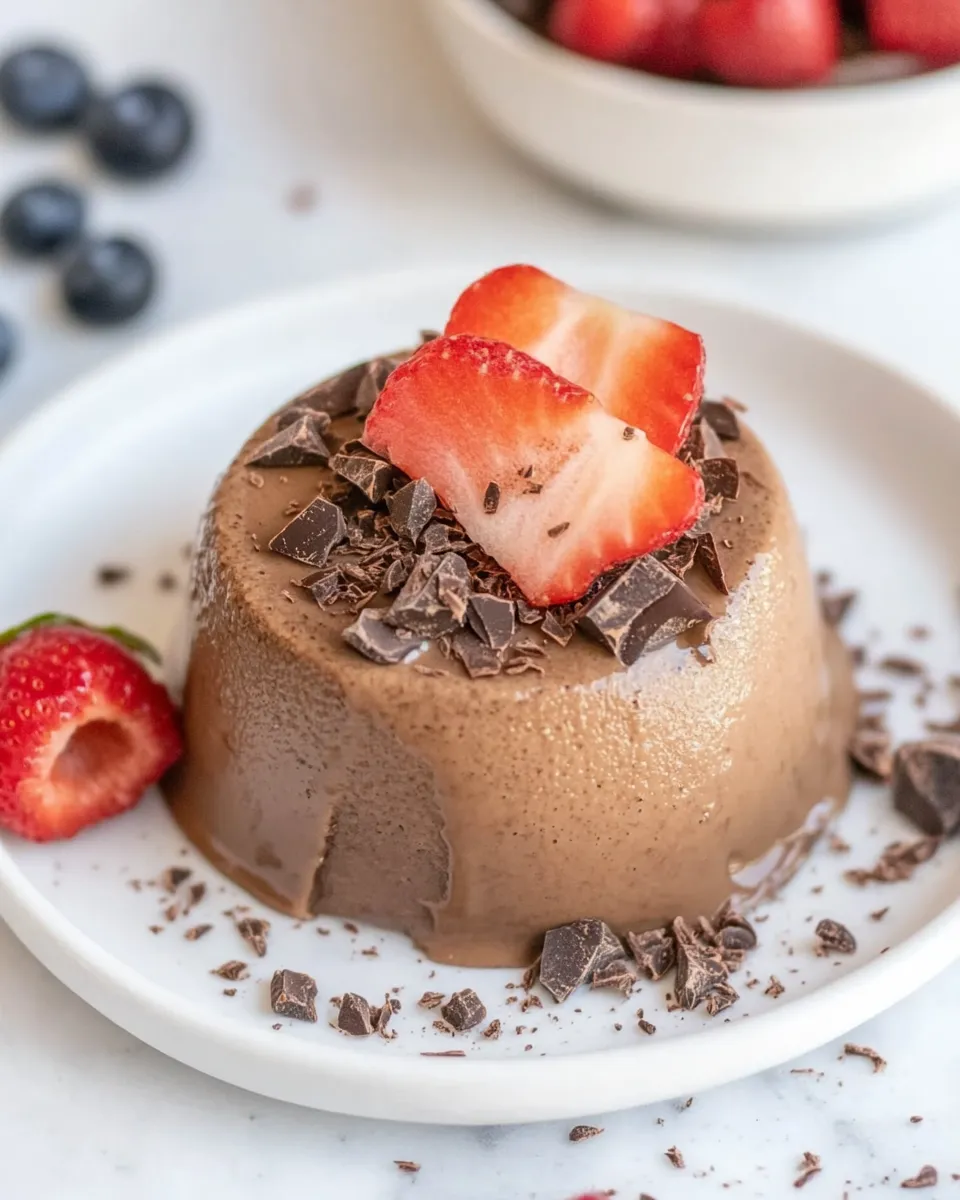
Rich, silky, and deceptively simple: this Dark Chocolate Panna Cotta is exactly the kind of dessert I make when I want something elegant that won’t take over my evening. It feels special, but the technique is straightforward. A few careful steps and a little patience in the fridge are all you need to end up with glossy, scoopable panna cotta that balances deep chocolate with a whisper of vanilla and espresso.
I love that this version uses canned coconut milk for body and flavor instead of heavy cream. It creates a smooth mouthfeel and a subtle tropical note that plays well with dark chocolate. The espresso powder cuts through the cocoa, sharpening the chocolate’s personality without tasting like coffee.
Follow the steps closely, keep an eye on temperatures, and you’ll have six perfectly set ramekins to serve as a quiet weeknight finish or a show-stopping finale for guests. Below I’ll walk you through the ingredients, the exact step-by-step process, common problems and fixes, and a few ideas for serving and storage.
What Goes In
Ingredients
- 4 ounces dark chocolate, chopped — provides the chocolate backbone and richness; choose 60–70% cacao for balance.
- ¼ cup canned coconut milk, for blooming gelatin — cool liquid helps the gelatin hydrate evenly.
- 2 teaspoons gelatin — the setting agent; measure accurately so the panna cotta is firm but tender.
- 1¾ cups canned coconut milk — the main liquid; gives texture and a gentle coconut flavor.
- 1 teaspoon espresso powder — brightens the chocolate flavor without adding coffee taste when used sparingly.
- 1 teaspoon vanilla extract — rounds and lifts the chocolate for a more aromatic finish.
Dark Chocolate Panna Cotta: Step-by-Step Guide
- Put the chopped 4 ounces dark chocolate in a large heatproof bowl and set aside.
- Sprinkle 2 teaspoons gelatin evenly over 1/4 cup canned coconut milk. Let the gelatin bloom for 5 minutes without stirring.
- In a saucepan, pour the remaining 1 3/4 cups canned coconut milk. Add 1 teaspoon espresso powder and 1 teaspoon vanilla extract and whisk to combine.
- Heat the coconut milk mixture over medium-low, stirring occasionally, until it is hot and just begins to simmer at the edges (do not let it boil).
- Add the bloomed gelatin (including the 1/4 cup liquid) to the hot coconut milk and whisk until the gelatin is completely dissolved. Remove the pan from heat.
- Pour the hot milk mixture through a fine-mesh strainer into the bowl with the chopped chocolate. Whisk until the chocolate is fully melted and the mixture is smooth.
- Divide the mixture evenly among six (6-ounce) ramekins. Let them cool at room temperature for 10–15 minutes, then refrigerate uncovered until set, at least 4 hours.
- If refrigerating longer than 4 hours, cover the ramekins with plastic wrap and keep up to 3 days.
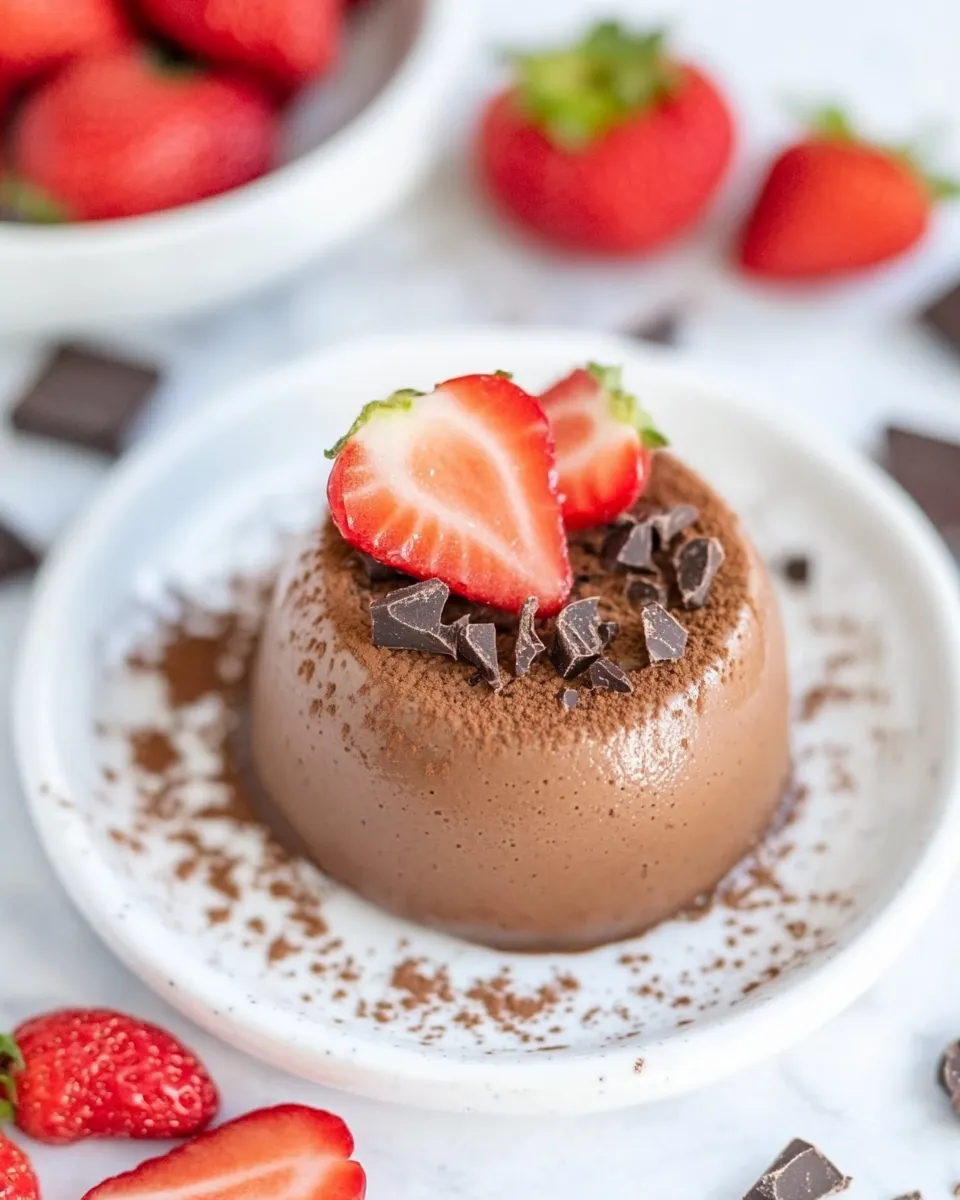
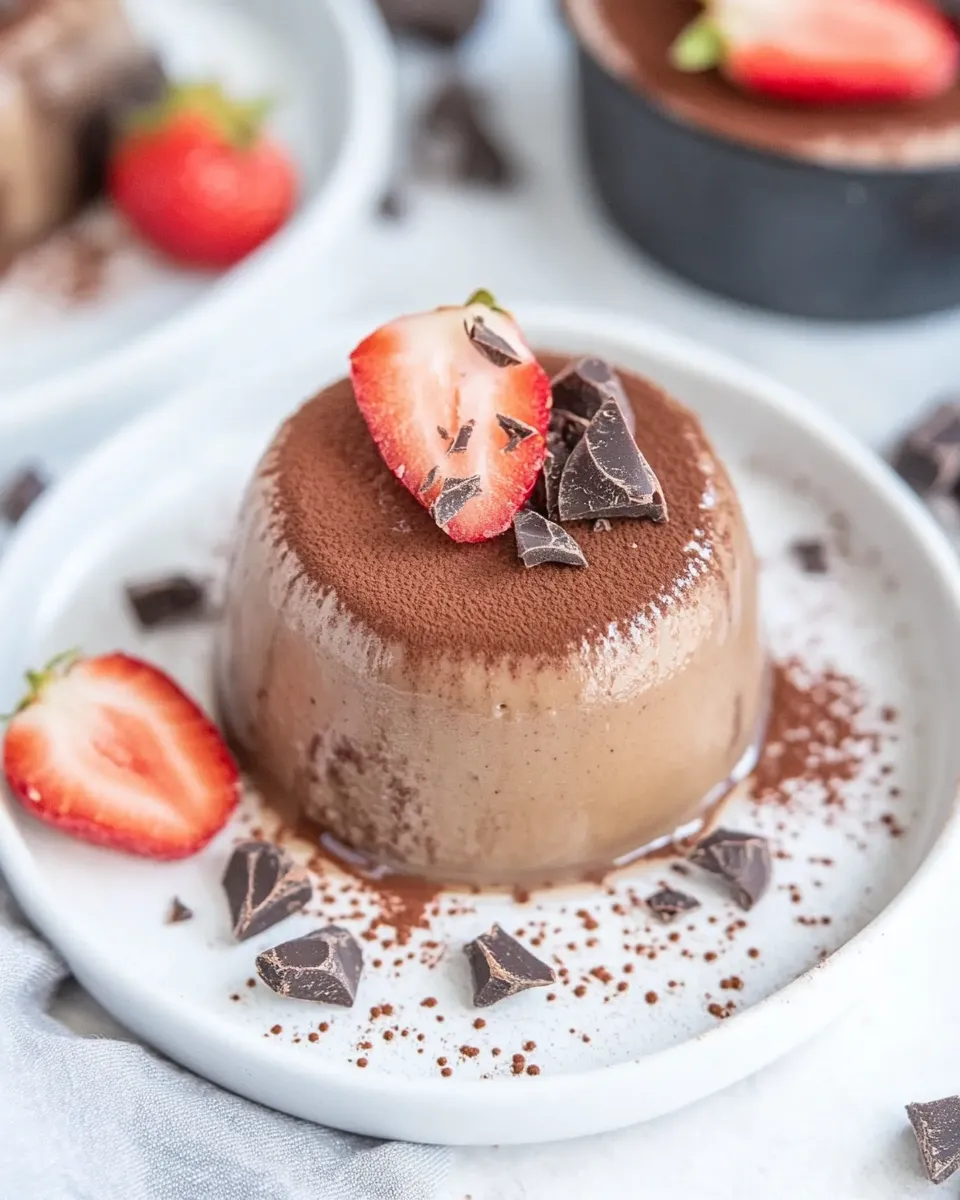
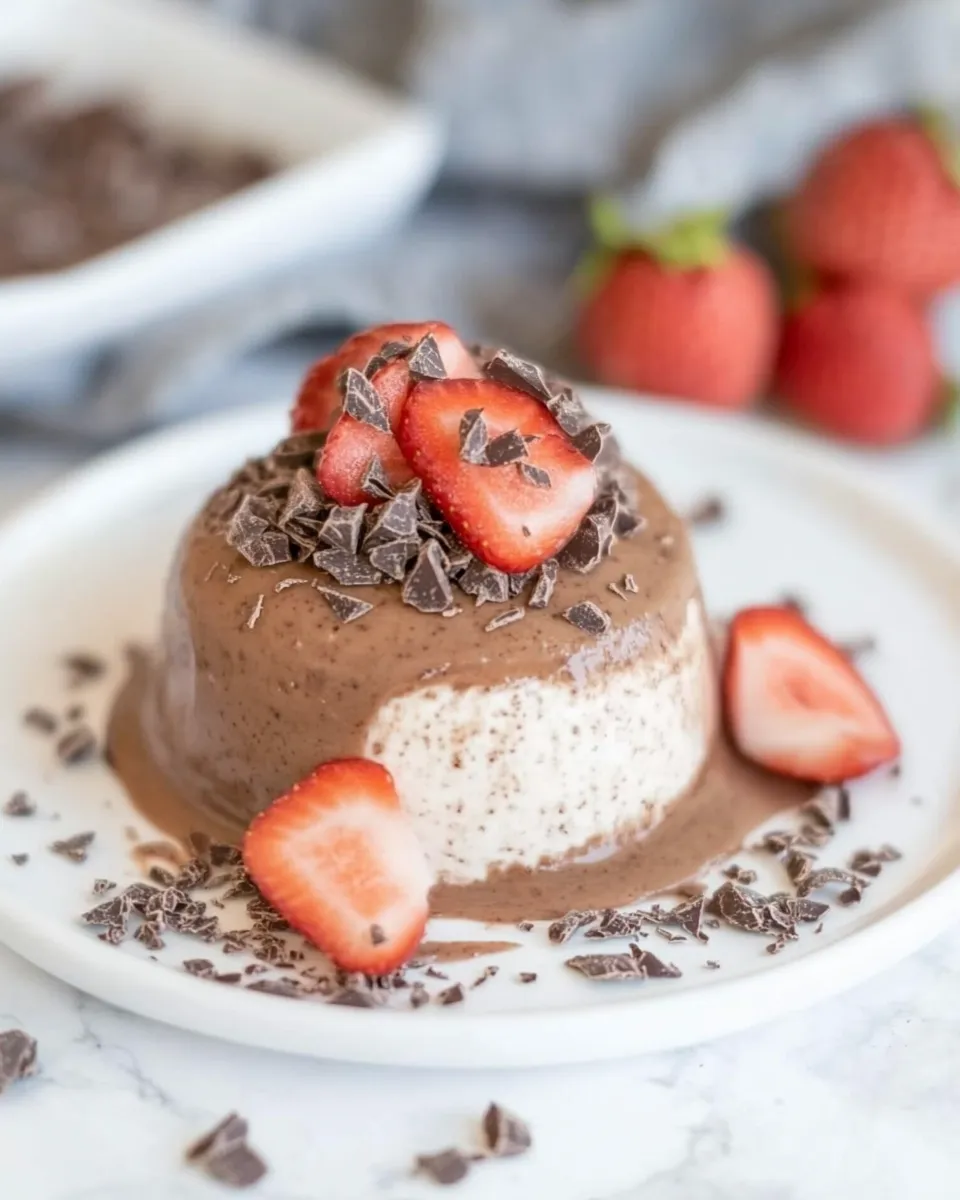
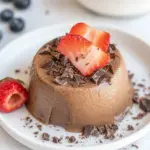
- To unmold, place each ramekin in a shallow bowl of warm water that reaches about halfway up the side of the ramekin for 2–3 minutes, remove, then invert onto a plate. Serve as is.
Top Reasons to Make Dark Chocolate Panna Cotta
This dessert earns a spot in my rotation for several practical reasons. First, it’s elegant without being labor-intensive. You don’t need tempering skills or a blowtorch—just a saucepan and a whisk. Second, texture: panna cotta sits in this perfect zone between custard and mousse. It’s creamy, not cakey, and it melts on the palate.
It’s also adaptable. While this recipe leans dairy-free thanks to coconut milk, it still reads as indulgent. You can plate it plainly for minimalist elegance or garnish with berries, toasted coconut, or a sprinkle of flaky salt for contrast. Finally, timing: it can be made ahead, which is huge when you’re entertaining. Make it the day before and spend your time on the main course.
Texture-Safe Substitutions
If you need to swap ingredients, prioritize texture over flavor. Gelatin is the key to panna cotta’s wobble. If you must replace it, agar-agar can work, but it sets differently and often yields a firmer, slightly more brittle texture. Start with small tests and keep in mind agar needs boiling to activate, unlike gelatin.
For the liquid, swapping one or both cans of coconut milk for full-fat dairy cream will give a richer, silkier mouthfeel. Use the same volumes. If you prefer a lighter set, reduce the gelatin slightly—by about 1/4 teaspoon—and test one ramekin first. For flavor swaps, match intensities: if you replace espresso powder with instant coffee, use less, as coffee can become bitter. Vanilla can be swapped for a splash of almond or orange liqueur, but those change the final profile.
Recommended Tools
- Large heatproof bowl — for melting the chocolate without direct heat.
- Fine-mesh strainer — removes any undissolved bits and ensures a silky finish.
- Whisk — essential for dissolving gelatin and emulsifying the chocolate and coconut milk.
- Small saucepan — to gently heat the coconut milk mixture.
- Six 6-ounce ramekins — standard serving size; use similar-sized vessels for even chilling.
- Measuring spoons and cups — the gelatin and liquids need accurate measurement.
- Shallow bowl — for the warm water bath when unmolding.
Things That Go Wrong
Here are the common missteps and how to fix or avoid them:
- Grainy texture: Often caused by overheating chocolate or not straining the mixture. Keep heat gentle and always strain into the chocolate bowl, then whisk until smooth.
- Doesn’t set: Either the gelatin wasn’t fully dissolved, or it was under-measured. Make sure the gelatin blooms and that you whisk it into hot liquid until it dissolves fully. Don’t skip the blooming step.
- Too firm or rubbery: Too much gelatin. Measure carefully. If a batch becomes too firm, use it as a sliced dessert with a fruit compote rather than trying to re-create the original texture.
- Bitter chocolate flavor: Using very high-percentage chocolate can edge bitter. Balance with the espresso and vanilla, or choose a slightly lower-cacao bar (60–70%).
- Ramekin sticks when unmolding: Don’t skip the warm water bath. Warm the ramekin sides halfway up for 2–3 minutes to loosen the edge, then invert. If it still holds, run a thin knife around the rim before trying again.
Warm & Cool Weather Spins
In warm weather, keep things bright and refreshing. Serve the panna cotta with a chilled berry compote or a citrus salad to cut the chocolate’s richness. Add a sprinkle of toasted coconut or crushed pistachios for a crunch contrast that keeps the mouth engaged.
In cool weather, go cozy. Pair with warm salted caramel sauce, roasted pears, or a spoonful of spiced compote. You can also top with a warm chocolate ganache (a little cream warmed and poured over chopped chocolate) to create a hot-and-cold contrast that feels indulgent without much extra effort.
Chef’s Rationale
Why coconut milk? It provides richness and a clean, rounded fat that replaces dairy cream without cloying sweetness. The dark chocolate brings depth; choosing something in the 60–70% range keeps bitterness in check while maintaining chocolate intensity. Espresso powder is a tiny, strategic ingredient: it doesn’t make this taste like coffee, but it amplifies chocolate’s complexity the way salt amplifies sweetness.
Gelatin is used because it sets at a tender, melt-in-the-mouth consistency that other setting agents don’t always match. Blooming gelatin in a cool liquid prevents lumps and ensures even dissolution. Straining into the chocolate is a small step that pays off with a glossy, uniform texture. Each technique is minimal but purposeful.
Keep-It-Fresh Plan
Refrigeration is your best friend. The recipe text notes you can refrigerate the ramekins uncovered for at least 4 hours to set. If you need them to wait longer, cover the ramekins with plastic wrap after the initial set period and keep them in the fridge for up to 3 days. This preserves texture and flavor without drying the surface.
Do not freeze panna cotta; freezing destroys the delicate set and creates ice crystals that ruin the mouthfeel. If you must make them farther ahead, unmold and keep covered in an airtight container in the refrigerator for up to 24 hours for best texture, up to 3 days if you leave them in the ramekins.
Top Questions & Answers
Q: Can I make this vegan?
A: The recipe relies on gelatin, which is not vegan. Agar-agar can be used as a vegan alternative, but it requires different handling (it must boil to activate and will set firmer). Try a small test batch and adjust the ratio cautiously.
Q: Can I use regular milk or cream instead of coconut milk?
A: Yes. Full-fat dairy cream will create a silkier, richer panna cotta. Use the same volumes. If you swap in dairy and keep the coconut for blooming gelatin, flavor will shift but texture remains similar.
Q: What if my panna cotta has tiny bubbles on top?
A: Small bubbles from whisking are normal. Let the ramekins sit at room temperature for 10–15 minutes before chilling; many bubbles will rise and dissipate. A quick tap on the counter also helps release trapped air.
Q: How can I tell when the gelatin is fully dissolved?
A: After adding the bloomed gelatin to hot liquid, whisk until the mixture looks homogeneous and there are no visible granules. Warmth plus whisking should dissolve it; if in doubt, keep the pan off the heat but warm and whisk a little longer.
Q: Is unmolding necessary?
A: No. You can serve the panna cotta straight from the ramekins. Unmolding makes for a prettier presentation but adds a step and slight risk of breakage.
Time to Try It
This Dark Chocolate Panna Cotta rewards accuracy and patience. Follow the steps as written, pay attention to temperatures, and don’t rush the chilling. Make it a day ahead if you can; the flavors relax overnight and the texture firms to the perfect, yielding custard. Treat the ramekins gently when unmolding, or skip unmolding and serve directly with a bright sauce or fresh fruit.
When you take that first spoonful, you’ll have the smooth, chocolatey luxury you were aiming for—without hours at the stove. Try it once exactly as written. After that, play with the garnishes and seasonal tweaks. Enjoy.
Dark Chocolate Panna Cotta
Ingredients
Ingredients
- 4 ouncesdark chocolate chopped
- 1/4 cupcanned coconut milk for blooming gelatin
- 2 teaspoonsgelatin
- 1 3/4 cupscanned coconut milk
- 1 teaspoonespresso powder
- 1 teaspoonvanilla extract
Instructions
Instructions
- Put the chopped 4 ounces dark chocolate in a large heatproof bowl and set aside.
- Sprinkle 2 teaspoons gelatin evenly over 1/4 cup canned coconut milk. Let the gelatin bloom for 5 minutes without stirring.
- In a saucepan, pour the remaining 1 3/4 cups canned coconut milk. Add 1 teaspoon espresso powder and 1 teaspoon vanilla extract and whisk to combine.
- Heat the coconut milk mixture over medium-low, stirring occasionally, until it is hot and just begins to simmer at the edges (do not let it boil).
- Add the bloomed gelatin (including the 1/4 cup liquid) to the hot coconut milk and whisk until the gelatin is completely dissolved. Remove the pan from heat.
- Pour the hot milk mixture through a fine-mesh strainer into the bowl with the chopped chocolate. Whisk until the chocolate is fully melted and the mixture is smooth.
- Divide the mixture evenly among six (6-ounce) ramekins. Let them cool at room temperature for 10–15 minutes, then refrigerate uncovered until set, at least 4 hours.
- If refrigerating longer than 4 hours, cover the ramekins with plastic wrap and keep up to 3 days.
- To unmold, place each ramekin in a shallow bowl of warm water that reaches about halfway up the side of the ramekin for 2–3 minutes, remove, then invert onto a plate. Serve as is.
Equipment
- large heatproof bowl
- Saucepan
- Whisk
- Fine-mesh strainer
- Ramekins
- shallow bowl
- Plastic Wrap
Notes
Ramekins
: You can use any 6-8 ounce mold you like. You can even use glasses and serve the panna cotta right from the glass if desired.
Milk/Cream: You can use either whole milk, heavy cream, or canned coconut milk. I would not recommend low-fat milk when making a panna cotta, as you want a velvety, rich consistency that is not achievable when using low-fat milk
To make
Dairy-Free Chocolate Panna Cotta
, use dairy-free chocolate and coconut milk.
To make
Paleo Chocolate Panna Cotta
, use coconut milk as your choice of dairy and Paleo-approved chocolate.
Storage
: Panna Cotta will keep in the fridge for up to 3 days. Fresh Panna Cotta is best, but you can also freeze panna cotta (unmolded), for up to 3 months. Defrost in the fridge overnight before serving.


