
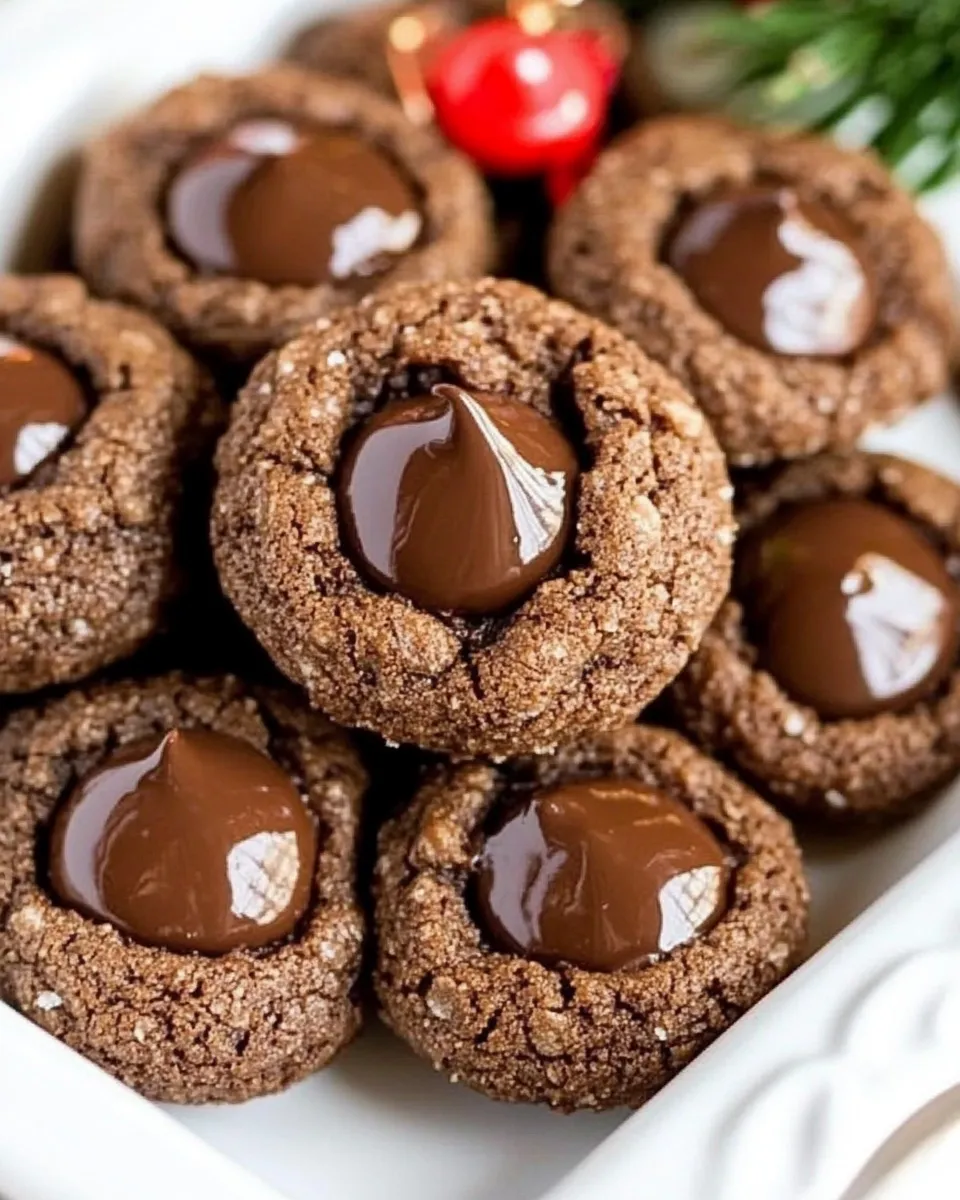
I bake these often when I want a confident chocolate fix that still feels homey. The cookies are dense, crackled on top, and give you that classic thumbprint hollow for filling — hence the name. They come together reliably and are forgiving enough for a busy afternoon or last-minute dessert.
There’s a rhythm to making them: dry ingredients whisked, butter and sugar creamed, eggs added one by one, then the melted chocolate folded in. You get a soft, almost brownie-like bite with a crisp edge if you bake them at the right temperature and don’t overmix the dough.
Below you’ll find exactly what I use and the precise steps to follow. I also include substitutions and common mistakes so you can adapt the cookies to your pantry without losing texture or flavor.
What We’re Using
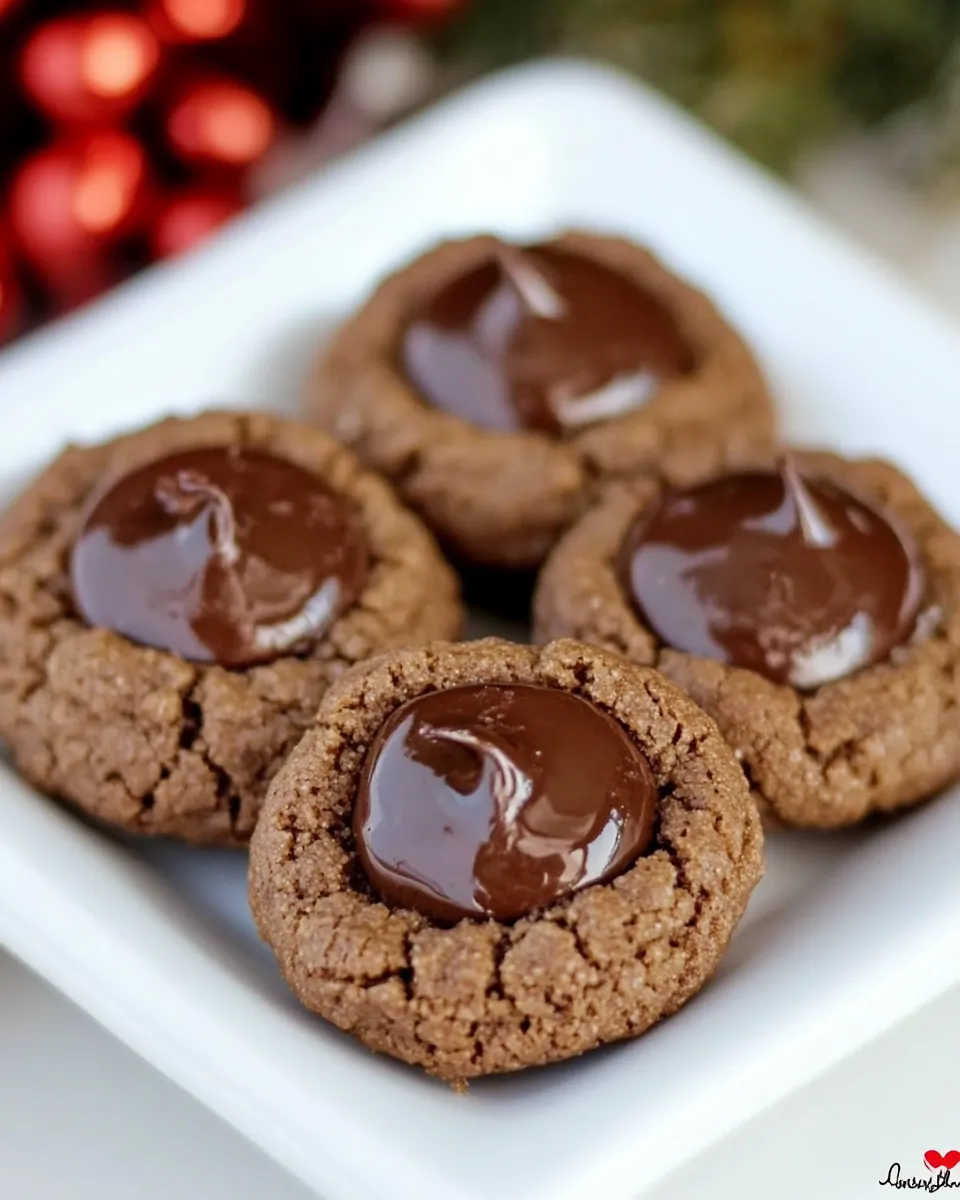
These cookies rely on a few building blocks: flour for structure, cocoa and melted chocolate for deep chocolate flavor, butter and sugar for richness and lift, eggs for binding, and a touch of leavening to give a light crackle. The thumbprint step — pressing a well into the warm cookie — is what creates the place for jam, ganache, or a sprinkle of flaky salt later.
Ingredients
- 1 ⅓ cups flour — provides structure; measure by spooning into the cup and leveling for accuracy.
- ½ teaspoon salt — balances sweetness and strengthens flavor.
- ½ teaspoon baking powder — gives a gentle lift and helps the crackled top form.
- ¼ teaspoon baking soda — works with the acid in the recipe (from the cocoa) to add tenderness.
- 1 stick (4 ounces) butter, at room temperature — adds richness and helps create a tender crumb; room temperature means soft but not melted.
- 1 ⅓ cups sugar — sweetens and contributes to the cookie’s chew and color; using slightly less will yield a milder cookie.
- ½ cup cocoa powder, sifted — delivers dry, intense chocolate flavor; sifting removes lumps and ensures even mixing.
- 3 eggs — bind and provide moisture; add them one at a time to keep the emulsion stable.
- 1 teaspoon vanilla — rounds out chocolate flavor; use pure vanilla if you have it.
- 3 ounces semisweet chocolate, melted and cooled slightly — melts into the batter for a fudgier interior and intensified chocolate depth.
Double Chocolate Thumbprints Cookies in Steps
- Preheat the oven to 350°F. Line one or two baking sheets with parchment paper and set aside.
- In a medium bowl, whisk together the flour, salt, baking powder, and baking soda until evenly combined.
- In the bowl of a stand mixer or a large mixing bowl, beat the butter, sugar, and sifted cocoa powder on medium speed until well blended, about 2 minutes, scraping the bowl down once or twice.
- Add the eggs one at a time, mixing until blended after each addition. Stir in the vanilla.
- Add the melted, slightly cooled semisweet chocolate and mix until combined.
- Add the flour mixture and mix on low speed (or fold by hand) just until incorporated; avoid overmixing.
- Use a tablespoon to drop rounded tablespoons of dough onto the prepared baking sheets, spacing them about 1½ inches apart.
- Bake until the cookies are puffed and crackled, about 8–10 minutes.
- Immediately after removing the cookies from the oven, use the rounded side of a ½‑teaspoon measuring spoon to make a deep well in the center of each cookie.
- Let the cookies rest on the baking sheet for 4–5 minutes, then transfer them to a wire rack to finish cooling completely.
Why It’s My Go-To
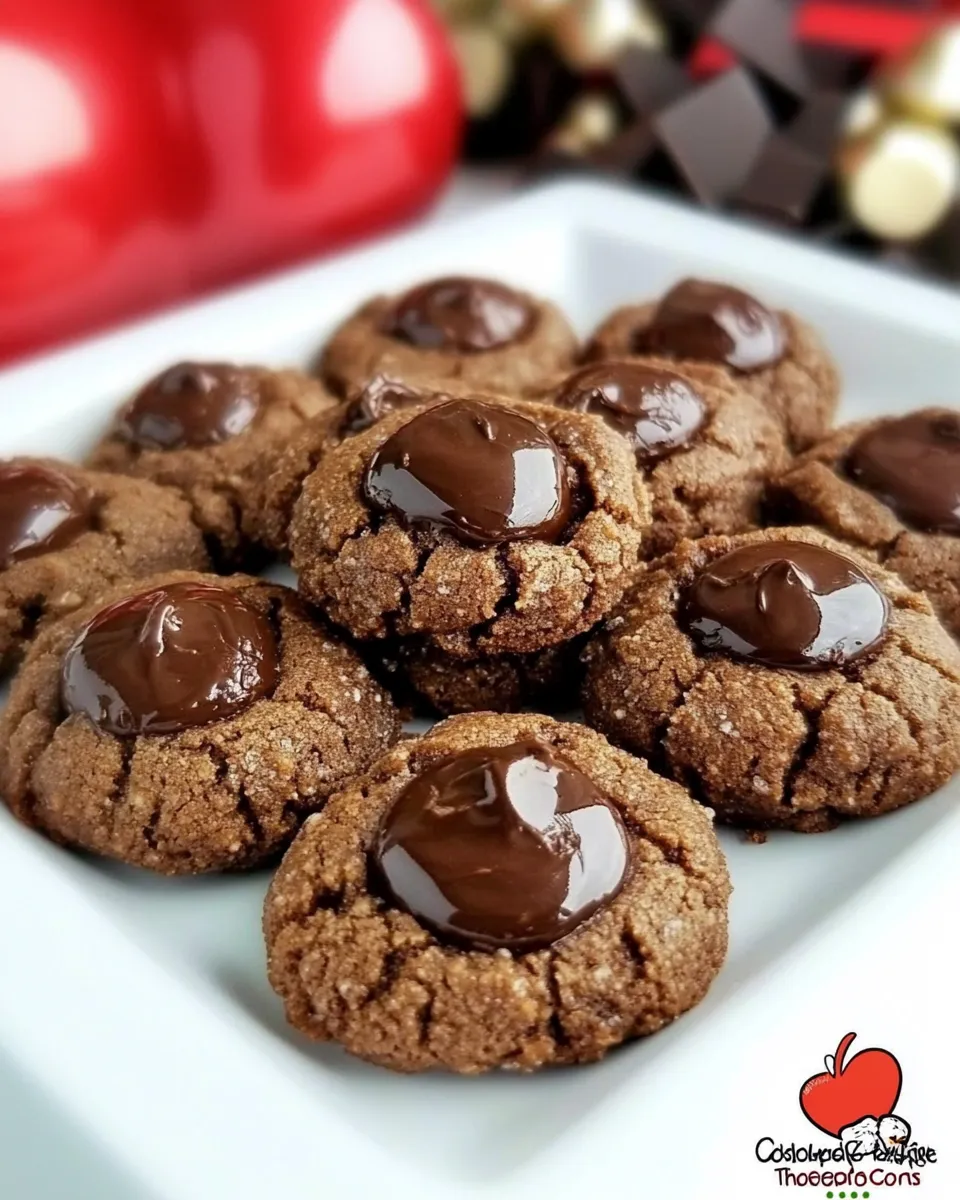
These cookies are dependable. The formula is straightforward, and the texture is what I reach for when I want something chocolate without fuss. They are a little like a cross between a soft cookie and a brownie: tender, chocolate-forward, and with a built-in place for a finishing touch — often jam, melted chocolate, or a dollop of caramel.
I also like that the dough keeps well for short periods in the fridge if you want to portion and bake later. For holidays, the thumbprint well makes it easy to dress each cookie differently so one batch can serve multiple tastes.
Finally, the method teaches technique: creaming butter and sugar with cocoa ensures the cocoa blooms into the fat, giving a more even chocolate flavor than simply folding in dry cocoa at the end. Little steps like that matter for texture and depth.
Smart Substitutions

Life happens; here are swaps that won’t derail the cookies.
Butter and Chocolate
- If you only have salted butter, reduce any extra salt or omit additional salt elsewhere; the recipe only calls for ½ teaspoon, so cut cautionary by a pinch if substituting.
- Semisweet chocolate can be swapped for bittersweet for a more intense flavor or milk chocolate if you want milder, sweeter cookies — remember milk chocolate will make the dough softer, so chill slightly before baking if it’s very soft.
Flour and Cocoa
- All-purpose flour is the target here. For a slightly cakier texture, you can use 1:1 cake flour substitution but reduce the mixing to avoid overworking.
- If you’re out of unsweetened cocoa, Dutch-processed will work but it may alter the leavening reaction slightly; use it and expect a deeper, less acidic flavor.
Eggs and Sweeteners
- Using large eggs is the standard; if you must replace them, a commercial egg replacer may work, but the texture will differ — these cookies rely on eggs for structure and moisture.
- For part-brown-sugar flavor, you can replace up to ¼ cup of the granulated sugar with light brown sugar. That adds moisture and a caramel note without changing the chemistry drastically.
Tools of the Trade
- Stand mixer or large mixing bowl and sturdy spatula — for creaming the butter and sugar well.
- Sifter or fine-mesh sieve — to remove lumps from cocoa powder before mixing.
- Baking sheets lined with parchment — prevents sticking and helps cookies bake evenly.
- ½‑teaspoon measuring spoon — used to press the thumbprint well right after baking.
- Wire rack — for finishing the cooling process so bottoms don’t get soggy.
What Not to Do
There are a few easy mistakes that change the result quickly.
Do not overmix the flour into the batter. Once the flour goes in, mix just until it disappears. Overmixing develops gluten and yields a tough cookie instead of a tender one.
Don’t skip the slightly cooled melted chocolate. If the chocolate is too hot, it can soften the butter and break the emulsion, leading to greasy, flat cookies.
Avoid using too much space between cookies on the sheet with the incorrect assumption they will spread more; the recipe expects the cookies to puff and crackle in place, and spacing them about 1½ inches apart gives them room without drying edges.
And importantly: don’t press the thumbprint while the cookie is cold. The well should be made immediately after baking while the cookie is still hot and pliable — that gives a clean hollow without cracking the whole cookie.
Spring to Winter: Ideas
These cookies transition nicely across seasons with a change in filling or finishing touch.
- Spring: Fill wells with bright raspberry or apricot jam and finish with a tiny grated lemon zest on top for a fresh contrast to the chocolate.
- Summer: Use a chilled ganache or spoonful of salted caramel that sets to a soft center; serve slightly chilled for a cool bite.
- Autumn: Try a spiced pear or fig jam and sprinkle with a pinch of cinnamon or a few toasted chopped pecans for texture.
- Winter: Use orange marmalade for a classic chocolate-orange pairing or top with a white chocolate drizzle and a flake of Maldon sea salt.
Chef’s Rationale
The recipe balances a few goals: deep chocolate flavor, a tender interior, and a quick method that doesn’t require resting or complicated shaping. I include both cocoa powder and melted chocolate because they contribute different qualities — cocoa gives dry chocolate intensity and color, while melted chocolate adds fat and a denser, fudgier bite.
Eggs are added one at a time to keep the batter smooth and to help emulsify the butter and chocolate. The brief baking time is deliberate: 8–10 minutes keeps the centers soft while the surface puffs and cracks, which creates the classic thumbprint shape and forgiving texture once cooled.
Save for Later: Storage Tips
Once cooled completely, store cookies in an airtight container at room temperature for up to 3 days. If you’ve filled them with jam or a soft filling, place parchment between layers to prevent sticking.
For longer storage, freeze baked, unfilled cookies in a single layer on a tray until solid, then transfer to a freezer bag for up to 2 months. Thaw at room temperature and then make the thumbprints and add fresh fillings if desired.
If you need to store dough, shape rounded tablespoons onto a tray, freeze until firm, then bag. Bake from frozen, adding a minute or two to the bake time and watch for the crackle as your cue.
Reader Q&A
Q: My cookies spread too much and became flat. What went wrong?
A: Most likely your butter was too warm or the dough was overmixed after adding flour. Chill the scooped dough briefly before baking, or ensure your butter is at room temperature (soft, not melted). Also check your leavening: old baking powder or soda can affect rise; replace if doubtful.
Q: How do I make the thumbprint hold a runny jam without leaking?
A: Make the well while the cookie is hot, but let the cookie cool until the fill won’t immediately run. For runnier fillings, consider a thin layer of melted chocolate as a base inside the well to form a minimal barrier, then add jam on top.
Q: Can I add mix-ins like nuts or chocolate chips?
A: Yes, small chopped nuts folded into the dough before dropping will work. Chocolate chips can be added sparingly but may affect how the surface cracks; if you want chips, press a few on top after dropping the dough so they are visible and don’t change the structure too much.
Bring It to the Table
Serve these cookies on a simple platter with a variety of fillings so guests can choose: a bowl of raspberry jam, a small pot of salted caramel, and a jar of ganache. For adult gatherings, a dusting of espresso powder in one batch adds a sophisticated lift. For kids, a colorful sprinkle on a jam-filled center is always a hit.
They look polished, but they’re quick — a practical cookie that travels well to potlucks and makes a dependable, approachable dessert when you want chocolate with a home-baked feel.

Double Chocolate Thumbprints Cookies
Ingredients
Ingredients
- 1 1/3 cups flour
- 1/2 teaspoon salt
- 1/2 teaspoon baking powder
- 1/4 teaspoon baking soda
- 1 stick 4 ounces butter, at room temperature
- 1 1/3 cups sugar
- 1/2 cup cocoa powder sifted
- 3 eggs
- 1 teaspoon vanilla
- 3 ounces semisweet chocolate melted and cooled slightly
Instructions
Instructions
- Preheat the oven to 350°F. Line one or two baking sheets with parchment paper and set aside.
- In a medium bowl, whisk together the flour, salt, baking powder, and baking soda until evenly combined.
- In the bowl of a stand mixer or a large mixing bowl, beat the butter, sugar, and sifted cocoa powder on medium speed until well blended, about 2 minutes, scraping the bowl down once or twice.
- Add the eggs one at a time, mixing until blended after each addition. Stir in the vanilla.
- Add the melted, slightly cooled semisweet chocolate and mix until combined.
- Add the flour mixture and mix on low speed (or fold by hand) just until incorporated; avoid overmixing.
- Use a tablespoon to drop rounded tablespoons of dough onto the prepared baking sheets, spacing them about 1½ inches apart.
- Bake until the cookies are puffed and crackled, about 8–10 minutes.
- Immediately after removing the cookies from the oven, use the rounded side of a ½‑teaspoon measuring spoon to make a deep well in the center of each cookie.
- Let the cookies rest on the baking sheet for 4–5 minutes, then transfer them to a wire rack to finish cooling completely.


