

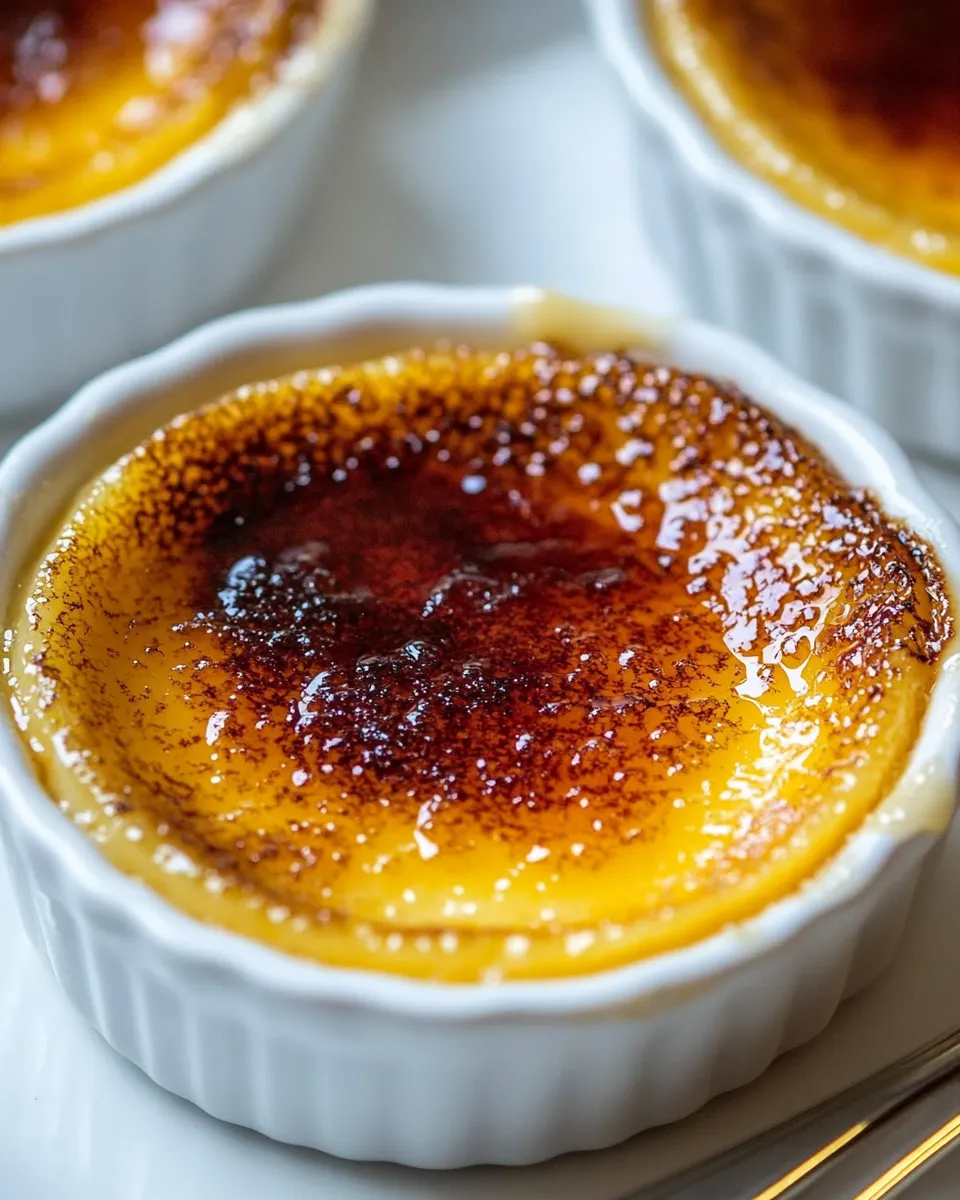
I love creme brulee for its simple, reliable contrast: a creamy, custardy base and that satisfying, crackable caramel top. This version is straightforward, forgiving, and uses a handful of pantry staples so you can pull it together on a weeknight or for guests without stress.
There are no fussy techniques here—just careful tempering and patience while the custards chill. I’ll walk you through the exact steps I use, the tools that make the process easier, and the little errors to avoid so every ramekin comes out smooth with a glossy caramel shell.
If you’ve been intimidated by the torch or the water bath, stick with me. You’ll find this method practical, approachable, and repeatable. By the end you’ll have a dessert that looks like you spent much more time on it than you actually did.
What We’re Using
We’re keeping equipment simple: a saucepan to heat the cream, a bowl for whisking yolks, a sieve for a silky custard, and ramekins set in a water bath for even baking. A kitchen torch is the quickest way to caramelize the sugar topping, but I’ll note a fallback if you don’t have one.
This recipe depends on technique more than exotic ingredients. Use the best-quality vanilla you can find, and take your time tempering the eggs so the custard remains smooth and free of curdled bits.
Ingredients
- 2 cups heavy whipping cream — the base of the custard; provides richness and a silky mouthfeel.
- 5 large egg yolks — thicken the custard and give it structure and a golden color.
- 1/2 cup sugar, plus extra for caramelizing — sweetens the custard; additional sugar is for the brûlée crust.
- 1 pinch fine sea salt — brightens the flavors and balances sweetness.
- 1 tsp vanilla extract, or vanilla bean paste — aromatic backbone of the custard; paste adds tiny flecks if you like a speckled look.
Creme Brulee: How It’s Done
- Preheat the oven to 300°F (150°C).
- Pour 2 cups heavy whipping cream into a medium saucepan. Set over medium heat and stir frequently until the cream is steaming and just below a simmer (small bubbles will form at the edge). Remove from heat and stir in 1 tsp vanilla extract (or vanilla bean paste).
- In a medium bowl, whisk together 5 large egg yolks, 1/2 cup sugar, and 1 pinch fine sea salt until blended and slightly pale.
- With the yolk mixture in the bowl, begin tempering: while whisking constantly, very slowly drizzle the hot cream into the eggs. Start with just a few drops at a time for the first 20–30 seconds, then increase to a thin, steady stream once the mixture has warmed. Continue until all the cream is incorporated.
- Strain the custard mixture through a fine-mesh sieve into a large measuring cup or bowl with a pouring lip. Discard any solids left in the sieve.
- Place six 4-oz ramekins in a 9×13-inch casserole dish. Divide the strained custard evenly among the six ramekins.
- Carefully pour boiling water into the baking dish until it reaches about halfway up the sides of the ramekins (take care to avoid splashing into the custards).
- Bake at 300°F for 30–35 minutes, or until the custard centers are nearly set and have only a slight jiggle when the ramekin is gently shaken.
- Using tongs or oven mitts, carefully remove the ramekins from the water bath and transfer them to a wire rack. Cool to room temperature, then cover and refrigerate until fully chilled, at least 2 hours and up to 3 days.
- When ready to serve, sprinkle 1 1/2 to 2 tsp sugar evenly over each chilled custard. Using a kitchen torch, move the flame in a circular pattern across the surface until the sugar melts and caramelizes to a deep amber color. Allow the caramel to harden for a minute before serving.
Why This Recipe Belongs in Your Rotation
This creme brulee is trustable. The ingredients are common, the steps are short, and the payoff is impressive. If you host dinners, it’s a small-batch dessert that can be prepped ahead and finished at the last minute, which takes stress out of entertaining.
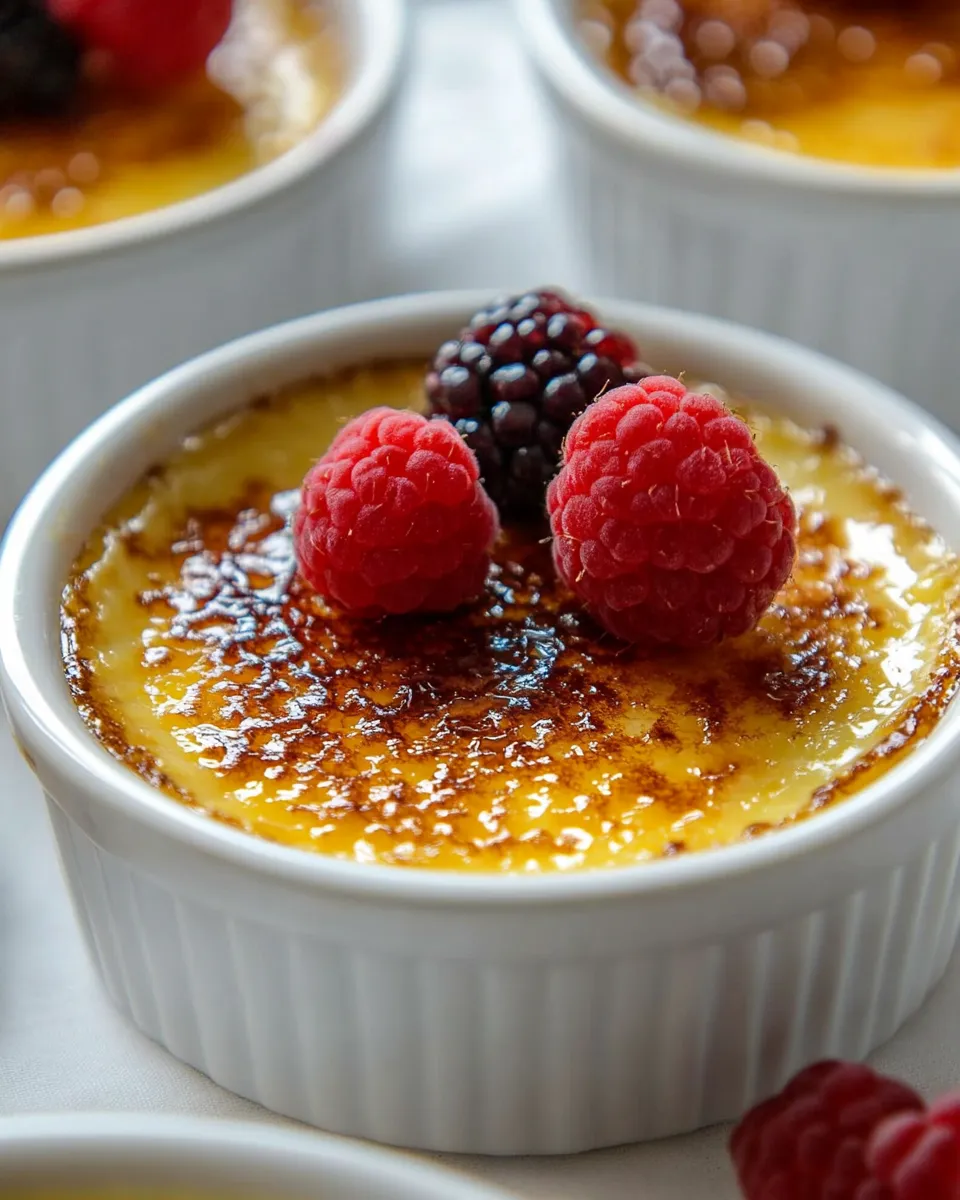
The method focuses on technique—careful heating, tempering, and a gentle water bath—so once you get comfortable with it, the result is reliably smooth custard and evenly caramelized tops. It’s also versatile: a straightforward base that pairs well with fresh fruit, coffee, or an after-dinner liqueur.
Healthier Substitutions
If you’re watching calories or fat, there are a few ways to lighten the dessert without completely changing the experience. Keep in mind that creme brulee’s character comes largely from the fat in the cream, so substitutions will alter texture and richness.
- Use half-and-half or a mix of milk and cream to lower fat content, but expect a slightly lighter mouthfeel and less richness.
- Reduce the sugar in the custard by a small amount (try trimming 1–2 tablespoons) if you prefer less sweet; keep the torching sugar amount the same if you want a crisp top.
- Flavor with vanilla bean paste or a small amount of citrus zest instead of additional sugars to enhance perceived sweetness without adding calories.
Equipment & Tools
- Medium saucepan — to heat the cream gently.
- Medium mixing bowl — for whisking the yolks and sugar.
- Whisk — for blending and tempering smoothly.
- Fine-mesh sieve — strains out any cooked egg bits for a silky texture.
- Six 4-oz ramekins — standard size for individual servings.
- 9×13-inch casserole dish — to hold the ramekins and the water bath.
- Kitchen torch — for quick, even caramelization; an oven broiler can work, but it’s less precise.
- Wire rack — for cooling before chilling.
Slip-Ups to Skip
There are a few common mistakes that turn a perfect creme brulee into a disappointment. Avoid these and your custards will be silky and consistent.
- Overheating the cream: Boiling the cream can alter texture and scald the flavor. Heat until steaming and just below a simmer.
- Rushing the tempering: Adding hot cream too quickly will cook the yolks. Start with droplets, whisk constantly, then a steady stream.
- Skipping the sieve: Straining removes any coagulated bits and yields the signature smoothness.
- Uneven water bath: Pour boiling water carefully and keep it away from splashing into ramekins—custards with water inside will be watery on top.
- Caramelizing too close: Hold the torch a few inches above the sugar and keep it moving to avoid hot spots and burnt sugar.
How to Make It Lighter
To keep the dessert lighter while preserving much of the experience, focus on portion control and topping technique rather than drastically changing the custard.
- Smaller ramekins: Serving in slightly smaller dishes reduces portion size without changing the method.
- Lean on flavor, not sugar: Use a good-quality vanilla and aromatic zest (a hint of orange or lemon) so the perceived sweetness is higher.
- Serve modestly: Pair a single small creme brulee with fresh berries or a strong espresso for a satisfying finish without overindulging.
What I Learned Testing
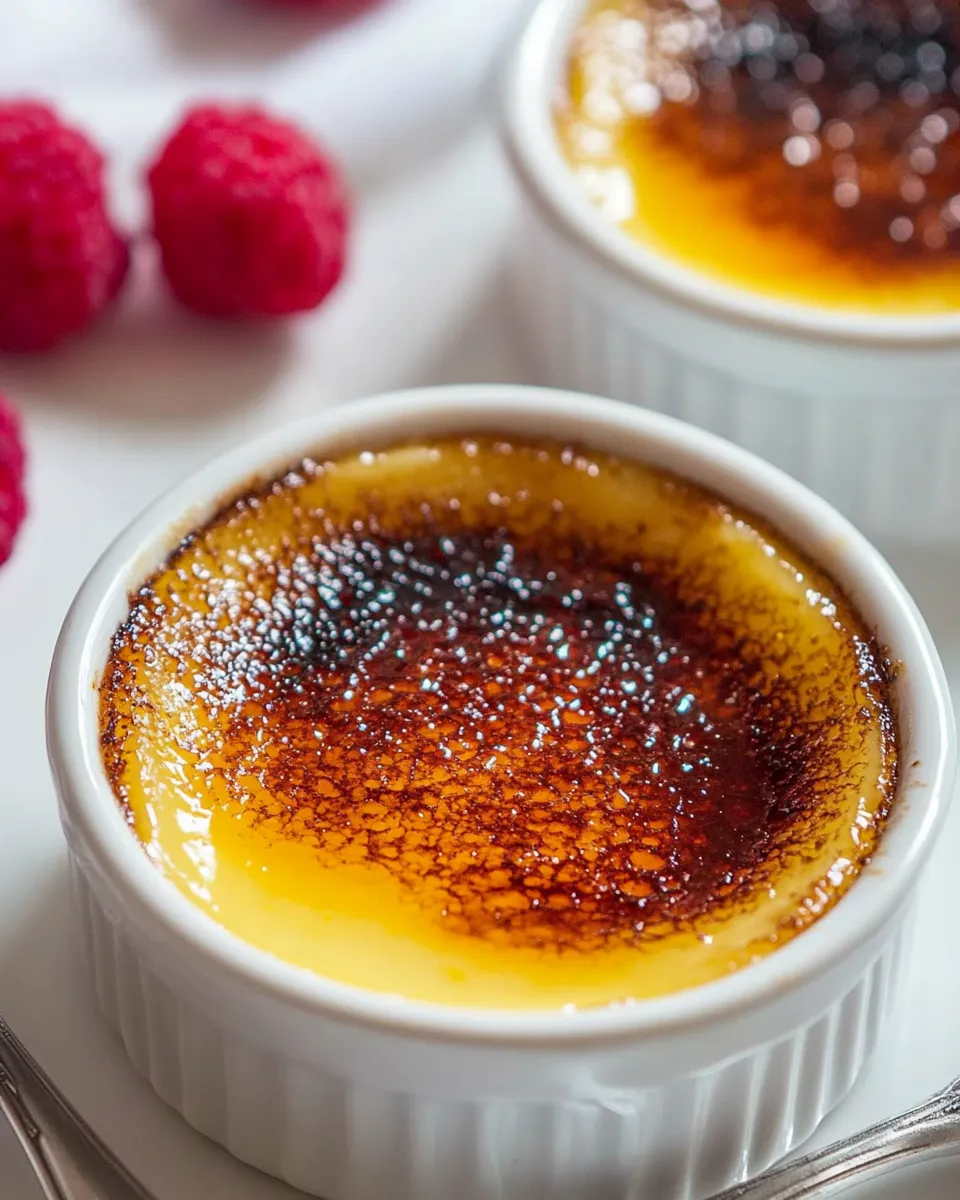
When I first started making creme brulee regularly, I treated the torch like a wild card. Over several batches I learned to keep the flame moving, to caramelize from a slight distance, and to trust the sugar’s color progression rather than a fixed time. Amber is the cue.
I also found chilling time matters: custards need at least two hours to set fully. If you rush this step the center won’t firm up and the final texture falls flat. Finally, a quick strain makes a dramatic difference—skip it and you’ll notice tiny bits in the custard.
How to Store & Reheat
Cover the chilled ramekins tightly and store in the refrigerator for up to 3 days. If you prepare them further in advance, caramelize the tops just before serving so the sugar remains crisp.
Reheating isn’t necessary, but if you prefer the custard slightly less cold, let it sit at room temperature for 10–15 minutes before torching. Avoid microwaving—heat will ruin the texture.
Troubleshooting Q&A
- My custard is grainy — what happened? Likely the eggs were partially cooked by cream that was too hot or by adding the cream too quickly. Next time, temper more slowly and strain the mixture.
- The centers didn’t set — how can I fix this? Bake a bit longer next time and ensure the water bath is at the correct level. The centers should have a slight jiggle but not be liquid.
- My sugar burned while torching — any tips? Hold the torch further away, keep it moving, and stop once the sugar reaches a deep amber. Burnt sugar tastes bitter, so start slow.
- How do I torch without a kitchen torch? You can place ramekins under a hot broiler for a short time, watching constantly and rotating the pan to evenly caramelize. It’s less precise, so stay close.
Make It Tonight
This creme brulee is an excellent candidate for a tonight-or-this-weekend dessert. The active prep time is short—mostly heating and whisking—then the oven and fridge do the rest. Gather the ingredients, warm the cream, temper the yolks patiently, bake them gently in a water bath, chill, and torch right before serving.
If you make just one change from your usual desserts, let it be this: give the custards the full chill time. Plan ahead, and the final caramel crack will be worth the wait. Happy baking—then cracking—and enjoy that first spoonful of creamy, vanilla-scented custard under a perfect caramel crust.

Easy Creme Brulee Recipe
Ingredients
Ingredients
- 2 cupsheavy whipping cream
- 5 large egg yolks
- 1/2 cupsugar plus extra for caramelizing
- 1 pinchfine sea salt
- 1 tspvanilla extract orvanilla bean paste
Instructions
Instructions
- Preheat the oven to 300°F (150°C).
- Pour 2 cups heavy whipping cream into a medium saucepan. Set over medium heat and stir frequently until the cream is steaming and just below a simmer (small bubbles will form at the edge). Remove from heat and stir in 1 tsp vanilla extract (or vanilla bean paste).
- In a medium bowl, whisk together 5 large egg yolks, 1/2 cup sugar, and 1 pinch fine sea salt until blended and slightly pale.
- With the yolk mixture in the bowl, begin tempering: while whisking constantly, very slowly drizzle the hot cream into the eggs. Start with just a few drops at a time for the first 20–30 seconds, then increase to a thin, steady stream once the mixture has warmed. Continue until all the cream is incorporated.
- Strain the custard mixture through a fine-mesh sieve into a large measuring cup or bowl with a pouring lip. Discard any solids left in the sieve.
- Place six 4-oz ramekins in a 9×13-inch casserole dish. Divide the strained custard evenly among the six ramekins.
- Carefully pour boiling water into the baking dish until it reaches about halfway up the sides of the ramekins (take care to avoid splashing into the custards).
- Bake at 300°F for 30–35 minutes, or until the custard centers are nearly set and have only a slight jiggle when the ramekin is gently shaken.
- Using tongs or oven mitts, carefully remove the ramekins from the water bath and transfer them to a wire rack. Cool to room temperature, then cover and refrigerate until fully chilled, at least 2 hours and up to 3 days.
- When ready to serve, sprinkle 1 1/2 to 2 tsp sugar evenly over each chilled custard. Using a kitchen torch, move the flame in a circular pattern across the surface until the sugar melts and caramelizes to a deep amber color. Allow the caramel to harden for a minute before serving.
Equipment
- Oven
- Medium Saucepan
- Whisk
- Fine Mesh Sieve
- measuring cup with pouring lip
- Ramekins
- 9x13 inch Baking Dish
- Tongs
- Wire Rack
- Kitchen torch
- Oven mitts
Notes
*If using larger ramekins, bake 5 minutes longer, or until nearly set with some wobble in the center.


