
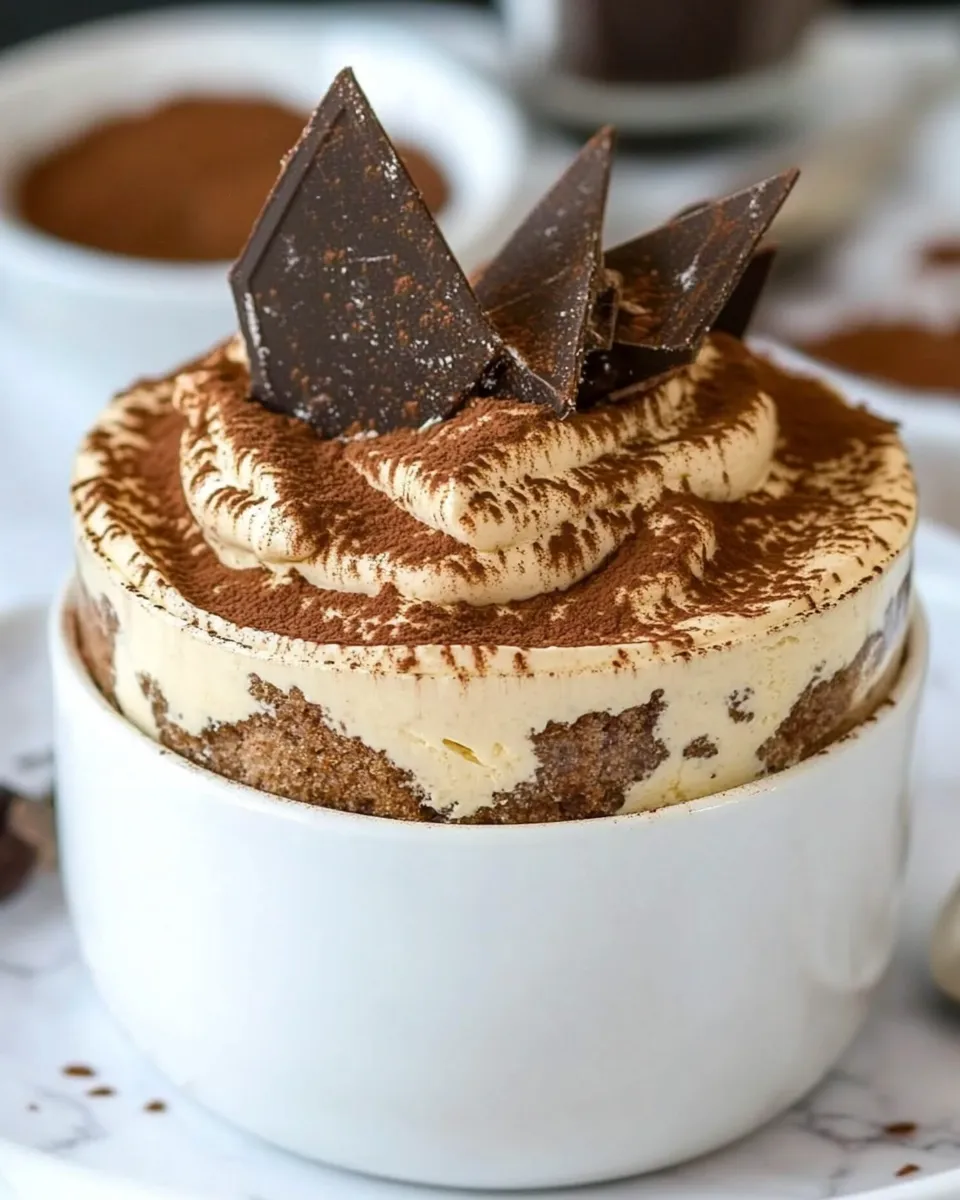
This Tiramisu Mousse is a quick, unfussy take on the classic dessert. It keeps the coffee and mascarpone heart of tiramisu but turns it into a light, velvety mousse you can spoon or pipe into individual glasses. It’s great for weeknight desserts, last-minute guests, or when you want something elegant without elaborate assembly.
I developed this as a simple, reliable recipe that doesn’t ask for tempering eggs or baking. The texture is airy thanks to whipped cream, and the flavor comes from instant coffee folded into a mascarpone-cream cheese base. You’ll finish each glass with cocoa and grated semi-sweet chocolate for the familiar bittersweet top note.
Below you’ll find exactly what I use, step-by-step directions, sensible swaps, common mistakes to avoid, and storage tips. No fluff—just clear, practical guidance so your mousse comes out light, balanced, and delicious every time.
What You’ll Gather
This section covers what to collect before you begin. Have the dairy chilled and the coffee dissolved and cooled before you start whipping. That short prep makes blending and folding easier and keeps the mousse stable.
Ingredients
- 1 ½ teaspoons instant coffee — dissolves in hot water to give the mousse its coffee flavor; I use the Starbucks Via packs.
- ¼ cup (59 ml) hot water — for dissolving the instant coffee; let the mixture cool before adding to the cheese.
- 1 cup (237 ml) heavy whipping cream — cold; whipped to stiff peaks to create the mousse’s light texture.
- 1 ½ cups (170 g) powdered sugar — sweetens the cheese mixture and helps stabilize it; sift if it’s clumpy.
- 8 ounces (226 g) marscarpone cheese or cream cheese — either works; low-fat cream cheese is fine but will be slightly tangier and less rich.
- 1 teaspoon vanilla extract — rounds out the flavors and balances the coffee.
- 1 tablespoon (5 g) unsweetened cocoa powder — for light dusting between layers to add classic tiramisu bitterness.
- 1 ounce (33 g) semi-sweet baking chocolate — grated over the top as the final finishing touch.
Tiramisu Mousse — Do This Next
- Stir 1 ½ teaspoons instant coffee into ¼ cup (59 ml) hot water until dissolved; let cool about 5 minutes.
- In a chilled bowl, beat 1 cup (237 ml) cold heavy whipping cream with a mixer until stiff peaks form; refrigerate until ready to use.
- In a separate bowl, beat 8 ounces (226 g) marscarpone cheese or cream cheese with 1 ½ cups (170 g) powdered sugar until smooth and no lumps remain.
- Mix in 1 teaspoon vanilla extract until combined.
- Add the cooled coffee to the cheese mixture: start with 1 tablespoon, mix, then add more as desired up to the remaining coffee (use up to the full ¼ cup) until you reach your preferred coffee flavor.
- Gently fold the chilled whipped cream into the coffee-cheese mixture in three additions, folding just until uniform and light.
- Transfer the mousse to a gallon-size Ziploc bag fitted with a large round or 1M tip, or use a spoon for layering.
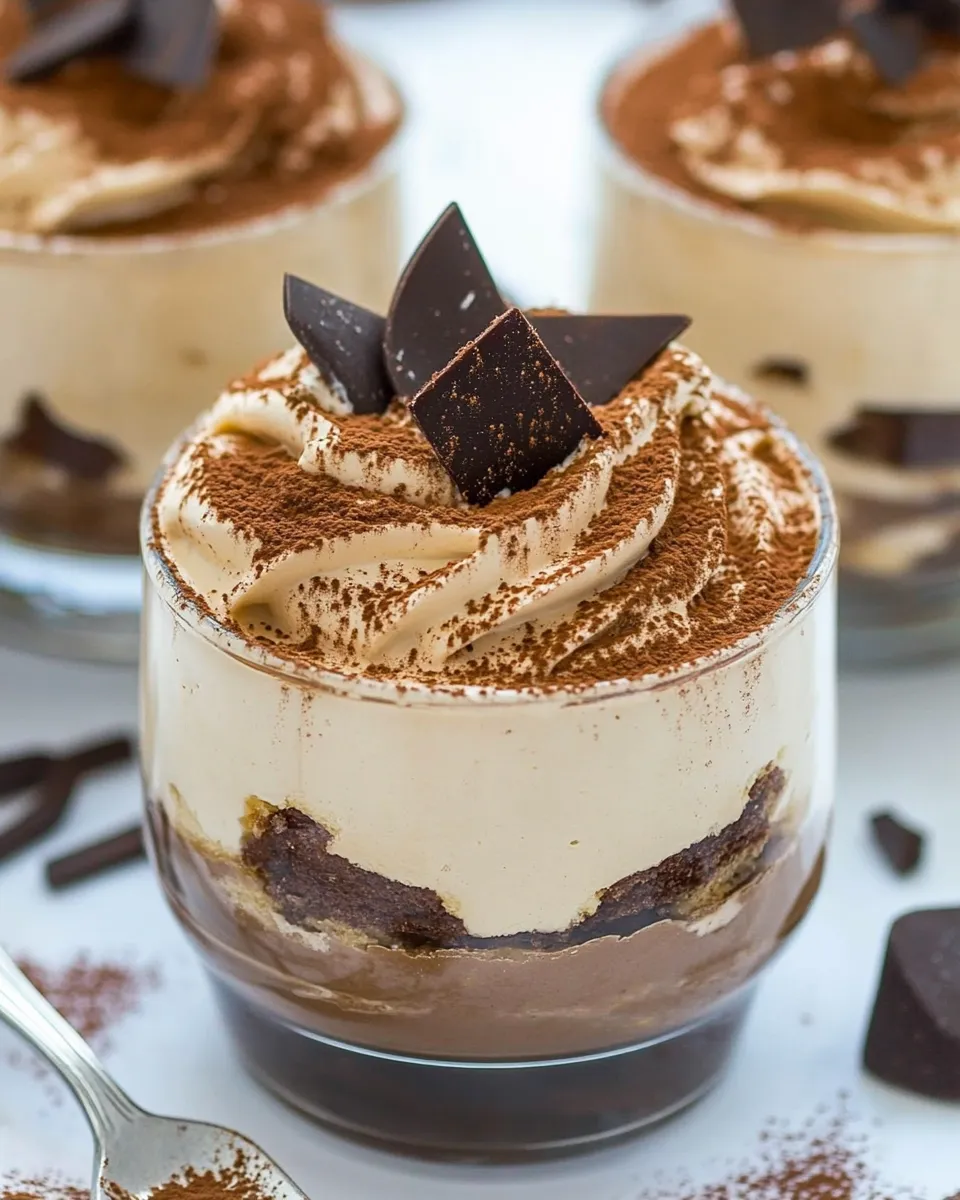
- Pipe or spoon a small amount of mousse into the bottoms of four serving glasses (about 6-ounce glasses). Lightly dust that layer with some of the 1 tablespoon (5 g) unsweetened cocoa powder.
- Continue layering mousse and a light dusting of cocoa powder until the glasses are filled, reserving the grated chocolate for the final topping.
- Grate the 1 ounce (33 g) semi-sweet baking chocolate over the top layer of each serving (instead of a final dusting of cocoa).
- Cover the glasses and chill in the refrigerator until ready to serve.
What You’ll Love About This Recipe
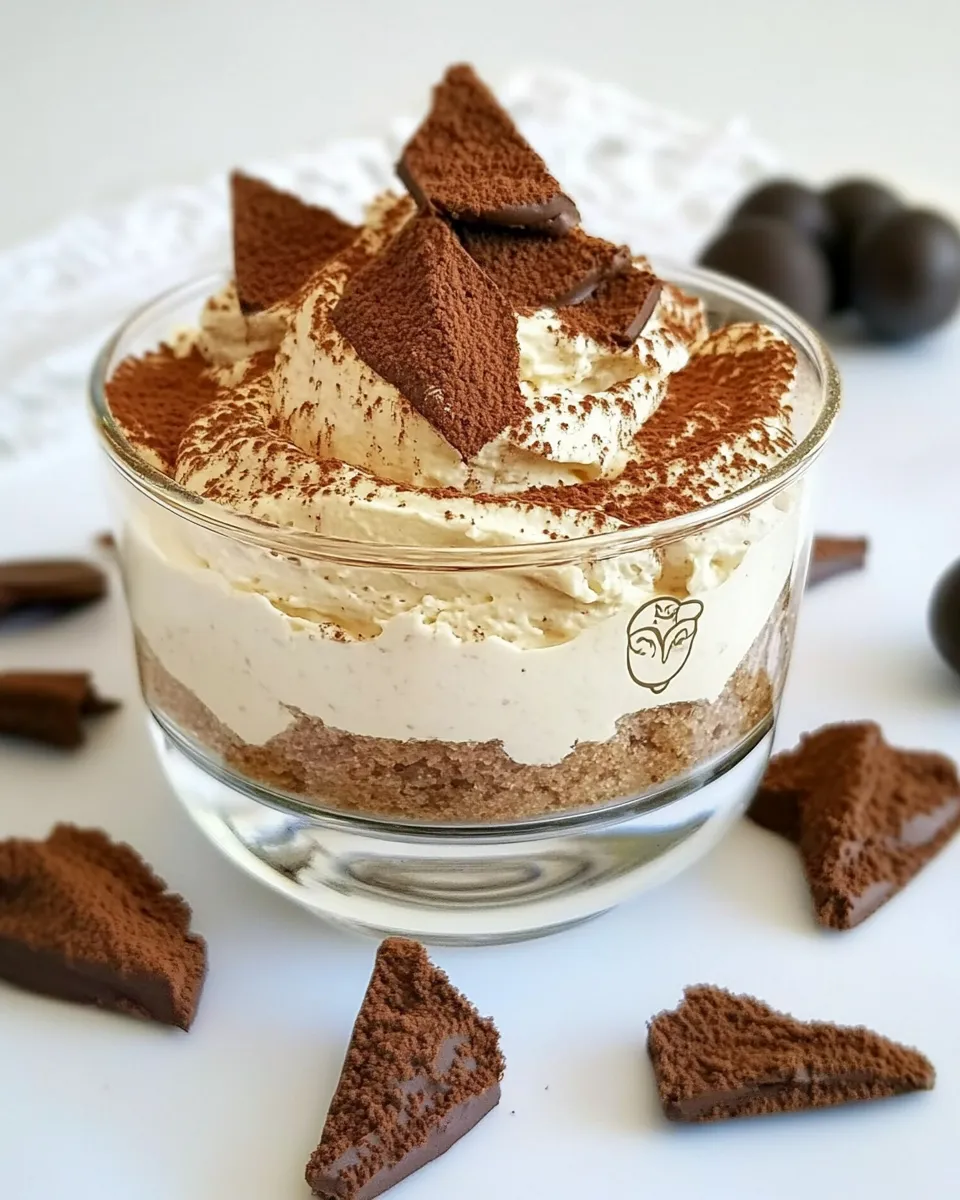
It’s fast without losing the tiramisu identity. The coffee infusion is adjustable, so you control how bold the dessert is. The whipped cream keeps everything light; the mascarpone (or cream cheese) keeps it rich and creamy. No ladyfingers to soak, no raw eggs to handle—just dependable texture and flavor.
It also scales well. Use the same ratios and portion into more or fewer glasses. The piping option makes it look groomed and professional with very little effort. And because it’s portioned, serving is tidy and simple.
Ingredient Swaps & Substitutions

- Marscarpone or cream cheese — the recipe already allows either. Marscarpone gives a silkier, richer result; cream cheese is tangier and more budget-friendly. Low-fat cream cheese is acceptable, but texture and richness will be reduced.
- Instant coffee — stick to instant for easy dissolving. If you prefer a milder profile, start with the 1 tablespoon suggested and add up to the full ¼ cup per your taste.
- Powdered sugar — this is used for smooth sweetness and quick dissolving into the cheese. If you use a different sweetener, expect a change in texture and sweetness intensity.
Equipment at a Glance
- Electric mixer or stand mixer (for whipping cream and beating the cheese)
- Chilled mixing bowl (cold bowl helps the cream whip faster)
- Measuring spoons and cups or a scale for accuracy
- Gallon-size Ziploc bag and large round or 1M piping tip — optional but helpful for neat layers
- Four 6-ounce serving glasses and a small grater for the chocolate
Mistakes That Ruin Tiramisu Mousse
- Adding hot coffee to the cheese too soon. If the coffee is warm rather than cooled, it can make the cheese mixture loose or cause the whipped cream to deflate when combined.
- Overmixing the whipped cream into the cheese mixture. Folding gently in three additions preserves air. Stirring vigorously kills volume and yields a dense mousse.
- Using room-temperature cream. Warm cream won’t whip properly. Chill the cream and bowl for best results.
- Skipping the cocoa dusting or reserving all the chocolate for the top. The light cocoa between layers adds balance. If you skip it, the dessert leans overly sweet and one-note.
- Piping too aggressively. If you overfill or force the bag too fast, layers can smear and lose contrast. Pipe slowly for neat layers.
Spring–Summer–Fall–Winter Ideas
Spring: Keep it bright. Serve chilled out of the fridge straight after a short rest; the mousse feels light after a heavy meal.
Summer: The glass portions are ideal for hot weather—cool and individual. Make them ahead and pull them out when guests arrive so people can enjoy chilled servings.
Fall: Let the coffee flavor be a little stronger. Start with a tablespoon of the dissolved coffee and add the full ¼ cup if you want a pronounced roast note that pairs well with crisp evenings.
Winter: Let portions sit in the fridge longer so flavors meld—overnight is fine. The grated semi-sweet chocolate on top contrasts nicely with the creamy interior after a day of chilling.
Insider Tips
- Chill everything first. Cold cream and a chilled bowl make whipping faster and more stable.
- Start small with coffee. The recipe instructs you to begin with 1 tablespoon and add more if desired. Follow that. It’s easy to add, impossible to remove.
- Fold in thirds. Add whipped cream in three portions and fold gently to keep the mousse airy.
- Use a piping bag for clean layers. If you want pretty glasses, transfer mousse to a Ziploc with the tip cut off or use an actual piping bag. Otherwise a spoon works fine.
- Freeze your grater. Chill the chocolate briefly so it grates more cleanly without melting in your hands.
Make-Ahead & Storage
You can assemble the mousse glasses and cover them in the refrigerator for convenient service. They hold their texture well for a day or two when kept chilled and covered. For best flavor, add the grated chocolate right before serving so it keeps its texture and appearance.
If you need to prepare components ahead: whip the cream and keep it tightly covered in the fridge for a few hours, and keep the coffee-coffee-cheese mixture covered separately. Fold and assemble within the same day for the best lift and mouthfeel.
FAQ
- Can I use only cream cheese? Yes. The recipe already allows cream cheese instead of mascarpone. Expect a slightly tangier and less silky result.
- Can I make this without a mixer? You can, but whipping cream by hand takes time and effort. A mixer gives more reliable, stiff peaks.
- How strong should the coffee flavor be? It’s personal. Start with 1 tablespoon of the dissolved coffee, taste, then add up to the full ¼ cup if you want it stronger.
- Do the glasses need to chill overnight? They don’t need to—chilling until the mousse is set (a couple of hours) is sufficient. Overnight makes the flavors meld more.
Final Thoughts
This Tiramisu Mousse gives you the essence of tiramisu with less fuss. The method is forgiving: keep ingredients cold, add coffee slowly, and fold gently. The result is an elegant, portioned dessert that looks pulled-together and tastes like you spent more time than you did.
Make the mousse for a casual dinner or a holiday spread. It’s easy to scale, easy to store, and reliably satisfying. If you try piping the layers, send a photo—I love seeing how readers present theirs. Enjoy.

Easy Tiramisu Mousse
Ingredients
Ingredients
- 1 1/2 teaspoonsinstant coffeeI use the Starbucks Via packs
- 1/4 cup 59 ml hot water
- 1 cup 237 ml heavy whipping creamcold (see note)
- 1 1/2 cups 170 g powdered sugarsee note
- 8 ounces 226 g marscarpone cheese or cream cheeselow fat cream cheese is fine
- 1 teaspoonvanilla extract
- 1 tablespoon 5 g unsweetened cocoa powder
- 1 ounce 33 g semi-sweet baking chocolate
Instructions
Instructions
- Stir 1 ½ teaspoons instant coffee into ¼ cup (59 ml) hot water until dissolved; let cool about 5 minutes.
- In a chilled bowl, beat 1 cup (237 ml) cold heavy whipping cream with a mixer until stiff peaks form; refrigerate until ready to use.
- In a separate bowl, beat 8 ounces (226 g) marscarpone cheese or cream cheese with 1 ½ cups (170 g) powdered sugar until smooth and no lumps remain.
- Mix in 1 teaspoon vanilla extract until combined.
- Add the cooled coffee to the cheese mixture: start with 1 tablespoon, mix, then add more as desired up to the remaining coffee (use up to the full ¼ cup) until you reach your preferred coffee flavor.
- Gently fold the chilled whipped cream into the coffee-cheese mixture in three additions, folding just until uniform and light.
- Transfer the mousse to a gallon-size Ziploc bag fitted with a large round or 1M tip, or use a spoon for layering.
- Pipe or spoon a small amount of mousse into the bottoms of four serving glasses (about 6-ounce glasses). Lightly dust that layer with some of the 1 tablespoon (5 g) unsweetened cocoa powder.
- Continue layering mousse and a light dusting of cocoa powder until the glasses are filled, reserving the grated chocolate for the final topping.
- Grate the 1 ounce (33 g) semi-sweet baking chocolate over the top layer of each serving (instead of a final dusting of cocoa).
- Cover the glasses and chill in the refrigerator until ready to serve.
Equipment
- Mixer
- Chilled Bowl
- gallon-size Ziploc bag or piping bag
- large round tip or 1M tip (optional)
- Grater
- Serving glasses
- Spoon
Notes
If using whipped topping, reduce powdered sugar by 1/4 cup so it’s not too sweet.
Make sure coffee is cool before adding to the mixture!


