
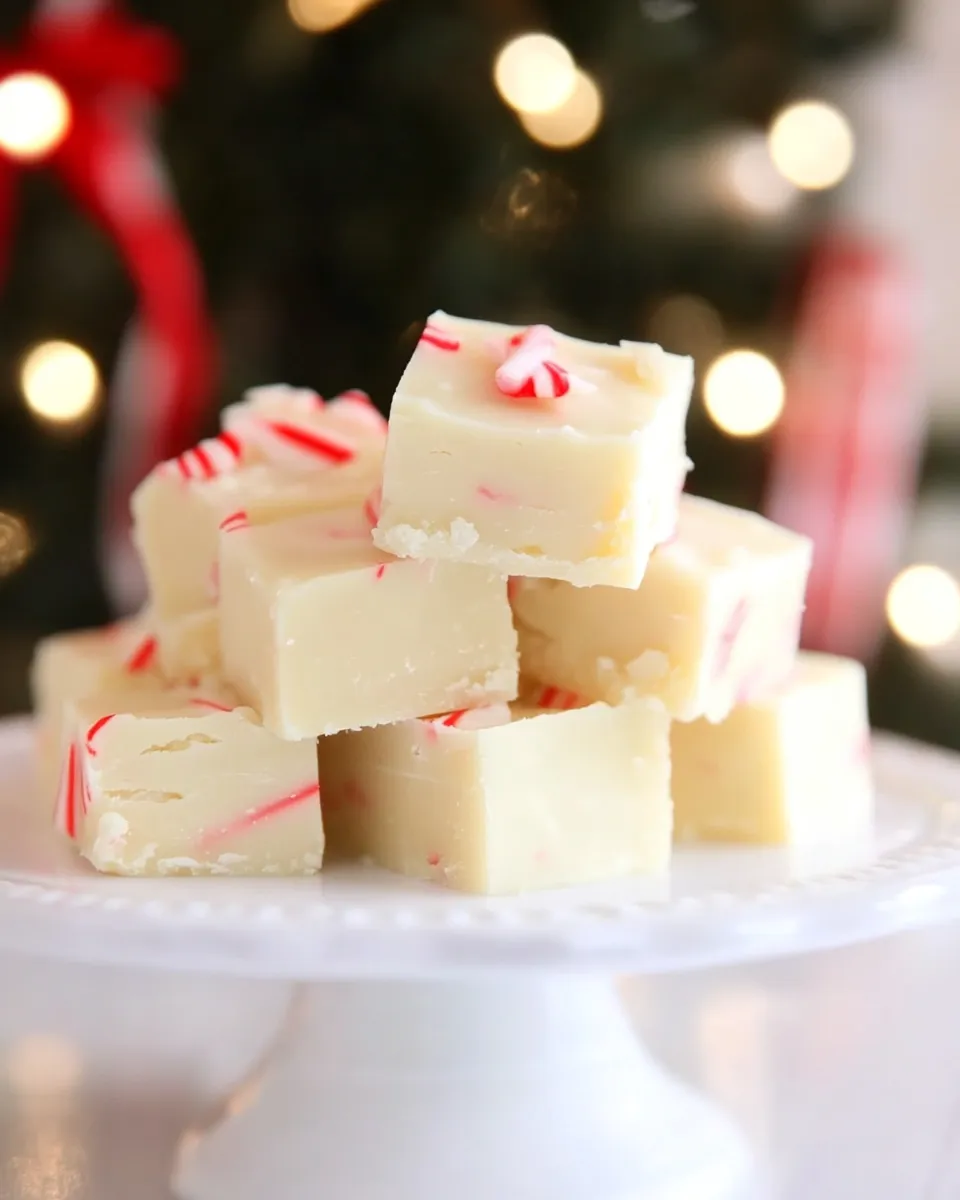
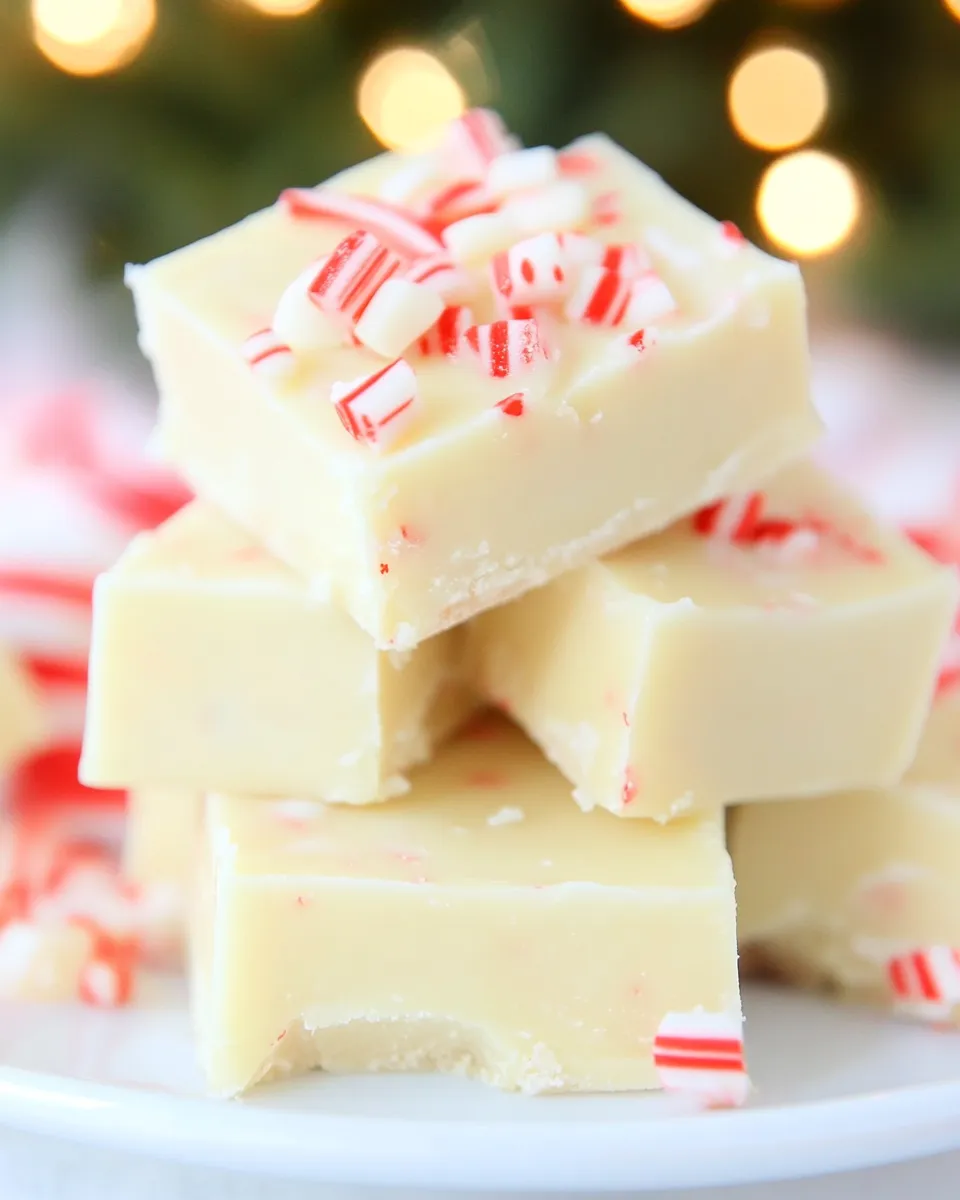
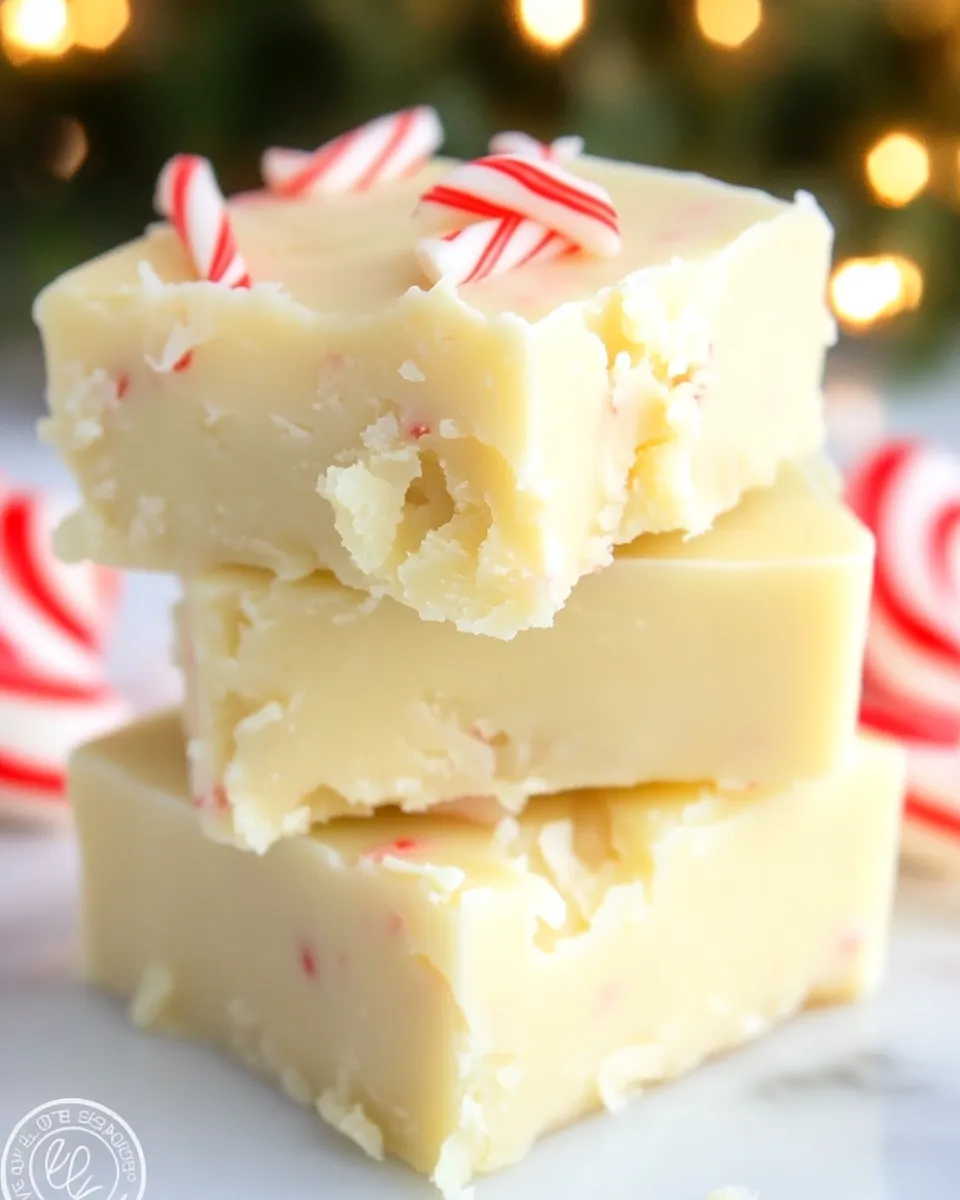
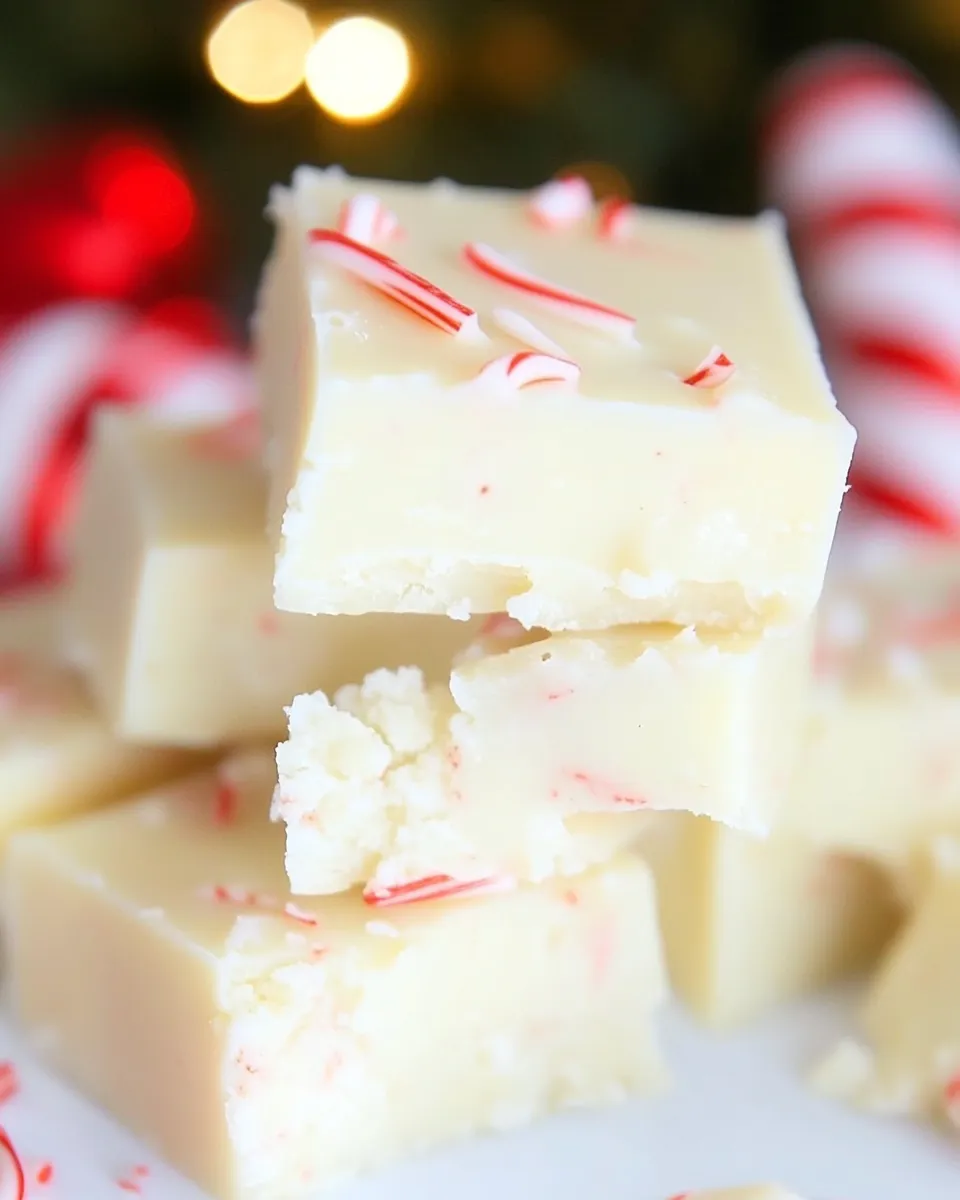
This white chocolate peppermint fudge is the kind of recipe I reach for when I need something festive, fast, and reliably delicious. It loves a holiday cookie plate, makes a sweet neighbor gift, and slices into perfect little squares for a party tray. The texture is creamy; the peppermint gives bright, cool contrast to the rich white chocolate.
What I value most about this version is its predictability. A short ingredient list, one pan to melt in, and a sheet pan to set it in — very little can go wrong when you keep the heat gentle and follow the steps. You’ll have fudge firm enough to slice in a few hours with no tempering, no candy thermometer, and no long, fussy steps.
Below I’ll walk through the ingredients, the exact method, helpful swaps for different diets, and storage tips so your fudge stays perfect. Read the steps first, prepare your pan and tools, and you’ll be cutting squares by the end of the afternoon.
The Ingredient Lineup
Ingredients
- 112 ounce bag white baking chips — the base of the fudge; provides the sweet, creamy body and sets firm when cooled.
- 2cupsmini marshmallows — add chew and help stabilize the texture so the fudge is smooth and spreadable when warm.
- 1/4cupmilk — thins the chocolate slightly and helps create a creamy mouthfeel; whole milk or 2% works well.
- 14 ounce stick of butter, sliced — enriches the mixture and promotes a glossy, tender set; sliced so it melts evenly.
- 1/2teaspoonpeppermint extract — concentrated flavor boost; a little goes a long way, stir in off the heat.
- Peppermint candycrushed — for texture and festive color; press into the top of the fudge so pieces stick and don’t fall off.
Make White Chocolate Peppermint Fudge: A Simple Method
- Line an 8″ x 8″ square baking pan with aluminum foil or parchment paper, leaving an overhang for easy removal. Lightly grease the lined pan with cooking spray or butter. Set aside.
- If your peppermint candy is not already crushed, place the Peppermint candy (crushed) in a zip-top bag, remove as much air as possible, and crush to small pieces with the flat end of a meat mallet or rolling pin. Transfer crushed candy to a small bowl and set aside.
- In a medium saucepan, combine the 112 ounce bag white baking chips, 2 cups mini marshmallows, 1/4 cup milk, and the 14 ounce stick of butter (sliced).
- Heat the saucepan over medium-low heat, stirring constantly with a heatproof spatula or wooden spoon, until the chips and marshmallows are fully melted and the mixture is creamy and smooth. Keep the heat low enough to prevent boiling or scorching.
- Remove the pan from the heat and stir in 1/2 teaspoon peppermint extract until evenly incorporated.
- Pour the melted mixture into the prepared baking pan and use a spatula to smooth the top. Evenly sprinkle the crushed peppermint candy over the surface and gently press the pieces into the fudge so they stick.
- Refrigerate the pan uncovered for 4–6 hours, or until the fudge is firm.
- Use the foil or parchment overhang to lift the fudge from the pan and transfer it to a cutting board. Cut into 1–2″ by 1–2″ squares.
Why It’s My Go-To
This recipe is stubbornly simple. It doesn’t demand precision beyond keeping the heat low while melting. That single habit — patient, gentle melting — is what separates glossy, creamy fudge from grainy, broken candy.
It’s also forgiving of minor variations. Whether your chips are a touch older or your butter runs a little soft, the marshmallows and the milk help bind everything into a stable, sliceable block. And the peppermint is a small but bright addition that turns otherwise one-note white chocolate into a holiday standout.
Vegan & Vegetarian Swaps
- Vegetarian: This recipe is already vegetarian-friendly as written. Ensure your marshmallows are marked vegetarian if that’s a concern.
- Vegan option: Use vegan white chocolate baking chips, a plant-based stick-style butter substitute, and vegan marshmallows. Swap 1/4 cup dairy milk for an unsweetened plant milk such as oat or soy.
- Flavor variation without dairy: Make the same ingredient swaps and be extra gentle when melting — some vegan chocolates react differently to heat and benefit from lower temperatures and patient stirring.
Gear Checklist
- 8″ x 8″ square baking pan — the recipe’s specified size; gives a perfect thickness for cutting 1–2″ squares.
- Aluminum foil or parchment paper — for lining and easy removal.
- Medium saucepan — use one with a heavy bottom to reduce hotspots.
- Heatproof spatula or wooden spoon — for constant stirring while melting.
- Zip-top bag and rolling pin or meat mallet — for crushing peppermint candy safely.
- Small bowl — to hold crushed candy while you melt and pour.
- Refrigerator space — the pan chills uncovered for several hours, so plan accordingly.
Steer Clear of These
Don’t rush the melting. High heat is the most common cause of trouble. It can scorch the white baking chips, separate the fats, or cause the marshmallows to seize into lumps. Always keep the heat at medium-low and stir constantly.
Don’t skip the lining. Even a well-greased pan can make removal difficult. The foil or parchment overhang is worth the extra minute; you’ll lift the whole block out cleanly for neat cuts.
Don’t overload the top with oversized candy pieces. Large shards can make cutting messy and increase breakage. Crush to small pieces that will adhere when gently pressed into the warm surface.
In-Season Flavor Ideas
- Holiday peppermints are classic, but you can layer in other seasonal flavors: a light sprinkle of crushed freeze-dried raspberries for a pink accent, a dusting of cocoa powder for contrast, or a few chopped toasted nuts for texture. Keep the candy proportions subtle so the white chocolate still shines.
- For a winter citrus twist, grate a small amount of orange zest into the melted mixture off the heat before pouring. Use sparingly — zest is potent and can overpower the peppermint.
- Make a striped look by drizzling a thin line of melted dark chocolate over the top before sprinkling peppermint. Chill briefly, then swirl with a skewer for a marbled effect.
Cook’s Notes
Melting and Heat Control
White chocolate is less tolerant of heat than dark chocolate. Keep the pan on medium-low and stir slowly but constantly until smooth. If the mixture looks grainy, reduce the heat and keep stirring — the chips and marshmallows will come together as residual heat distributes.
Texture Adjustment
If your mixture seems too thick to spread, a teaspoon or two of additional milk can help. Add a tiny splash at a time off the stove and stir until you reach a spreadable consistency. Likewise, if the mixture is thin, pour quickly into the pan; it will firm as it cools.
Candy Crushing Tips
Place the candy in a double layer of bag or wrap with a towel before hitting. Aim for small, uniform pieces so they press into the fudge evenly and look tidy on the cut squares.
Best Ways to Store
Once cut, store the squares in an airtight container in a single layer or separated by parchment. At room temperature in a cool, dry place, they’ll hold for several days. If your kitchen is warm or humid, keep them refrigerated.
Refrigerator: place in an airtight container for up to two weeks. Let squares come to near room temperature before serving for the best texture.
Freezer: for longer storage, freeze squares in a single layer on a tray until firm, then stack with parchment between layers in an airtight container. Freeze up to 2 months. Thaw in the refrigerator before bringing to room temperature to avoid condensation on the surface.
Questions People Ask
- Can I halve or double the recipe? Yes. Halving fits a smaller pan or loaf pan well. Doubling will require a larger pan or two 8″ pans; adjust chilling time as a thicker batch will take longer to set.
- Why did my fudge turn grainy? Usually from overheating or not stirring consistently while melting. Return to very low heat and stir; often the fats will re-emulsify if you’re patient. If it’s truly broken, a small splash of hot cream (warmed separately) and continuous stirring can sometimes rescue it.
- Can I skip the marshmallows? Marshmallows help with texture and stability. You can try omitting them, but expect a denser, more brittle set. The marshmallows also assist in creating a creamy mouthfeel with minimal effort.
- Do I have to refrigerate it uncovered for 4–6 hours? The recipe’s recommended uncovered refrigeration helps the top set cleanly and avoids trapping condensation. Cover once the surface is set if you need to keep refrigerator flavors away.
Serve & Enjoy
Use the foil or parchment overhang to lift the block out cleanly. Cut into 1–2″ by 1–2″ squares for bite-sized treats. If you need perfectly neat edges, chill until very firm and use a sharp knife warmed in hot water, wiped dry between cuts.
These squares are lovely on a dessert tray alongside cookies or biscotti. They also make cheerful gifts: stack a few in a small box or cellophane bag and tie with a ribbon. Because they slice neatly and travel well, they’re perfect for potlucks and holiday hosting.
Make them a day ahead when possible. The flavors meld and the peppermint becomes pleasantly integrated with the white chocolate. Keep a few on hand for quick hostess gifts, and don’t be surprised if they’re the first thing to disappear at parties.

Easy White Chocolate Peppermint Fudge Recipe
Ingredients
Ingredients
- 112 ounce bag white baking chips
- 2 cupsmini marshmallows
- 1/4 cupmilk
- 14 ounce stick of butter sliced
- 1/2 teaspoonpeppermint extract
- Peppermint candycrushed
Instructions
Instructions
- Line an 8" x 8" square baking pan with aluminum foil or parchment paper, leaving an overhang for easy removal. Lightly grease the lined pan with cooking spray or butter. Set aside.
- If your peppermint candy is not already crushed, place the Peppermint candy (crushed) in a zip-top bag, remove as much air as possible, and crush to small pieces with the flat end of a meat mallet or rolling pin. Transfer crushed candy to a small bowl and set aside.
- In a medium saucepan, combine the 112 ounce bag white baking chips, 2 cups mini marshmallows, 1/4 cup milk, and the 14 ounce stick of butter (sliced).
- Heat the saucepan over medium-low heat, stirring constantly with a heatproof spatula or wooden spoon, until the chips and marshmallows are fully melted and the mixture is creamy and smooth. Keep the heat low enough to prevent boiling or scorching.
- Remove the pan from the heat and stir in 1/2 teaspoon peppermint extract until evenly incorporated.
- Pour the melted mixture into the prepared baking pan and use a spatula to smooth the top. Evenly sprinkle the crushed peppermint candy over the surface and gently press the pieces into the fudge so they stick.
- Refrigerate the pan uncovered for 4–6 hours, or until the fudge is firm.
- Use the foil or parchment overhang to lift the fudge from the pan and transfer it to a cutting board. Cut into 1–2" by 1–2" squares.
Equipment
- 8x8-inch square baking pan
- Aluminum foil or parchment paper
- Zip-Top Bag
- Meat Mallet or Rolling Pin
- Small Bowl
- Medium Saucepan
- heatproof spatula or wooden spoon
- Refrigerator
- Cutting Board
Notes
You may use salted butter for this recipe. If using unsalted, add a pinch of salt if desired.
To use regular size marshmallows instead of the mini size, you will need 16 regular size marshmallows.


