
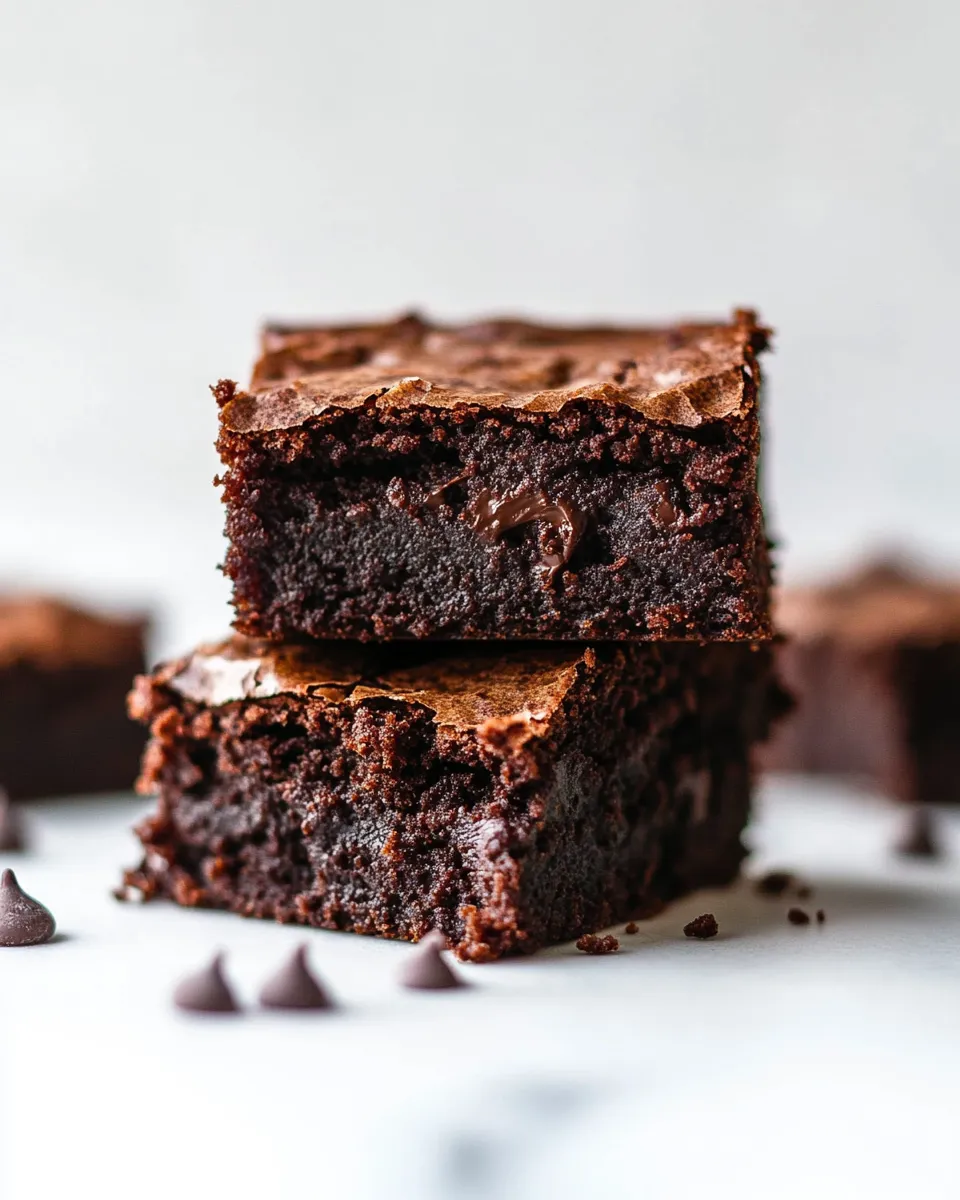
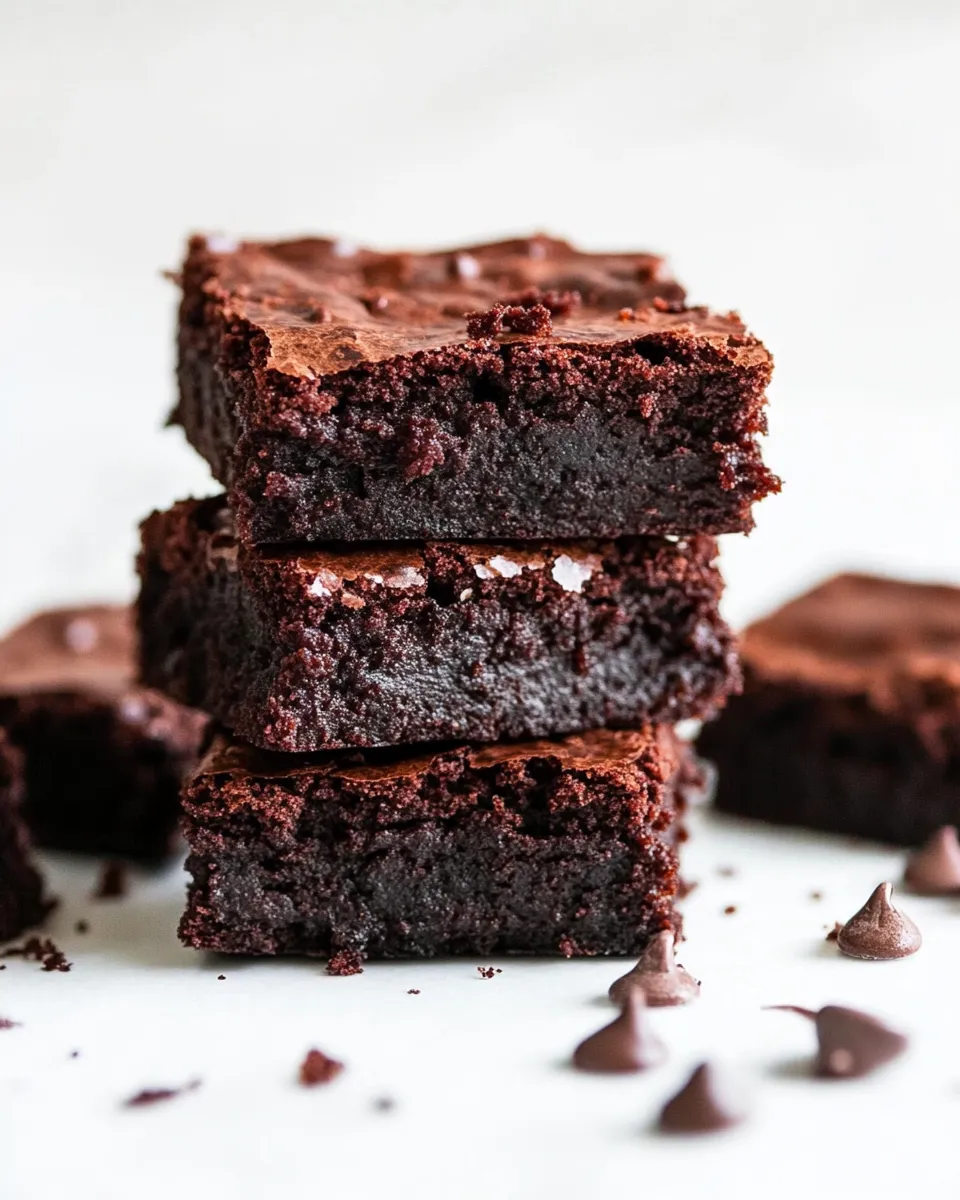
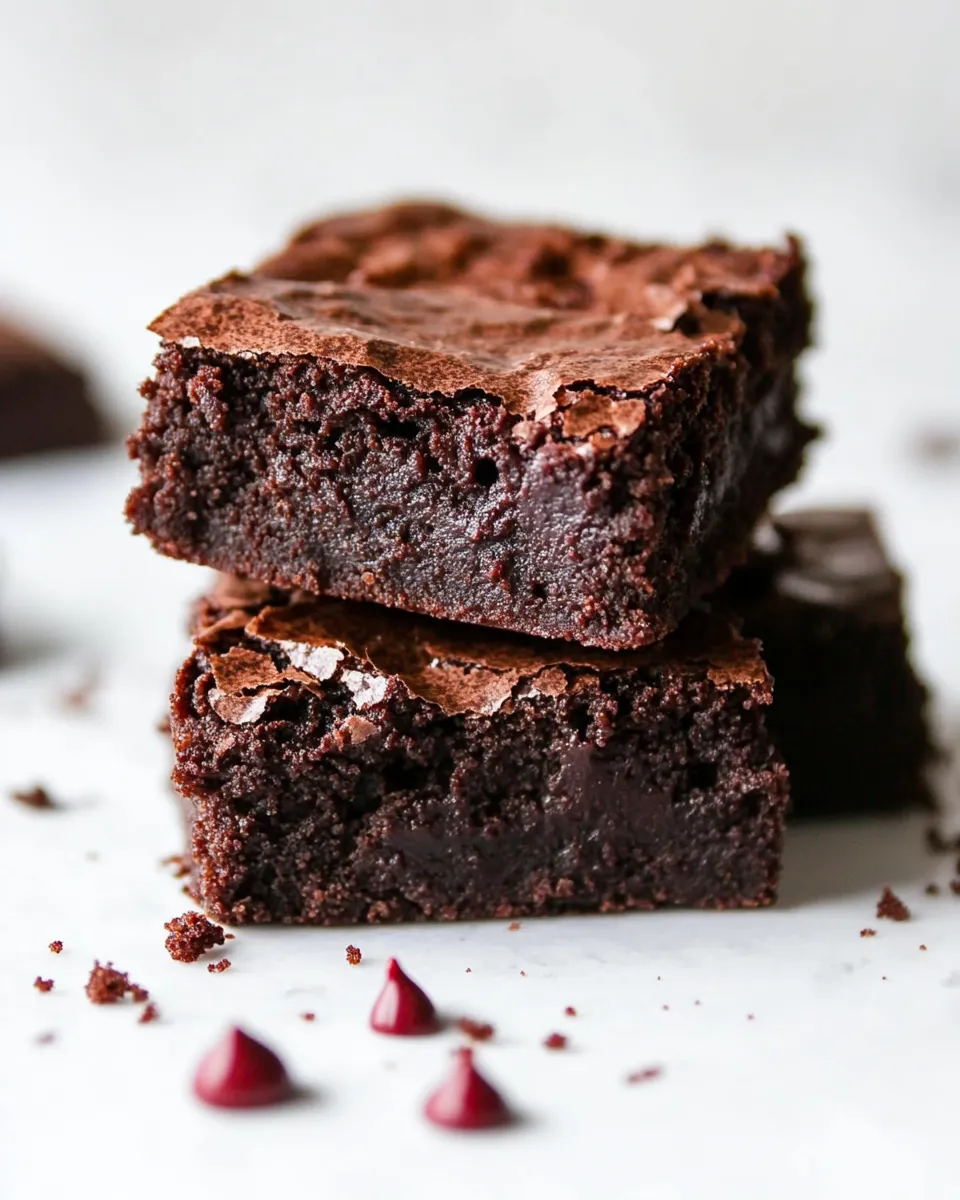
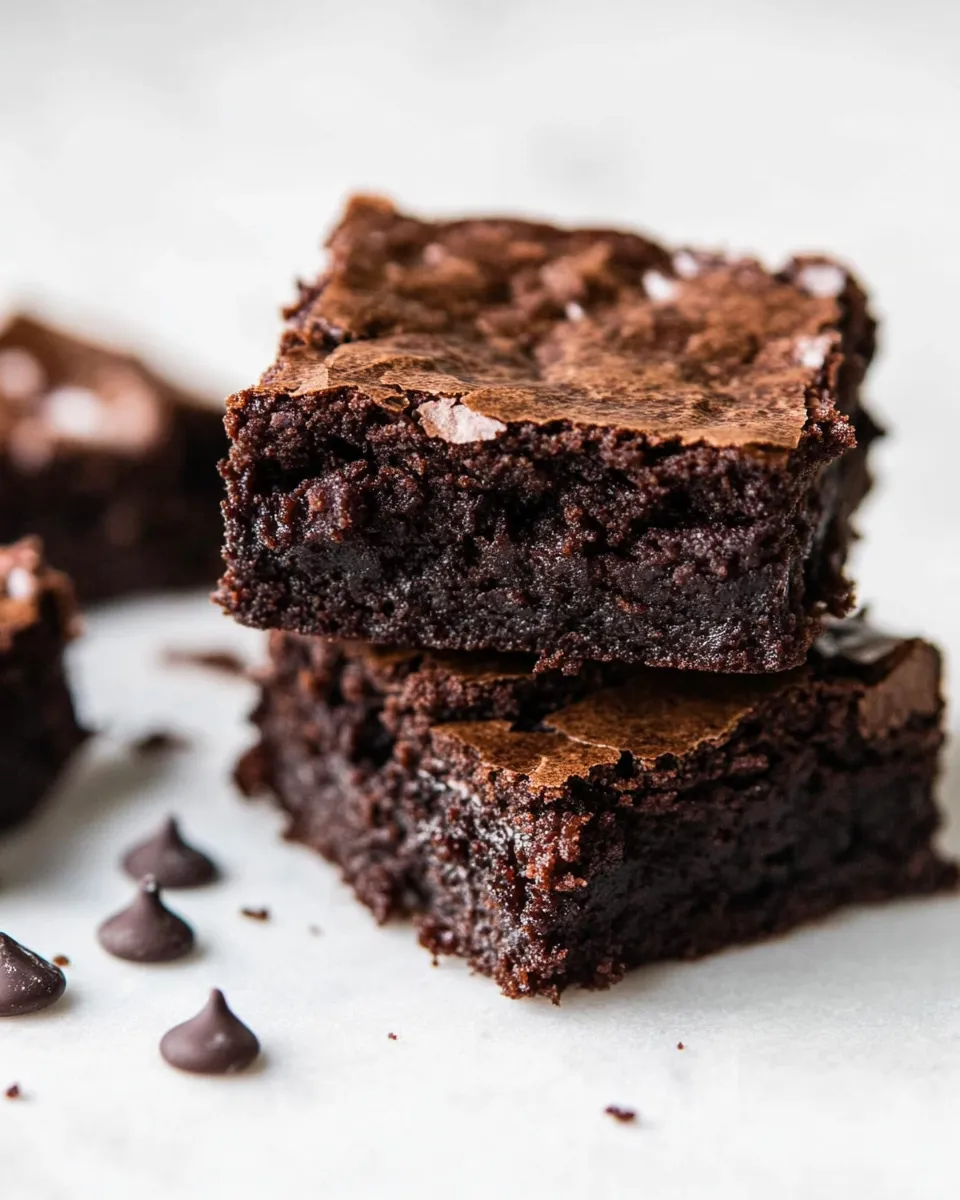
I make these eggless brownies every time someone asks for a fudgy, reliable treat that doesn’t rely on eggs. They’re forgiving, quick to pull together, and have that glossy, crackly top everyone loves. The texture lands between a dense brownie and a tender bar — rich, chocolatey, and easy to slice once cooled.
This recipe uses a simple double-boiler step to melt butter, oil, and sugar together, which concentrates flavor and gives the surface that beautiful sheen. A little Greek yogurt adds moisture and helps with structure in place of eggs. No special equipment, no mystery ingredients, just straightforward technique and a delicious result.
Below you’ll find the ingredients, the exact step-by-step method, and practical tips to keep these brownies consistent every time. Read the sections that matter to you — whether you want swaps, storage advice, or ways to avoid the common missteps — and you’ll be rewarded with a pan full of chocolate goodness.
What’s in the Bowl
Ingredients
- 4 tablespoons unsalted butter — adds richness and helps the top set shiny and crackly.
- 4 tablespoons avocado oil (or any neutral flavored oil) — keeps brownies moist and tender; neutral oils won’t overpower chocolate.
- 1 cup sugar — sweetness and structure; melting it with the fats encourages that glossy surface.
- 1/4 cup plain non-fat Greek yogurt — the egg substitute: provides moisture, slight tang, and binding power.
- 1 teaspoon vanilla — flavor enhancer; don’t skip it.
- 3/4 cup all-purpose or GF 1:1 flour (125g) — the base; use a 1:1 gluten-free blend if needed.
- 1/2 cup unsweetened cocoa powder (40g) — concentrated chocolate flavor; sift if lumpy.
- 1 tablespoon cornstarch — helps with structure and gives a slightly fudgy set.
- 1/2 teaspoon baking soda — a touch of lift so brownies aren’t too dense.
- 1/4 teaspoon salt — balances sweetness and rounds out chocolate.
- 2 tablespoons hot water — loosens the batter slightly for a smooth texture.
- 1/4 cup mini semi-sweet chocolate chips — pockets of melty chocolate; optional but delightful.
Build Eggless Brownies Step by Step
- Preheat the oven to 325°F (160°C). Line the bottom of an 8×8-inch pan with parchment paper and spray or lightly grease the sides.
- Fill a medium pot about halfway with water and bring it to a boil. Place a heatproof bowl (glass or metal) over the pot to form a double boiler, making sure the bottom of the bowl does not touch the water.
- Add the 4 tablespoons unsalted butter, 4 tablespoons avocado oil, and 1 cup sugar to the bowl. Whisk over the simmering water until the butter is fully melted and the mixture is uniform and slightly grainy.
- Remove the bowl from the heat. Stir in the 1 teaspoon vanilla and 1/4 cup plain non-fat Greek yogurt until combined.
- Add 3/4 cup all-purpose (or GF 1:1) flour, 1/2 cup unsweetened cocoa powder, 1 tablespoon cornstarch, 1/2 teaspoon baking soda, and 1/4 teaspoon salt. Stir gently just until the dry ingredients are incorporated and no large dry streaks remain.
- Stir in the 2 tablespoons hot water. Then fold in the 1/4 cup mini semi-sweet chocolate chips, mixing as little as possible to avoid deflating the batter.
- Pour the batter into the prepared pan and spread it evenly.
- Bake for 35–40 minutes, until the top is set and slightly crackly (a toothpick inserted near the center should come out with a few moist crumbs).
- Remove the pan from the oven and immediately place it on a heatproof pad or trivet, then transfer the pan to the refrigerator for 10 minutes to cool briefly.
- Remove the pan from the refrigerator and let the brownies cool completely at room temperature before lifting out, slicing, and serving.
Top Reasons to Make Eggless Brownies
- They’re foolproof: the double-boiler step stabilizes the batter and brings out richer chocolate flavor without complicated steps.
- Egg-free but not compromise: you still get a fudgy, tender texture thanks to yogurt and the balance of fats.
- Minimal special ingredients: most kitchens already have everything on hand or easy substitutions are available.
- Great for allergy considerations: they work for folks who can’t or prefer not to eat eggs (watch dairy if that’s a concern).
- Texture control: you can hit fudgier or more cake-like results by adjusting bake time slightly within the given window.
- Transportable and sliceable: chill briefly, then cool fully — they hold shape well for boxes, bake sales, and picnics.
No-Store Runs Needed
If you bake semi-regularly, this recipe is a pantry-friendly rescue. The list uses staples: butter, a neutral oil, sugar, flour, cocoa, a touch of cornstarch, baking soda, salt, and chocolate chips. The only slightly unusual item might be plain non-fat Greek yogurt — regular yogurt works fine if you have it. Avocado oil can be swapped for any neutral oil you keep on hand; I often use canola or light olive oil. In short: you likely won’t need to make a special trip to the store.
Cook’s Kit
Essentials
- 8×8-inch baking pan — for the correct thickness and bake time.
- Parchment paper — lines the pan and makes removal easy.
- Medium pot and a heatproof bowl — to form the double boiler.
- Whisk and spatula — whisk for the melted mixture, spatula to fold gently.
- Measuring cups and spoons — accurate amounts matter for texture.
Avoid These Traps
- Overmixing dry into wet — mixing until no large streaks remain is enough; overworking develops gluten and ruins fudginess.
- Using water that’s too hot for the double boiler — the bowl should sit above simmering water, not boil in it. Too much direct heat can scorch sugar or melt things unevenly.
- Baking past the window — 35–40 minutes is the guideline. A toothpick should pull a few moist crumbs; if it comes out dry, the brownies will be drier than intended.
- Skipping the brief chill — moving the hot pan straight to room temperature can give you a messier top and softer slices. Ten minutes in the fridge firms them just enough for handling.
- Not lining the pan — these brownies are easier to slice cleanly when you lift the whole slab out on the parchment.
Dietary Swaps & Alternatives
- Butter — swap with vegan butter if you need dairy-free; quality matters for flavor.
- Avocado oil — any neutral-flavored oil works (canola, grapeseed, light olive oil).
- Greek yogurt — for a dairy-free option, use plain unsweetened soy or coconut yogurt (texture may vary slightly).
- All-purpose flour — the recipe accepts a 1:1 gluten-free flour blend as listed; weigh if you can for consistency.
- Chocolate chips — swap semi-sweet for dark chips, or omit for a less sweet bar.
- Sugar — granulated white sugar gives the crackly top; if you must reduce, expect a softer top and slightly different texture.
Little Things that Matter
- Measure flour by spooning into the cup and leveling or, better, weigh it. Too much flour dries the brownies.
- Sift cocoa if it’s lumpy; dry lumps can leave streaks or pockets of undissolved chocolate powder.
- When folding in chips, do it gently. The batter benefits from a little air; aggressive stirring will knock that out.
- Let the pan cool fully before slicing. Warm brownies are soft and smear; cooled ones slice cleanly and hold their shape.
- Use a sharp knife and wipe it between cuts for neat squares.
Meal Prep & Storage Notes
- Short-term: Store cooled, sliced brownies in an airtight container at room temperature for up to 3 days.
- Longer storage: Refrigerate for up to 7 days. Bring to room temperature before serving for best texture.
- Freezing: Wrap slices tightly in plastic wrap and place in a freezer-safe bag or container for up to 3 months. Thaw in the fridge overnight, then come to room temperature or warm briefly.
- Reheating: A quick 10–12 second zap in the microwave revives a single slice and gives melty chocolate chips. Be careful not to overheat.
Reader Q&A
- Q: Can I use melted chocolate instead of cocoa powder?
A: You can, but that changes the fat-to-dry ratio. Cocoa powder keeps the batter balanced for this method. If you swap in melted chocolate, reduce some fat and adjust sugar — I recommend sticking to cocoa here unless you adapt the recipe. - Q: Why use both butter and oil?
A: Butter brings flavor and helps the top set shiny, while oil contributes moistness. Together they give a richer mouthfeel than either alone. - Q: My top didn’t crackle — what happened?
A: The crackly top often comes from melting sugar with fats and the rapid change when baking. Make sure you whisk the melted mixture until slightly grainy and don’t overbake. - Q: Can I double the recipe?
A: Yes. Use a larger pan (13×9) and watch baking time — it will likely take longer. Check with a toothpick starting at the original time and adjust. - Q: Are mini chips necessary?
A: No. They are a nice touch for pockets of melty chocolate but the brownies are delicious without them.
Let’s Eat
Slice these eggless brownies once they’re fully cool and serve them as-is, with ice cream, or a dollop of yogurt for a lighter touch. They’re comfortable at room temperature, portable for a picnic, and perfect when you want a reliably chocolatey bite without eggs. If you try them, let me know how you like the texture — slightly fudgy, more cake-like, or just the right crackle on top. Enjoy, and bake with confidence.

Eggless Brownies
Ingredients
Ingredients
- 4 tablespoonsunsalted butter
- 4 tablespoonsavocado oil or any neutral flavored oil
- 1 cupsugar
- 1/4 cupplain non-fat Greek yogurt
- 1 teaspoonvanilla
- 3/4 cupall-purpose or GF 1:1 flour 125 g
- 1/2 cupunsweetened cocoa powder 40 g
- 1 tablespooncornstarch
- 1/2 teaspoonbaking soda
- 1/4 teaspoonsalt
- 2 tablespoonshot water
- 1/4 cupmini semi-sweet chocolate chips
Instructions
Instructions
- Preheat the oven to 325°F (160°C). Line the bottom of an 8×8-inch pan with parchment paper and spray or lightly grease the sides.
- Fill a medium pot about halfway with water and bring it to a boil. Place a heatproof bowl (glass or metal) over the pot to form a double boiler, making sure the bottom of the bowl does not touch the water.
- Add the 4 tablespoons unsalted butter, 4 tablespoons avocado oil, and 1 cup sugar to the bowl. Whisk over the simmering water until the butter is fully melted and the mixture is uniform and slightly grainy.
- Remove the bowl from the heat. Stir in the 1 teaspoon vanilla and 1/4 cup plain non-fat Greek yogurt until combined.
- Add 3/4 cup all-purpose (or GF 1:1) flour, 1/2 cup unsweetened cocoa powder, 1 tablespoon cornstarch, 1/2 teaspoon baking soda, and 1/4 teaspoon salt. Stir gently just until the dry ingredients are incorporated and no large dry streaks remain.
- Stir in the 2 tablespoons hot water. Then fold in the 1/4 cup mini semi-sweet chocolate chips, mixing as little as possible to avoid deflating the batter.
- Pour the batter into the prepared pan and spread it evenly.
- Bake for 35–40 minutes, until the top is set and slightly crackly (a toothpick inserted near the center should come out with a few moist crumbs).
- Remove the pan from the oven and immediately place it on a heatproof pad or trivet, then transfer the pan to the refrigerator for 10 minutes to cool briefly.
- Remove the pan from the refrigerator and let the brownies cool completely at room temperature before lifting out, slicing, and serving.
Equipment
- 8x8-inch Pan
- Parchment Paper
- Medium Pot
- Heatproof bowl
- Whisk
- Spatula


