
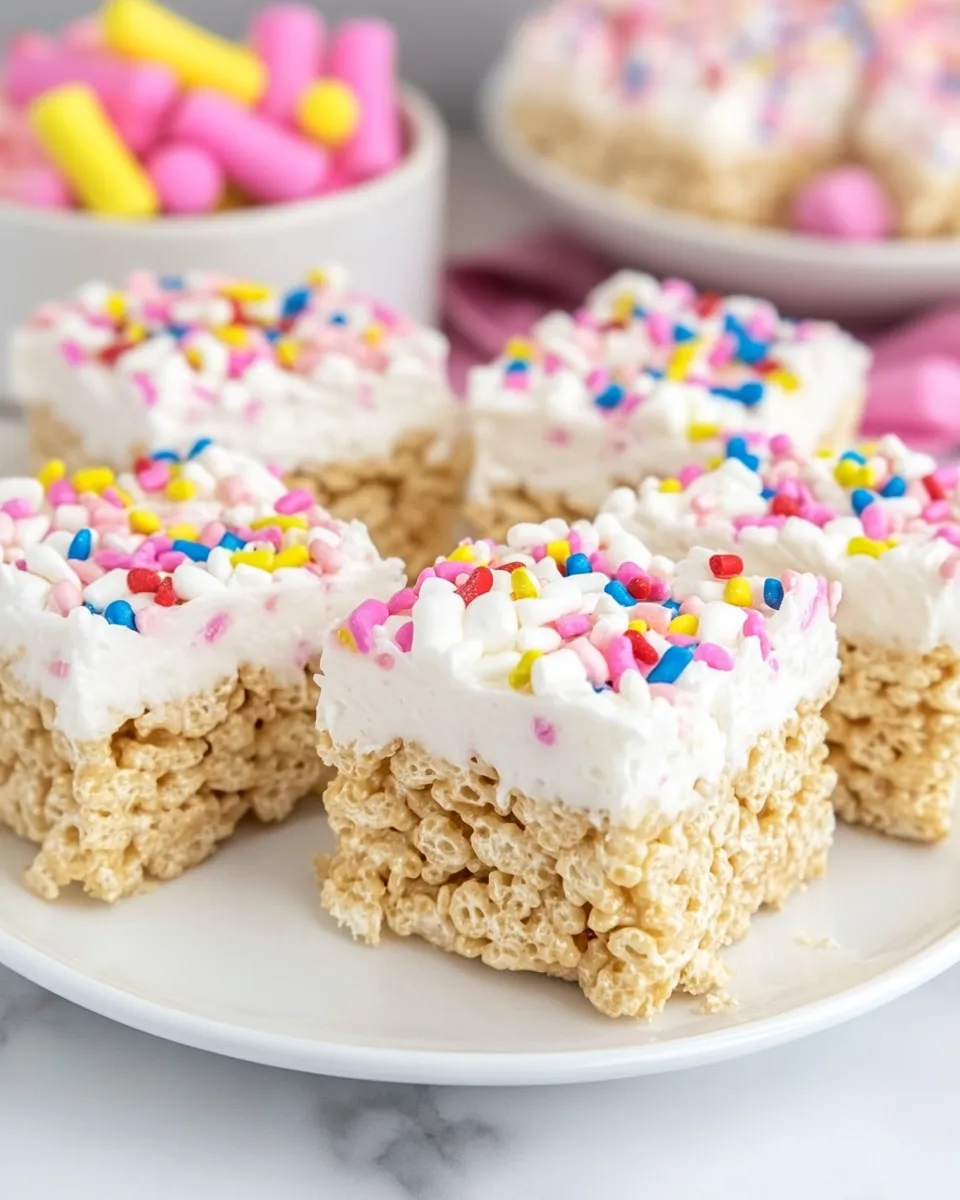
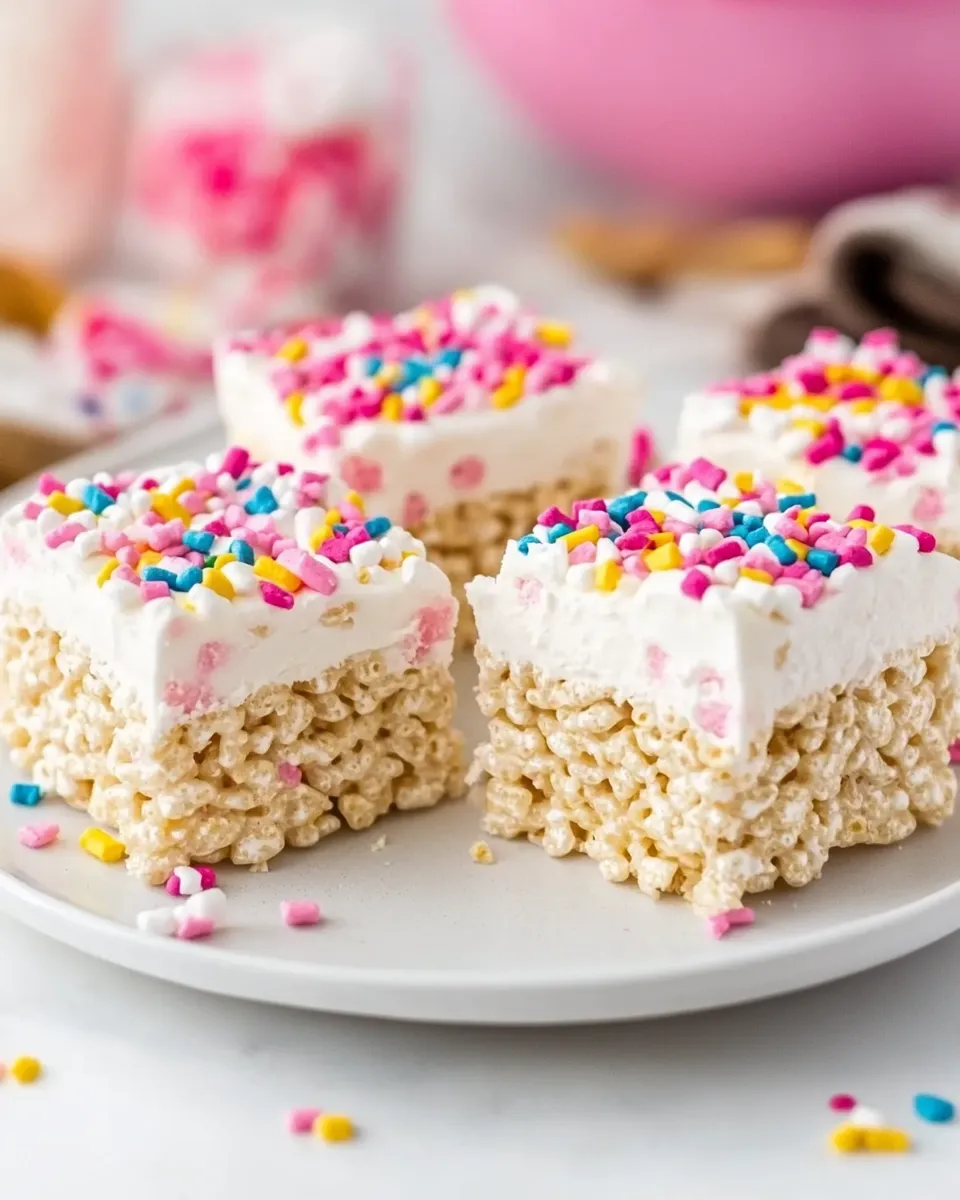
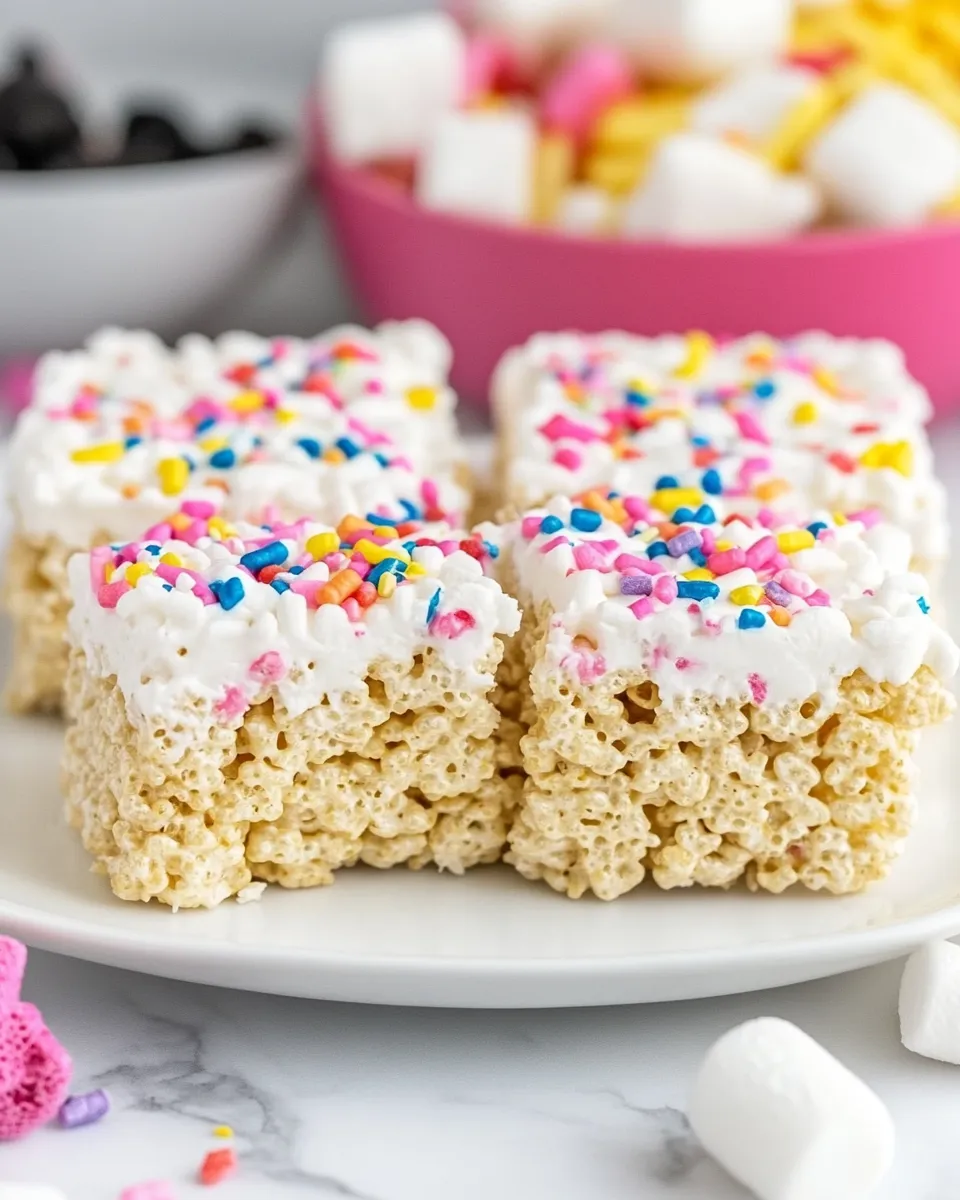
These Extra-Marshmallow Rice Krispies Bars with Confetti are the kind of treat that disappears faster than you can snap a photo. They’re chewy, sweet, and festive — a bite of nostalgia boosted by soft, whole marshmallows and a glossy confetti-dusted top. I make them for birthdays, school parties, and whenever I need an easy, cheerful dessert that people actually talk about.
The method is straightforward and forgiving. Melted marshmallows and butter create the glue, plain Rice Krispies add the crunch, and a final white-chocolate glaze dyed pink with candy coloring gives the bars a polished, party-ready look. A handful of whole miniature marshmallows folded in at the end keeps texture bouncy and fun.
Read through the steps once, gather the handful of tools, and you’ll be done in under an hour, most of which is passive cooling time. Below I break down the exact ingredient list, the step-by-step process, troubleshooting, swaps, storage, and quick answers to common reader questions.
The Ingredient Lineup
- 8T.unsalted butter — melts to coat the marshmallows and help the mixture set up firm without burning.
- 3 10-oz.bags miniature marshmallowsdivided — two bags melt into the base, the remaining bag is folded in whole for extra chew and little pockets of soft marshmallow.
- ¼tsp.kosher salt — balances the sweetness and brings out flavor in the marshmallow-white chocolate combo.
- 9c.Rice Krispies® cereal — the crunchy backbone; measured as listed so texture stays just right.
- 3 4-oz.bars good quality white chocolateI use Ghirardelli — melts into the coating; higher-quality white chocolate yields a smoother, less grainy topping.
- pink candy coloring from Wilton Candy Colors “Garden Colors Set”do not use regular food coloring as it will seize up and not work! — a candy-specific dye keeps the white chocolate fluid and glossy without seizing.
- a mix of sprinkles — adds the confetti look and extra fun; choose small nonpareils and jimmies so they stick well to warm chocolate.
Mastering Extra-Marshmallow Rice Krispies Bars with Confetti: How-To
- Line a 9″ x 13″ pan with parchment paper, letting two opposite sides overhang the pan. Set pan aside.
- In a very large pot over medium heat, melt 8 tablespoons unsalted butter.
- Add 2 of the 10-oz bags of miniature marshmallows to the melted butter. Reduce the heat to medium-low and stir almost constantly until the marshmallows are completely melted and smooth.
- Stir in 1/4 teaspoon kosher salt, then remove the pot from the heat.
- Add 9 cups Rice Krispies cereal to the marshmallow mixture. Fold gently with a spatula or large spoon until the cereal is evenly coated.
- Add the remaining 1 (10-oz) bag of miniature marshmallows (do not melt them). Gently fold these marshmallows into the mixture so they remain whole and distributed.
- Transfer the mixture to the prepared pan. Cover the top with a piece of parchment (or nonstick surface) and press the mixture evenly into the pan—use the flat bottom of a measuring cup or a spatula covered with parchment to prevent sticking—until you have a smooth, even surface.
- Let the bars cool completely at room temperature until set and firm. Use the parchment overhangs to lift the slab from the pan and place it on a cutting board. Cut into squares.
- Place all three 4-oz bars of white chocolate in a medium microwave-safe bowl. Microwave on low/50% power in 15–20 second bursts, stirring between bursts, until the chocolate is almost fully melted. (Alternatively, melt the chocolate in a double boiler.) Stir until completely smooth. Take care not to scorch the chocolate.
- Stir in pink candy coloring from Wilton Candy Colors a little at a time until you reach the desired shade. Do not use regular food coloring.
- Arrange a few cut bars on a piece of parchment or a baking sheet. Spoon and spread the colored white chocolate over the tops of 2–4 bars at a time while the chocolate is warm and fluid. Immediately sprinkle with a mix of sprinkles. Repeat in batches until all bars are coated (reheat the chocolate briefly if it firms).
- Let the coated bars sit at room temperature until the chocolate is completely set before serving or storing.
Top Reasons to Make Extra-Marshmallow Rice Krispies Bars with Confetti
Quick wins: they come together fast and use pantry staples. You can have a full tray ready in under an hour. They’re also highly portable — cut into squares, stacked in a container, and tossed in a bag for a picnic, bake sale, or school treat.
Textural contrast is the second big reason. The standard Rice Krispies bar is good, but folding in an extra bag of whole mini marshmallows gives you soft pockets amid crisp cereal. That variation makes every bite interesting and keeps people coming back for more.
Finally, the white chocolate glaze dyed with candy coloring elevates the appearance without adding complicated steps. That glossy, colorful finish turns a humble snack into something you’d be proud to bring to a party.
Swap Guide

Want to tweak the bars? Here are safe swaps and what to expect.
- Butter: You can substitute salted butter but reduce or omit the added kosher salt. Flavor will shift slightly saltier.
- White chocolate: If you prefer, use chocolate couverture or chips labeled for baking; higher cocoa-butter content melts smoother. Avoid candy coating wafers that set very hard and lack real chocolate flavor.
- Coloring: Use only candy-specific colors for chocolate. Regular gel or liquid food coloring can seize melted chocolate and ruin the glaze.
- Sprinkles: Any small sprinkles or shimmer dust work. Larger sugar shapes may not stick well and can slide off the warm glaze.
Before You Start: Equipment
Gather these tools before you begin — having them ready speeds the process and keeps things tidy.
- 9″ x 13″ pan lined with parchment (with overhang) — makes removing the slab simple.
- Very large pot — the cereal and marshmallow need space to fold together without spilling.
- Heatproof spatula or large spoon — for gentle folding so marshmallows stay intact.
- Flat-bottomed measuring cup or parchment-covered spatula — for even pressing into the pan without sticking.
- Microwave-safe bowl or double boiler — for melting the white chocolate gently.
- Parchment or baking sheet for glazing batches — gives a clean surface to set the finished bars.
Watch Outs & How to Fix
Common pitfalls and quick fixes so you don’t end up with a sticky mess.
Marshmallows seizing or burning
Keep heat moderate. If the melted marshmallow smells toasted, you’ve overheated; take the pot off the heat and stir in the cereal immediately to cool the mass down. Never crank heat to speed melting.
Mixture too sticky to press
Press the mixture with parchment between the mixture and your tool. If it’s still unworkable, let it rest 3–5 minutes off heat to cool slightly — that usually makes it manageable without changing texture.
White chocolate seizes
White chocolate is sensitive. If you used regular food coloring and it seized, you can sometimes rescue it by adding a small spoonful of neutral oil or a teaspoon of warm cream and whisking, but results vary. Best practice: use candy coloring as directed.
Sprinkles sliding off
Apply sprinkles while the glaze is still warm and fluid so they adhere. If the glaze firms, reheat gently in short bursts.
Allergy-Friendly Swaps
Make these bars more allergy-aware with a few adjustments.
- Dairy-free: Use a plant-based butter substitute that melts well and a dairy-free white chocolate alternative labeled for melting. Texture will be slightly different but still satisfying.
- Gluten-free: Use a certified gluten-free crispy rice cereal. Many brands offer a rice crisp that’s processed to avoid cross-contact.
- Nuts: This recipe doesn’t call for nuts, but check labels on sprinkles and chocolate — manufactured in facilities with tree nuts is common. Choose certified-nut-free brands when needed.
Insider Tips
A few habits I use every time to get consistent results.
- Measure the cereal by filling the cup and leveling it. The 9 cups measurement matters for texture — too much cereal makes bars dry; too little makes them gooey.
- When pressing the mixture into the pan, press firmly but don’t compress so much that bars become rock hard. Aim for an even surface without stripping the airiness completely.
- Work in batches for glazing. Melt enough chocolate to coat a few bars at once; reheating the same bowl repeatedly can overheat the chocolate if you’re not careful.
- Use the parchment overhang to lift the slab cleanly. It keeps cutting and serving simple without scraping the pan.
Refrigerate, Freeze, Reheat
Storage is easy but has a few rules to preserve texture and appearance.
- Room temperature: Store in an airtight container at room temperature for up to 3 days. The sprinkles and white chocolate coating will stay best this way.
- Refrigerator: You can refrigerate for up to a week, but the chocolate topping may bloom slightly (white streaks) from moisture shifts. Let bars come to room temperature before serving for the best chew.
- Freezer: Wrap individual bars in parchment and foil and freeze up to 1 month. Thaw at room temperature; avoid condensation by keeping them wrapped until fully thawed.
- Reheating: No need to reheat. If the chocolate hardens too much in cold storage, pull bars to room temperature for 30–45 minutes to soften before serving.
Reader Q&A
Q: Can I use marshmallow fluff instead of melted marshmallows?
A: I don’t recommend it for the full-melt portion because fluff has different moisture and texture. The recipe relies on whole melted marshmallows plus whole unmelted minis for pockets.
Q: What if I don’t have pink candy coloring?
A: You can skip coloring and leave the white chocolate uncolored, or use a different candy-specific dye. Do not use standard food gels/liquids for white chocolate.
Q: Can I make these ahead for a party?
A: Yes. Make them the day before and store in a single layer in an airtight container. If stacking, separate layers with parchment.
Serve & Enjoy
Cut squares and serve on a platter lined with parchment or wax paper. These bars are kid-approved and adult-approved — the confetti look makes them a hit at casual celebrations, and the extra marshmallows keep everyone guessing in the best way.
Bring a box to your next brunch, pack them for a picnic, or leave a small plate on the counter for friends who pop by. They travel well and keep their charm wherever they go.

Extra-Marshmallow Rice Krispies Bars with Confetti
Ingredients
Ingredients
- 8 T.unsalted butter
- 3 10- oz.bags miniature marshmallowsdivided
- 1/4 tsp.kosher salt
- 9 c.Rice Krispies® cereal
- 3 4- oz.bars good quality white chocolateI use Ghirardelli
- pink candy coloring from Wilton Candy Colors “Garden Colors Set”do not use regular food coloring as it will seize up and not work!
- a mix of sprinkles
Instructions
Instructions
- Line a 9" x 13" pan with parchment paper, letting two opposite sides overhang the pan. Set pan aside.
- In a very large pot over medium heat, melt 8 tablespoons unsalted butter.
- Add 2 of the 10-oz bags of miniature marshmallows to the melted butter. Reduce the heat to medium-low and stir almost constantly until the marshmallows are completely melted and smooth.
- Stir in 1/4 teaspoon kosher salt, then remove the pot from the heat.
- Add 9 cups Rice Krispies cereal to the marshmallow mixture. Fold gently with a spatula or large spoon until the cereal is evenly coated.
- Add the remaining 1 (10-oz) bag of miniature marshmallows (do not melt them). Gently fold these marshmallows into the mixture so they remain whole and distributed.
- Transfer the mixture to the prepared pan. Cover the top with a piece of parchment (or nonstick surface) and press the mixture evenly into the pan—use the flat bottom of a measuring cup or a spatula covered with parchment to prevent sticking—until you have a smooth, even surface.
- Let the bars cool completely at room temperature until set and firm. Use the parchment overhangs to lift the slab from the pan and place it on a cutting board. Cut into squares.
- Place all three 4-oz bars of white chocolate in a medium microwave-safe bowl. Microwave on low/50% power in 15–20 second bursts, stirring between bursts, until the chocolate is almost fully melted. (Alternatively, melt the chocolate in a double boiler.) Stir until completely smooth. Take care not to scorch the chocolate.
- Stir in pink candy coloring from Wilton Candy Colors a little at a time until you reach the desired shade. Do not use regular food coloring.
- Arrange a few cut bars on a piece of parchment or a baking sheet. Spoon and spread the colored white chocolate over the tops of 2–4 bars at a time while the chocolate is warm and fluid. Immediately sprinkle with a mix of sprinkles. Repeat in batches until all bars are coated (reheat the chocolate briefly if it firms).
- Let the coated bars sit at room temperature until the chocolate is completely set before serving or storing.
Equipment
- 9 x 13-inch pan
- Parchment Paper
- very large pot
- Spatula
- Measuring Cup
- Microwave-safe Bowl
- Cutting Board
Notes
from a farmgirl’s dabbles


