
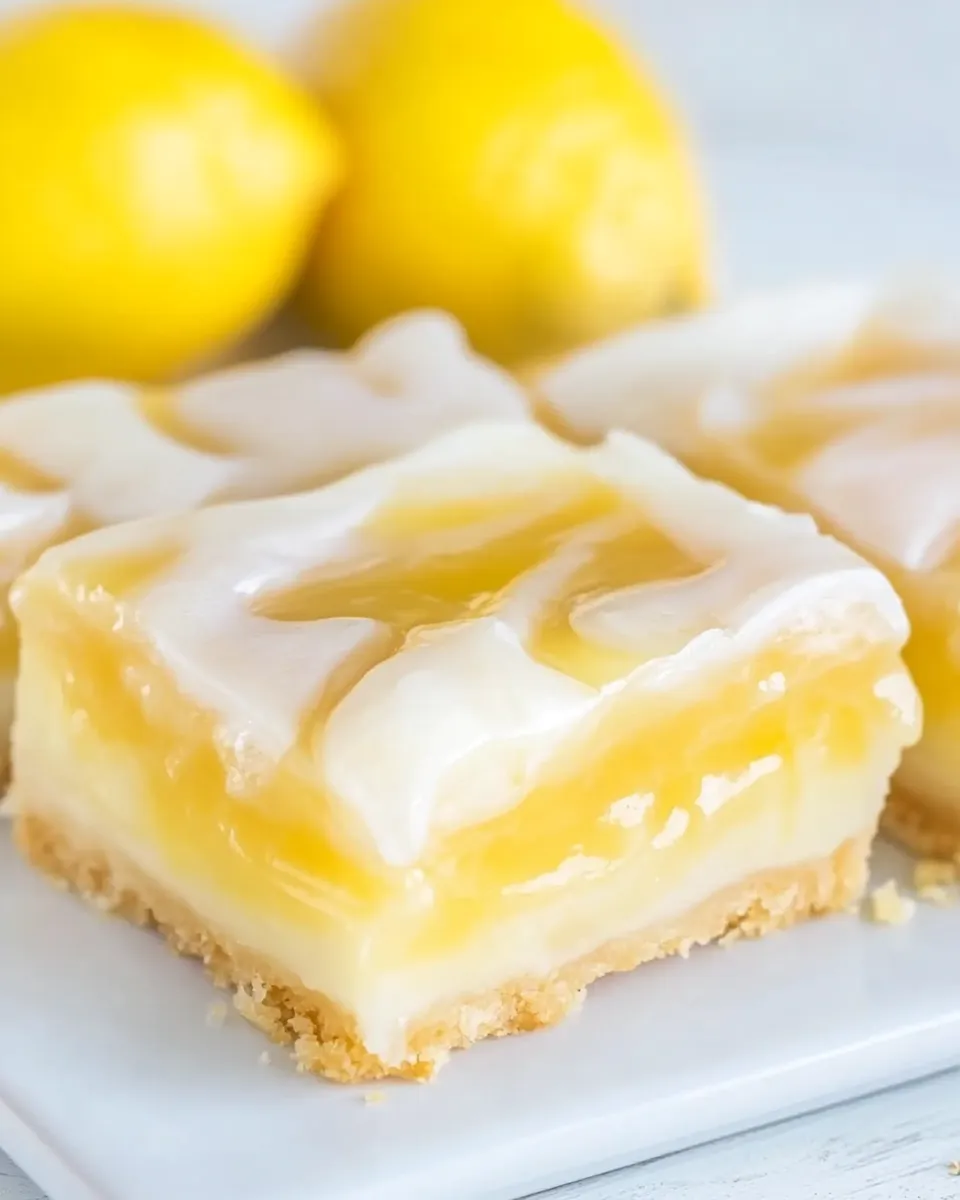
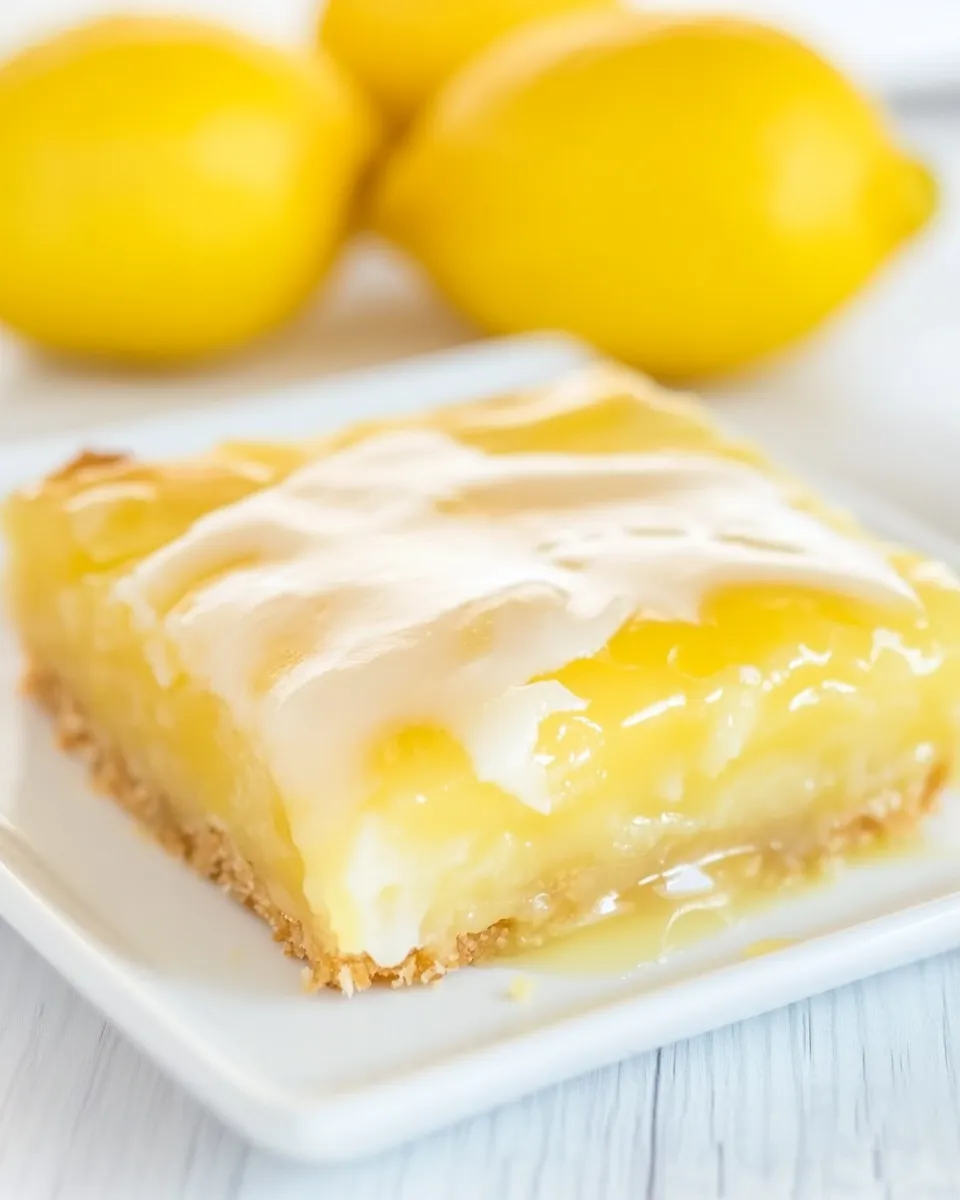
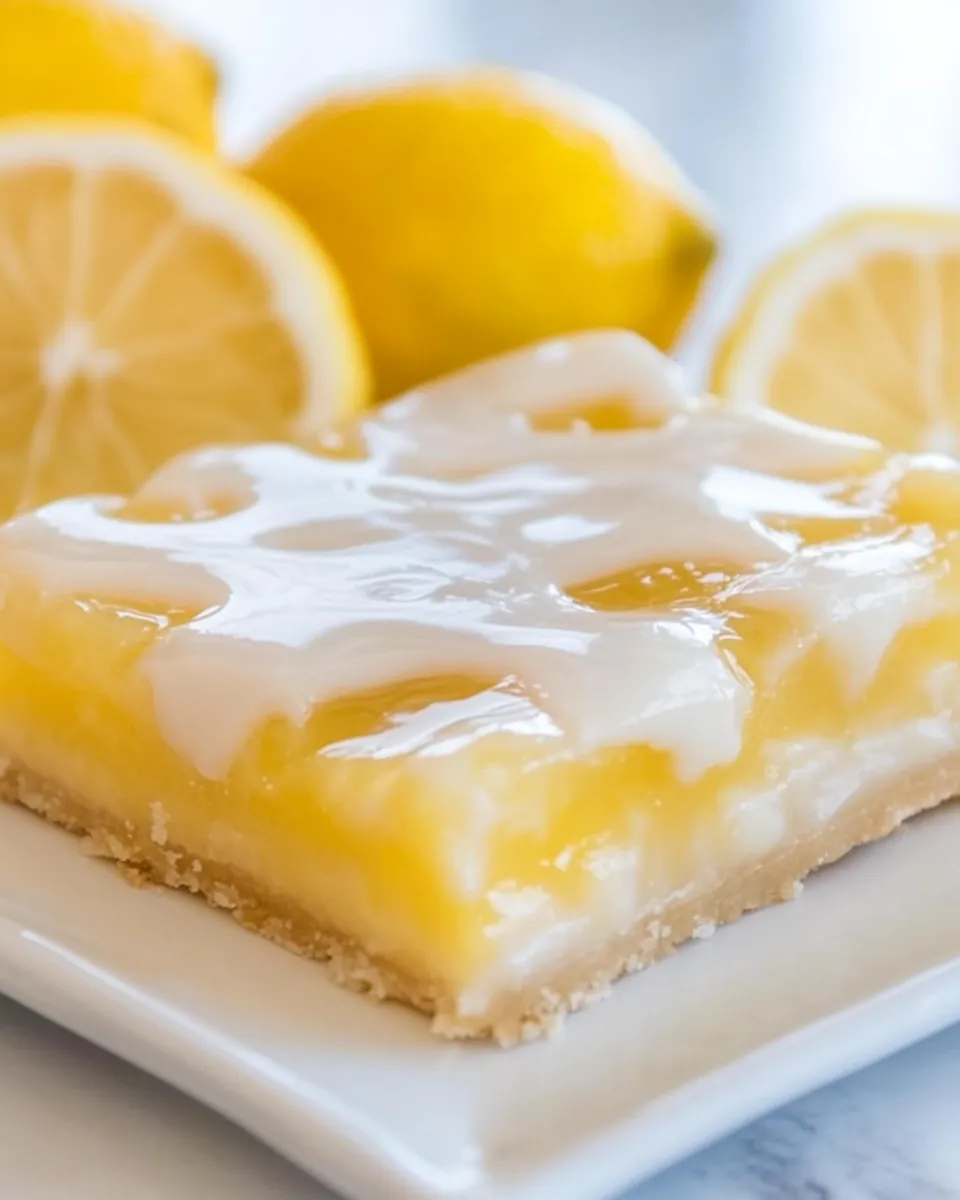
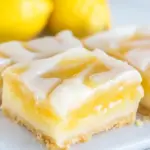
Bright, buttery, and impossibly simple—these Glazed Lemon Pie Bars are the kind of thing I make when I want something that looks special without a fuss. They have a tender, shortbread-like base, a creamy store-bought lemon pie filling for speed and consistency, and a glossy lemon-scented glaze that ties everything together. Guests always ask for the recipe; it’s that reliably good.
The technique is straightforward: cream butter and sugar, fold in the eggs and extracts, press most of the dough into a jelly roll pan, spread the lemon filling, and drop the reserved dough over the top so it bakes into a rustic, golden lid. Allow the bars to cool completely before glazing so the drizzle stays bright and sets into a pretty finish.
If you want a recipe that travels well, slices cleanly, and makes a tray perfect for potlucks, picnics, or a weekday treat, this is it. Below I walk you through the ingredients, the exact steps, helpful swaps, and troubleshooting tips so your bars turn out every time.
Ingredient Checklist
Ingredients
- 1 cup unsalted butter, softened — provides richness and a tender, shortbread-like crumb; room temperature is best for creaming.
- 2 cups granulated sugar — sweetens and helps create a light, slightly crisp edge when creamed with butter.
- ½ teaspoon salt, or to taste — balances sweetness and enhances flavor; use table or kosher salt adjusted to preference.
- 4 large eggs — bind the dough and add structure; add them one at a time as directed for even incorporation.
- 1 teaspoon vanilla extract — deepens the flavor base without competing with the lemon.
- ¼ teaspoon almond extract, or 1/2 teaspoon if you love almond extract; lemon extract may be substituted — adds a subtle nutty note that pairs beautifully with lemon; optional strength adjustment noted.
- 3 cups all-purpose flour — the primary structure for the dough; measure by spooning into the cup and leveling for accuracy.
- two 23-ounce jars lemon pie filling — the tart, creamy center; using jars saves time and gives consistent texture and flavor.
- 1 ¼ cups confectioners’ sugar, sifted if yours is particularly lumpy — the base for the glaze; sifting ensures a smooth drizzle.
- ½ teaspoon vanilla extract — flavor for the glaze; complements the lemon without overpowering.
- ½ teaspoon almond extract, lemon extract may be substituted — optional second extract note for the glaze to echo the dough.
- 2 to 3 tablespoons lemon juice, as necessary for consistency — thins the glaze to a pourable consistency and intensifies lemon flavor; add gradually.
Glazed Lemon Pie Bars in Steps
- Preheat the oven to 350°F (175°C). Spray a 15 x 10 x 1-inch jelly roll pan with cooking spray. Optional: line the pan with a sheet of foil, spray the foil, and press the foil into the pan to allow lifting the finished bars out for neater cutting.
- In the bowl of a stand mixer fitted with the paddle attachment (or in a large bowl with a handheld mixer), add 1 cup softened unsalted butter, 2 cups granulated sugar, and 1/2 teaspoon salt. Beat on medium-high speed until light and fluffy, about 3 minutes. Stop and scrape down the sides of the bowl.
- Add the 4 large eggs one at a time, beating well after each addition. Stop and scrape down the sides of the bowl.
- Add 1 teaspoon vanilla extract and 1/4 teaspoon almond extract (or 1/2 teaspoon almond if you prefer a stronger almond flavor; lemon extract may be substituted). Beat on medium-high speed for about 30 seconds to incorporate.
- Gradually add 3 cups all-purpose flour and beat on medium-low speed until just incorporated, about 1 minute. Scrape the bowl as needed.
- Reserve about 1/4 of the dough mixture in the mixing bowl. Turn the remaining approximately 3/4 of the dough into the prepared pan. Using a spatula (lightly dampening the spatula or your hands can help), press and spread the dough into an even layer across the bottom of the pan and into the corners. The dough will be sticky—work patiently to smooth it.
- Open both 23-ounce jars of lemon pie filling and spoon the lemon filling evenly over the dough layer in the pan, leaving a 1/4-inch bare margin along the edges to prevent the filling from sticking to the pan sides during baking.
- Drop the reserved dough in small spoonfuls (about 2 teaspoons each) over the lemon filling, spacing them so the dough pieces will spread and join as they bake. It is okay if the topping does not completely cover the filling.
- Bake in the preheated oven for about 35 minutes, or until the dough on top and around the edges is very lightly golden brown.
- Remove the pan from the oven and place it on a wire rack. Allow the bars to cool completely in the pan before glazing, about 1 to 2 hours.
- If your confectioners’ sugar is lumpy, sift 1 1/4 cups confectioners’ sugar into a medium bowl. Add 1/2 teaspoon vanilla extract and 1/2 teaspoon almond extract (lemon extract may be substituted). Add 2 to 3 tablespoons lemon juice, a little at a time, and whisk until the glaze reaches a smooth, pourable drizzling consistency.
- Evenly drizzle the glaze over the cooled bars. If you lined the pan with foil, lift the bars out using the foil and transfer to a cutting board. Cut into bars and serve immediately.
Why This Recipe is a Keeper
There are recipes that take hours and recipes that deliver the same pleasure in less time. These bars fall into the latter category. The lemon flavor is bright without being aggressive, the buttery dough creates a lovely base, and the glaze gives a polished finish. Using lemon pie filling is a practical shortcut: it keeps the texture creamy and consistent, which is especially helpful if you want a dependable tray every time.
They’re also versatile. Slice them small for parties, larger for an afternoon treat, and they travel well in a container. The combination of flaky edges, soft center, and glossy glaze is immediately appealing and reliably popular with a wide range of palates.
Dairy-Free/Gluten-Free Swaps

Need to adapt these bars? You can make thoughtful swaps without changing the technique.
- For dairy-free: replace the 1 cup unsalted butter with a one-to-one plant-based baking stick, keeping it softened. The texture will be similar though slightly different in flavor.
- For gluten-free: use a 1-to-1 gluten-free all-purpose flour blend designed for baking. Because blends vary, watch the dough’s consistency and press gently into the pan as directed.
- Lemon pie filling: check labels if you need a gluten-free or dairy-free brand. Many jarred fillings are naturally gluten-free, but always confirm; if not, look for a compatible alternative or make a simple lemon curd separately.
Before You Start: Equipment
- 15 x 10 x 1-inch jelly roll pan (or similar rimmed baking sheet).
- Stand mixer with paddle attachment or handheld mixer and a large bowl.
- Spatula and a small spoon for dropping topping pieces.
- Wire cooling rack and a cutting board.
- Sifter (optional) or fine mesh strainer for confectioners’ sugar if needed.
- Foil for lining the pan if you want to easily lift the whole slab out for cleaner slicing.
Troubles You Can Avoid
Common problems are all solvable with small adjustments:
- Sticky, unmoldable dough: if the dough is too soft to press, chill it briefly (10–15 minutes) so it’s easier to handle. Lightly dampening your spatula or hands helps smooth the surface without adding extra flour.
- Filling bubbling over or sticking to sides: leave the 1/4-inch bare margin along the edges exactly as directed. It keeps the filling from climbing the pan sides and makes removal easier.
- Uneven top coverage: drop small, evenly spaced spoonfuls of the reserved dough so pieces can spread and meet while baking; it’s fine if it looks rustic—the finished texture is part of the charm.
- Glaze too thin or too thick: add lemon juice a few drops at a time until you reach a pourable drizzling consistency. If it becomes too thin, stir in a bit more confectioners’ sugar.
Better Choices & Swaps
A few small decisions will elevate the final result:
- Vanilla and extract choices: the recipe gives you almond extract with an option to increase it or swap for lemon extract. If you prefer a cleaner lemon profile, use lemon extract in both dough and glaze; if you like complexity, keep the almond.
- Pan lining: foil makes lifting and slicing neater. Parchment can work too, but foil pressed into the corners conforms better to the pan’s shape.
- Filling options: while lemon pie filling is recommended for speed and texture, you can substitute high-quality lemon curd if you prefer a fresher, more tangy center. If using curd, be mindful that its moisture level may differ slightly—watch the bake time and edge color.
Pro Tips & Notes
Timing and texture
Letting the bars cool completely before glazing is crucial. If you glaze while warm, the drizzle will sink into the filling and run off the edges. One to two hours of cooling yields the best set and clean slices.
Slicing like a pro
For clean cuts, chill the slab briefly after glazing so the drizzle firms up, then use a sharp knife wiped clean between cuts. If you lined the pan with foil, lifting the bars out makes uniform slicing much easier.
Storage
Store glazed bars in an airtight container at room temperature for up to two days. Refrigerate if your kitchen is warm; cold bars are firmer and slice neater, but bring them to room temperature before serving for best flavor.
Freezer-Friendly Notes
These bars freeze well, which is great for making ahead.
- Freeze unglazed: bake and cool completely, then wrap tightly in plastic wrap and foil. Freeze for up to 2 months. Thaw in the refrigerator, then glaze just before serving.
- Freeze glazed: if you must, freeze single portions on a sheet pan until firm, then wrap individually. Note that glazing can change texture slightly after thawing; for the freshest appearance and texture, glaze after thawing.
- To thaw: move from freezer to refrigerator overnight, then bring to room temperature for 30–60 minutes before serving. If you froze unglazed, finish with the glaze after thawing.
FAQ
Can I make these bars with homemade lemon curd instead of jarred filling?
Yes. Homemade curd will be tangier and may be slightly looser than jarred pie filling; keep an eye on the edges while baking and allow full cooling time so the curd sets.
Why do the bars need to cool so long before glazing?
The glaze needs a firm surface so it stays on top and looks glossy. Warm bars will cause the glaze to melt and run, leaving a thinner, less attractive finish.
Can I reduce the sugar?
This recipe’s balance—sweet dough, sweet-tart filling, and a bright glaze—relies on the given sugar amounts. Reducing sugar will change texture and browning; if you must reduce, do so cautiously and expect differences in color and crumb.
My top browned too quickly—what happened?
Oven temperatures vary. If the top is browning too fast, tent loosely with foil during the last 10–15 minutes of baking to prevent over-browning while the center finishes.
That’s a Wrap
These Glazed Lemon Pie Bars are a dependable, crowd-pleasing traybake that hits the sweet-tart spot. They’re forgiving, adaptable, and quick enough for a last-minute dessert. Follow the steps above, keep an eye on cooling, and you’ll have neat, glossy bars that look like you spent way more time on them than you did.
Make a batch this week—slice a few into a lunchbox, bring a pan to a gathering, or keep them on the counter for a treat that disappears fast. If you try any swaps or have questions while baking, leave a note and I’ll help troubleshoot the next batch.
Glazed Lemon Pie Bars
Ingredients
Ingredients
- 1 cupunsalted butter softened
- 2 cupsgranulated sugar
- 1/2 teaspoonsalt or to taste
- 4 large eggs
- 1 teaspoonvanilla extract
- 1/4 teaspoonalmond extract or 1/2 teaspoon if you love almond extract; lemon extract may be substituted
- 3 cupsall-purpose flour
- two 23-ounce jars lemon pie filling
- 1 1/4 cupsconfectioners’ sugar sifted if yours is particularly lumpy
- 1/2 teaspoonvanilla extract
- 1/2 teaspoonalmond extract lemon extract may be substituted
- 2 to 3 tablespoonslemon juice as necessary for consistency
Instructions
Instructions
- Preheat the oven to 350°F (175°C). Spray a 15 x 10 x 1-inch jelly roll pan with cooking spray. Optional: line the pan with a sheet of foil, spray the foil, and press the foil into the pan to allow lifting the finished bars out for neater cutting.
- In the bowl of a stand mixer fitted with the paddle attachment (or in a large bowl with a handheld mixer), add 1 cup softened unsalted butter, 2 cups granulated sugar, and 1/2 teaspoon salt. Beat on medium-high speed until light and fluffy, about 3 minutes. Stop and scrape down the sides of the bowl.
- Add the 4 large eggs one at a time, beating well after each addition. Stop and scrape down the sides of the bowl.
- Add 1 teaspoon vanilla extract and 1/4 teaspoon almond extract (or 1/2 teaspoon almond if you prefer a stronger almond flavor; lemon extract may be substituted). Beat on medium-high speed for about 30 seconds to incorporate.
- Gradually add 3 cups all-purpose flour and beat on medium-low speed until just incorporated, about 1 minute. Scrape the bowl as needed.
- Reserve about 1/4 of the dough mixture in the mixing bowl. Turn the remaining approximately 3/4 of the dough into the prepared pan. Using a spatula (lightly dampening the spatula or your hands can help), press and spread the dough into an even layer across the bottom of the pan and into the corners. The dough will be sticky—work patiently to smooth it.
- Open both 23-ounce jars of lemon pie filling and spoon the lemon filling evenly over the dough layer in the pan, leaving a 1/4-inch bare margin along the edges to prevent the filling from sticking to the pan sides during baking.
- Drop the reserved dough in small spoonfuls (about 2 teaspoons each) over the lemon filling, spacing them so the dough pieces will spread and join as they bake. It is okay if the topping does not completely cover the filling.
- Bake in the preheated oven for about 35 minutes, or until the dough on top and around the edges is very lightly golden brown.
- Remove the pan from the oven and place it on a wire rack. Allow the bars to cool completely in the pan before glazing, about 1 to 2 hours.
- If your confectioners’ sugar is lumpy, sift 1 1/4 cups confectioners’ sugar into a medium bowl. Add 1/2 teaspoon vanilla extract and 1/2 teaspoon almond extract (lemon extract may be substituted). Add 2 to 3 tablespoons lemon juice, a little at a time, and whisk until the glaze reaches a smooth, pourable drizzling consistency.
- Evenly drizzle the glaze over the cooled bars. If you lined the pan with foil, lift the bars out using the foil and transfer to a cutting board. Cut into bars and serve immediately.
Equipment
- stand mixer (or handheld mixer and large bowl)
- paddle attachment
- 15 x 10 x 1-inch jelly roll pan
- Spatula
- Wire Rack
- sifter (optional)
- foil (optional)
Notes
Storage:
Bars will keep airtight at room temp for up to 5 days, noting crust will soften as time passes. I like the bars at room temp but my family enjoys them chilled. They will keep in the fridge airtight for up to 1 week or in the freezer for up to 3 months.
Adapted from
Glazed Cherry Pie Bars
.


