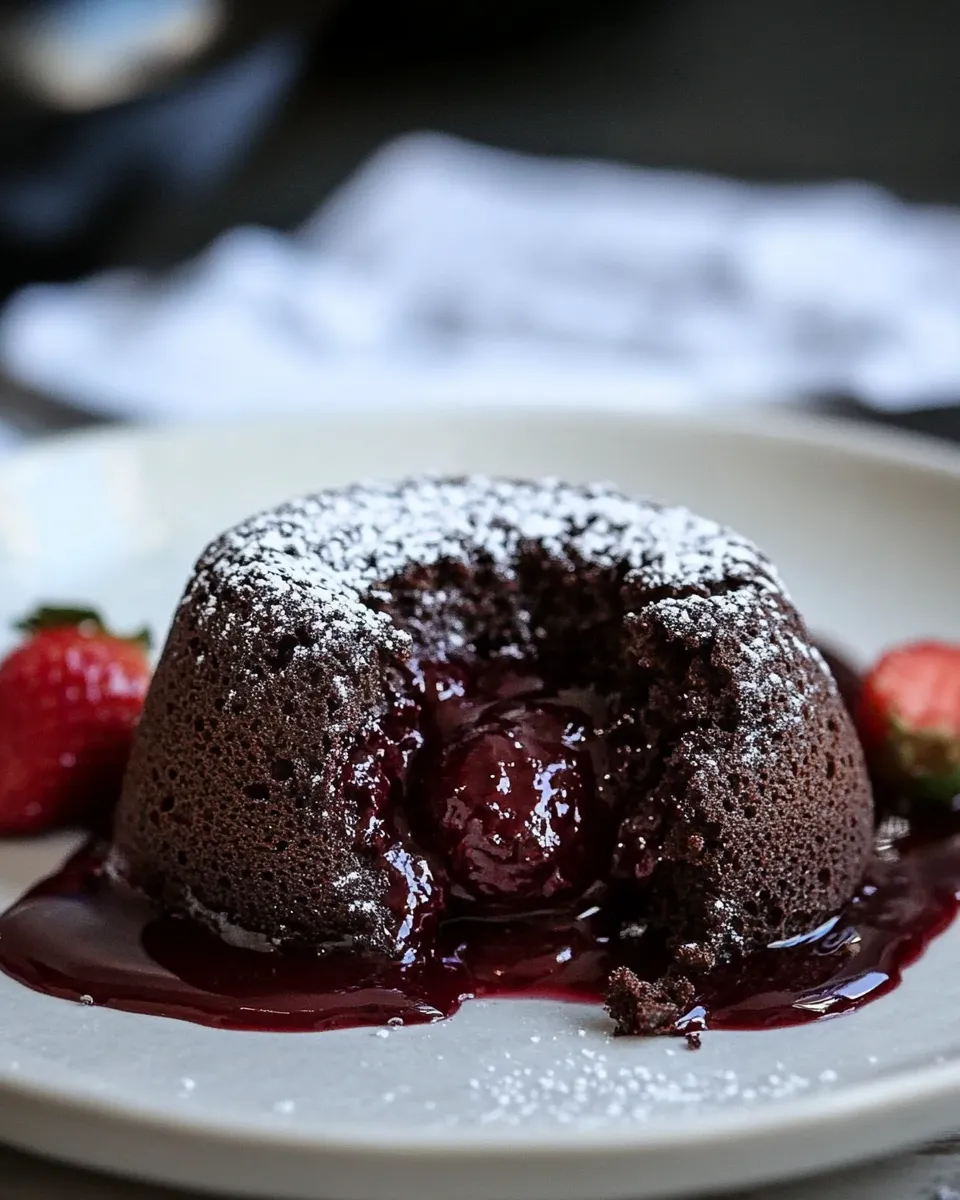
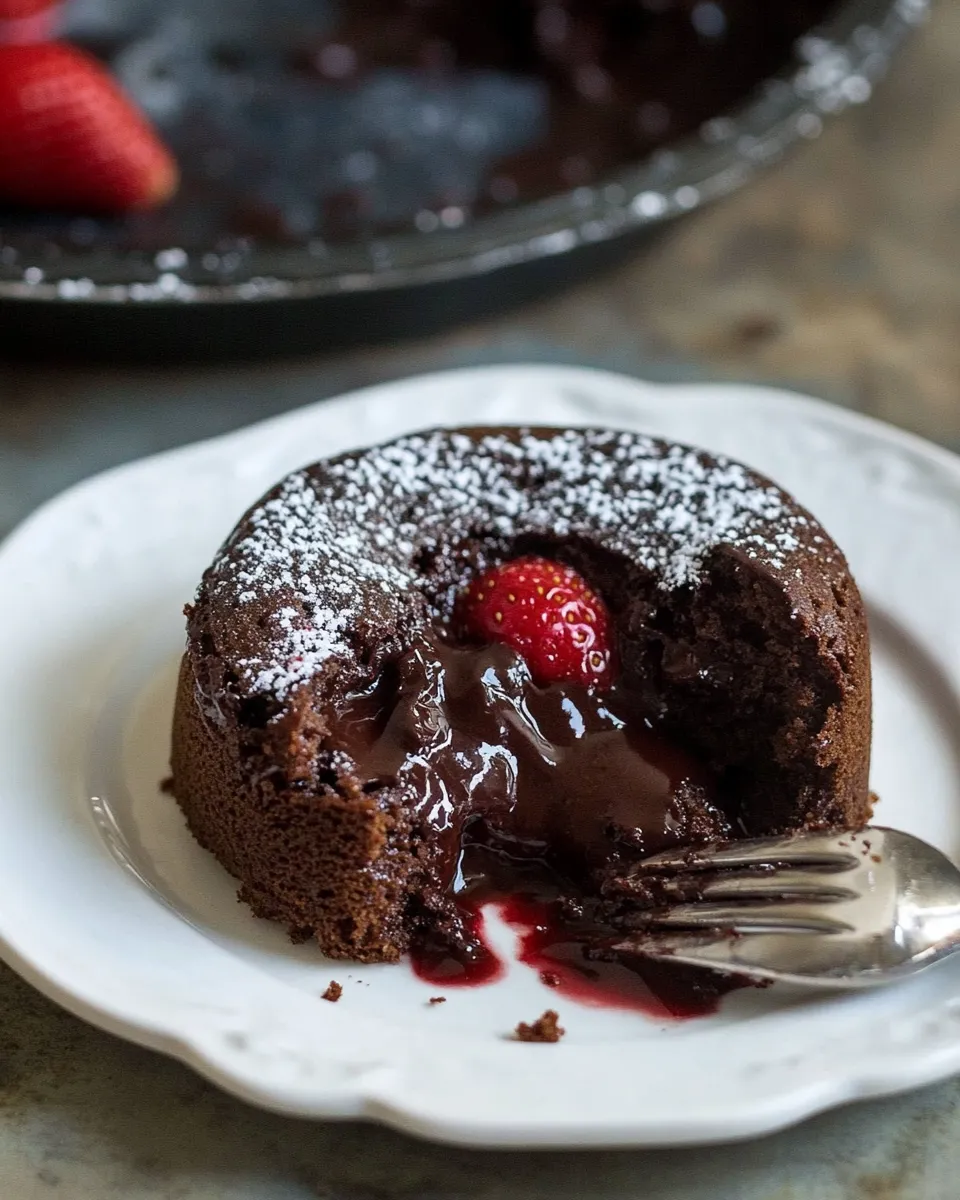
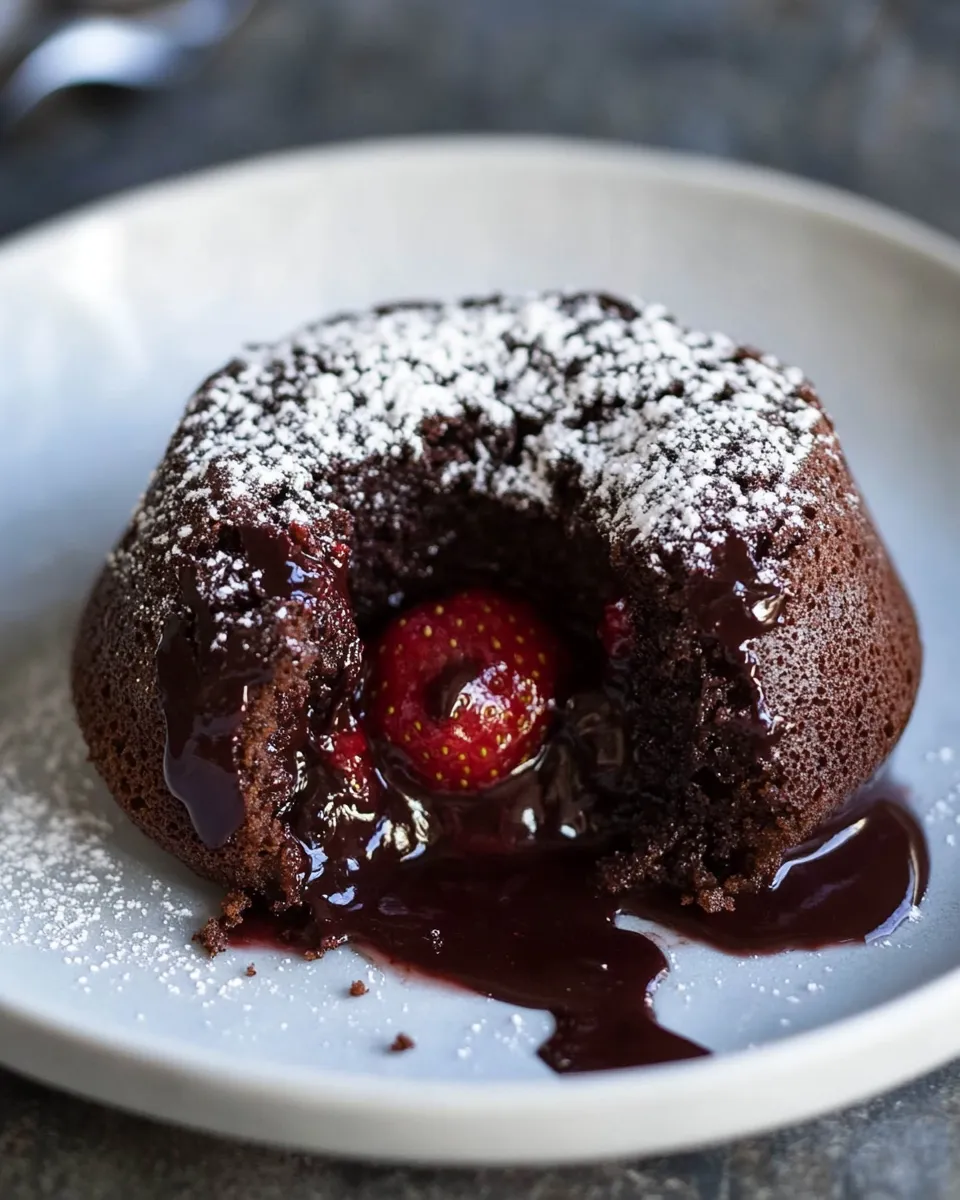
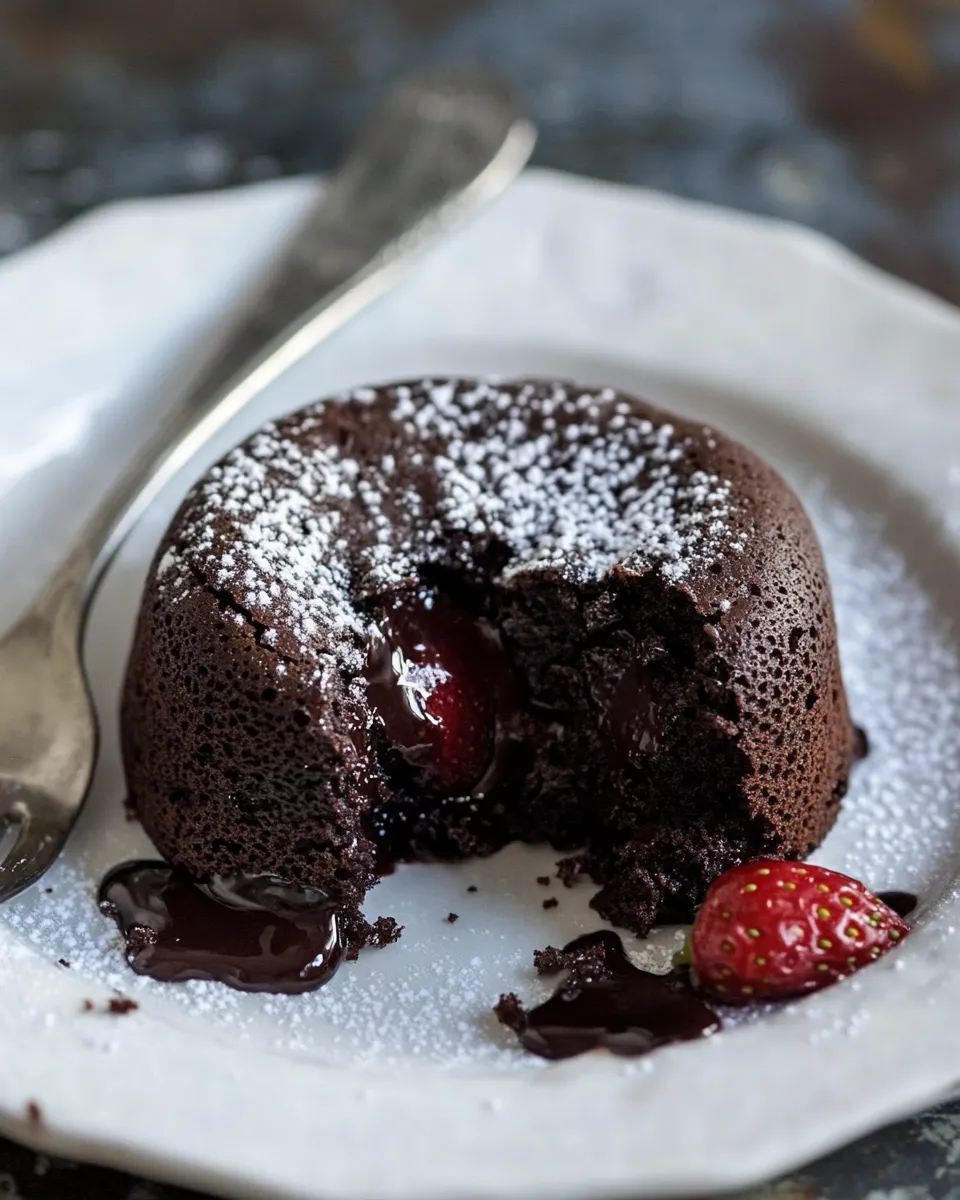
This is a small, reliable chocolate lava cake that happens to be gluten-free and built around really simple pantry-friendly ingredients. It yields two individual cakes with molten centers and a bright strawberry surprise in the middle. The texture is rich and fudgy on the outside, molten and saucy in the center — the sort of dessert that feels like a treat without a dozen steps.
I tested timing, chocolate temperature, and the exact way the batter meets the fruit spread so the centers stay liquid while the outside sets. The recipe strips away anything unnecessary: just chocolate, coconut oil, eggs, coconut sugar, applesauce, cocoa powder, a little vanilla and salt, plus strawberry fruit spread for the filling. If you follow the steps and baking time closely, you’ll get consistent results.
Below you’ll find a clear ingredients list with tips, the step-by-step method straight from the tested directions, equipment notes, common pitfalls, and adaptations for diet needs. Keep the ramekins ready and your microwave at hand — we’re keeping this practical and dependable.
Ingredient Breakdown
Every ingredient here has a job: chocolate and cocoa for depth and structure, coconut oil for silkiness, eggs and yolk for lift and set, coconut sugar for sweetness and slight caramel notes, applesauce to add moisture without extra fat, and the strawberry spread to create a simple, bright center. The result is a compact, gluten-free dessert that still behaves like a classic lava cake.
Ingredients
- 3 oz dairy-free dark chocolate — provides the chocolate base and the molten core when melted; choose 60–75% cacao for balance.
- 1 tablespoon coconut oil plus additional for the ramekins — helps melt the chocolate smoothly and greases the ramekins to release the cakes cleanly.
- 1 large egg — builds structure and helps the cake set on the outside while the center stays molten.
- 1 egg yolk — adds richness and a silkier texture to the batter.
- 1/4 cup coconut sugar — sweetens and brings a mild caramel note; it also affects the batter’s color and finish.
- 3 tablespoons unsweetened applesauce — adds moisture and a bit of lift without adding extra oil or glutenous structure.
- 1/4 teaspoon vanilla extract — elevates the chocolate and balances sweetness.
- Pinch of sea salt — sharpens the chocolate flavor and counters sweetness.
- 2 tablespoons cocoa powder plus additional for the ramekins — deepens chocolate flavor and helps set the cake exterior; dust ramekins so cakes release cleanly and appear finished.
- 4 teaspoons organic strawberry fruit spread — the bright, jammy center; choose a spread with whole fruit pieces for texture, if desired.
Gluten-Free Chocolate Lava Cake (With Strawberry!): From Prep to Plate
- Preheat oven to 400°F. Grease two ramekins with the additional coconut oil and dust the insides with the additional cocoa powder, tapping out any excess. Set the ramekins aside.
- Place 3 oz dairy-free dark chocolate and 1 tablespoon coconut oil in a large microwave-safe bowl. Microwave at 50% power for 30 seconds, stir, then continue microwaving in 30-second bursts, stirring after each, until the chocolate is fully melted and smooth. Set aside to cool slightly.
- While the chocolate is melting, combine 1 large egg, 1 egg yolk, 1/4 cup coconut sugar, 3 tablespoons unsweetened applesauce, 1/4 teaspoon vanilla extract, and a pinch of sea salt in a large bowl. Use an electric hand mixer to beat until the mixture lightens in color and the coconut sugar begins to break down, about 2 minutes.
- Pour the beaten egg mixture into the melted chocolate and coconut oil, whisking constantly until fully combined and the mixture begins to thicken slightly. Gently fold in 2 tablespoons cocoa powder until evenly incorporated.
- Divide the batter evenly between the two prepared ramekins, filling each just over halfway. Spoon 2 teaspoons organic strawberry fruit spread into the center of each ramekin. Divide any remaining batter equally over the fruit spread so each ramekin is just over 3/4 full; smooth the tops lightly.
- Place the ramekins on a baking sheet and bake in the preheated oven until the outside is set but the center appears slightly soft and undercooked, about 10 minutes.
- Remove the ramekins from the oven and let them stand for 1 minute. Run a small knife around the inside edge of each ramekin to loosen the cake. Place a plate on top of a ramekin, invert the plate and ramekin together, then lift the ramekin off so the cake releases onto the plate. If a cake sticks, wait an additional 30 seconds and try again.
Why Cooks Rave About It
There’s a satisfying contrast here: a lightly set exterior with a molten, chocolatey heart. The coconut oil and dairy-free chocolate create a glossy, smooth center when melted, while the eggs give the outside just enough structure to slice into. Using coconut sugar and applesauce keeps the sweetness natural and the texture moist, so the cake doesn’t taste dry or cakey like some gluten-free bakes can.
The strawberry fruit spread is a small but critical flourish. It cuts through the richness with acidity and brightness and creates a clean flavor contrast that feels tailored rather than tacked on. For busy home cooks, the short ingredient list and quick bake time make this dessert repeatable and crowd-pleasing.
What to Use Instead
If you need to swap something, choose replacements that keep the balance of fat, liquid, and structure. Small changes will affect texture, so adjust thoughtfully:
- Chocolate: If you don’t have dairy-free dark chocolate, use any dark chocolate you prefer. Higher cacao yields a less sweet result; lower cacao will be sweeter and softer.
- Coconut oil: Neutral oils like refined avocado oil or light olive oil can work in a pinch, but you’ll change the flavor slightly. If using butter (not dairy-free), expect a richer taste.
- Coconut sugar: Granulated white sugar can replace it at a 1:1 ratio for a cleaner sweetness; brown sugar will add extra molasses notes.
- Applesauce: Mashed banana or pumpkin puree can add moisture but will introduce their own flavors. Keep quantities the same and expect flavor shifts.
- Strawberry fruit spread: Raspberry jam or a spoonful of salted caramel would work for a different flavor profile — use an equal amount so the batter-to-filling ratio stays the same.
Before You Start: Equipment
- Two 6-ounce ramekins (or similar size) — the recipe is designed for individual servings.
- Large microwave-safe bowl — for melting the chocolate and coconut oil.
- Electric hand mixer — makes beating the eggs and sugar faster and more consistent.
- Whisk and rubber spatula — for combining chocolate and folding in cocoa powder.
- Baking sheet — place ramekins on it for easy handling into and out of the oven.
- Small knife and plates — for loosening and inverting the cakes cleanly.
Don’t Do This
- Don’t overbake. The lava effect depends on a slightly undercooked center. Stick close to the 10-minute bake time and watch the rim set before checking.
- Don’t skip greasing and dusting the ramekins. Even a tiny amount of unstuck batter will make release harder; grease and cocoa dusting are simple insurance.
- Don’t pour piping-hot chocolate into the eggs. Let the chocolate cool only slightly; if it’s too hot, it will scramble the eggs. Stirring constantly while combining helps disperse heat.
- Don’t substitute too much applesauce or liquid at once. The batter’s density is important for the outside to set while the inside stays molten.
Adaptations for Special Diets
Gluten-free: This recipe is naturally gluten-free as written (no flour). If you need to avoid cross-contamination, use certified gluten-free chocolate and spreads.
Dairy-free: The recipe already uses dairy-free dark chocolate and coconut oil. If you tolerate dairy, you can use regular dark chocolate or butter in place of coconut oil for a richer taste.
Vegan: The eggs are central to the texture and setting behavior here. Vegan swaps are possible but require testing: aquafaba (chickpea brine) whipped to stiff peaks can sometimes mimic egg whites but won’t replicate the yolk’s richness exactly. Flax or chia “eggs” (1 tablespoon ground flax + 3 tablespoons water per egg) add binding but often produce a denser, less molten interior. If you try vegan substitutions, expect changes to the final texture and possibly longer bake times; I recommend small test runs rather than swapping all eggs at once for an event.
Nut-free: The recipe contains no nuts, but always ensure labels (chocolate, spread) are certified nut-free if needed.
Testing Timeline
Follow this practical testing timeline when you make these so you hit the ideal bake window:
- 20 minutes before baking: Preheat oven to 400°F and prepare ramekins (grease + cocoa dust). This avoids cooling losses when you place the batter in.
- 8–10 minutes: Melt chocolate and combine batter. You’ll be ready to fill ramekins promptly.
- 10 minutes baking time: Start checking at 9 minutes if your oven runs hot. Look for set edges and a slightly soft center.
- 1 minute rest after oven: Remove and let stand for 1 minute before attempting release; if a cake sticks, wait an extra 30 seconds as noted.
Storing, Freezing & Reheating
Best served immediately. If you must store, cover the ramekins tightly and refrigerate for up to 24 hours. Reheat gently in a 300°F oven for 6–8 minutes to warm through — don’t microwave aggressively, which can cause the texture to become grainy or the center to fully set.
Freezing whole finished cakes isn’t ideal; instead, freeze the batter (in an airtight container) for up to one month. Thaw overnight in the fridge and bake as directed, adding a minute or two to the bake time if the batter is still chilled. If you want to freeze unbaked filled ramekins, wrap them tightly and freeze; bake from partially thawed (still cold) and add a couple minutes to the bake time, watching the edges for set.
Quick Q&A
What if my center isn’t molten?
Either the cake was overbaked, the batter was too cool when it went in, or the chocolate proportion was off. Next time try dropping the bake time by 30–60 seconds or ensuring the batter is room temperature when you bake.
What if the cake sticks to the ramekin?
Grease and dust thoroughly next time. After baking, allow the cake to rest the full minute and run a small knife between cake and ramekin before inverting. If it still clings, wait an extra 30 seconds — residual heat often helps release it.
Can I make this in one larger dish?
Yes, but timing changes: a single larger cake will bake differently and likely lose the molten center unless you reduce depth or watch timing very closely. Individual ramekins give the most reliable results.
Can I prep ahead?
You can make the batter ahead and keep it chilled for a few hours; bring it to room temperature before baking or expect slightly longer bake time. Filling ramekins and refrigerating overnight is possible, but again, expect a slight increase in bake time.
Ready to Cook?
Gather your ingredients and tools, preheat the oven, and follow the steps precisely. The formula here was developed to be forgiving yet precise enough to deliver that molten center every time. These two ramekins are quick to assemble and impressive to serve — no complicated techniques required. Plate with a few fresh strawberries or a dusting of extra cocoa powder if you like, and enjoy the moment when the center spills out warm and glossy.

Gluten-Free Chocolate Lava Cake (With Strawberry!)
Ingredients
Ingredients
- 3 ozdairy-free dark chocolate
- 1 tablespooncoconut oilplus additional for the ramekins
- 1 large egg
- 1 egg yolk
- 1/4 cupcoconut sugar
- 3 tablespoonsunsweetened applesauce
- 1/4 teaspoonvanilla extract
- Pinch of sea salt
- 2 tablespoonscocoa powderplus additional for the ramekins
- 4 teaspoonsorganic strawberry fruit spread
Instructions
Instructions
- Preheat oven to 400°F. Grease two ramekins with the additional coconut oil and dust the insides with the additional cocoa powder, tapping out any excess. Set the ramekins aside.
- Place 3 oz dairy-free dark chocolate and 1 tablespoon coconut oil in a large microwave-safe bowl. Microwave at 50% power for 30 seconds, stir, then continue microwaving in 30-second bursts, stirring after each, until the chocolate is fully melted and smooth. Set aside to cool slightly.
- While the chocolate is melting, combine 1 large egg, 1 egg yolk, 1/4 cup coconut sugar, 3 tablespoons unsweetened applesauce, 1/4 teaspoon vanilla extract, and a pinch of sea salt in a large bowl. Use an electric hand mixer to beat until the mixture lightens in color and the coconut sugar begins to break down, about 2 minutes.
- Pour the beaten egg mixture into the melted chocolate and coconut oil, whisking constantly until fully combined and the mixture begins to thicken slightly. Gently fold in 2 tablespoons cocoa powder until evenly incorporated.
- Divide the batter evenly between the two prepared ramekins, filling each just over halfway. Spoon 2 teaspoons organic strawberry fruit spread into the center of each ramekin. Divide any remaining batter equally over the fruit spread so each ramekin is just over 3/4 full; smooth the tops lightly.
- Place the ramekins on a baking sheet and bake in the preheated oven until the outside is set but the center appears slightly soft and undercooked, about 10 minutes.
- Remove the ramekins from the oven and let them stand for 1 minute. Run a small knife around the inside edge of each ramekin to loosen the cake. Place a plate on top of a ramekin, invert the plate and ramekin together, then lift the ramekin off so the cake releases onto the plate. If a cake sticks, wait an additional 30 seconds and try again.
Equipment
- Ramekins
- Microwave-safe Bowl
- Electric hand mixer
- Whisk
- Baking Sheet
- Small knife
- Plate