
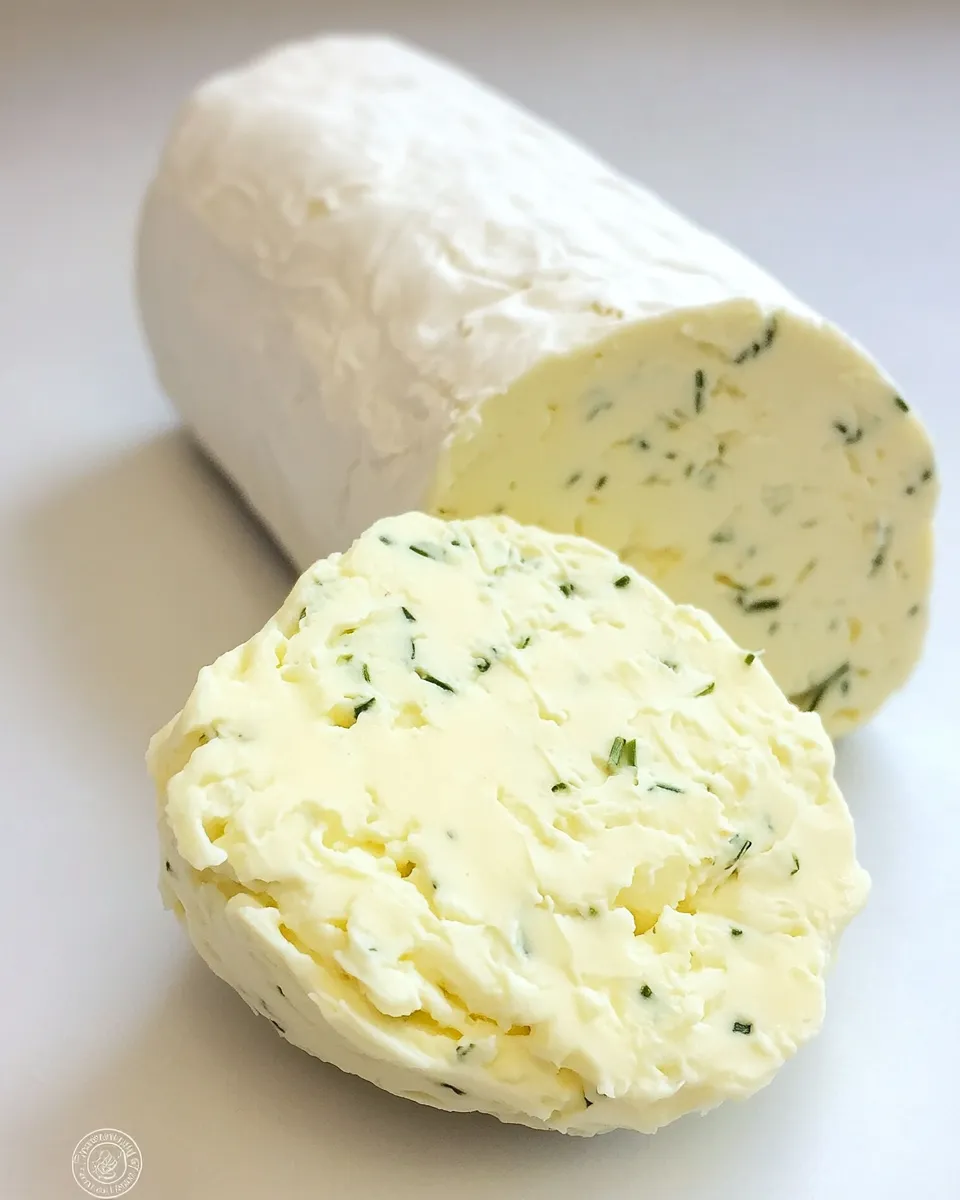
I love a simple compound butter because it does so much with so little effort. This goats cheese and chive butter is one of my go-to finishes: tang from the cheese, a gentle onion lift from the chives, and silky texture thanks to proper creaming of butter. It takes under ten minutes active time and transforms everything from roasted vegetables to a slice of sourdough.
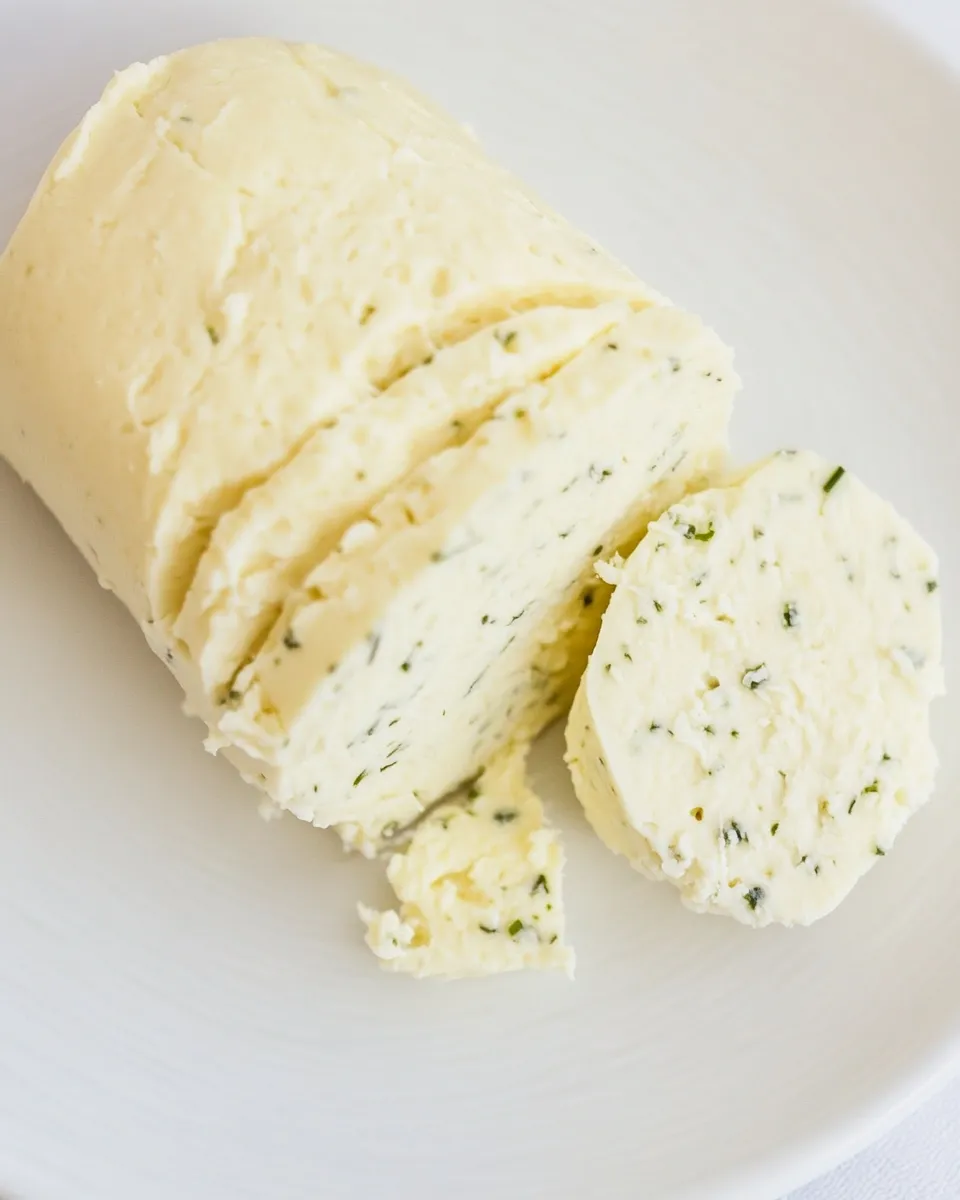
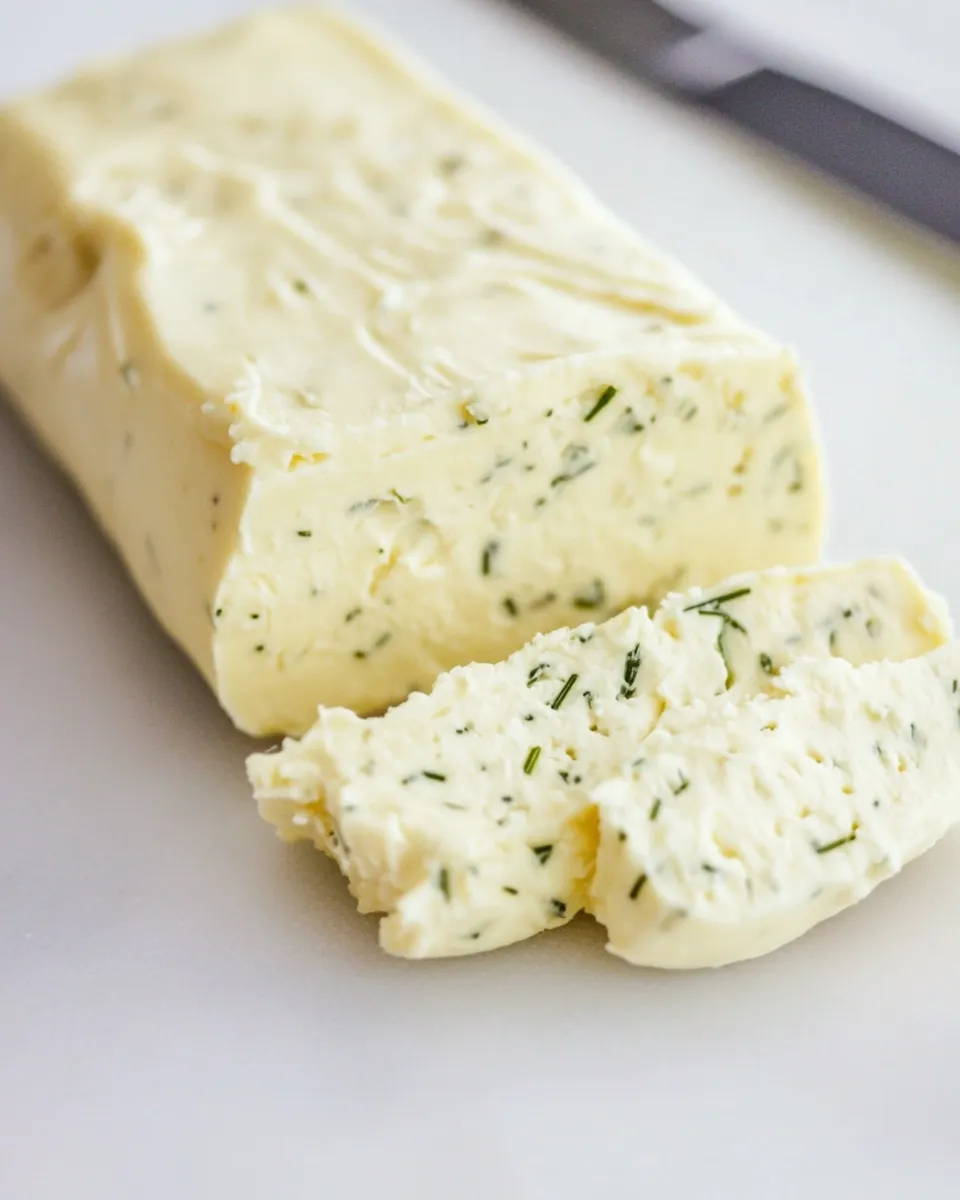
There’s no fuss here — just three ingredients and a food processor. The technique is straightforward and forgiving. Once you’ve made a log and chilled it, you can slice off rounds for immediate use or keep it for the week ahead.
Treat this like a finishing touch rather than a main. Use it to melt over hot grains, slather on bread, dot on baked fish, or toss with steamed green beans. It’s a small habit that elevates a weeknight plate without adding complexity.
The Essentials
This section covers the what and why: what you need, why the proportions work, and quick notes before you start. The recipe relies on three components: salted butter for the creamy base and seasoning, fresh soft goat cheese for acidity and tang, and chives for a bright, herbaceous note. The salt in the butter seasons the compound butter as you make it, so taste as you go and adjust if using unsalted butter instead.
The technique is simple: process everything until smooth, shape into a log, and chill. Pressing and rolling the mixture tight in plastic wrap gives you neat slices and makes the butter easy to store.
Ingredients
- ½ cup salted butter (at room temperature) — provides the smooth, spreadable base and salt to season the butter.
- 3.5 oz fresh soft goat cheese — adds tang, creaminess, and a bright, lactic note that lifts the flavor.
- 1 tablespoon chopped chives — gives a mild oniony freshness and flecks of green for appearance.
Goats Cheese and Chive Butter, Made Easy
This is the section where I strip the process down to essentials so you can see the whole recipe at a glance. No fuss, no extra ingredients, just the clear steps and the reason behind each one. The texture matters: fully combined and even, not lumpy. The chill matters: firm slices that hold shape.
Keep your butter at true room temperature — soft enough to blend but not melted. The goat cheese should be fresh and soft; if it’s cold from the fridge, give it a few minutes to warm so it combines smoothly.
Why This Recipe Belongs in Your Rotation
– Fast payoff: From start to fridge in under 15 minutes. That’s quicker than making a salad dressing and far more transformative.
– Versatility: Use it on bread, roasted veg, grilled meats, or simply melted into warm pasta. One compound butter, lots of uses.
– Layered flavor with little effort: Salted butter does the heavy lifting; goat cheese brings acidity and body; chives add a vegetal lift. Together they read as intentional rather than one-note.
– Dinner-party friendly: Make ahead and slice onto warm plates right before guests arrive. It looks composed and tastes indulgent with minimal work.
Allergy-Friendly Substitutes

If you or someone you cook for has dietary restrictions, there are reasonable swaps, but be mindful that the final flavor and texture will change.
– Dairy-free option: Use a firm, spreadable plant-based butter in place of salted butter and a dairy-free creamy cheese alternative that resembles soft goat cheese in texture. Choose versions that aren’t excessively flavored so they blend well with chives.
– Lower-sodium: Start with unsalted butter and add a pinch of fine salt to taste. Because the original calls for salted butter, take care when seasoning — taste after blending.
– Herb swaps: If chives aren’t available, very finely minced spring onion or the green part of scallions can stand in. Parsley is milder and can work if you want a different herb profile.
Equipment Breakdown
– Food processor — recommended for the smoothest, creamiest texture and fastest processing. A small bowl-style processor is ideal for this quantity.
– Spatula — for scraping down the sides to ensure even blending.
– Cling film (plastic wrap) — to shape and store the butter in a neat log.
– Plate or tray — to chill the butter on so it keeps its shape and stays clean.
– Knife — to slice the chilled log into rounds.
If you don’t have a food processor, a bowl and a sturdy fork or hand mixer can work: beat the butter and goat cheese together until smooth, stir in the chives, then shape and chill. It will take a bit longer and require more elbow grease.
Frequent Missteps to Avoid
– Using butter that’s too cold: You’ll end up with uneven chunks of butter and goat cheese. The butter should be soft enough to dent with a finger but not oily or melted.
– Over-processing: Run the processor in short bursts and scrape down the sides. Over-mixing can warm the butter too much and make it greasy.
– Skimping on scraping: If you don’t pause to scrape the bowl, you’ll have lumps and pockets of unmixed cheese. Scrape once or twice during processing.
– Not sealing the log well: If the cling film isn’t tight or ends aren’t secured, the butter can absorb fridge odors or dry out around the edges.
– Over-salting: Because the recipe calls for salted butter, taste before adding any extra salt to finished slices.
Make It Year-Round
This butter works in all seasons. In spring and summer, use it to dress grilled asparagus or sweet potatoes straight from the grill. In fall and winter, drop a round onto roasted root vegetables or a hot baked potato for instant richness. Because it’s made ahead and stores well, it’s a handy pantry-to-plate boost any time of year.
For seasonal variation, you can pair the chives with a tiny pinch of lemon zest in warmer months for brightness, or add a little freshly cracked black pepper in cooler months for warmth. These are optional finishing touches — the base recipe is intentionally simple.
Method to the Madness
- Put ½ cup salted butter (at room temperature), 3.5 oz fresh soft goat cheese, and 1 tablespoon chopped chives into a food processor.
- Process until smooth, stopping once or twice to scrape down the sides with a spatula and then process again, until the mixture is fully combined and even in texture.
- Lay a large strip of cling film (plastic wrap) on the work surface along its long edge. Spoon the butter mixture onto the cling film in a rough log along the long edge, leaving space at both ends.
- Roll the cling film around the mixture tightly to form a compact log, using the cling film to press and shape the butter as you roll.
- Twist or tie the cling film ends to seal the log, then refrigerate and store in the fridge until firm and ready to use.
Notes on technique:
– If your food processor is small, work in brief bursts and tap the bowl so the mixture moves toward the blade. Scrape well between bursts for an even texture.
– When spooning onto the cling film, don’t worry about perfection. The rolling and shaping will smooth the log. Press gently as you roll to remove air pockets and create a compact cylinder.
– Chill the log for at least an hour to firm it up. For quicker results, flatten into a thick pat on a tray and chill uncovered for 20–30 minutes, then roll if you prefer slices.
Shelf Life & Storage
Store the wrapped log in the refrigerator for up to 7–10 days. Keep it tightly sealed in the cling film and, if possible, slide it into a small airtight container to protect it from absorbing other flavors.
For longer storage, freeze the log: wrap it tightly in cling film, then again in foil or place it in an airtight freezer bag. It will keep in the freezer for up to 3 months. Thaw overnight in the refrigerator before slicing. Note: freezing can slightly change texture, but the flavor remains attractive and the butter is still excellent melted over hot dishes.
If you’ve sliced rounds and want to prepare ahead, arrange slices between sheets of parchment in a small airtight container. This prevents them from sticking together and makes quick use easier.
Common Questions
- Can I use unsalted butter instead? — Yes. If you choose unsalted, add a small pinch of fine salt to taste after processing. Go slowly; the goat cheese may already bring some tang but little salt.
- What if my goat cheese is crumbly? — Let it warm a few minutes at room temperature, then blend. If it remains particularly dry, a teaspoon of neutral cream or a splash of milk can help smooth the texture, but that’s optional.
- Can I make this without a food processor? — Yes. Use a bowl and a sturdy fork to mash the butter and goat cheese together until smooth, or a hand mixer on low. It will take a little more time and elbow grease.
- How do I serve it on a hot steak or fish? — Slice rounds just before plating and place on the hot protein so the butter melts and forms a quick sauce. For fish, a thinner slice works well so it melts evenly.
- Is goat cheese essential? — It’s central to the recipe’s character. A mild cream cheese will make a different, richer spread but won’t replicate the tang that goat cheese provides.
Final Bite
This goats cheese and chive butter is one of those pantry-friendly hacks that rewards a little prep with a lot of payoff. It’s small-batch, approachable, and reliably elevates meals without extra fuss. Keep a log in the fridge and reach for it on busy weeknights, sudden guests, or whenever you want food to feel a little more deliberate. Slices melt beautifully, add flavor without drowning a dish, and make simple dinners feel thoughtful. Give it a try this week — you’ll use it more than you expect.

Goats Cheese and Chive Butter
Ingredients
Ingredients
- 1/2 cupsalted butterat room temperature
- 3.5 ozfresh soft goat cheese
- 1 tablespoonchopped chives
Instructions
Instructions
- Put ½ cup salted butter (at room temperature), 3.5 oz fresh soft goat cheese, and 1 tablespoon chopped chives into a food processor.
- Process until smooth, stopping once or twice to scrape down the sides with a spatula and then process again, until the mixture is fully combined and even in texture.
- Lay a large strip of cling film (plastic wrap) on the work surface along its long edge. Spoon the butter mixture onto the cling film in a rough log along the long edge, leaving space at both ends.
- Roll the cling film around the mixture tightly to form a compact log, using the cling film to press and shape the butter as you roll.
- Twist or tie the cling film ends to seal the log, then refrigerate and store in the fridge until firm and ready to use.
Equipment
- Food Processor
- Spatula
- Plastic Wrap


