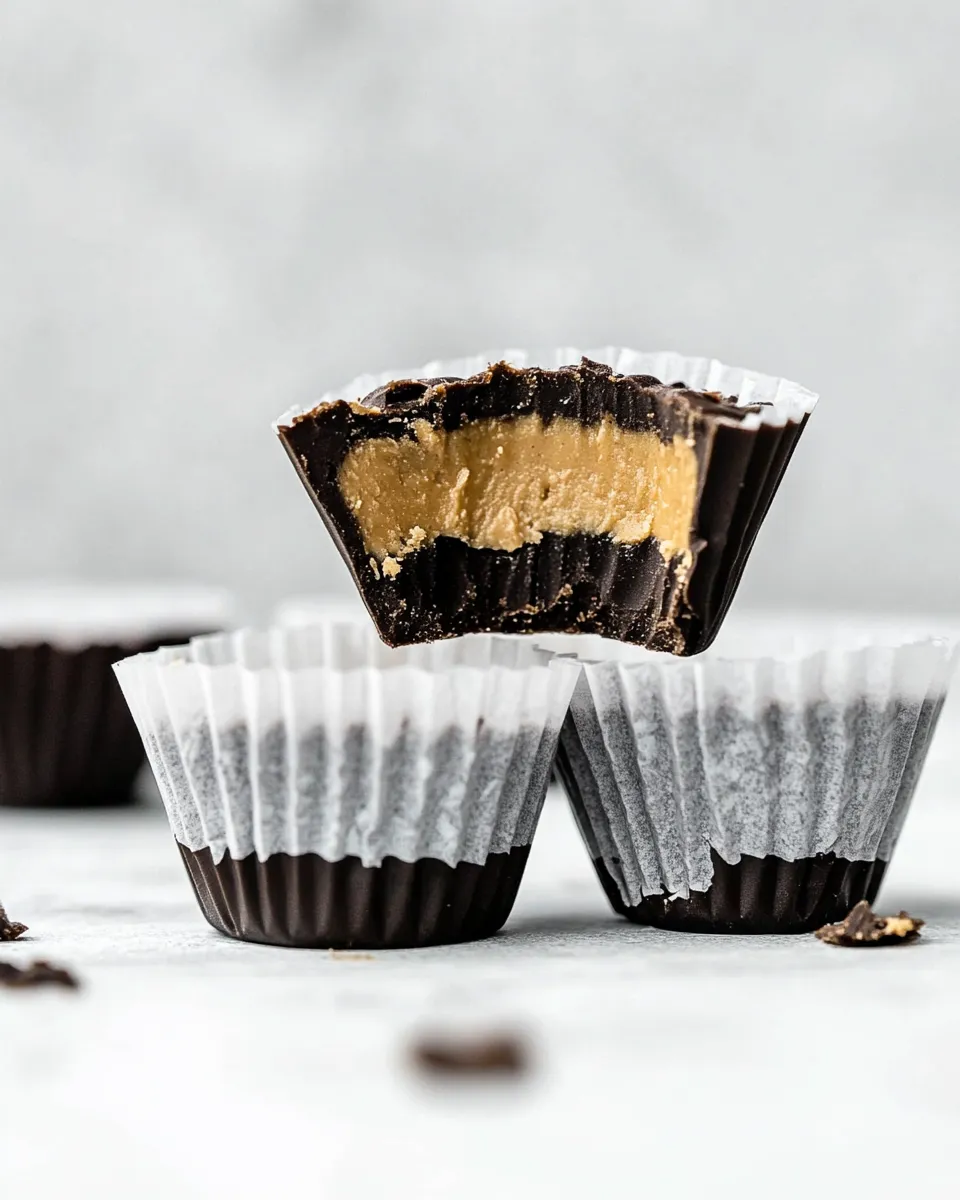
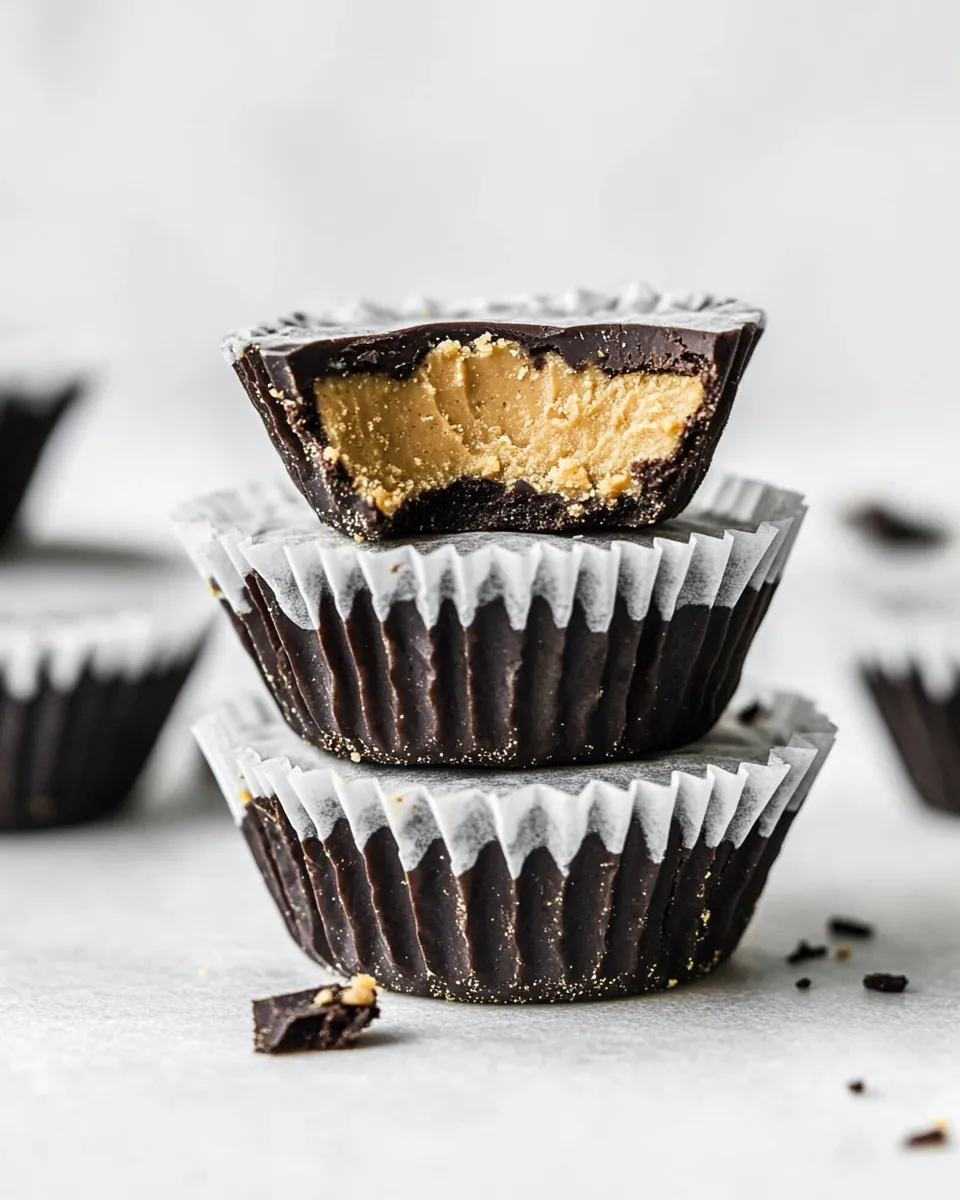
I make these Healthy Protein Peanut Butter Cups when I want a bite-sized treat that feels indulgent but won’t derail a balanced day. They’re small, portable, and the texture is exactly what you want: a thin chocolate shell, a soft peanut-butter center, and just enough sweetness. No tempering, no candy thermometer — just simple steps and a few minutes of active work.
They’re perfect after a workout or as a mid-afternoon pick-me-up with a cup of coffee. I like to keep the recipe small-batch so the cups stay fresh and I’m not tempted to overdo it. The little tweaks — using a vanilla protein powder, a no-stir peanut butter, and dairy-free chocolate chips — make them higher in protein and suitable for folks avoiding dairy.
Below you’ll find exactly what I use, the precise step-by-step method I follow, and practical tips so your batch turns out as reliably as mine. Short on equipment or want to swap an ingredient? There are sensible options listed in each section.
Ingredients
- 1cupsemisweet dairy-free chocolate chips — provides the chocolate shell; dairy-free variety keeps these vegan-friendly if your protein powder is too.
- 1tablespooncoconut oil — thins the melted chocolate so it sets glossy and smooth; helps pouring and sealing the edges.
- 3tablespoonsnatural creamy peanut butterno-stir variety — the filling’s base; choose a no-stir style for a creamier, more predictable texture.
- 3tablespoonsvanilla protein powderof choice — boosts protein and adds a hint of vanilla; any scoopable vanilla powder works.
What to Buy
Shop for quality over variety here: one good bag of chocolate chips will determine the overall flavor. I reach for semisweet dairy-free chips to keep these accessible to dairy-free eaters and to balance the salty peanut butter. If you don’t need dairy-free, a regular semisweet works too, but stick with semisweet rather than milk chocolate to avoid an overly sweet cup.
Buy a natural, creamy peanut butter — the no-stir variety saves time because it’s already well blended and won’t separate as much. For the protein powder, any vanilla-flavored powder is acceptable: whey, pea, soy, or a blended protein. Choose based on dietary needs and taste. Coconut oil is pantry-stable; pick refined if you don’t want a strong coconut flavor.
If you don’t already have mini-muffin liners and a 12-cup mini-muffin pan, add those to your cart. The pans are inexpensive and useful beyond just this recipe. Otherwise, at least make sure you have small liners that fit a mini cup — they make removal and portion control so much simpler.
Stepwise Method: Healthy Protein Peanut Butter Cups
- Line a 12-cup mini-muffin pan with 12 mini-muffin liners.
- Place the chocolate chips and coconut oil in a microwave-safe bowl. Microwave at 50% power in 30-second intervals, stirring well between intervals, until the chocolate is completely melted and smooth.
- Spoon a very thin layer of the melted chocolate into the bottom of each lined muffin cup (just enough to cover the bottom). Tap the pan gently on the counter to level the chocolate.
- Transfer the pan to the freezer for 5–10 minutes, until the chocolate layer is firm.
- While the chocolate is chilling, combine the natural creamy peanut butter and the vanilla protein powder in a bowl. Stir or knead until evenly mixed and a cohesive dough forms. Divide the mixture into 12 equal portions and roll each portion into a small ball (roughly teaspoon-sized).
- Remove the muffin pan from the freezer. Place one peanut butter ball into the center of each chocolate-lined cup and press each ball flat with your fingers or the back of a spoon, leaving a small chocolate rim visible around the edge.
- Reheat the remaining chocolate if it has started to set: microwave at 50% power in 15-second intervals, stirring between intervals, until smooth.
- Spoon the melted chocolate over each peanut-butter-filled cup to fully cover the filling and seal the edges. Smooth the tops as needed.
- Cover the pan with plastic wrap and refrigerate for 30 minutes to 1 hour, until the cups are fully set.
- Let the peanut butter cups sit at room temperature for a few minutes before serving, or store them in a sealed container in the refrigerator until ready to eat.
What Makes This Recipe Special
These peanut butter cups stand out because they balance indulgence and practical nutrition. The vanilla protein powder transforms the peanut butter into a lightly sweet, protein-packed filling, so each bite contributes to your daily protein goals. Because the chocolate is thinned with a touch of coconut oil, it sets with a professional-looking sheen without the fuss of tempering.
Another benefit is portion control. Making 12 mini cups keeps servings small and satisfying. The recipe is also versatile: you can easily adjust protein types or nut butters while keeping the method identical. The result is a snack that tastes like a treat but fits into a conscious eating plan.
What to Use Instead
- Peanut butter alternative: almond butter or sunflower seed butter can substitute one-for-one if you avoid peanuts; texture will vary slightly.
- Protein powder alternative: use any vanilla protein powder you prefer (whey, pea, soy, mixed plant). If your powder is very sweet, reduce additional sweeteners elsewhere or choose an unflavored version and add a pinch of salt.
- Chocolate alternative: use regular semisweet or dark chocolate chips if dairy-free is unnecessary; white chocolate will be much sweeter and may change the balance.
- Coconut oil swap: a neutral oil like refined avocado oil won’t impart coconut flavor but may affect setting slightly; keep quantities the same.
Before You Start: Equipment
- 12-cup mini-muffin pan — gives shape and portion control.
- Mini-muffin liners — make removal clean and simple.
- Microwave-safe bowl — for melting chocolate in intervals.
- Spoon or small offset spatula — useful for smoothing and sealing chocolate tops.
- Plastic wrap or a cover — to protect while chilling.
Missteps & Fixes
If your chocolate looks grainy after melting, it usually means it overheated. Reheat in short bursts at lower power and stir thoroughly between intervals to smooth it out. If smoothing fails, add a tiny bit more coconut oil (a quarter teaspoon) and stir until glossy.
If the peanut butter-protein mixture is too dry or crumbly, knead in a few drops of water or a tiny splash of neutral oil, a drop at a time, until it holds together. If it’s too soft and spreads into the chocolate, add a scant pinch more protein powder and chill the balls briefly before placing them in the cups.
Chocolate sometimes separates or sets too hard in warm kitchens. Work quickly and keep the filled pan in the fridge while you finish topping each cup. If the top chocolate doesn’t seal to the bottom, press gently with a spoon to encourage contact and then chill right away.
Seasonal Flavor Boosts
- Winter: add a pinch of ground cinnamon or a tiny flick of orange zest to the peanut butter mix for cozy, seasonal notes.
- Spring: fold in finely chopped freeze-dried strawberries into the peanut mixture for a bright, tart contrast.
- Summer: sprinkle a few flaky sea salt crystals on top before chilling to heighten the chocolate-peanut contrast.
- Autumn: a small pinch of pumpkin pie spice can pair surprisingly well with vanilla protein and peanut butter.
Behind-the-Scenes Notes
I prefer melting chocolate at 50% power in short bursts because it gives control and avoids scorching. Stirring between intervals is non-negotiable — it distributes heat and encourages a smooth melt. Adding coconut oil thins the chocolate so it spreads easily, which is the trick to neat bottoms and smooth tops without tempering.
The decision to use a no-stir peanut butter is practical. Natural, stirred peanut butter has more oil separation, which can make the dough looser and harder to portion. No-stir keeps the filling uniform and consistent each time. The vanilla protein powder both adds protein and helps firm the filling, so choose one with a texture you like when mixed into nut butter.
Storing Tips & Timelines
Store completed cups in a single layer in a sealed container in the refrigerator for up to 2 weeks. If you need longer storage, freeze them for up to 2 months — thaw a few minutes at room temperature before serving for the best texture. Keep them chilled in warm weather to prevent softening.
Room-temperature storage is fine for a few hours if you’re serving them at a party, but they will soften more quickly the warmer it gets. For transport, keep them in a cool bag or an insulated container so the chocolate doesn’t bloom or weep.
Ask the Chef
Q: Can I make the recipe in silicone molds instead of a muffin pan?
A: Yes. Silicone molds work well and can give you prettier edges if you prefer. Just make sure they’re mini-sized and use liners if you want neater removal.
Q: My protein powder makes the filling gritty. Help?
A: Try a different protein powder with a finer grind or substitute a portion with a nut flour (if your diet allows) to smooth texture. Also, longer kneading and a brief rest in the fridge can hydrate the powder and improve mouthfeel.
Q: Can I double the batch?
A: You can double or triple the ingredients, but melt the chocolate in a larger bowl and work in batches when spooning and filling so the chocolate doesn’t set before you finish. A chilled baking sheet or brief returns to the freezer help keep things moving.
Before You Go
These Healthy Protein Peanut Butter Cups are one of my favorite quick projects when I want something homemade but uncomplicated. They’re small, satisfying, and reliably delicious. Make a single batch, tweak the protein choice to suit your goals, and you’ll have a portable snack that feels like a treat without overindulgence.
If you try them, leave a note about which protein powder you used and how you flavored them — I love swapping ideas with readers. And if you need help troubleshooting a specific step, drop a question and I’ll walk you through it.
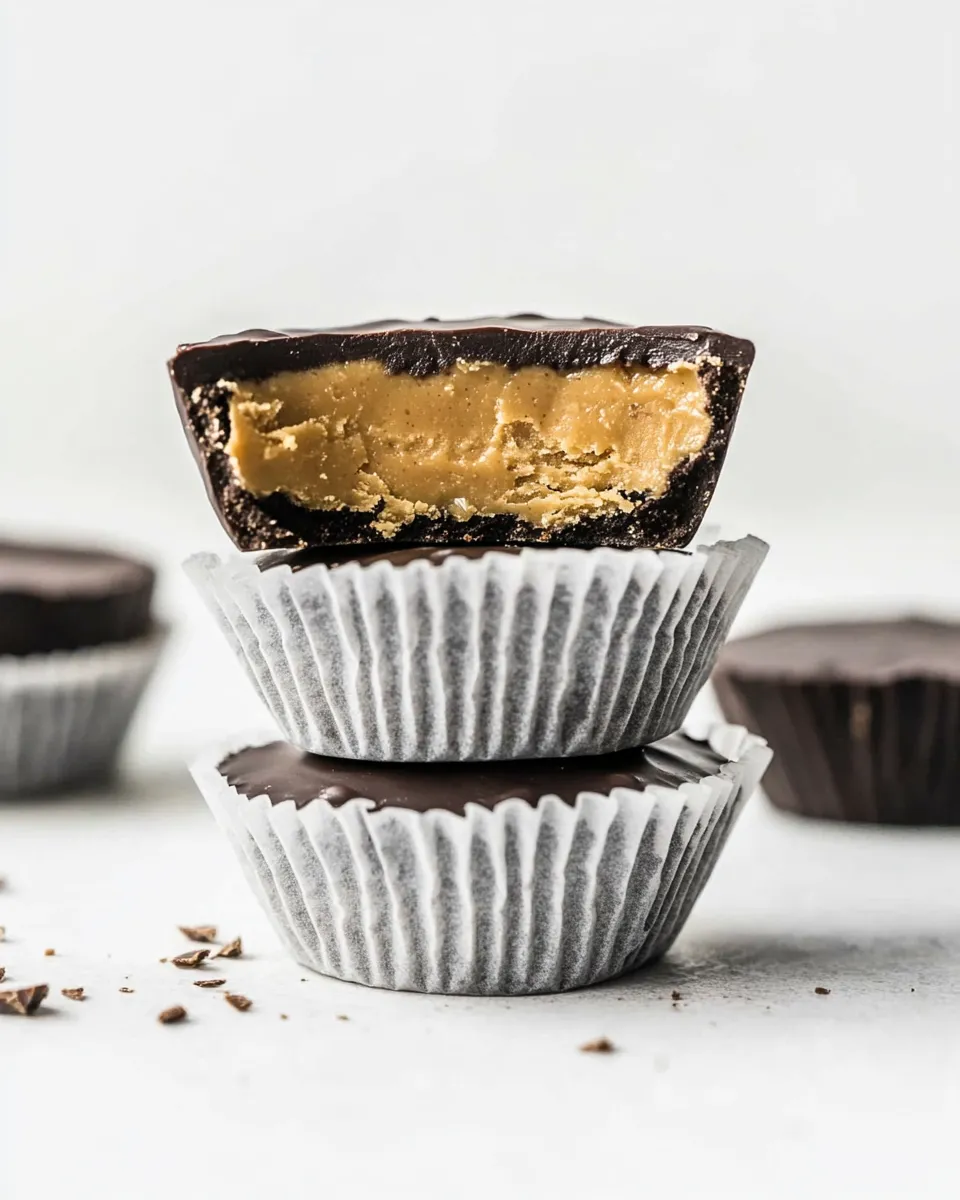
Healthy Protein Peanut Butter Cups
Ingredients
Ingredients
- 1 cupsemisweet dairy-free chocolate chips
- 1 tablespooncoconut oil
- 3 tablespoonsnatural creamy peanut butterno-stir variety
- 3 tablespoonsvanilla protein powderof choice
Instructions
Instructions
- Line a 12-cup mini-muffin pan with 12 mini-muffin liners.
- Place the chocolate chips and coconut oil in a microwave-safe bowl. Microwave at 50% power in 30-second intervals, stirring well between intervals, until the chocolate is completely melted and smooth.
- Spoon a very thin layer of the melted chocolate into the bottom of each lined muffin cup (just enough to cover the bottom). Tap the pan gently on the counter to level the chocolate.
- Transfer the pan to the freezer for 5–10 minutes, until the chocolate layer is firm.
- While the chocolate is chilling, combine the natural creamy peanut butter and the vanilla protein powder in a bowl. Stir or knead until evenly mixed and a cohesive dough forms. Divide the mixture into 12 equal portions and roll each portion into a small ball (roughly teaspoon-sized).
- Remove the muffin pan from the freezer. Place one peanut butter ball into the center of each chocolate-lined cup and press each ball flat with your fingers or the back of a spoon, leaving a small chocolate rim visible around the edge.
- Reheat the remaining chocolate if it has started to set: microwave at 50% power in 15-second intervals, stirring between intervals, until smooth.
- Spoon the melted chocolate over each peanut-butter-filled cup to fully cover the filling and seal the edges. Smooth the tops as needed.
- Cover the pan with plastic wrap and refrigerate for 30 minutes to 1 hour, until the cups are fully set.
- Let the peanut butter cups sit at room temperature for a few minutes before serving, or store them in a sealed container in the refrigerator until ready to eat.
Equipment
- 12-cup mini muffin pan
- mini muffin liners
- Microwave-safe Bowl
- Spoon
- Freezer
- Refrigerator
- Plastic Wrap