
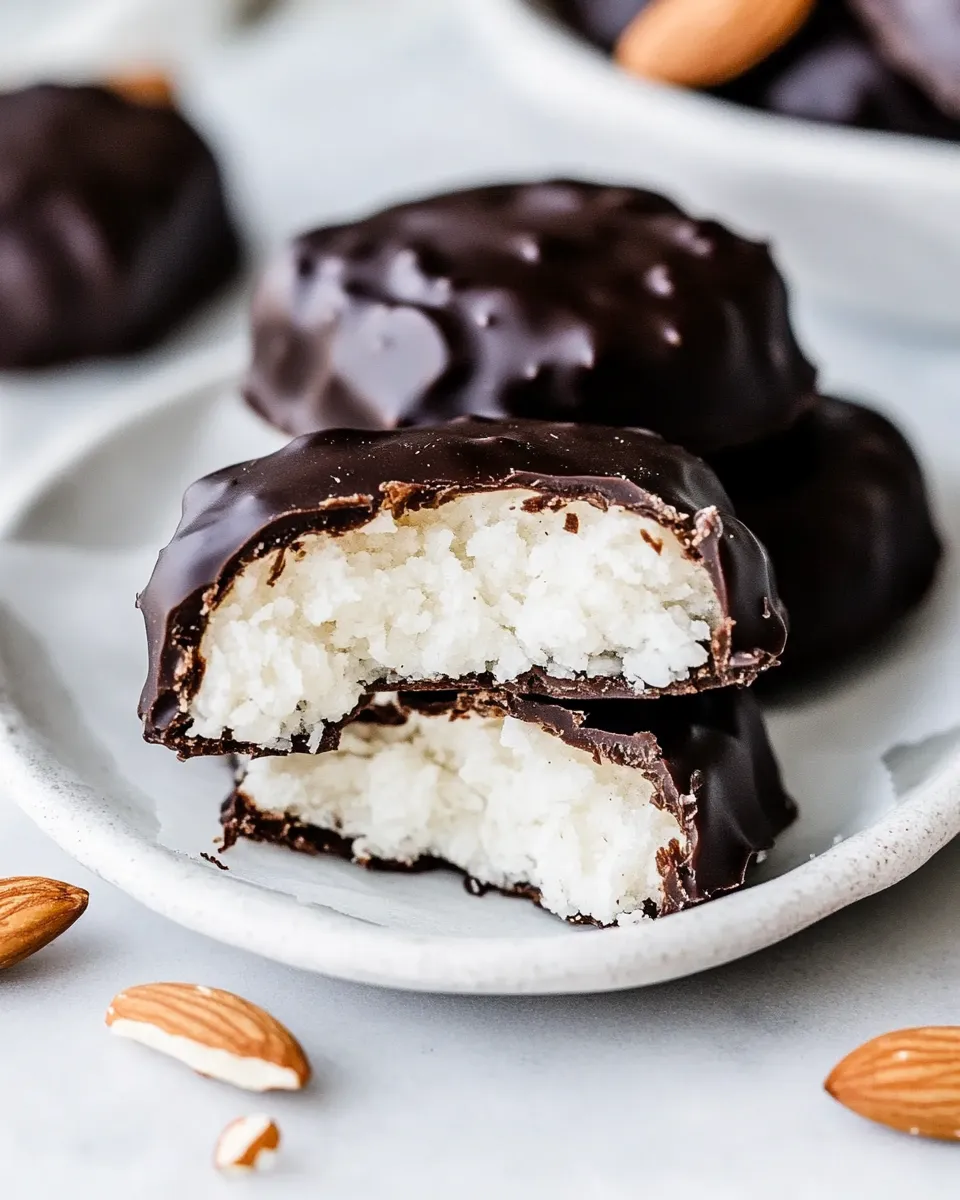
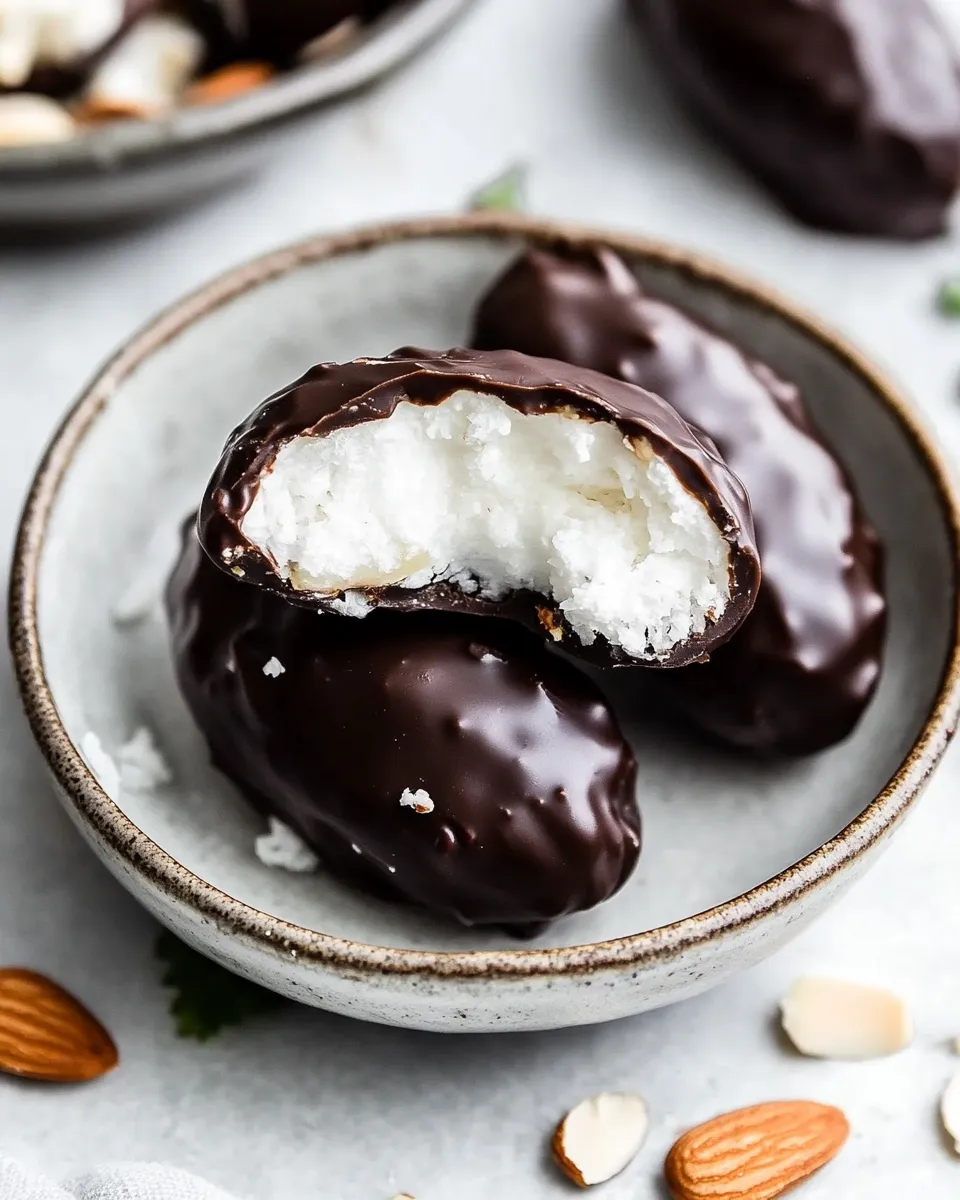
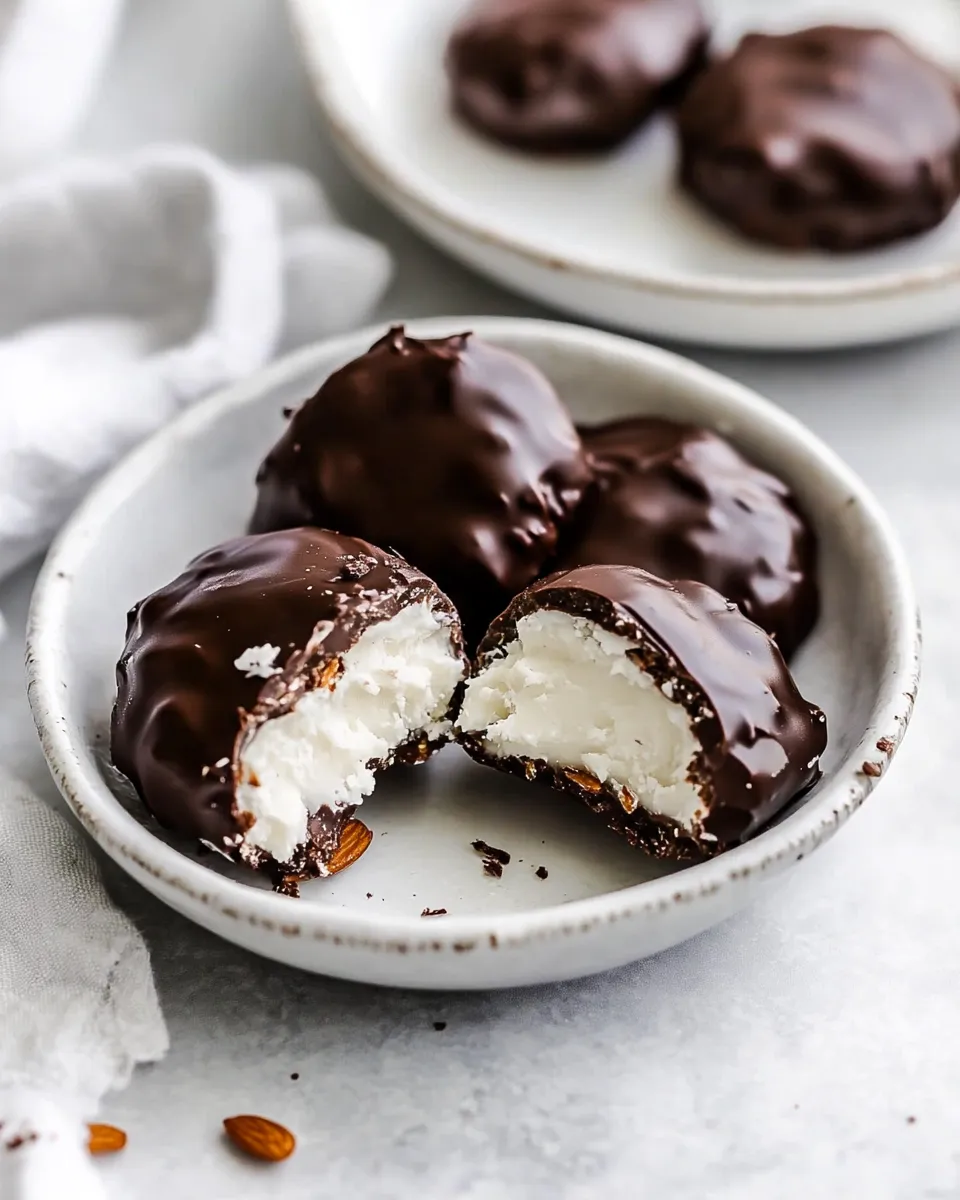
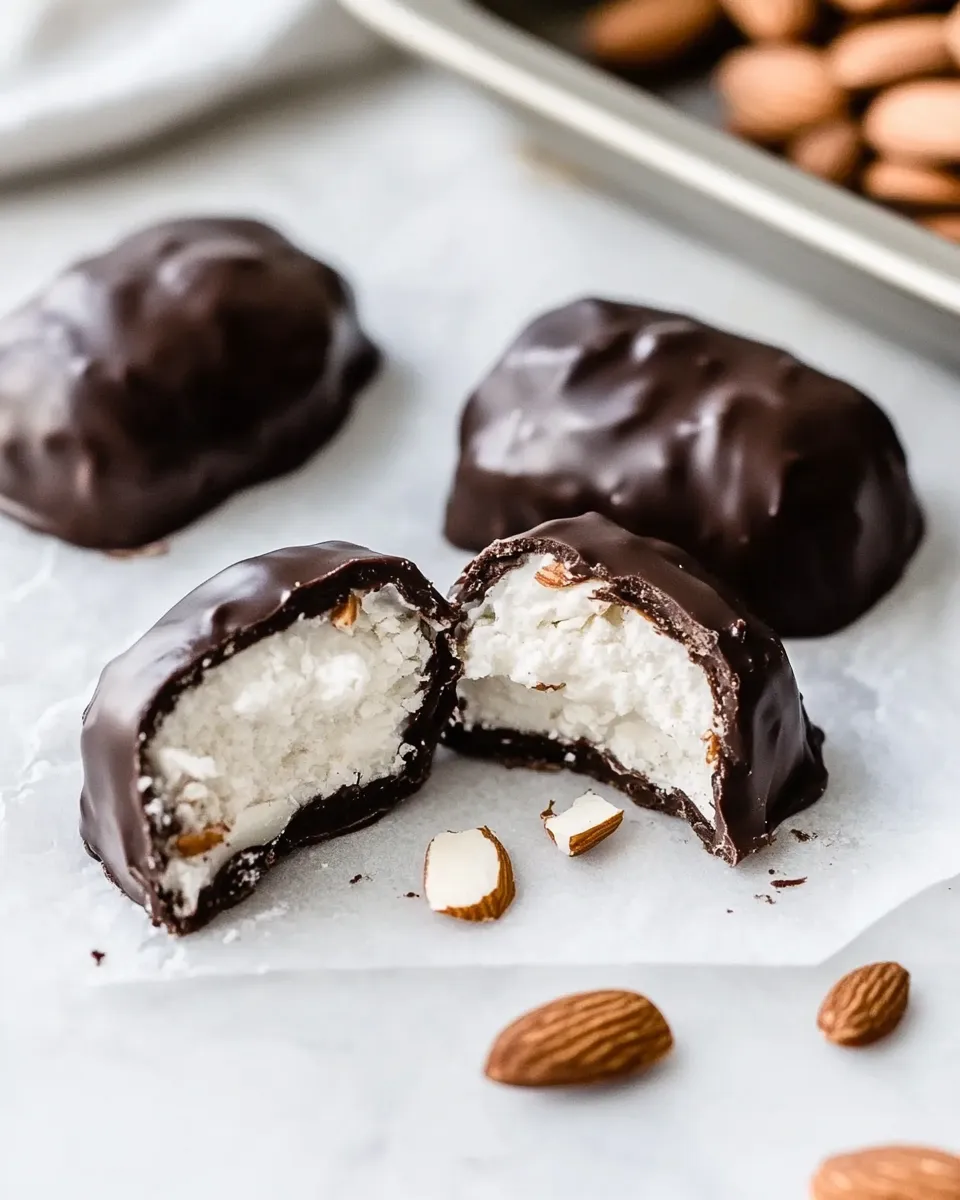
These Homemade Almond Joys are a small batch treat you can make without special equipment and with pantry-friendly ingredients. They have the same crunchy almond, chewy coconut, and glossy chocolate shell you expect from the candy bar, but you control the sweetness, quality of chocolate, and the size. They’re straightforward — a melt, a chill, a quick dip — and they reward patience.
If you’ve ever hesitated because candy-making felt technical, this one keeps it simple. No thermometer, no tempering, no long stovetop rituals. The marshmallow and corn syrup base binds the coconut and gives the interior a soft, chewy texture that holds together for trimming, pressing almonds on top, and coating in chocolate.
Make a tray for a party, package a few for gifts, or stash them in the freezer for a late-night craving. The method below is precise, practical, and built from steps I use every time I make them at home.
What’s in the Bowl
Ingredients
- 1 1/3 cups mini marshmallows, or about 13 regular marshmallows — the binder that gives the centers chew and structure.
- 1/2 cup light corn syrup — keeps the marshmallow melted and gives a pliable, tacky texture for shaping.
- pinch of salt — balances sweetness and brightens flavors.
- 8 ounces shredded coconut sweetened, or unsweetened — the main body and texture; use according to your sweetness preference.
- 1 teaspoon vanilla extract — adds depth and rounds the sweetness.
- 25-30 almonds, whole, roasted (preferred) or regular — the signature crunch and visual finish.
- 12 ounces good quality semi-sweet chocolate, or almond bark — the coating; higher-quality chocolate gives a cleaner snap and better shine.
Homemade Almond Joys Made Stepwise
- In a medium saucepan combine 1/2 cup light corn syrup, 1 1/3 cups mini marshmallows (or about 13 regular marshmallows), and a pinch of salt. Cook over medium heat, stirring constantly, until the marshmallows are completely melted and smooth. Continue stirring for about 1 minute more.
- Remove the pan from the heat and stir in 8 ounces shredded coconut and 1 teaspoon vanilla extract until evenly combined.
- Transfer the coconut-marshmallow mixture to a bowl, cover, and refrigerate for at least 1 hour, or until well cooled and firm.
- Line a baking sheet with parchment paper.
- Using a spoon or small scoop, portion the chilled coconut mixture into small logs about the size of a fat Tootsie Roll (or double that size if you prefer larger pieces that can hold 2 almonds). Place the logs on the parchment paper with a little space between them. This should make about 25 small almond joys.
- Press one whole almond on top of each coconut log (use 25–30 whole almonds as needed). If you made larger pieces, press two almonds on top of each instead.
- Return the baking sheet to the refrigerator or place it in the freezer while you melt the chocolate; colder logs are easier to coat.
- If using chocolate bars, chop the 12 ounces of good-quality semi-sweet chocolate (or break the almond bark into pieces). Place the chocolate in a microwave-safe bowl and microwave in 20-second increments, stirring after each increment, until the chocolate is fully melted and smooth.
- Working one piece at a time, use a fork to dip each chilled coconut log into the melted chocolate, fully coating it. Lift with the fork and gently tap the fork on the edge of the bowl to let excess chocolate drip off.
- Place the coated candies back onto the parchment-lined sheet, keeping the almond facing up. Repeat until all pieces are coated.
- Allow the chocolate to set at room temperature, or refrigerate the tray until the chocolate is firm.
Why This Recipe is a Keeper
This recipe is reliable and forgiving. The marshmallow-corn syrup base is more predictable than working with eggs or sugar syrups that require exact temperatures. You get a consistently chewy center that holds together for dipping. The whole process—from melting to chilling to dipping—moves quickly, but yields a fresh, homemade candy with better texture and flavor than most mass-produced versions.
It’s also flexible. Make them small for bites or slightly larger to feel indulgent; press one or two almonds on top for different presentations. The use of 12 ounces of chocolate gives a thick, satisfying coating when you work carefully, and the step to chill the centers before dipping makes the process much easier and less messy.
Allergy-Friendly Substitutes
If you need to avoid ingredients for allergies or dietary choices, there are workable swaps. Keep in mind that changing certain ingredients affects texture and flavor.
- Nuts: Replace almonds with roasted sunflower seeds or pumpkin seeds if avoiding tree nuts; they give crunch and a similar visual anchor.
- Coconut: For those with coconut allergies, this particular recipe loses its defining character if you remove coconut, but you could experiment with finely chopped oats mixed with a touch of honey or syrup to mimic texture (note: this is an adaptation and will change flavor and chew).
- Chocolate: Choose dairy-free dark chocolate labeled vegan if avoiding dairy; many semi-sweet bars are suitable. Almond bark is often dairy-free but check labels.
- Marshmallows: Use vegan marshmallows if you need a gelatin-free option; they melt similarly but check texture and chill times.
Equipment Breakdown
- Medium saucepan — for melting the marshmallows and corn syrup. A heavy-bottomed pan helps distribute heat evenly.
- Heatproof bowl — for melting chocolate in the microwave.
- Microwave (or double boiler) — the microwave is fast; a double boiler gives gentler heat if your microwave isn’t reliable.
- Spatula or wooden spoon — for vigorous stirring while melting marshmallows and for folding in coconut.
- Parchment-lined baking sheet — keeps the candies from sticking and makes cleanup easy.
- Spoons or small scoop — to portion the centers evenly; a small cookie scoop works well.
- Forks — for dipping and tapping off excess chocolate.
- Refrigerator/freezer — chilling the centers and setting chocolate is faster and neater with cold temps.
Errors to Dodge
A few missteps can turn a simple batch into a sticky mess. Watch for these common problems and their fixes.
- Overheating marshmallows: Cook just until melted and smooth, then stir an extra minute; overheating can make the mixture grainy and harden too quickly.
- Skipping the chill: Dipping warm centers leads to structural collapse and a messy coating. Refrigerate at least an hour so pieces hold their shape.
- Chocolate too hot: If your chocolate is piping hot, it will melt the centers when dipped. Cool it slightly and stir until smooth, testing with a small piece first.
- Too much chocolate on each piece: Tap gently on the fork to remove excess. Thick globs create long set times and uneven finishes.
- Using very wet coconut: If your shredded coconut is damp, the centers may be loose. Use dry shredded coconut and measure by weight or pack volume lightly.
Variations for Dietary Needs
Small swaps make this recipe friendly to various diets. Keep in mind texture and taste will shift with substitutions.
- Lower-sugar option: Use unsweetened shredded coconut and choose a lower-sugar chocolate, but expect the centers to be less sweet; a touch of powdered sugar could be added to the mixture if needed.
- Vegan option: Use vegan marshmallows and dairy-free chocolate. Ensure all packaged ingredients are labeled vegan.
- Nut-free option: Replace almonds with roasted seeds for crunch, and clearly label the batch to avoid cross-contact.
- Larger bars: Double the scoop size and press two almonds on top for a chunkier treat; allow for slightly longer chill time before dipping.
Cook’s Notes
Melting and Texture Tips
Stir the marshmallow mixture constantly over medium heat to avoid scorching. When you remove the pan from heat and fold in the coconut and vanilla, work quickly so the mixture doesn’t set in the pan.
Shaping and Chilling
Portion with a small scoop or two spoons to keep sizes consistent; uniform pieces set evenly and look better. Chilling for at least an hour is key—if you’re short on time, a quick 20–30 minute stint in the freezer will help, but don’t forget them and let them freeze solid.
Chocolate Handling
Microwave in short bursts and stir between each to avoid seizing. If your chocolate thickens, stir in a teaspoon of coconut oil or neutral oil to smooth it (use sparingly to prevent a greasy finish).
Shelf Life & Storage
Store the finished Almond Joys in an airtight container. At room temperature, they’ll keep for about 4–5 days in a cool place. Refrigerate for up to 2 weeks; bring to room temperature briefly before serving for the best texture. For longer storage, freeze in a single layer on a tray until firm, then transfer to a freezer-safe container for up to 3 months. Thaw in the refrigerator overnight to prevent condensation forming on the chocolate.
Top Questions & Answers
- Q: Can I use fresh coconut instead of shredded?
A: Fresh coconut has higher moisture and will change the texture; shredded dried coconut is recommended for structure. - Q: Do I have to use corn syrup?
A: Corn syrup helps keep the marshmallow mixture pliable. Some bakers use light agave or golden syrup as alternatives, but this may slightly alter texture and sweetness. - Q: Will the chocolate set without tempering?
A: Yes. Tempering improves snap and sheen but isn’t necessary here. Using good-quality chocolate and allowing it to set in a cool place gives a pleasant finish. - Q: How do I prevent the almonds from sinking?
A: Press them gently into firm, well-chilled centers so they sit on the surface rather than dropping in. - Q: Can I make these gluten-free?
A: Yes. The listed ingredients are naturally gluten-free, but always check labels on marshmallows and chocolate for cross-contamination warnings.
Make It Tonight
If you want these for tonight, start early: melting, mixing, and at least an hour of chilling adds up. Plan about 90–120 minutes from start to finish if you include chilling, dipping, and setting time. Work steadily: melt, mix, chill, portion, top with almonds, chill briefly, melt chocolate, dip, and set. You’ll have a tray of glossy, homemade Almond Joys ready to enjoy, share, or gift.
Keep a tray in the fridge for immediate snacking and freeze extras for emergencies. Once you’ve made them once, you’ll know exactly how you like yours — smaller, larger, darker chocolate, or two almonds on top. Practical, small-batch candy-making doesn’t have to be complicated. These are proof.

Homemade Almond Joys
Ingredients
Ingredients
- 1 1/3 cupsmini marshmallows or about 13 regular marshmallows
- 1/2 cuplight corn syrup
- pinch of salt
- 8 ouncesshredded coconutsweetened or unsweetened
- 1 teaspoonvanilla extract
- 25-30 almonds whole, roasted (preferred) or regular
- 12 ouncesgood quality semi-sweet chocolate or almond bark
Instructions
Instructions
- In a medium saucepan combine 1/2 cup light corn syrup, 1 1/3 cups mini marshmallows (or about 13 regular marshmallows), and a pinch of salt. Cook over medium heat, stirring constantly, until the marshmallows are completely melted and smooth. Continue stirring for about 1 minute more.
- Remove the pan from the heat and stir in 8 ounces shredded coconut and 1 teaspoon vanilla extract until evenly combined.
- Transfer the coconut-marshmallow mixture to a bowl, cover, and refrigerate for at least 1 hour, or until well cooled and firm.
- Line a baking sheet with parchment paper.
- Using a spoon or small scoop, portion the chilled coconut mixture into small logs about the size of a fat Tootsie Roll (or double that size if you prefer larger pieces that can hold 2 almonds). Place the logs on the parchment paper with a little space between them. This should make about 25 small almond joys.
- Press one whole almond on top of each coconut log (use 25–30 whole almonds as needed). If you made larger pieces, press two almonds on top of each instead.
- Return the baking sheet to the refrigerator or place it in the freezer while you melt the chocolate; colder logs are easier to coat.
- If using chocolate bars, chop the 12 ounces of good-quality semi-sweet chocolate (or break the almond bark into pieces). Place the chocolate in a microwave-safe bowl and microwave in 20-second increments, stirring after each increment, until the chocolate is fully melted and smooth.
- Working one piece at a time, use a fork to dip each chilled coconut log into the melted chocolate, fully coating it. Lift with the fork and gently tap the fork on the edge of the bowl to let excess chocolate drip off.
- Place the coated candies back onto the parchment-lined sheet, keeping the almond facing up. Repeat until all pieces are coated.
- Allow the chocolate to set at room temperature, or refrigerate the tray until the chocolate is firm.
Equipment
- Medium Saucepan
- spoon or small scoop
- Bowl
- refrigerator or freezer
- Baking Sheet
- Parchment Paper
- Microwave-safe Bowl
- knife (for chopping chocolate)
- Fork
Notes
To make homemade
Mounds Bars
, leave out the almonds.
Storage Instructions:
You can store homemade almond joys at room temperature or in the fridge (depending on your climate), in an airtight container for 1 week.
Freezing Instructions:
Place in a freezer-safe container in the freezer for up to 3 months.


