
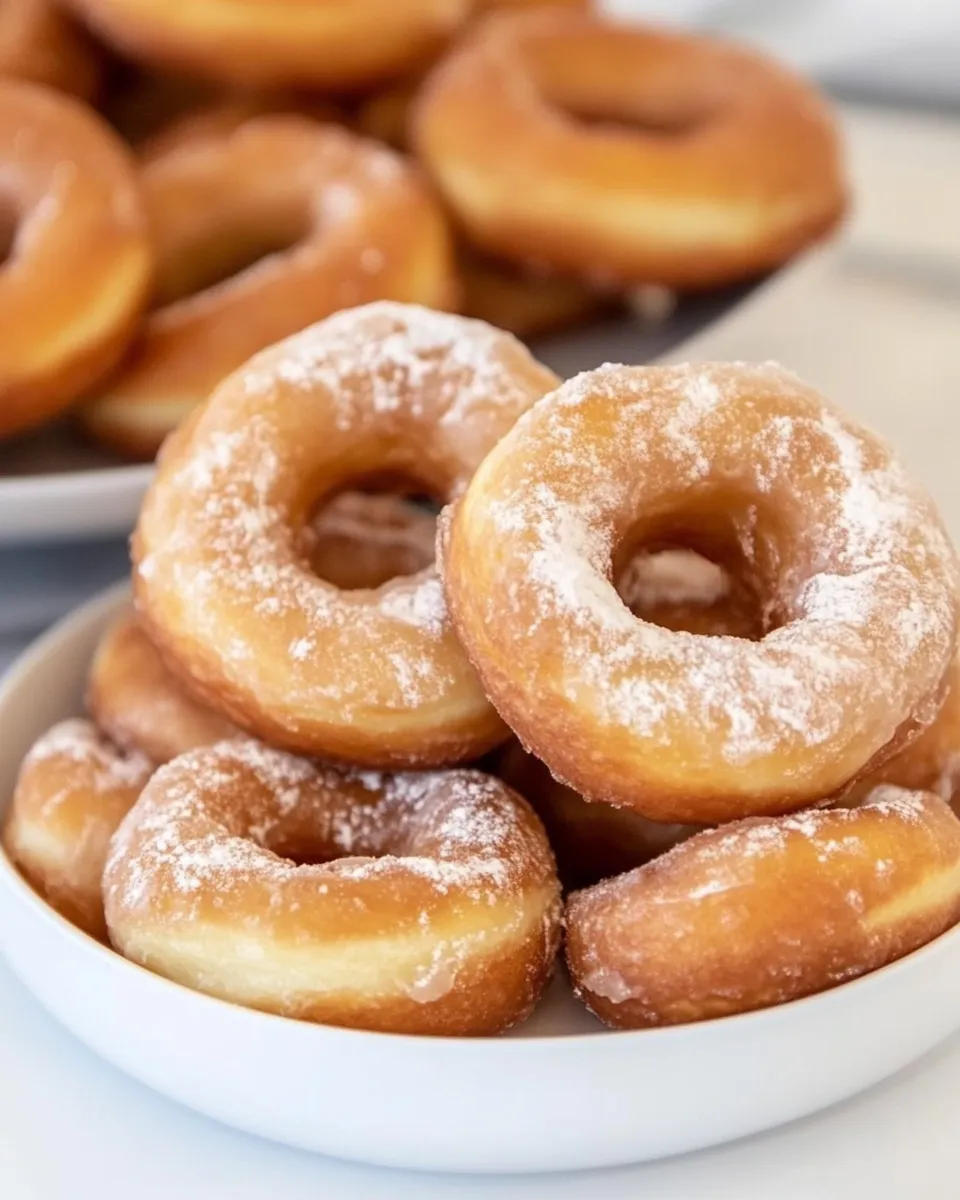
There’s something about a warm, freshly fried doughnut that just makes the morning feel possible. These are the kind you make the night before, sleep on, and finish the next day for a breakfast that feels indulgent but completely doable. The recipe makes light, pillowy doughnuts with a thin, glossy glaze — the classic you remember from childhood, but with a grown-up texture and predictable results.
I test recipes until they behave, and this one is built around predictable steps: warm milk to wake up the yeast, a short knead in a mixer, a slow overnight chill, and a gentle fry. The result is consistent. You’ll get doughnuts that puff nicely, hold their shape in the oil, and take a glaze that sets thin and smooth.
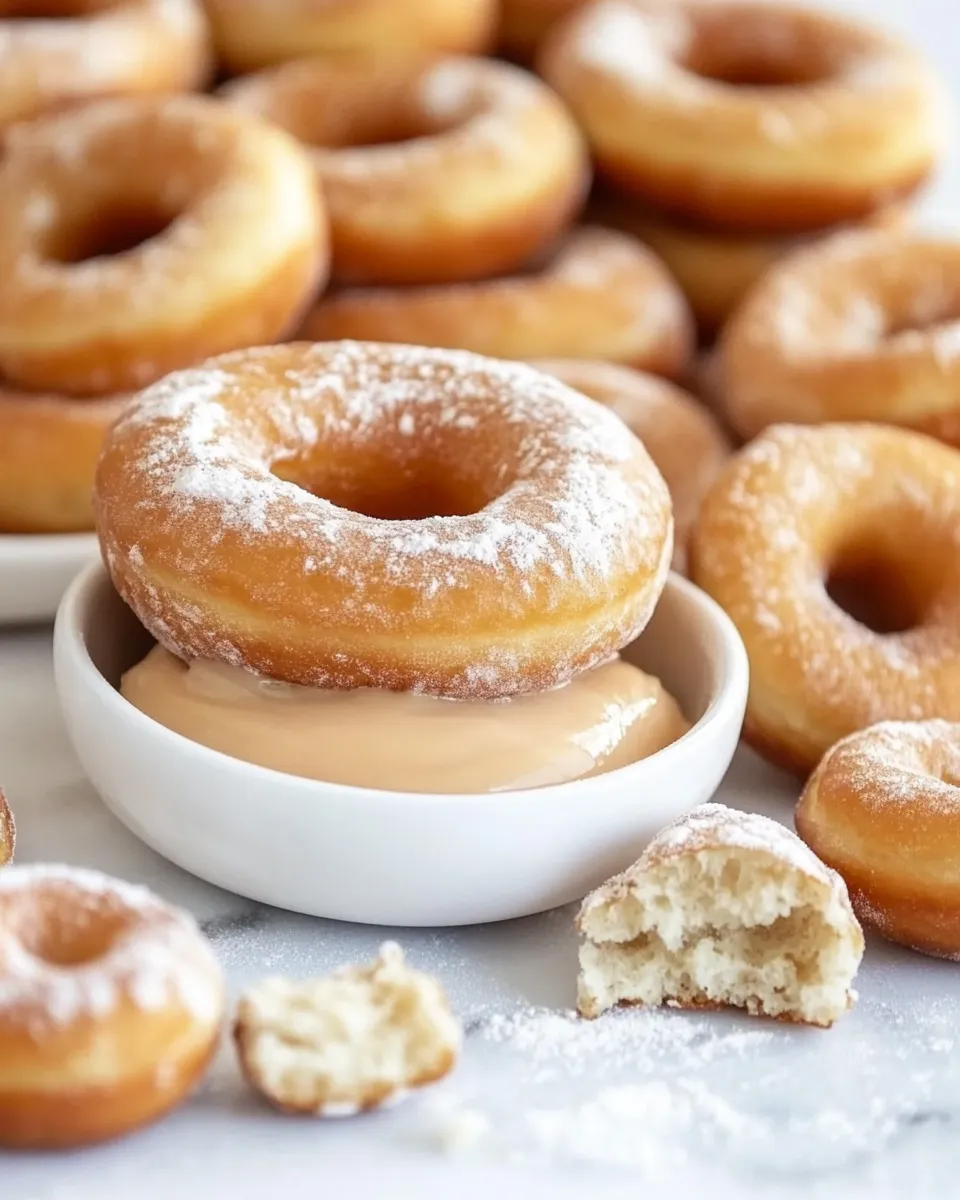
I’ll walk you through the exact ingredients and the full method, plus gear, troubleshooting, and how to keep these working for you any time of year. Practical tips are sprinkled in so you don’t have to guess — just follow the steps and enjoy the best reward: a plate of warm doughnuts to share (or very quickly, not).
Ingredients
- 1 cup plus 2 tablespoons whole milk — warms the dough and activates the yeast; test temperature with your fingertip.
- ¼ cup sugar — feeds the yeast and sweetens the dough.
- 2 ¼ teaspoons Active Dry Yeast (1 envelope) — the leavening agent; make sure it’s fresh and not past its expiration.
- 2 large eggs slightly beaten — add richness and structure to the dough.
- 10 tablespoons unsalted butter melted and slightly cooled — adds fat for tenderness and flavor; don’t add while too hot.
- 4 cups all-purpose flour — the base of the dough; measure by spooning into the cup and leveling.
- ½ teaspoon fine sea salt — balances sweetness and strengthens gluten.
- Canola oil for frying — neutral-flavored oil with a high smoke point; use enough so doughnuts can float freely.
- 3 cups powdered sugar sifted — for the glaze; sifted for a silky finish.
- ⅛ teaspoon fine sea salt — balances the glaze’s sweetness.
- ½ teaspoon pure vanilla extract — adds depth of flavor to the glaze.
- ½ cup milk — thins the glaze to the right consistency.
Shopping List
- Whole milk — get a fresh carton; you’ll need 1 cup plus 2 tablespoons plus ½ cup for the glaze.
- Sugar and powdered sugar — granulated for the dough, powdered for the glaze.
- Active Dry Yeast — one envelope (or equivalent weight in bulk).
- Eggs and unsalted butter — plan for 2 large eggs and 10 tablespoons butter.
- All-purpose flour and fine sea salt.
- Canola oil — pick up at least 1 quart; you may need more depending on your pot size.
- Pure vanilla extract — a small bottle goes a long way in the glaze.
Mastering Homemade Doughnuts: How-To
- Measure 1 cup plus 2 tablespoons whole milk into a microwave-safe bowl or measuring cup. Heat in 30-second increments on high until the milk is warm but not hot (test with a fingertip—should feel warm, not uncomfortable).
- Stir 1/4 cup sugar into the warm milk until dissolved. Sprinkle 2 1/4 teaspoons active dry yeast over the milk, stir gently once or twice, then let the mixture sit undisturbed for 10 minutes (it should become foamy).
- In a small bowl, whisk 2 large eggs with the 10 tablespoons melted unsalted butter (melted and slightly cooled). In a separate bowl, whisk together 4 cups all-purpose flour and 1/2 teaspoon fine sea salt. Set both bowls aside.
- Fit an electric mixer with the dough hook. Add the egg/butter mixture to the mixer bowl. Turn the mixer to medium-low and, with the mixer running, pour in the yeast/milk mixture. Let the hook mix this for about 1–2 minutes to combine.
- With the mixer still on medium-low, add the flour mixture in 1/4- to 1/2-cup increments, allowing each addition to incorporate before adding more, until all the flour is added.
- Stop the mixer and scrape down the bowl and dough hook. Turn the mixer on medium-low and knead for 5 full minutes.
- Stop the mixer, scrape the bottom and sides of the bowl, then run the mixer on medium-low for an additional 30 seconds.
- Turn off the mixer and let the dough rest, undisturbed in the mixer bowl, for 10 minutes.
- Lightly oil a clean bowl. Transfer the dough to the oiled bowl, turning it gently to coat all sides with oil. Cover the bowl tightly with plastic wrap.
- Place the bowl in a warm, draft-free spot and let the dough rise until doubled in size, about 1 hour. (If your kitchen is cold or drafty, place the covered bowl in the oven with only the oven light on; do not turn the oven on.)
- After the dough has doubled, gently deflate it (press down once or twice to release large air bubbles). Cover and refrigerate the dough for at least 8 hours or overnight.
- The next day, turn the chilled dough out onto a lightly floured work surface. Roll the dough to a thickness of 1/4 to 1/3 inch.
- Using a 3-inch cutter, cut as many doughnut rounds as possible. Re-roll scraps as needed and continue cutting. Use a 1-inch cutter to cut the center hole from each round and to cut doughnut holes from the scraps.
- Place the cut doughnuts and doughnut holes on a lightly floured baking sheet, spaced so they are not touching. Cover the sheet with a clean tea towel and let rise in a warm place until visibly puffed and airy, about 1 to 1 hour 15 minutes.
- When the doughnuts are nearly finished rising, heat canola oil in a large, heavy-bottomed pot to 375°F (190–191°C). Use enough oil to give the doughnuts room to float freely (at least 1 quart is a good guideline). Keep a thermometer in the oil and do not allow it to exceed 380°F.
- Fry 1–2 doughnuts at a time (do not overcrowd). Gently lower each doughnut into the hot oil and cook about 1 minute per side, turning once, until golden brown. Doughnut holes will cook faster—about 30 seconds per side.
- Use a slotted spoon to remove fried doughnuts and holes, letting excess oil drip back into the pot. Transfer them to several layers of paper towels for initial draining. Wait about 5 seconds, flip each once more onto a clean part of the paper towels for another 5 seconds, then move the doughnut to a wire rack set over a rimmed baking sheet to catch drips. Repeat with remaining pieces.
- Let the doughnuts cool slightly while you make the glaze.
- Whisk together 3 cups sifted powdered sugar, 1/8 teaspoon fine sea salt, 1/2 teaspoon pure vanilla extract, and 1/2 cup milk until completely smooth.
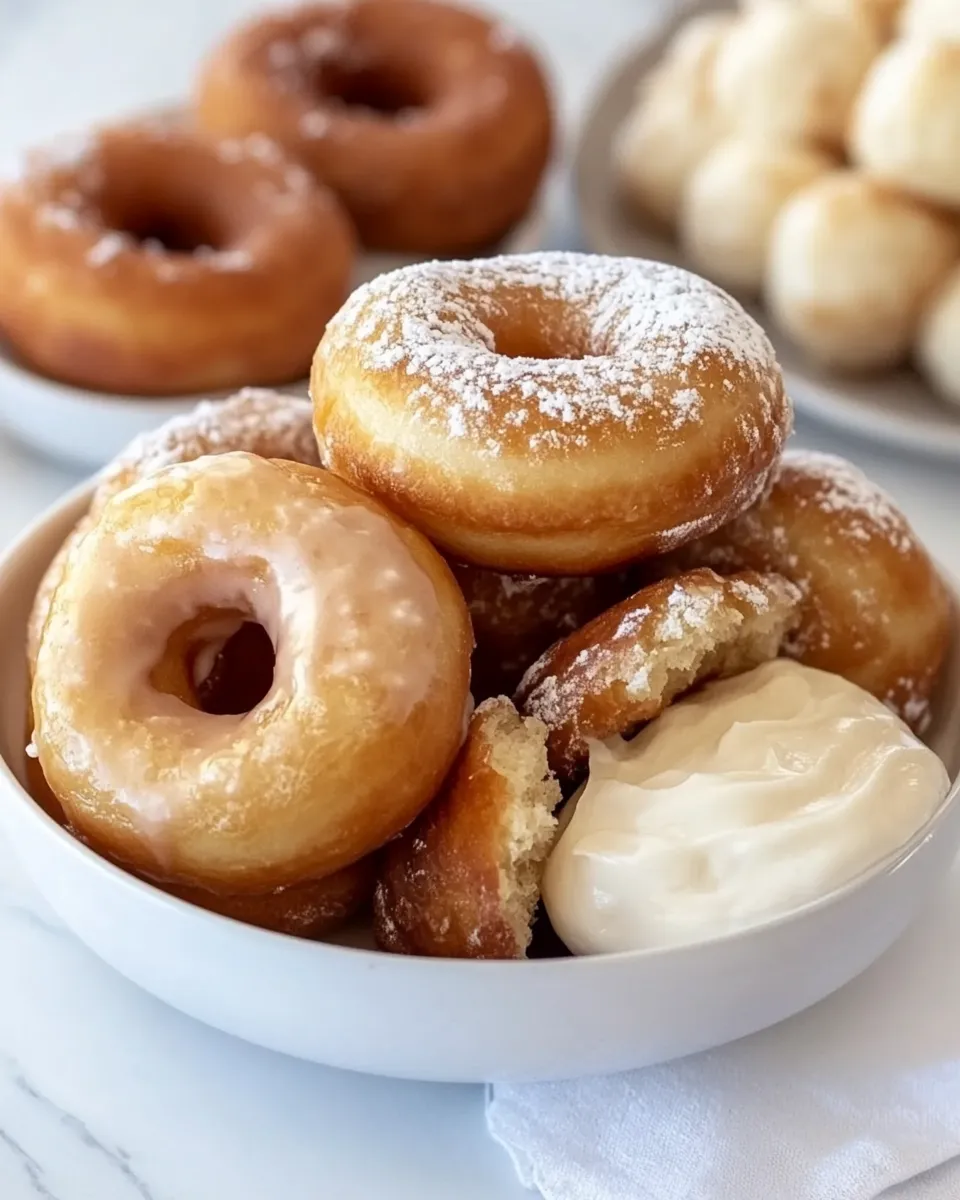
- One at a time, dip each doughnut into the glaze so it is submerged about halfway; completely submerge the doughnut holes and remove with a slotted spoon. Allow excess glaze to drip back into the bowl, then place glazed doughnuts right-side up on the wire rack. The rimmed baking sheet will catch drips.
- Let the glaze set briefly, then serve the doughnuts warm if possible, or at room temperature.
Why This Recipe Belongs in Your Rotation
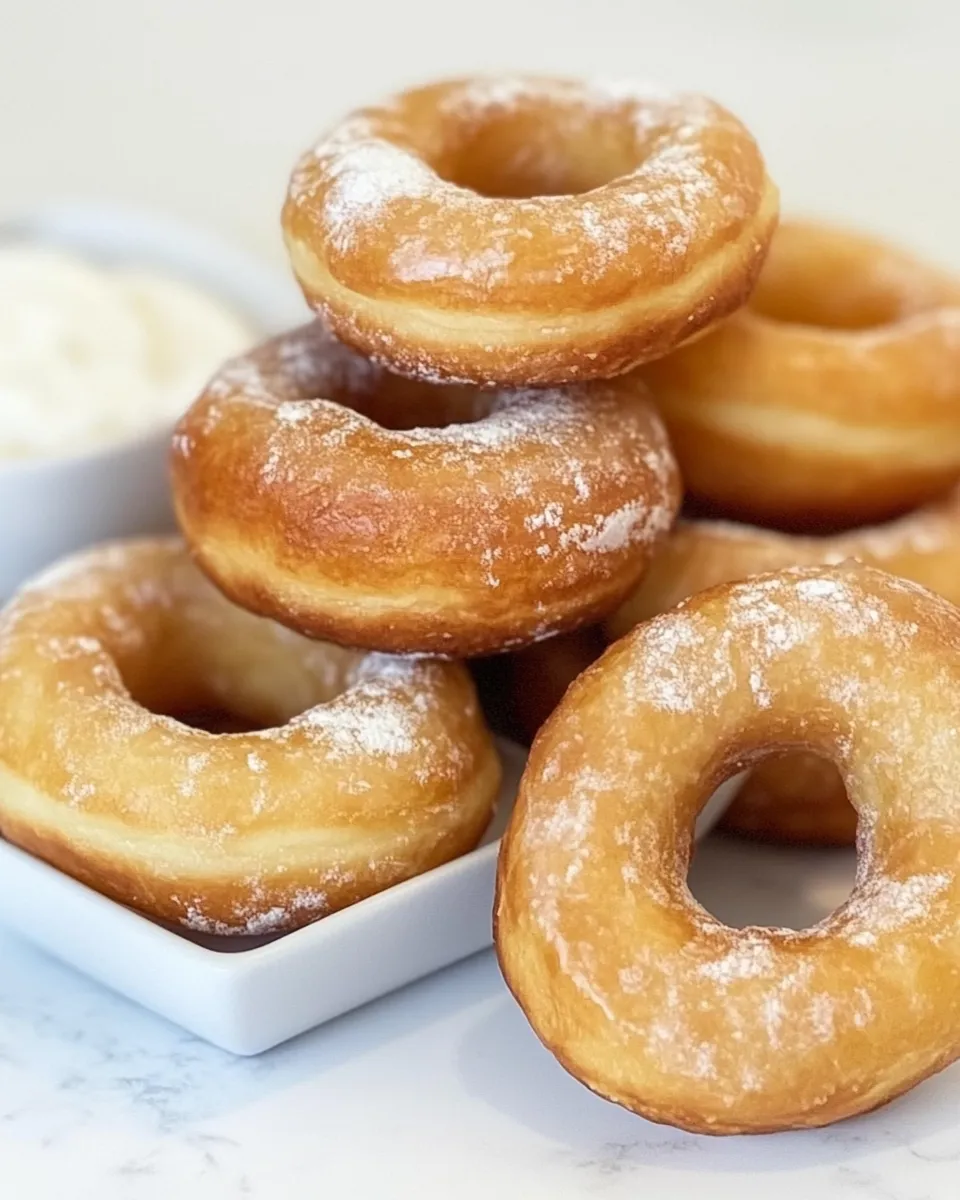
This doughnut method is forgiving and repeatable. The overnight chill is the difference between a dense, flat round and a doughnut with internal lightness and flavor. The short knead, combined with a slow cold proof, gives a tender crumb without a sticky, unmanageable dough.
The glaze is classic and quick: sifted powdered sugar, a touch of salt, vanilla, and milk. It sets thin so you get a shiny finish without a cloying surface. If you want to improvise later, the dough is a reliable base for flavored glazes or coatings.
Allergy-Friendly Substitutes
If you need to adapt this recipe, here are safe swaps to try. Note: I’m only suggesting ingredient replacements, not changing quantities.
- Milk: swap whole milk for an equal measure of full-fat plant milk (oat or soy provide similar richness). The texture will be slightly different but the process remains the same.
- Butter: use a plant-based margarine or vegan butter in place of unsalted butter, melted and cooled to the same temperature.
- Eggs: for egg-free needs, try a commercial egg replacer or a mix of aquafaba (chickpea liquid) — two tablespoons of aquafaba can replace one egg, but results will vary; this recipe is egg-forward, so expect a textural change.
- Glaze: replace the ½ cup milk in the glaze with a plant milk if avoiding dairy.
What’s in the Gear List
- Electric mixer with dough hook — makes mixing and kneading consistent and easy.
- Measuring cups and spoons — accurate measurements matter for dough texture.
- 3-inch and 1-inch round cutters — one for the doughnut, one for the hole.
- Large, heavy-bottomed pot and a candy/deep-fry thermometer — control oil temperature precisely.
- Slotted spoon or spider — for safe removal of fried doughnuts.
- Wire rack set over a rimmed baking sheet and paper towels — for draining and catching glaze drips.
- Plastic wrap and a lightly oiled bowl — for the first rise and overnight chill.
Troubleshooting Tips
Rise problems
Yeast doesn’t foam: the milk may have been too hot or the yeast is old. Try again with fresh yeast and make sure milk feels warm, not hot, to the fingertip.
Dough didn’t double: check temperature. A cool spot will slow rising; use the oven light trick or a warm corner. If it still refuses, the yeast may have been weakened.
Frying and texture issues
Doughnuts absorb too much oil: oil was too cool. Maintain 375°F (190–191°C) and don’t overcrowd the pot. Let the oil return to temperature between batches.
Over-browning or burning: oil too hot—watch that thermometer and do not let oil exceed 380°F.
Glaze problems
Glaze is too thin: add a touch more sifted powdered sugar, a tablespoon at a time. Too thick: add a splash of milk, a teaspoon at a time.
Make It Year-Round
These doughnuts work in every season. In cooler months, keep dough in a cozy warm spot for rises. In summer, the initial rise will be faster; watch the dough closely so it doesn’t overproof before refrigerating.
Flavor swaps by season: add a pinch of cinnamon to the glaze in fall, a little lemon zest in spring, or top with chopped toasted nuts in winter. The base dough and glaze take flavors well without changing the method.
Notes on Ingredients
Whole milk gives the best tenderness and flavor here; skim milk will produce a less rich dough. Sugar in the dough helps the yeast along and lightly sweetens the crumb—don’t skip it. The dough calls for 10 tablespoons of unsalted butter; unsalted lets you control salt, so use that unless you prefer a slightly saltier dough and adjust accordingly.
Two salt measurements appear in the recipe: ½ teaspoon in the dough and 1/8 teaspoon in the glaze. They serve different functions—dough salt strengthens gluten and balances flavor in the finished doughnut, while the small amount in the glaze cuts sweetness and brightens the vanilla.
Refrigerate, Freeze, Reheat
Refrigerate: Store glazed doughnuts in an airtight container at room temperature for a day. If you must refrigerate (for longer storage), keep them in a sealed container and know refrigeration will slightly firm the glaze and crumb.
Freeze: For longer storage, freeze unglazed, fully cooled doughnuts in a single layer on a baking sheet until firm, then transfer to a freezer bag. Freeze up to 2 months. Thaw at room temperature and refresh in a 300°F oven for 5–7 minutes if you want them warm, then glaze.
Reheat: To warm glazed doughnuts, use a low oven (300°F) for 5–7 minutes or a microwave for 8–10 seconds per doughnut. Microwaving removes crispness but is quick; the oven is best for texture.
Your Top Questions
Can I make these without a mixer? Yes, by hand, but expect a longer kneading time and more elbow grease. The mixer shortens and standardizes the knead.
Why refrigerate overnight? The cold rest develops flavor and improves texture; it also makes the dough easier to roll and cut.
How do I tell when doughnuts are done frying? Golden brown on both sides and a light internal spring is a good indicator. Holes cook faster—about 30 seconds per side as the recipe notes.
Can I bake these instead of frying? This recipe is formulated for frying. Baking will change texture and color; if you want a baked doughnut, use a recipe specifically designed for that method.
Next Steps
Make these once exactly as written to learn how your dough behaves. After that, play with flavors: dipped chocolate glaze, citrus glaze with lemon zest, or a cinnamon-sugar toss while hot. Keep notes on what you change so your next batch improves in the direction you want.
Share a dozen with friends and note the minute differences that matter to you — whether you prefer slightly thinner glaze, a deeper fry for crispness, or a richer butter flavor. This base recipe is reliable, and once it’s in your rotation you’ll find dozens of small, delicious ways to make it your own.
Homemade Doughnuts
Ingredients
Ingredients
- 1 cupplus 2 tablespoons whole milk
- 1/4 cupsugar
- 2 1/4 teaspoonsActive Dry Yeast1 envelope
- 2 large eggslightly beaten
- 10 tablespoonsunsalted buttermelted and slightly cooled
- 4 cupsall-purpose flour
- 1/2 teaspoonfine sea salt
- Canola oil for frying
- 3 cupspowdered sugarsifted
- 1/8 teaspoonfine sea salt
- 1/2 teaspoonpure vanilla extract
- 1/2 cupmilk
Instructions
Instructions
- Measure 1 cup plus 2 tablespoons whole milk into a microwave-safe bowl or measuring cup. Heat in 30-second increments on high until the milk is warm but not hot (test with a fingertip—should feel warm, not uncomfortable).
- Stir 1/4 cup sugar into the warm milk until dissolved. Sprinkle 2 1/4 teaspoons active dry yeast over the milk, stir gently once or twice, then let the mixture sit undisturbed for 10 minutes (it should become foamy).
- In a small bowl, whisk 2 large eggs with the 10 tablespoons melted unsalted butter (melted and slightly cooled). In a separate bowl, whisk together 4 cups all-purpose flour and 1/2 teaspoon fine sea salt. Set both bowls aside.
- Fit an electric mixer with the dough hook. Add the egg/butter mixture to the mixer bowl. Turn the mixer to medium-low and, with the mixer running, pour in the yeast/milk mixture. Let the hook mix this for about 1–2 minutes to combine.
- With the mixer still on medium-low, add the flour mixture in 1/4- to 1/2-cup increments, allowing each addition to incorporate before adding more, until all the flour is added.
- Stop the mixer and scrape down the bowl and dough hook. Turn the mixer on medium-low and knead for 5 full minutes.
- Stop the mixer, scrape the bottom and sides of the bowl, then run the mixer on medium-low for an additional 30 seconds.
- Turn off the mixer and let the dough rest, undisturbed in the mixer bowl, for 10 minutes.
- Lightly oil a clean bowl. Transfer the dough to the oiled bowl, turning it gently to coat all sides with oil. Cover the bowl tightly with plastic wrap.
- Place the bowl in a warm, draft-free spot and let the dough rise until doubled in size, about 1 hour. (If your kitchen is cold or drafty, place the covered bowl in the oven with only the oven light on; do not turn the oven on.)
- After the dough has doubled, gently deflate it (press down once or twice to release large air bubbles). Cover and refrigerate the dough for at least 8 hours or overnight.
- The next day, turn the chilled dough out onto a lightly floured work surface. Roll the dough to a thickness of 1/4 to 1/3 inch.
- Using a 3-inch cutter, cut as many doughnut rounds as possible. Re-roll scraps as needed and continue cutting. Use a 1-inch cutter to cut the center hole from each round and to cut doughnut holes from the scraps.
- Place the cut doughnuts and doughnut holes on a lightly floured baking sheet, spaced so they are not touching. Cover the sheet with a clean tea towel and let rise in a warm place until visibly puffed and airy, about 1 to 1 hour 15 minutes.
- When the doughnuts are nearly finished rising, heat canola oil in a large, heavy-bottomed pot to 375°F (190–191°C). Use enough oil to give the doughnuts room to float freely (at least 1 quart is a good guideline). Keep a thermometer in the oil and do not allow it to exceed 380°F.
- Fry 1–2 doughnuts at a time (do not overcrowd). Gently lower each doughnut into the hot oil and cook about 1 minute per side, turning once, until golden brown. Doughnut holes will cook faster—about 30 seconds per side.
- Use a slotted spoon to remove fried doughnuts and holes, letting excess oil drip back into the pot. Transfer them to several layers of paper towels for initial draining. Wait about 5 seconds, flip each once more onto a clean part of the paper towels for another 5 seconds, then move the doughnut to a wire rack set over a rimmed baking sheet to catch drips. Repeat with remaining pieces.
- Let the doughnuts cool slightly while you make the glaze.
- Whisk together 3 cups sifted powdered sugar, 1/8 teaspoon fine sea salt, 1/2 teaspoon pure vanilla extract, and 1/2 cup milk until completely smooth.
- One at a time, dip each doughnut into the glaze so it is submerged about halfway; completely submerge the doughnut holes and remove with a slotted spoon. Allow excess glaze to drip back into the bowl, then place glazed doughnuts right-side up on the wire rack. The rimmed baking sheet will catch drips.
- Let the glaze set briefly, then serve the doughnuts warm if possible, or at room temperature.
Equipment
- Nordic Ware Aluminum Half Sheet Pans
- Cooling rack
- Donut cutter
Notes
A good thermometer is key to making a perfectly cooked doughnut.
Use a set of chopsticks or skewers to easily add doughnuts to/from the fry oil and flip them while cooking.


