
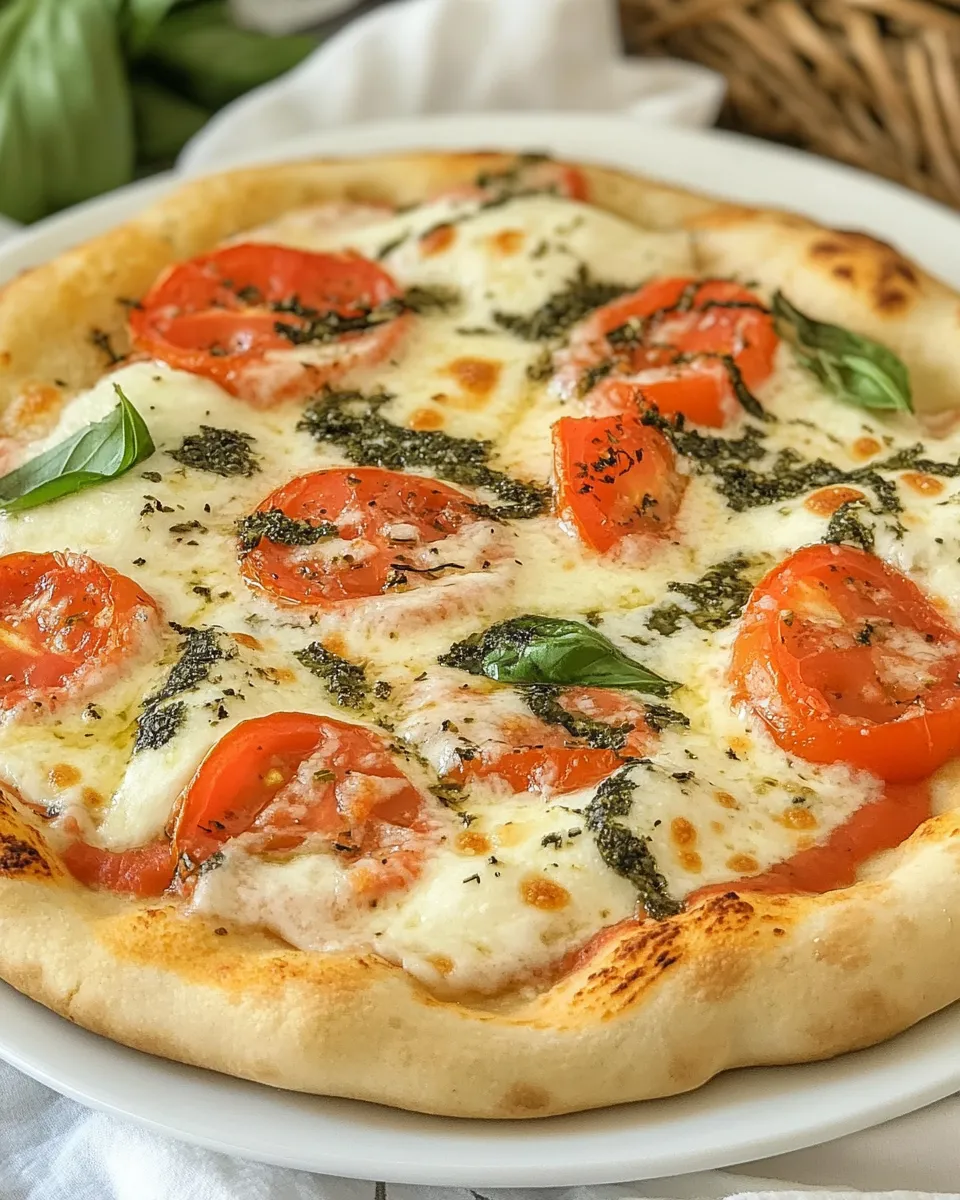
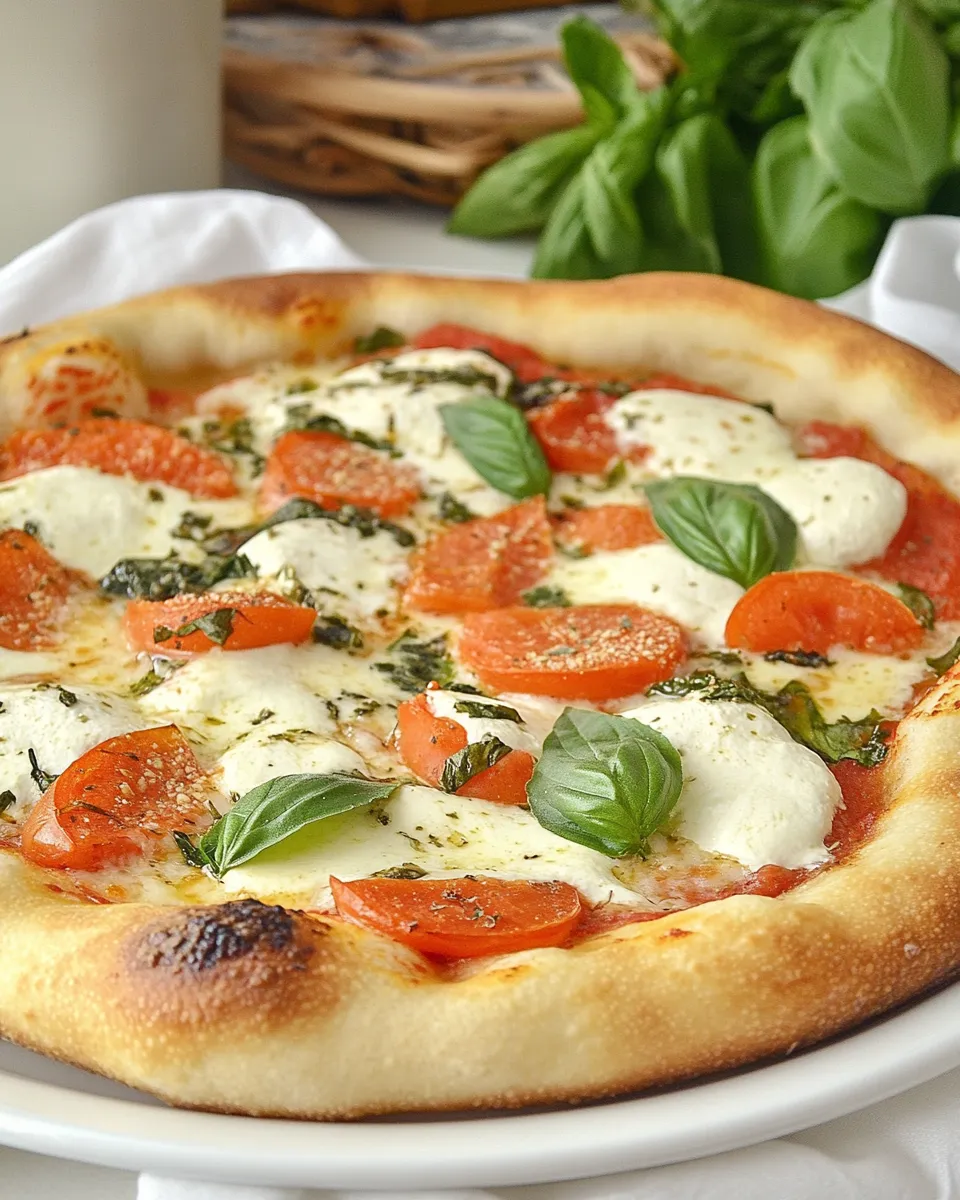
There are a few simple pleasures in life that taste like care: a blistered crust, warm basil, and a bright tomato sauce. This Homemade Pizza Margherita is one of them — straightforward, hands-on, and honest. I’ll walk you through a process that uses a cold-fermented, food-processor dough for texture and flavor, then a hot stone bake for that crisp, chewy crust.
No tricks, just a reliable method. I rely on timing and a couple of small habits — like preheating the stone and resting the dough at room temperature before baking — to get consistent results. If you like a crisp bottom, a lightly charred edge, and fresh toppings, this is the recipe to keep in rotation.
I’m practical about tools and timing: the ingredients list is short and the technique has a few critical steps. Read through, prepare in stages, and don’t be afraid to adapt a topping or two. This post covers the recipe, gear, common mistakes, storage, and sensible swaps for dietary needs.
What We’re Using
This version focuses on a lean, classic Margherita: a high-hydration dough made quickly in a food processor and rested in the fridge for flavor, then stretched and baked on a hot pizza stone. Expect to use a food processor, a pizza stone (or very hot baking surface), parchment, and a pizza peel if you have one. The dough’s long, cool rest is the secret to good flavor and an open crumb.
Ingredients
- 3 cups bread flour plus more to dust the work surface — gives structure and chew to the crust; dusting prevents sticking.
- 2 teaspoons sugar — feeds the yeast and adds a touch of browning to the crust.
- ½ teaspoons instant yeast, (I use Red Star Platinum Yeast) — the leavening agent; instant yeast works straight into dry ingredients.
- 1 ⅓ cups ice water — cold water slows fermentation during mixing and gives a tacky, high-hydration dough.
- 1 ½ teaspoons salt — essential for flavor and to strengthen the dough.
- 1 tablespoon olive oil plus more to oil the work surface — adds a subtle richness and helps keep the dough moist while resting.
Cooking (Homemade Pizza Margherita): The Process
- Add the flour, sugar, and instant yeast to the bowl of a food processor and pulse for 1–2 seconds to combine.
- With the processor running, slowly pour the ice water through the feed tube until the dough just comes together (about 10 seconds). Stop the processor.
- Let the dough rest in the processor bowl for 10 minutes.
- Add the olive oil and salt to the bowl and process until the dough cleans the sides of the bowl, about a minute or less.
- Remove the dough from the processor and transfer it to a lightly oiled work surface. Knead briefly until the dough is smooth and cohesive.
- Form the dough into a ball, place it in a lightly oiled bowl, cover tightly with plastic wrap, and refrigerate for 24–72 hours.
- When ready to bake, remove the dough from the refrigerator. Divide it into two equal pieces, shape each piece into a tight dough ball, and place the balls on a lightly oiled baking sheet. Lightly oil a piece of plastic wrap, cover the dough balls, and let them rest at room temperature for 1 hour.
- At least 30 minutes (preferably 30–60 minutes) before baking, place a pizza stone in the oven and preheat the oven to 500°F so the stone gets fully heated.
- Lightly dust a piece of parchment paper with bread flour. Working with one dough ball at a time, gently pat or stretch the dough into an approximately 12-inch circle on the parchment. (Repeat for the second ball if using both.)
- Top each stretched dough with your preferred toppings.
- Using a pizza peel, transfer the pizza on its parchment onto the preheated pizza stone.
- Bake for about 12 minutes, or until the crust is golden brown and the toppings are cooked to your liking. Remove from the oven and serve.
Why Cooks Rave About It
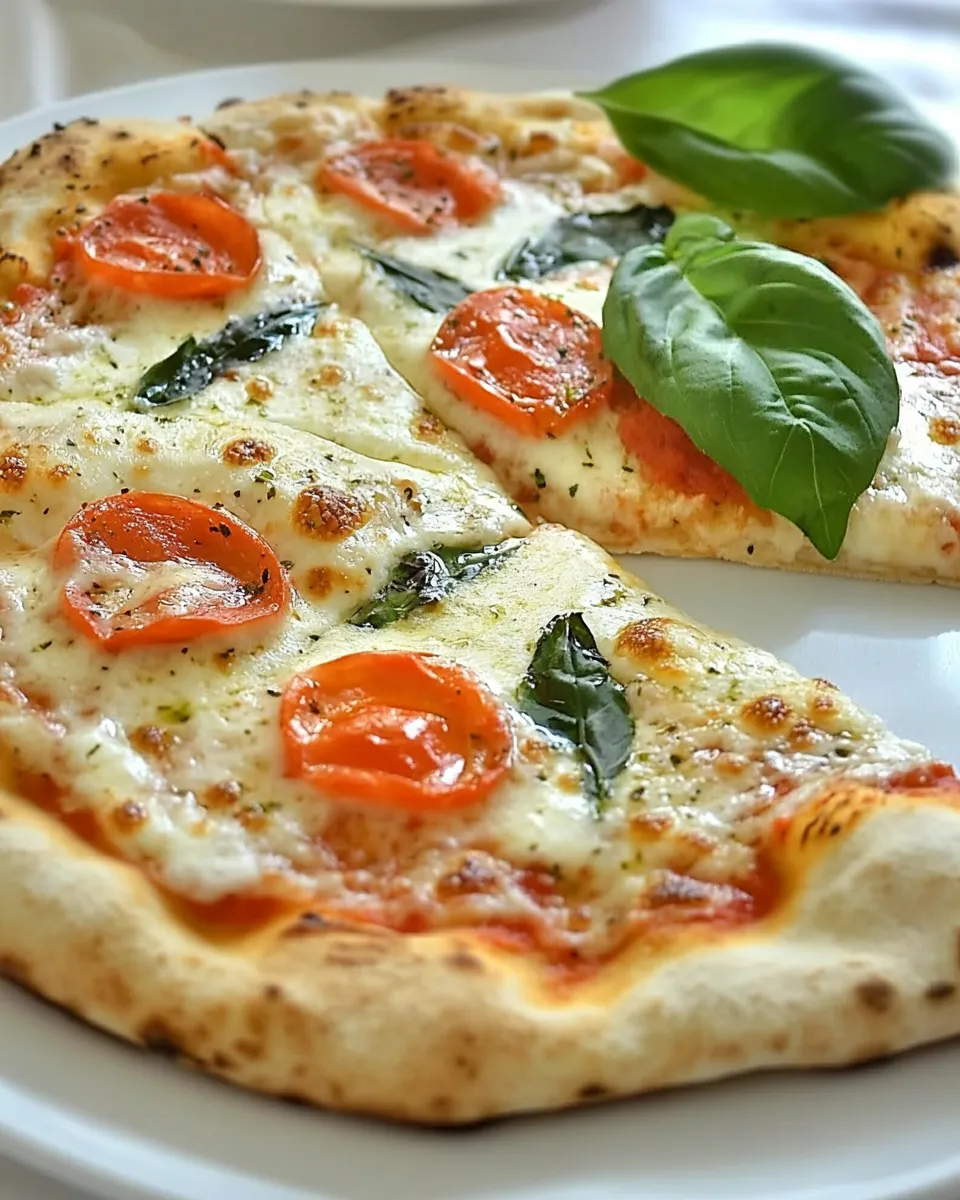
There are three big reasons this Margherita wins praise: texture, flavor, and speed of hands-on time. The dough’s cold rest develops a subtle, nutty flavor without extra effort. A short processor-based mix cuts kneading time but still creates a dough with good gluten development. Finally, the hot stone bake gives you that pizzeria-style crackle on the bottom while keeping the inside tender.
It’s also very forgiving. The long refrigerate window (24–72 hours) gives you flexibility. Make the dough a day or two ahead, then shape and bake when it suits you. The recipe yields two 12-inch pies so you can feed a small group, or freeze one ball for next week.
Dairy-Free/Gluten-Free Swaps

Dairy-free: Replace mozzarella with a plant-based shredded cheese or simply top with a drizzle of olive oil, fresh basil, and a sprinkle of salt for a bright, dairy-free Margherita. Remember that melt and browning will vary between vegan cheeses.
Gluten-free: Swap the bread flour for a high-quality gluten-free 1:1 baking flour formulated for yeast breads and pizza. Texture will differ — expect a softer, less chewy crust — so consider using a pizza pan or baking steel and reducing handling. You’ll also want to check the blend’s hydration needs; gluten-free doughs often require slightly different water amounts.
Gear Checklist
- Food processor — the recipe’s mixing method depends on it for speed and consistent dough.
- Pizza stone or baking steel — essential for a crisp bottom and good oven spring.
- Pizza peel (or the back of a large baking sheet) — for transferring pizza to and from the oven.
- Parchment paper — makes transfer easy and prevents sticking.
- Large bowl, plastic wrap, and a lightly oiled baking sheet — for the cold ferment and room-temp rest.
- Measuring cups and spoons — accurate hydration and yeast amounts matter.
- Bench scraper or knife — to divide the dough evenly into two balls.
Mistakes That Ruin Homemade Pizza Margherita
A few missteps will derail the best dough. Know them so you can avoid them.
- Underpreheating the stone. If the stone isn’t hot, the crust won’t crisp properly and the bake will be longer and drier.
- Overworking the dough after the cold rest. Handle with care; you want to preserve the air pockets created by fermentation.
- Using too much flour while stretching. Excess flour leads to a heavy, dry crust. Dust lightly and use a gentle touch.
- Adding cold toppings straight from the fridge. Cold toppings lower the surface temp and can extend bake time; bring cheeses and sauces closer to room temp.
- Rushing the rest at room temperature. The dough needs roughly 1 hour to relax and warm up; skip this and the dough will resist stretching.
Customize for Your Needs
Margherita is simple, which is why it’s a great canvas. Here are small, effective changes to make it yours without disturbing the dough’s performance:
- Oil the crust edge lightly before baking for a glossier, softer rim.
- Add a swirl of good olive oil and fresh basil immediately after baking for brightness.
- Swap the tomato base: use crushed San Marzano tomatoes seasoned lightly with salt for a classic profile, or use a quick confit for depth.
- If you want a lighter, thinner crust, stretch larger than 12 inches and bake a little less time; watch closely.
- For a heartier pie, par-bake the crust 3–4 minutes before adding toppings, then finish with toppings until done.
If You’re Curious
Why cold fermentation? The long, slow rest in the fridge develops flavor and strengthens the gluten network at a relaxed pace. You get a more complex crust than a quick same-day dough.
Why ice water? Cold water slows the yeast and allows a short autolyse-like rest after the initial mixing. It makes the dough more manageable and improves final structure when coupled with the chilled fermentation.
Why a food processor? It cuts mixing and kneading time drastically. The blade creates consistent hydration and a tidy, cohesive dough when used as directed.
Shelf Life & Storage
Dough:
- Refrigerated dough balls: 24–72 hours as the recipe states — beyond that the dough can over-ferment and weaken.
- To freeze: after forming balls, wrap tightly in plastic and freeze up to 3 months; thaw in the fridge overnight, then let warm and rest at room temperature an hour before shaping.
Leftover pizza:
- Store in an airtight container in the refrigerator for up to 3 days. Reheat in a hot skillet or in the oven at 400°F to refresh the crust.
Your Questions, Answered
Q: Can I make this without a food processor? A: Yes. Mix the dry ingredients, add cold water, let rest, then knead in olive oil and salt by hand until smooth. The timing changes slightly, but the steps are otherwise similar.
Q: Can I bake without a pizza stone? A: Yes. Use a preheated inverted baking sheet or a cast-iron pan. Heat as hot as your oven allows and watch the crust closely; results will vary but you can get a good crust with high heat and preheating.
Q: How do I tell when the dough is properly fermented? A: Look for a slight dome and noticeable air bubbles under the surface. The dough should be relaxed and slightly jiggly when shaken in its bowl.
Q: Is 500°F necessary? A: Higher oven temps give better oven spring and browning. If your oven maxes lower, compensate with a longer bake on a preheated steel or cast iron and keep an eye on doneness.
In Closing
This Homemade Pizza Margherita is practical, reliable, and rewarding. The cold ferment builds flavor while the food processor keeps hands-on time short. With attention to stone heat and a gentle stretch, you’ll bake a crust that’s crisp outside and tender inside, ready for simple toppings that shine. Make one batch, learn the rhythm, and you’ll be turning out great pies on weeknights and weekends alike.
Happy baking — and please let me know how your first bake goes. Small tweaks make big differences, and I love hearing what works in your kitchen.

Homemade Pizza Margherita
Ingredients
Ingredients
- 3 cups bread flour plus more to dust the work surface
- 2 teaspoons sugar
- 1/2 teaspoons instant yeast (I use Red Star Platinum Yeast)
- 1 1/3 cups ice water
- 1 1/2 teaspoons salt
- 1 tablespoon olive oil plus more to oil the work surface
Instructions
Instructions
- Add the flour, sugar, and instant yeast to the bowl of a food processor and pulse for 1–2 seconds to combine.
- With the processor running, slowly pour the ice water through the feed tube until the dough just comes together (about 10 seconds). Stop the processor.
- Let the dough rest in the processor bowl for 10 minutes.
- Add the olive oil and salt to the bowl and process until the dough cleans the sides of the bowl, about a minute or less.
- Remove the dough from the processor and transfer it to a lightly oiled work surface. Knead briefly until the dough is smooth and cohesive.
- Form the dough into a ball, place it in a lightly oiled bowl, cover tightly with plastic wrap, and refrigerate for 24–72 hours.
- When ready to bake, remove the dough from the refrigerator. Divide it into two equal pieces, shape each piece into a tight dough ball, and place the balls on a lightly oiled baking sheet. Lightly oil a piece of plastic wrap, cover the dough balls, and let them rest at room temperature for 1 hour.
- At least 30 minutes (preferably 30–60 minutes) before baking, place a pizza stone in the oven and preheat the oven to 500°F so the stone gets fully heated.
- Lightly dust a piece of parchment paper with bread flour. Working with one dough ball at a time, gently pat or stretch the dough into an approximately 12-inch circle on the parchment. (Repeat for the second ball if using both.)
- Top each stretched dough with your preferred toppings.
- Using a pizza peel, transfer the pizza on its parchment onto the preheated pizza stone.
- Bake for about 12 minutes, or until the crust is golden brown and the toppings are cooked to your liking. Remove from the oven and serve.
Equipment
- Food Processor
- Oven
- Pizza Stone
- Pizza Peel
- Parchment Paper
- Baking Sheet
- Plastic Wrap


