
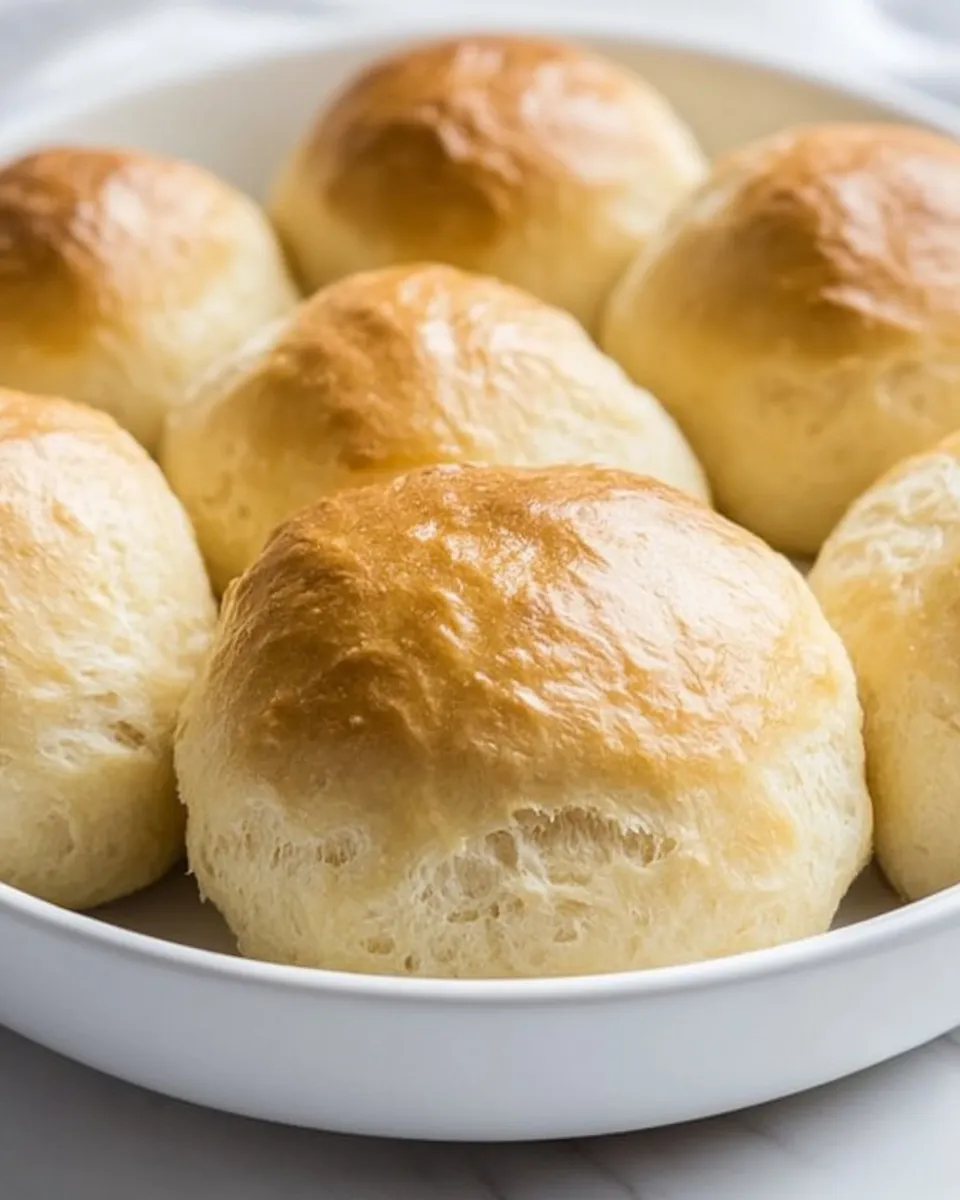
These are the dinner rolls I reach for when I want something pillowy, reliable, and quick enough to make on a weeknight. They come together with a handful of pantry staples and produce a soft crumb that stays tender for days. No fuss, just the kind of roll your family will request again and again.
I developed this recipe to be forgiving: the dough is mixed and kneaded in a stand mixer, so you don’t need advanced technique. The timeline is straightforward—two rises and a short bake—and the result is golden-topped rolls that pull apart cleanly and soak up butter like a charm. I’ll walk you through each step and share troubleshooting tips so you can bake with confidence.
Follow the steps exactly for predictable results. I’ll also list swaps, hardware I love, and simple fixes if the dough isn’t cooperating. Let’s make these rolls—warm, soft, and perfect for dinner, sandwiches, or weekend brunch.
The Essentials

These rolls rely on a few basic principles: warm milk to activate instant yeast, a bit of sugar to feed it, and enough hands-off kneading in the mixer to develop gluten. The butter and egg add richness and tenderness, while a gentle rise schedule gives a light, airy texture.
Plan for roughly 2.5–3 hours from start to finish, much of which is passive rising time. Temperature matters: aim for a warm, draft-free spot for your dough to rise. If your kitchen is cold, a slightly longer rise is fine—patience pays off.
Ingredients
- 250ml/1 cup milk — warms the dough and activates the yeast; should feel warm but not hot to the touch.
- 3 teaspoon instant dry yeast — the leavener; ensure it’s fresh for a reliable rise.
- 1 ½ tablespoon granulated sugar — feeds the yeast and adds a touch of sweetness.
- ½ teaspoon salt — balances flavor and controls yeast activity.
- 45g/1.5oz soft salted butter — keeps the crumb tender and adds flavor; room temperature is best.
- 1 egg — enriches the dough and improves color and structure.
- 600g/3 cups plain flour — forms the dough; may need a touch more or less depending on humidity.
- drizzle of olive oil — used to coat the bowl and baking sheet to prevent sticking.
Super Soft Dinner Rolls: How It’s Done
- Heat the milk in the microwave for 20 seconds. Test with your fingertip — it should feel warm but not hot.
- Pour the warm milk into the bowl of your stand mixer. Add the instant dry yeast, granulated sugar, salt, soft salted butter (in pieces), and the egg.
- Fit the mixer with the dough hook. Add half of the plain flour and mix on speed 1 until it starts to come together.
- Slowly add the remaining flour while continuing to mix on speed 1 until the dough is well combined.
- Continue kneading with the dough hook on speed 1 until the dough is smooth, elastic, and pulls cleanly away from the sides of the bowl (about 5–7 minutes).
- Pour a drizzle of olive oil into a large mixing bowl and spread it around to coat the inside.
- Transfer the dough to the oiled bowl and turn it once or twice so all sides are lightly coated in oil. Cover the bowl with a tea towel and set aside to rise for 75 minutes, or until roughly doubled in size.
- Lightly oil a baking sheet with a little of the olive oil (or line with baking paper if you have it). Set it aside.
- Punch down the risen dough to release the air. Divide the dough into 12 equal pieces.
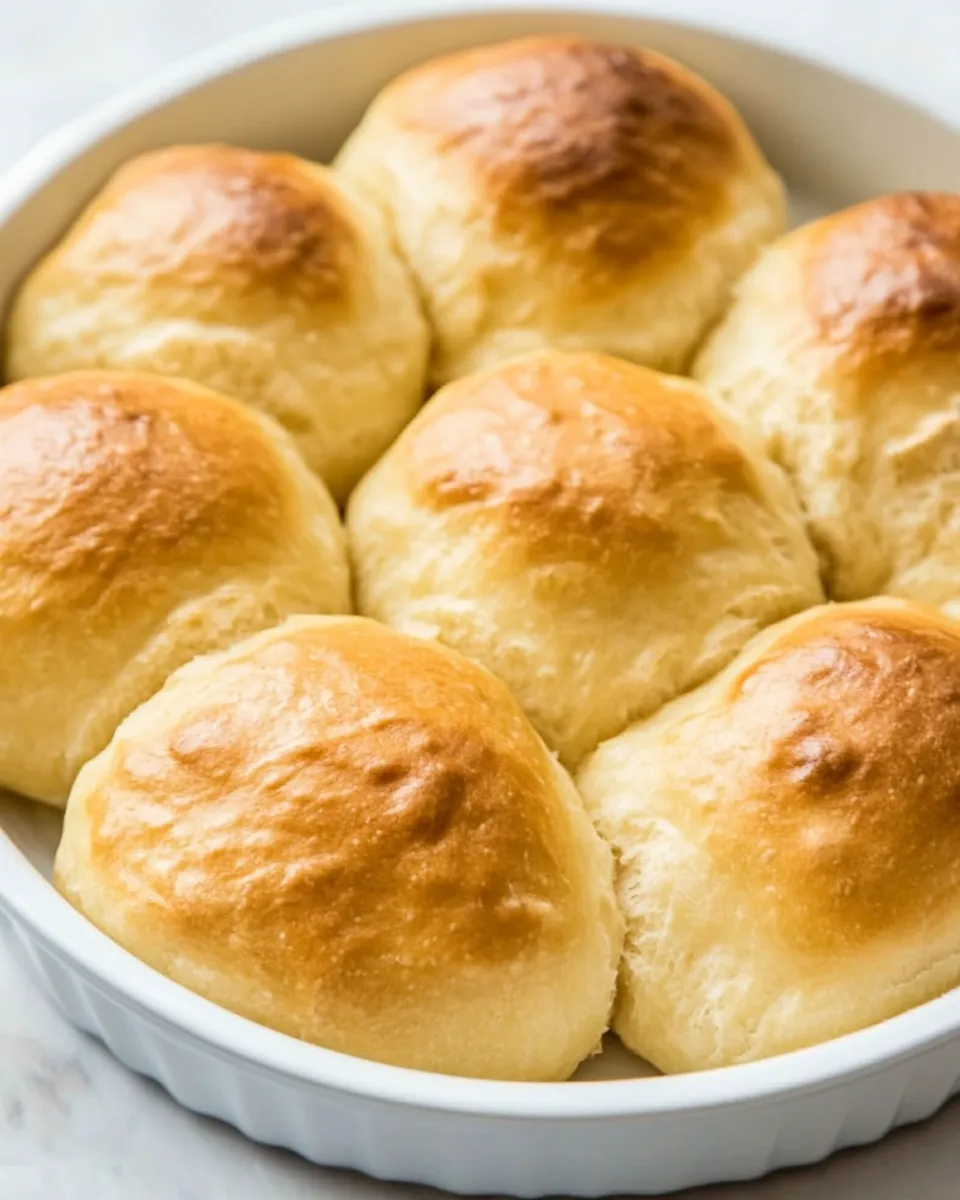
- Shape each piece into a smooth ball by cupping your hand in a “C” shape and rolling the dough on the work surface, creating surface tension. Place the 12 rolls on the prepared baking sheet, leaving a little space between them.
- Cover the rolls with the tea towel and let them rise for another 60 minutes, or until puffy and nearly doubled.
- Preheat the oven to 190°C.
- Bake the rolls for 12–14 minutes, until just lightly browned on top.
- Remove the rolls from the oven and allow them to cool slightly before serving.
Why You’ll Love This Recipe
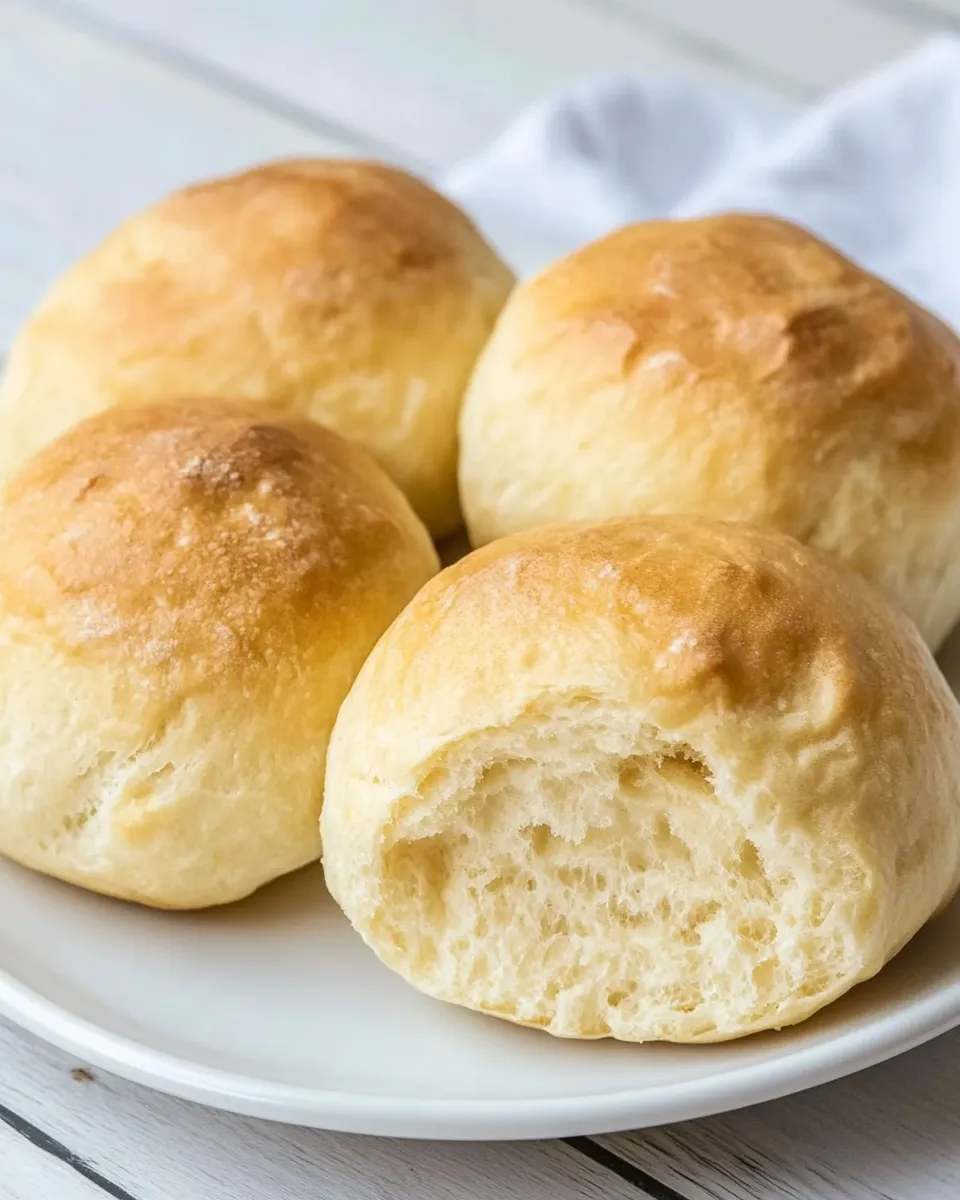
First, the texture. These rolls are soft through the center with a thin, tender crust—exactly what you want for buttery dinner rolls or mini sandwich buns. The egg and butter give a richer mouthfeel than plain white rolls, but they’re still light.
Second, the method is straightforward and reliable. Using instant yeast and a standby stand mixer removes most of the variables. The timing allows you to prep earlier in the day and finish them warm just before dinner.
Finally, they’re versatile. Serve them plain, split and slather with butter, or fill with a savory roast — they hold up well and reheat beautifully.
Smart Substitutions
- If you only have active dry yeast: proof it in the warmed milk with the sugar for 5–10 minutes until foamy, then continue. Reduce the yeast amount slightly if you like a slower rise (optional).
- Milk alternatives: use unsweetened almond or oat milk at the same volume. The flavor and browning will be slightly different, but structure holds up.
- Butter swaps: unsalted butter is fine; increase salt by a pinch. For a dairy-free option, use a firm plant-based butter.
- Flour: plain flour (all-purpose) is required here. Bread flour will yield a chewier roll; cake flour will be too soft—stick to plain for the intended texture.
- Salt: if using salted butter and you prefer less salt, you can reduce the added salt by half. I tested the recipe with the listed amounts for balanced flavor.
Hardware & Gadgets
Stand mixer with a dough hook — this recipe is written around one. It takes the elbow grease out of kneading and gives consistent gluten development in 5–7 minutes.
Equipment that helps but isn’t essential: an instant-read thermometer (milk temp), a dough scraper for dividing, and a baking sheet lined with parchment. A warm spot for proofing—an oven with the light on or a proofing drawer—makes rises predictable.
Watch Outs & How to Fix
Problem: Dough is too sticky or too dry
Fix: Flour absorption varies. If the dough clings to your hands and pool of sticky dough forms, add flour 1 tablespoon at a time during kneading until it cleans the bowl. If the dough feels dry and crumbly, add a teaspoon of water or milk and continue kneading until elastic.
Problem: Rolls don’t rise enough
Fix: Check yeast freshness first. If yeast is old, discard and use fresh yeast. If yeast is good, the likely issue is temperature. Move the bowl to a warmer spot (near a warm oven or on top of a warm appliance). Give it more time—an extra 30–45 minutes can make the difference.
Problem: Overproofed rolls
Fix: If rolls have expanded and then collapsed, they’ve gone too long. Lightly reshape them, allow a short second rise (30 minutes), then bake immediately. You may get a slightly denser crumb but still tasty.
Problem: Dense crumb after baking
Fix: Often caused by under-kneading or using too much flour. Ensure your mixer kneads until the dough is smooth and elastic. Watch the dough during the first rise—if it barely expanded, it needs more time or warmer conditions.
Health-Conscious Tweaks
To reduce fat, you can cut the butter slightly, but expect a firmer texture. Use low-fat milk instead of whole milk; rolls will be a touch less tender but still good. For whole-grain flavor, substitute up to half the plain flour with white whole wheat; the rolls will be denser and nuttier.
If you need lower sodium, use unsalted butter and reduce the added salt to 1/4 teaspoon. Sweetness is minimal already; you can keep the sugar as listed to feed the yeast without making the rolls noticeably sweet.
Notes from the Test Kitchen
I tested these rolls at different scales and found 12 to be a perfect yield for a standard baking sheet and family portion. Dividing into equal pieces matters for even baking; I use a kitchen scale to get 12 uniform balls.
When shaping, create tension on the surface of each ball by rolling it in a “C” shape with firm, consistent pressure. That surface tension gives the rolls a smooth top and helps them rise upward rather than spread out.
Bake time can vary by oven. My oven runs true at 190°C and bakes these in 12–14 minutes. If your oven browns quickly, tent loosely with foil after 10 minutes and check for a light golden top around 12–14 minutes.
Cooling, Storing & Rewarming
Cool on a rack for 10–15 minutes before serving. They’re best warm, but not piping hot—the crumb sets as they cool slightly. To store, let rolls cool completely, then place in an airtight container at room temperature for up to 2 days. For longer storage, freeze individually wrapped rolls for up to 3 months.
To rewarm: thaw at room temperature if frozen, then reheat covered with foil at 160°C for 8–10 minutes, or microwave one roll for 10–15 seconds until warm. Brushing with a little melted butter after warming brings back that fresh-from-the-oven shine and softness.
Questions People Ask
Q: Can I make the dough by hand instead of a stand mixer?
A: Yes. Use a spoon to combine, then turn onto a floured surface and knead for 10–12 minutes until smooth and elastic. It requires more effort but works fine.
Q: How do I know when the dough has been kneaded enough?
A: The dough should be smooth and elastic and pull cleanly away from the sides of the bowl. You can perform the windowpane test: stretch a small piece—if it stretches thin without tearing, gluten is developed.
Q: Can I make these ahead and bake later?
A: Yes. After shaping the rolls, freeze the unbaked tray (wrap tightly). When ready, thaw covered in the fridge overnight and allow the second rise at room temperature for 45–60 minutes before baking.
Q: What if my kitchen is cold and the dough takes forever to rise?
A: Use an oven with just the light on as a proofing environment, or place the bowl on top of a warm appliance. Slightly longer rises are okay; the flavor can even improve with a slower rise.
Bring It Home
These Super Soft Dinner Rolls are a reliable, everyday recipe that delivers on texture and flavor with minimal fuss. Keep the ingredients simple, follow the steps, and use the troubleshooting tips if something feels off. Warm them, split them, and load them with butter—this is comfort cooking the family will love.

Homemade Super Soft Dinner Rolls
Ingredients
Ingredients
- 250 ml/1 cup milk
- 3 teaspooninstant dry yeast
- 1 1/2 tablespoongranulated sugar
- 1/2 teaspoonsalt
- 45 g/1.5 oz soft salted butter
- 1 egg
- 600 g/3 cups plain flour
- drizzle of olive oil
Instructions
Instructions
- Heat the milk in the microwave for 20 seconds. Test with your fingertip — it should feel warm but not hot.
- Pour the warm milk into the bowl of your stand mixer. Add the instant dry yeast, granulated sugar, salt, soft salted butter (in pieces), and the egg.
- Fit the mixer with the dough hook. Add half of the plain flour and mix on speed 1 until it starts to come together.
- Slowly add the remaining flour while continuing to mix on speed 1 until the dough is well combined.
- Continue kneading with the dough hook on speed 1 until the dough is smooth, elastic, and pulls cleanly away from the sides of the bowl (about 5–7 minutes).
- Pour a drizzle of olive oil into a large mixing bowl and spread it around to coat the inside.
- Transfer the dough to the oiled bowl and turn it once or twice so all sides are lightly coated in oil. Cover the bowl with a tea towel and set aside to rise for 75 minutes, or until roughly doubled in size.
- Lightly oil a baking sheet with a little of the olive oil (or line with baking paper if you have it). Set it aside.
- Punch down the risen dough to release the air. Divide the dough into 12 equal pieces.
- Shape each piece into a smooth ball by cupping your hand in a "C" shape and rolling the dough on the work surface, creating surface tension. Place the 12 rolls on the prepared baking sheet, leaving a little space between them.
- Cover the rolls with the tea towel and let them rise for another 60 minutes, or until puffy and nearly doubled.
- Preheat the oven to 190°C.
- Bake the rolls for 12–14 minutes, until just lightly browned on top.
- Remove the rolls from the oven and allow them to cool slightly before serving.
Equipment
- Stand mixer
- dough hook
- Mixing Bowl
- Baking Sheet
- Microwave
- Tea towel
- work surface


