I make a lot of cheesecakes for the blog, but this Instant Pot Chocolate Cheesecake is the one I keep coming back to when I want reliable texture and a quick-ish finish. It sets beautifully in the pressure cooker, stays moist, and the Oreo crust gives it a pleasing crunch that balances the dense chocolate filling. I like that it feels special without demanding a whole day of hands-on baking.
You’ll find this recipe straightforward, but it rewards attention to a few small details: room-temperature cream cheese, a tight foil seal, and a patient chill at the end. Follow those and you’ll get a glossy, sliceable cheesecake every time. I write this with a practical focus—no fluff—so you can get it into the oven (or Instant Pot) and on the table.
Below I’ve included the exact ingredient list and step-by-step directions I use. Read through the tips and troubleshooting later on; they’ll help you avoid the common hiccups and make the process smoother. Let’s get to it.
Ingredients
- 20 Oreo cookies with filling — the crust; pulse whole cookies for maximum chocolate flavor and binding from the filling.
- 16 ounces cream cheese room temp — provides structure and creaminess; allow it to fully soften for a lump-free filling.
- 1/2 cup sour cream — adds tang and keeps the filling tender.
- 1/4 cup white sugar — sweetens without overpowering the chocolate.
- 1 tablespoon cornstarch — stabilizer that helps the cheesecake set while preventing cracks.
- 1/4 cup unsweetened cocoa powder — deepens the chocolate flavor and firms the texture a bit.
- 1/2 teaspoon espresso powder — boosts chocolate flavor; it won’t make the cheesecake taste like coffee.
- 2 eggs room temp — bind the filling; add them one at a time and don’t overmix.
- 8 oz semi-sweet chocolate melted and slightly cooled — fold in for a rich, silky chocolate base.
- 1 teaspoon vanilla — rounds the flavors.
- 1/2 cup chocolate chips — for the ganache; use what you have, but semi-sweet yields a balanced glaze.
- 1/2 cup heavy whipping cream — combined with the chips to make a shiny, pourable ganache.
Your Shopping Guide
When shopping for this cheesecake, prioritize the chocolate and cream cheese quality. A good semi-sweet chocolate (the 8 ounces called for) makes a big difference in flavor. Look for chocolate with at least 50–60% cacao for balance. The chocolate chips for the ganache don’t need to be fancy—standard chips melt well and give a glossy finish.
Oreos are listed explicitly; buy the exact amount so the crust holds together nicely. If you prefer a stronger chocolate crust, choose double-stuff Oreos. For the dairy items—cream cheese, sour cream, heavy whipping cream—buy full-fat versions for the best texture and mouthfeel. Lower-fat options can work, but the cheesecake will be less rich and may have a slightly different set.
Finally, check your Instant Pot size before you start. This recipe uses a 6″ or 7″ springform pan and the trivet; most 6-quart Instant Pots will accommodate that setup comfortably. If you have a smaller pot, measure the diameter and height to be sure the pan and sling will fit with the lid closed.
Instant Pot Chocolate Cheesecake: How It’s Done
- Pulse the 20 Oreo cookies (with filling) in a food processor until fine crumbs form. Press the crumbs into the bottom and about 1 inch up the sides of a 6″ or 7″ springform pan using a measuring cup or the bottom of a glass. Place the prepared crust in the freezer while you make the filling.
- In a large bowl, beat the 16 ounces cream cheese (room temperature) on high until smooth and light.
- Add 1/4 cup white sugar and 1 tablespoon cornstarch to the cream cheese and mix just until combined.
- Beat in 1/2 cup sour cream until just incorporated, taking care not to overmix.
- Add the slightly cooled, melted 8 ounces semi-sweet chocolate, 1/4 cup unsweetened cocoa powder, 1/2 teaspoon espresso powder, and 1 teaspoon vanilla. Mix until the mixture is uniform.
- Add the 2 eggs one at a time, mixing on low and stopping as soon as each egg is incorporated. Do not overmix.
- Pour the filling into the prepared Oreo crust. Tightly cover the top of the springform pan with aluminum foil to prevent condensation from dripping onto the cheesecake.
- Pour 1 cup of water into the Instant Pot inner pot and place the trivet inside. Fold a long strip of aluminum foil several times to make a sturdy sling, slide the sling under the springform pan, then set the pan on the trivet with the sling ends accessible so you can lift the pan out later.
- Close the Instant Pot lid and set the valve to Sealing. Cook on High pressure for 35 minutes. When the cook time ends, allow a natural pressure release until the pressure has fully released, then open the lid.
- Carefully lift the pan from the Instant Pot using the foil sling. Remove the foil covering the pan and place the pan on a wire rack to cool to room temperature.
- Once cooled completely, transfer the cheesecake (still in the pan) to the refrigerator and chill overnight (at least 8 hours) to fully set.
- To make the ganache, combine 1/2 cup chocolate chips and 1/2 cup heavy whipping cream in a microwave-safe bowl. Microwave in 30‑second intervals, stirring between each interval, until the chocolate is fully melted and the mixture is smooth. Let the ganache cool a few minutes until slightly thickened but still pourable.
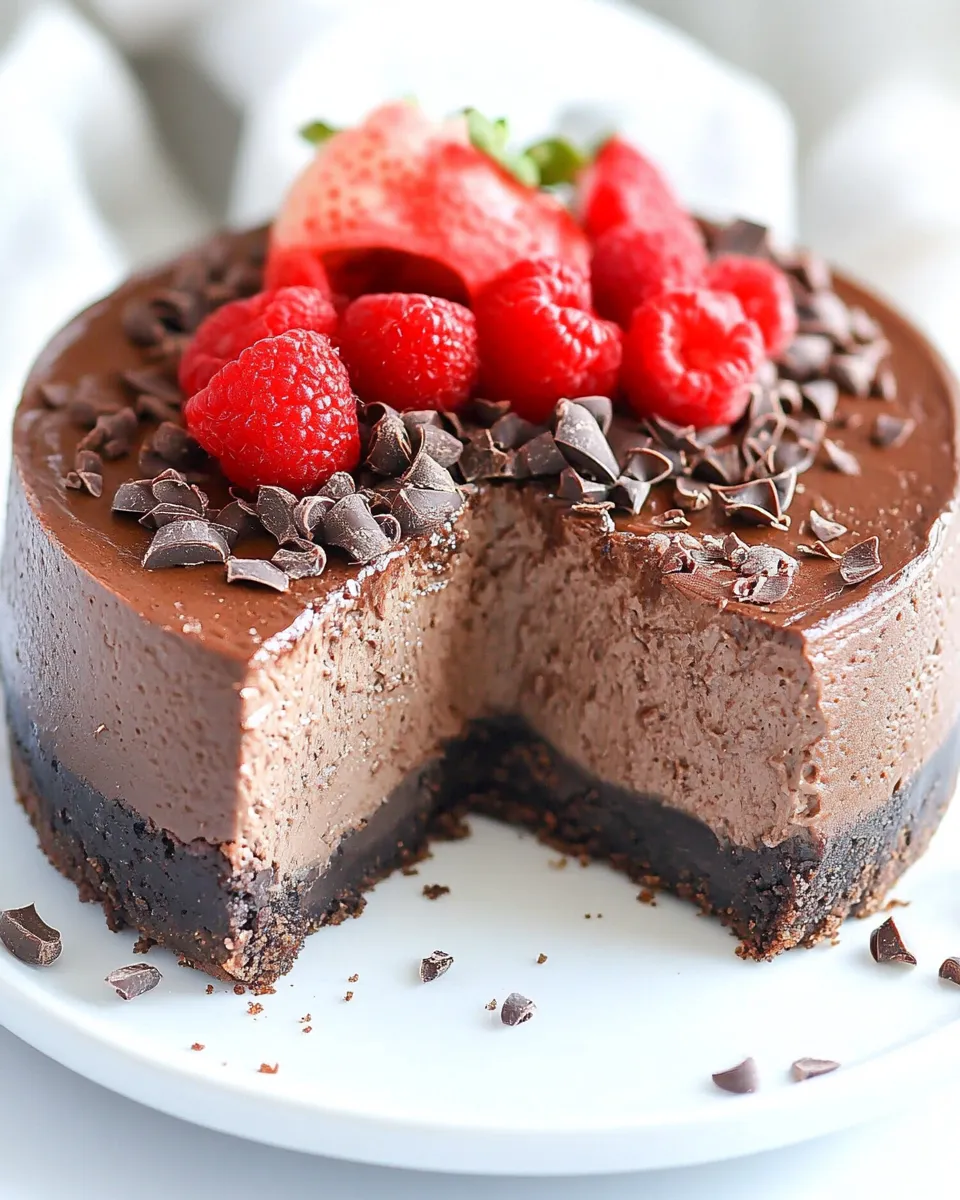
- Pour the ganache over the chilled cheesecake and spread to the edges. Return the cheesecake to the refrigerator until the ganache is set (about 30 minutes to 1 hour).
- Remove the springform ring, slice, and serve. If desired, wipe a knife clean between slices for neat edges.
What Makes This Recipe Special
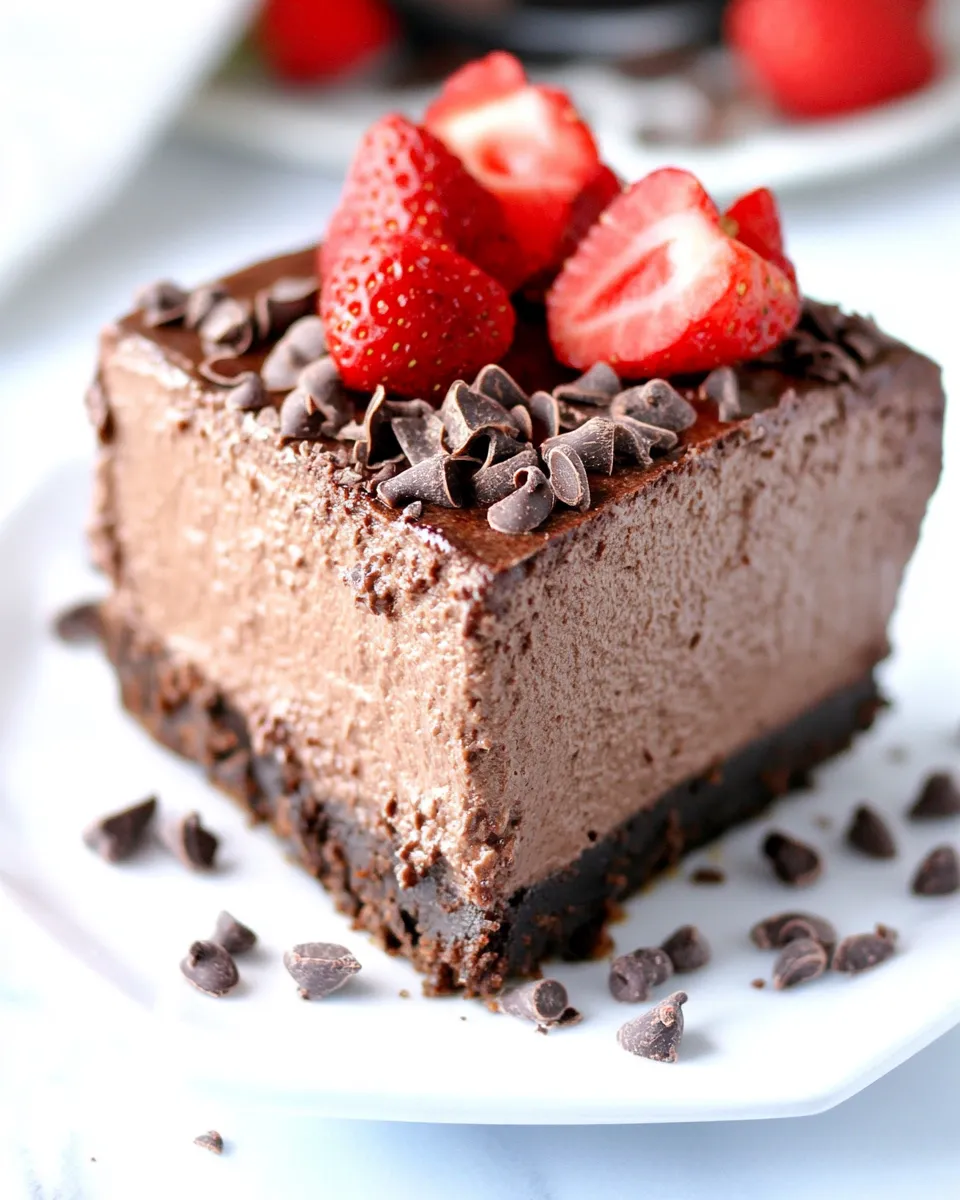
This cheesecake is special because the Instant Pot gives reliably even, moist cooking without the long bake-and-bake-again routine. Pressure cooking minimizes the temperature swings that often cause cracking. The Oreo crust, using the cookies with their filling, acts like both flavor and binder—no added butter is required in the ingredient list, keeping things simple.
The chocolate is layered into the filling and again as a ganache finishing touch. That two-stage chocolate approach creates depth: rich chocolate in the body and a shiny top that sets quickly after brushing on. Texturally, you get a dense, creamy interior and a crisp cookie edge—the contrast that makes each bite interesting.
Ingredient Swaps & Substitutions
If you want to change the profile slightly, consider these swaps. They’re intentionally conservative—to preserve texture and the integrity of the instructions above.
- Oreos: swap for a similar sandwich cookie (including gluten-free sandwich cookies) if you need a gluten-free crust. The amount stays the same.
- Semi-sweet chocolate: you can use darker chocolate for a more intense flavor or milk chocolate for a sweeter finish. Keep the 8-ounce amount to maintain filling structure.
- Sour cream: full-fat plain yogurt can work in a pinch, but texture and tang will differ slightly. Use the same volume.
- Ganache: if you prefer a thinner glaze, warm the ganache slightly more before pouring; to thicken it, let it cool a touch longer before spreading.
Tools of the Trade
These are the tools that make the process smooth and predictable.
- Instant Pot or another electric pressure cooker capable of sealing and high-pressure cooking.
- 6″ or 7″ springform pan to fit comfortably inside your pot.
- Food processor to pulse oreos into fine crumbs quickly.
- Wire rack to cool the cheesecake evenly after pressure cooking.
- Aluminum foil to wrap the pan tightly and to create a sling for lifting the hot pan out of the pot.
- Measuring cups and spoons for accurate amounts—chocolate-based recipes are sensitive to proportions.
Problems & Prevention
Cracks, soggy crusts, or a runny center are the typical complaints with cheesecakes. Here’s how to avoid them with this recipe:
- Cracks: don’t overbeat the filling after adding the eggs. Mix on low and stop as soon as each egg is incorporated. Also, cool the cheesecake gradually—rapid temperature changes increase cracking risk.
- Soggy crust: pressing crumbs up the sides and freezing the crust briefly helps it firm up before filling. Also, ensure the crust is compacted; a loose crust absorbs filling moisture faster.
- Condensation drip: wrap the pan tightly in aluminum foil before pressure cooking to keep condensation from the Instant Pot lid from dripping onto the surface.
- Undercooked center: follow the 35-minute high-pressure time and allow a full natural pressure release. The overnight chill is essential—don’t try to rush the set time.
How to Make It Lighter
If you want a lighter-feeling slice without changing the method, there are small adjustments that help without sabotaging the structure:
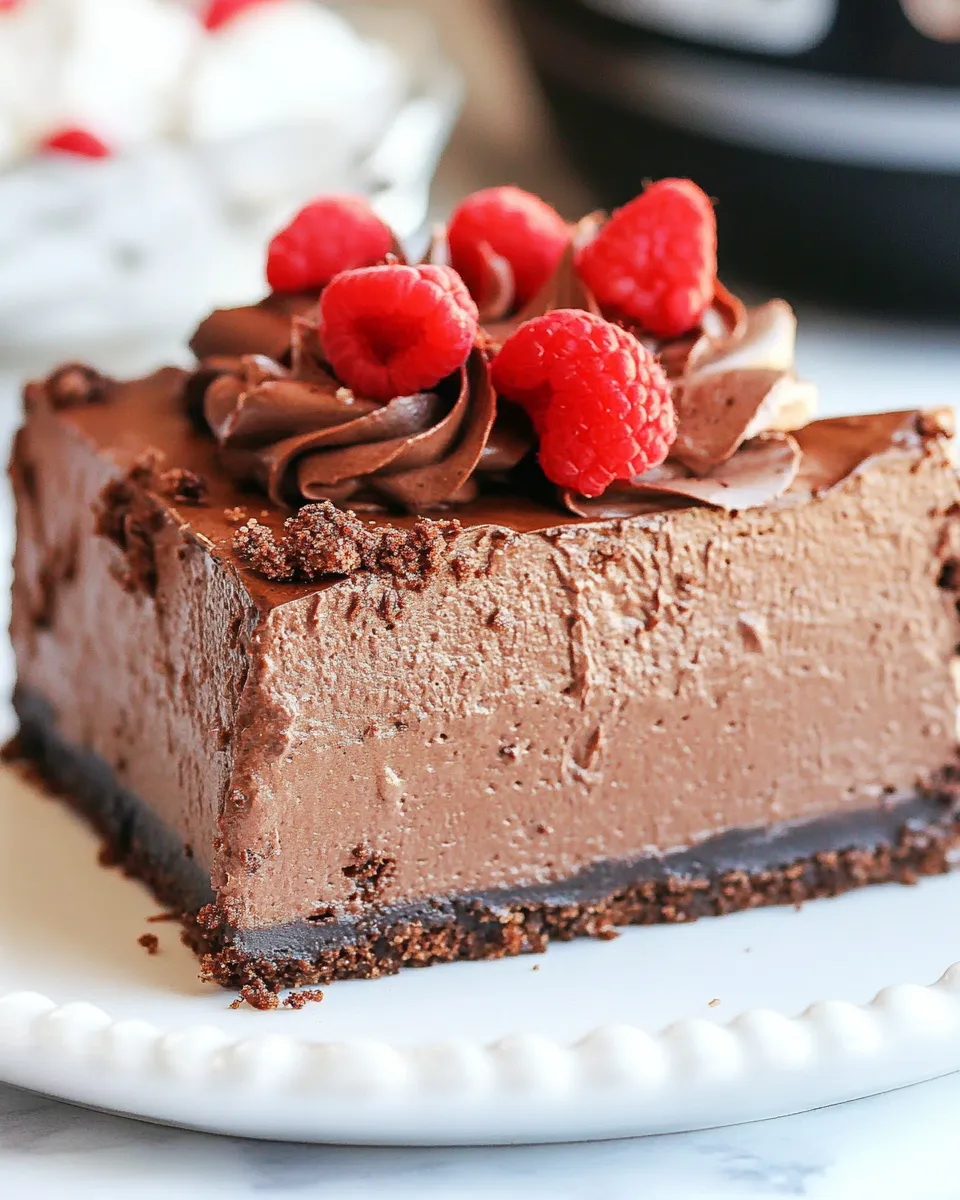
- Serve smaller slices. Chocolate cheesecake is rich; a thin slice satisfies.
- Top with fresh berries or a light berry coulis to cut through the chocolate density.
- Refrigerate uncovered for the last hour to let some surface moisture evaporate before serving, which makes each bite feel less heavy.
Testing Timeline
Expect this overall timeline from start to finish, keeping hands-on time minimal:
- Prep crust and filling: about 25–35 minutes (includes pulsing cookies, pressing crust, and mixing the filling).
- Instant Pot cook: 35 minutes at high pressure, plus natural pressure release time (plan for 20–30 minutes depending on your machine).
- Room-temperature cool: 30–60 minutes to avoid thermal shock before refrigerating.
- Chill time: overnight (minimum 8 hours) for best texture—this is essential.
- Ganache set: 30 minutes to 1 hour after pouring.
Save It for Later
Store leftover cheesecake covered in the refrigerator for up to 4–5 days. Keep it in the springform pan or transfer to an airtight container to prevent it from absorbing other fridge odors. For longer storage, freeze slices individually wrapped in plastic and a layer of foil; they keep well for 1–2 months. Thaw overnight in the fridge before serving.
Helpful Q&A
Q: Can I double this recipe for a larger pan or two cheesecakes?
A: Doubling inside one pan is risky—this recipe is calibrated for a 6″ or 7″ springform. If you need more servings, make two separate pans (if your Instant Pot can fit two, great) or make sequential batches. Cooking time depends on the depth, so don’t assume more volume equals longer cook time without checking fit and depth.
Q: My cheesecake wobbles in the center after cooking—did it fail?
A: A slight wobble after cooking is normal; it firms up as it cools and chills overnight. If it’s very liquid, it may need more chilling time. Never judge doneness immediately after pressure cooking.
Q: Can I omit the ganache?
A: Yes. The ganache is optional but adds a glossy finish and extra chocolate layer. If you skip it, consider dusting the top with cocoa powder or serving with fresh berries.
In Closing
This Instant Pot Chocolate Cheesecake is one of those dependable desserts that looks and tastes like a lot more work than it was. Follow the exact ingredient list and steps above for best results: soft cream cheese, careful mixing, the foil wrap, the 35-minute high-pressure cook, and that crucial overnight chill. Do those things and you’ll be rewarded with a velvety, chocolate-forward cheesecake that slices cleanly and disappears fast.
Make it for a weeknight treat, a small celebration, or whenever you want chocolate with a confident, professional texture. If you try it, I’d love to hear how yours turns out and any tweaks you made—sharing tips is how we all get better in the kitchen.

Instant Pot Chocolate Cheesecake
Ingredients
Ingredients
- 20 Oreo cookieswith filling
- 16 ouncescream cheeseroom temp
- 1/2 cupsour cream
- 1/4 cupwhite sugar
- 1 tablespooncornstarch
- 1/4 cupunsweetened cocoa powder
- 1/2 teaspoonespresso powder
- 2 eggsroom temp
- 8 ozsemi-sweet chocolatemelted and slightly cooled
- 1 teaspoonvanilla
- 1/2 cupchocolate chips
- 1/2 cupheavy whipping cream
Instructions
Instructions
- Pulse the 20 Oreo cookies (with filling) in a food processor until fine crumbs form. Press the crumbs into the bottom and about 1 inch up the sides of a 6" or 7" springform pan using a measuring cup or the bottom of a glass. Place the prepared crust in the freezer while you make the filling.
- In a large bowl, beat the 16 ounces cream cheese (room temperature) on high until smooth and light.
- Add 1/4 cup white sugar and 1 tablespoon cornstarch to the cream cheese and mix just until combined.
- Beat in 1/2 cup sour cream until just incorporated, taking care not to overmix.
- Add the slightly cooled, melted 8 ounces semi-sweet chocolate, 1/4 cup unsweetened cocoa powder, 1/2 teaspoon espresso powder, and 1 teaspoon vanilla. Mix until the mixture is uniform.
- Add the 2 eggs one at a time, mixing on low and stopping as soon as each egg is incorporated. Do not overmix.
- Pour the filling into the prepared Oreo crust. Tightly cover the top of the springform pan with aluminum foil to prevent condensation from dripping onto the cheesecake.
- Pour 1 cup of water into the Instant Pot inner pot and place the trivet inside. Fold a long strip of aluminum foil several times to make a sturdy sling, slide the sling under the springform pan, then set the pan on the trivet with the sling ends accessible so you can lift the pan out later.
- Close the Instant Pot lid and set the valve to Sealing. Cook on High pressure for 35 minutes. When the cook time ends, allow a natural pressure release until the pressure has fully released, then open the lid.
- Carefully lift the pan from the Instant Pot using the foil sling. Remove the foil covering the pan and place the pan on a wire rack to cool to room temperature.
- Once cooled completely, transfer the cheesecake (still in the pan) to the refrigerator and chill overnight (at least 8 hours) to fully set.
- To make the ganache, combine 1/2 cup chocolate chips and 1/2 cup heavy whipping cream in a microwave-safe bowl. Microwave in 30‑second intervals, stirring between each interval, until the chocolate is fully melted and the mixture is smooth. Let the ganache cool a few minutes until slightly thickened but still pourable.
- Pour the ganache over the chilled cheesecake and spread to the edges. Return the cheesecake to the refrigerator until the ganache is set (about 30 minutes to 1 hour).
- Remove the springform ring, slice, and serve. If desired, wipe a knife clean between slices for neat edges.
Equipment
- Instant Pot
- 6" or 7" springform pan
- Food Processor
- Trivet
- Aluminum Foil
- Wire Rack
- Microwave-safe Bowl
Notes
Use a 6" or 7" springform pan as noted; cover the pan tightly with foil before pressure cooking to prevent condensation.