
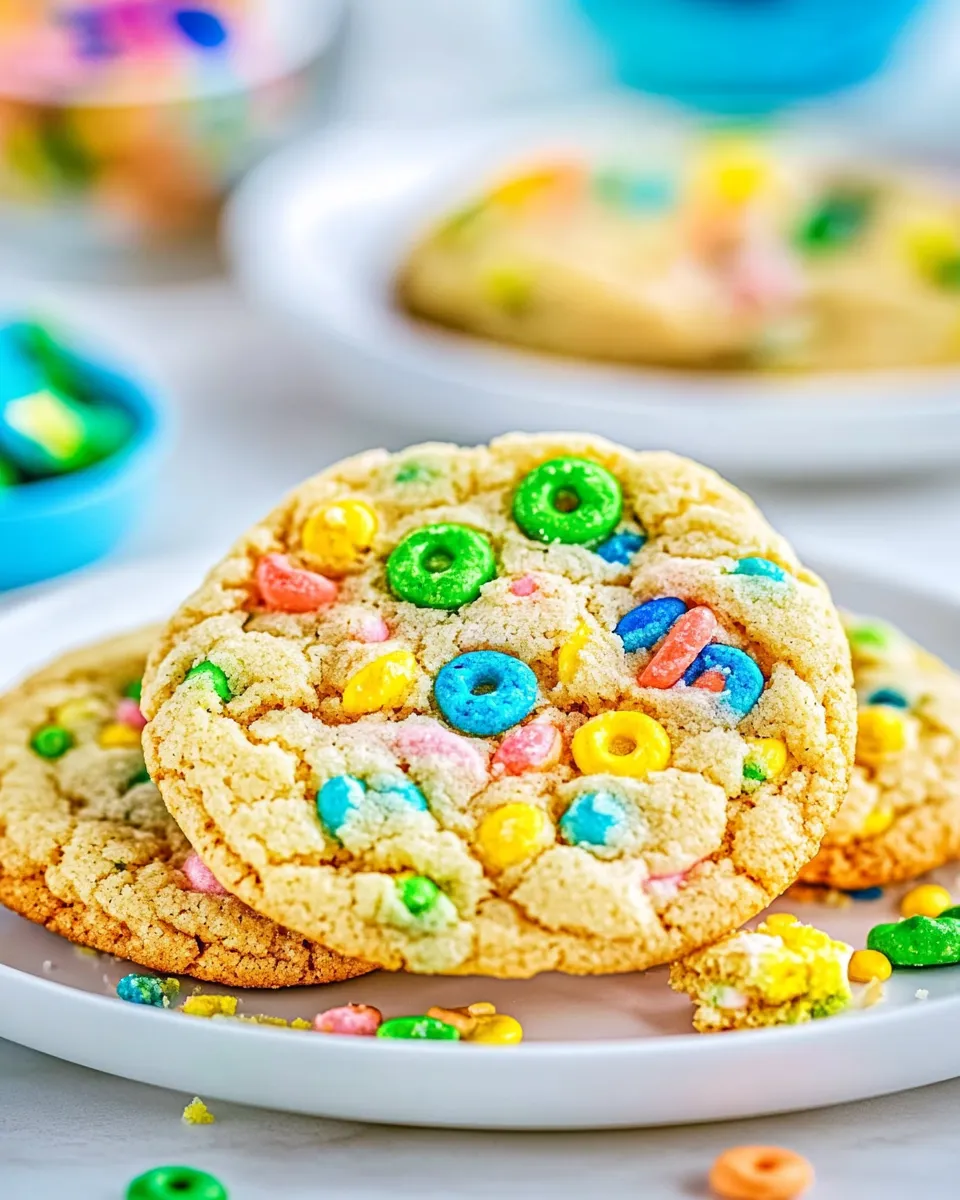
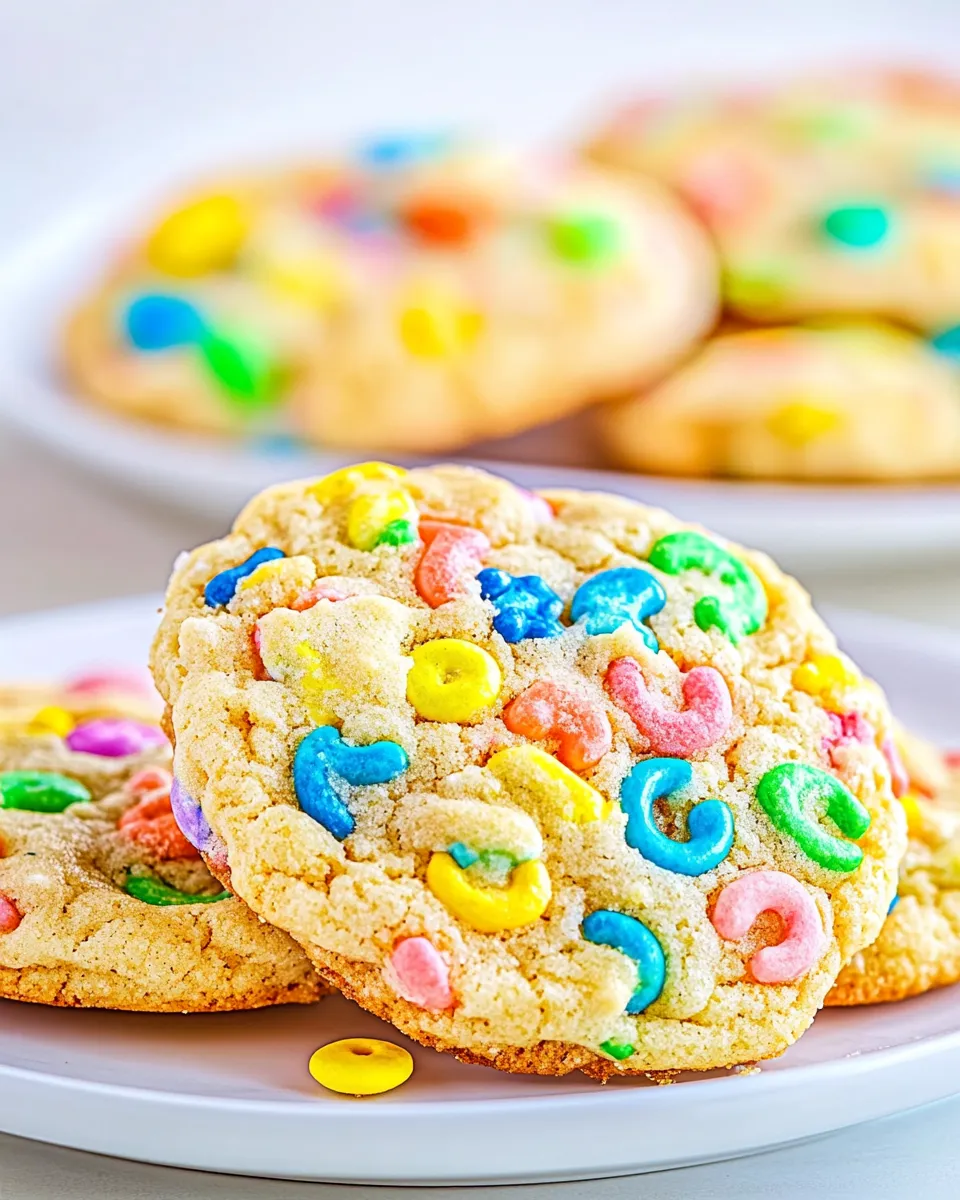
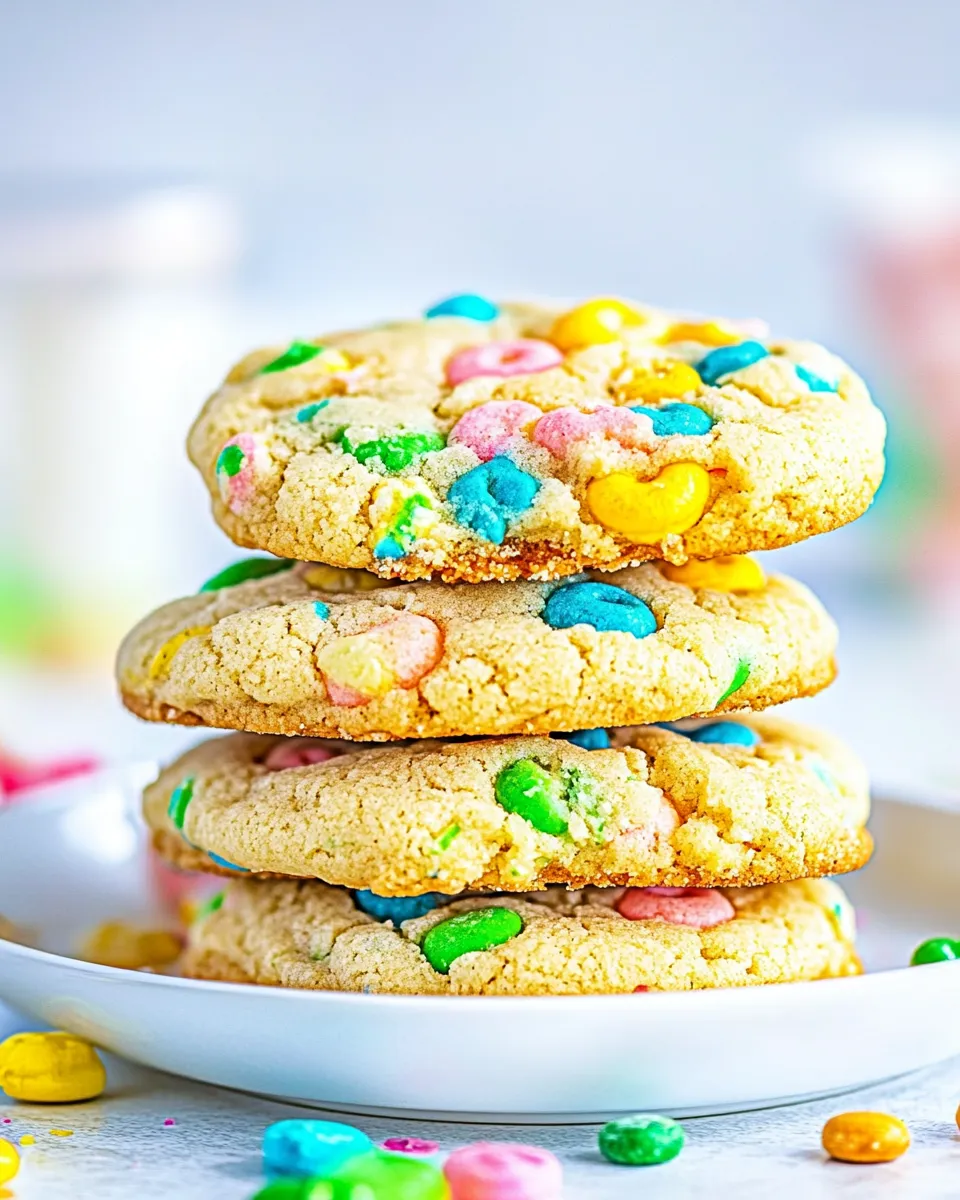
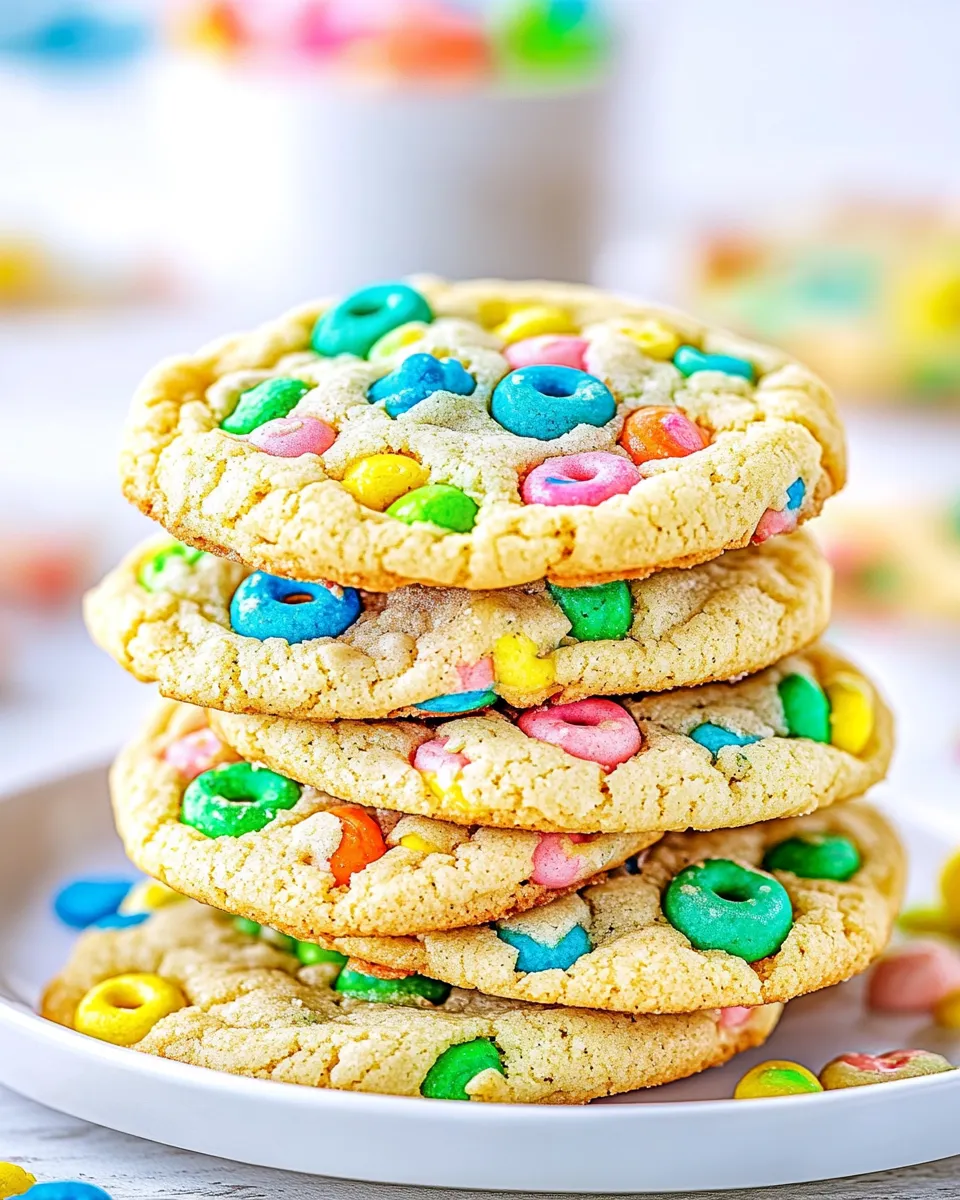
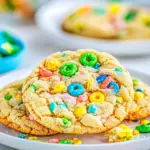
When I first tested this recipe, I was after a cookie that kept the playful crunch and candy-sweet personality of Lucky Charms without turning into a sticky, melted mess. These cookies hit that balance: a tender, chewy base studded with cereal flakes and bright marshmallow pieces that stay distinct after baking. They feel nostalgic and unapologetically fun, but they bake like a grown-up cookie should — predictable, forgiving, and easy to portion.
I like these for a weekend bake because they tolerate a few swaps (shortening or extra butter, more or less fluff) and still deliver. The dough is straightforward to handle: it creams, it comes together, and the marshmallows survive the oven when folded in carefully. The green-marbling option adds a little showmanship for holidays or themed parties, and the plain version is the quickest path to a plateful of crowd-pleasers.
Below you’ll find the exact ingredient list and step-by-step directions I used. I also included troubleshooting notes, sensible substitutions, the tools I reach for every time, and answers to common questions so you can bake these with confidence tonight.
Ingredient List
- 2 ½ cups all-purpose flour — provides structure and body to the cookie; don’t overmeasure to avoid a dry crumb.
- 1 ½ teaspoons salt — balances sweetness and sharpens flavor.
- 1 ¼ teaspoons baking soda — primary leavening for rise and lift.
- ½ teaspoon baking powder — adds a touch of extra lift and a lighter texture.
- 1 ½ cups granulated sugar — sweetens and encourages spread; creamed well it helps with a tender bite.
- 1 cup unsalted butter, room temperature — richness and flavor; soft but not melted is ideal for creaming.
- ¼ cup shortening, optional (or substitute with ¼ cup additional butter) — optional for a slightly chewier, more stable cookie; if omitted, use extra butter as noted.
- 2 large eggs + 1 yolk — moisture, structure, and extra richness from the additional yolk.
- ⅓ cup Marshmallow Fluff, optional but recommended — adds marshmallow flavor, chew, and a subtle sticky tenderness to the dough.
- 1 teaspoon vanilla extract — essential background flavor that ties everything together.
- ⅔ cup crushed Lucky Charms cereal, cereal pieces only — crushed cereal gives texture and that signature oat-y crunch without too-large pieces.
- 1 ½ cups marshmallow pieces from Lucky Charms cereal, plus more for topping — the colorful marshmallows are the showstoppers; folding them in late keeps them distinct.
- Green food coloring, optional — for the marbled version; a few drops go a long way.
How to Prepare (Lucky Charms Cookies)
- Preheat the oven to 350°F (175°C). Line two baking sheets with parchment paper and set aside.
- In a medium bowl, whisk together 2 ½ cups all-purpose flour, 1 ½ teaspoons salt, 1 ¼ teaspoons baking soda, and ½ teaspoon baking powder. Set the dry mixture aside.
- In the bowl of a stand mixer fitted with the paddle attachment (or in a large bowl using a handheld mixer), beat 1 ½ cups granulated sugar, 1 cup unsalted butter (room temperature), and ¼ cup shortening (if using; or substitute with the extra ¼ cup butter) on high speed for about 1 minute, until smooth and fluffy.
- Add 2 large eggs + 1 yolk, ⅓ cup Marshmallow Fluff (optional), and 1 teaspoon vanilla extract to the creamed mixture. Beat until incorporated and smooth.
- Add the reserved dry mixture and ⅔ cup crushed Lucky Charms cereal (cereal pieces only) to the mixer. Mix on low speed just until combined; do not overmix.
- Decide whether to make plain cookies or green marbled cookies:
- For plain cookies: fold 1 ½ cups marshmallow pieces (from Lucky Charms cereal) into the entire dough until evenly distributed, then continue to step 8.
- For green marbled cookies: transfer about 1/3 of the dough into a separate small bowl. Add a small amount of green food coloring to that portion and mix until evenly colored. Fold 1 ½ cups marshmallow pieces into the remaining (larger) uncolored dough only. Then continue to step 7.
- (Green marbled assembly) For each cookie, scoop 1 tablespoon of green dough and 2 tablespoons of the plain dough. Gently roll the two pieces side-by-side until they adhere but are not fully mixed; form into balls and slightly flatten to about 2-inch discs. Place discs on the prepared baking sheet about 3 inches apart. Press several marshmallows into the top of each disc.
- (Plain cookie assembly) Using a large 3-tablespoon cookie scoop, portion 3-tablespoon balls from the plain dough. Lightly flatten each ball into a 2-inch disc. Place discs on the prepared baking sheet about 3 inches apart. Press several marshmallows into the top of each disc.
- Bake the cookies one sheet at a time on the center oven rack for 18–20 minutes, rotating the baking sheet halfway through baking for even browning. For a flatter, chewier cookie, you may (optionally) give the baking sheet a firm slap onto the oven rack every few minutes after the cookies have baked for about 10 minutes. Remove the cookies when the tops look slightly glossy and are just set (they will firm as they cool). Do not overbake.
- Allow the baked cookies to cool on the baking sheet for about 10 minutes, then transfer them to a wire rack to cool completely.
- Store cooled cookies in an airtight container at room temperature for up to 5 days, or freeze for up to 4 months. Unbaked cookie dough balls can also be frozen in an airtight container or zip-top bag for up to 4 months; when baking from frozen, add 1–2 minutes to the baking time.
Why This Recipe Works
The formula balances sugar, fat, and leavening so the cookies spread predictably but keep a chewy center. Using both baking soda and a touch of baking powder gives an initial rise and a gentle lift that prevents a dense, tough cookie. The extra yolk adds tenderness and chew, which is what you want in a marshmallow-studded cookie — the marshmallows stay soft without collapsing the whole structure.
Creaming the butter and sugar until fluffy traps air, which translates into a better texture and even browning. Adding the crushed cereal to the dry mix keeps the cereal from getting pulverized by the mixer and distributes it more evenly. Finally, folding the marshmallow pieces in at the end reduces melting, preserving their color and bite.
Healthier Substitutions
If you’re looking to make small swaps without changing the recipe mechanics, here are practical options that keep the cookie chemistry intact:
- Shortening: use the optional ¼ cup shortening (already listed) for slightly less saturated fat if that’s helpful for texture.
- Butter: choose a good-quality unsalted butter for flavor; if you must, a 1:1 swap with a plant-based butter will work in structure, though flavor will differ.
- Sugar: you can reduce sugar slightly (start by 10–15%) if you prefer less sweet; the texture will still be fine but expect a touch less spread.
- Flour: for gluten-free needs, use a reliable 1:1 gluten-free flour blend, but expect slightly different chew and color.
Tools of the Trade
These are the small helpers that make the bake easier and more consistent:
- Stand mixer with paddle attachment (or a handheld mixer) — creaming is easier and more consistent.
- Large mixing bowls — one for dry, one for wet, and a small bowl for the colored dough if marbling.
- Cookie scoop (1 tablespoon and 3-tablespoon sizes) — ensures uniform cookies and even baking.
- Baking sheets lined with parchment paper — promotes even browning and easy removal.
- Wire cooling rack — prevents soggy bottoms by allowing air circulation.
Problems & Prevention
Crumbly dough: If your dough feels dry and falls apart, you likely overmeasured the flour or undermeasured the fats. Add a teaspoon of milk or a touch more Marshmallow Fluff and mix until it holds; avoid extra flour.
Marshmallows melting into blobs: Fold marshmallows in at the end and press a few on top before baking. That keeps the interior pieces more intact and the top pieces visually appealing.
Cookies spread too much: Make sure your butter wasn’t melted when creamed and that the dough is chilled slightly if your kitchen is very warm. Also ensure accurate measuring of flour — spoon and level the flour rather than scooping.
Variations for Dietary Needs
Gluten-free: Use a commercial 1:1 gluten-free flour blend and handle gently. Texture will shift but flavor will remain familiar.
Dairy-free: A solid plant-based butter that behaves like butter in baking (not a soft margarine) can replace the butter. Use the recipe’s optional note about shortening as your guide.
Egg-free: For a true egg-free or vegan swap, use a tested egg replacer product and skip the extra yolk — expect a change in tenderness and richness. Because eggs contribute structure and moisture, results will differ from the original.
Insider Tips
1) Keep marshmallows as intact as possible. Chop gently or pull from the cereal rather than forcing through a spice grinder. The little marshmallows are the visual star.
2) If you’re making the green-marble version, add food coloring sparingly. A little goes a long way and helps you avoid an artificial flavor or overly wet dough.
3) Bake one sheet at a time on the center rack for the most even heat. If you must bake two sheets simultaneously, rotate and swap positions halfway through.
4) For the chewiest center, remove cookies when the tops are glossy and just set. They’ll look slightly underdone but will firm as they cool.
Shelf Life & Storage
These cookies keep well at room temperature when stored in an airtight container. They stay fresh for up to 5 days, though the marshmallows will soften slightly over time. For longer storage, freeze cooled cookies in a single layer on a tray, transfer to a freezer bag or airtight container, and keep for up to 4 months. Thaw at room temperature for about 30–60 minutes before serving.
Frequently Asked Questions
- Can I use a different cereal? — You can, but Lucky Charms marshmallows are unique. A similar cereal will change the flavor profile and appearance.
- Will the marshmallows melt and disappear? — If folded in at the end and pressed on top before baking, many will remain visible; smaller pieces may soften but won’t fully vanish in these proportions.
- Can I refrigerate the dough overnight? — Yes. Chilling will firm the dough and can concentrate the flavors; let slightly warm before scooping if it becomes very hard.
- Why add both baking soda and baking powder? — Each contributes differently: baking soda reacts with acidic components for spread and browning; baking powder gives a gentler lift for a softer crumb.
- Is Marshmallow Fluff necessary? — It’s optional but recommended for added marshmallow flavor and chew; the recipe works without it.
Make It Tonight
If you want cookies on the table tonight, schedule 15 minutes for mise en place (measure and line pans), 15–20 minutes to make the dough, and 18–20 minutes per batch for baking plus resting time — plan on about 1 hour to enjoy the first batch hot from the oven. The plain version saves time because you skip the marbling step. Scoop, press a few marshmallows on top, bake one sheet at a time, and cool briefly on the sheet before transferring to a rack. Serve warm for melty marshmallow pockets or cool for easier handling and packing.
These cookies are reliable, colorful, and forgiving once you follow the steps above. They make a cheerful dessert or an unexpected addition to cookie exchanges. Happy baking — and don’t forget to leave a few for taste-testing as you work.
Lucky Charms Cookies
Ingredients
Ingredients
- 2 1/2 cupall-purpose flour
- 1 1/2 teaspoonsalt
- 1 1/4 teaspoonbaking soda
- 1/2 teaspoonbaking powder
- 1 1/2 cupsgranulated sugar
- 1 cupunsalted butter room temperature
- 1/4 cupshortening optional (or substitute with 1/4 cup additional butter)
- 2 large eggs + 1 yolk
- 1/3 cupMarshmallow Fluff optional but recommended
- 1 teaspoonvanilla extract
- 2/3 cupcrushed Lucky Charms cereal cereal pieces only
- 1 1/2 cupsmarshmallow pieces from Lucky Charms cereal plus more for topping
- Green food coloring optional
Instructions
Instructions
- Preheat the oven to 350°F (175°C). Line two baking sheets with parchment paper and set aside.
- In a medium bowl, whisk together 2 ½ cups all-purpose flour, 1 ½ teaspoons salt, 1 ¼ teaspoons baking soda, and ½ teaspoon baking powder. Set the dry mixture aside.
- In the bowl of a stand mixer fitted with the paddle attachment (or in a large bowl using a handheld mixer), beat 1 ½ cups granulated sugar, 1 cup unsalted butter (room temperature), and ¼ cup shortening (if using; or substitute with the extra ¼ cup butter) on high speed for about 1 minute, until smooth and fluffy.
- Add 2 large eggs + 1 yolk, ⅓ cup Marshmallow Fluff (optional), and 1 teaspoon vanilla extract to the creamed mixture. Beat until incorporated and smooth.
- Add the reserved dry mixture and ⅔ cup crushed Lucky Charms cereal (cereal pieces only) to the mixer. Mix on low speed just until combined; do not overmix.
- Decide whether to make plain cookies or green marbled cookies: - For plain cookies: fold 1 ½ cups marshmallow pieces (from Lucky Charms cereal) into the entire dough until evenly distributed, then continue to step 8. - For green marbled cookies: transfer about 1/3 of the dough into a separate small bowl. Add a small amount of green food coloring to that portion and mix until evenly colored. Fold 1 ½ cups marshmallow pieces into the remaining (larger) uncolored dough only. Then continue to step 7.
- (Green marbled assembly) For each cookie, scoop 1 tablespoon of green dough and 2 tablespoons of the plain dough. Gently roll the two pieces side-by-side until they adhere but are not fully mixed; form into balls and slightly flatten to about 2-inch discs. Place discs on the prepared baking sheet about 3 inches apart. Press several marshmallows into the top of each disc.
- (Plain cookie assembly) Using a large 3-tablespoon cookie scoop, portion 3-tablespoon balls from the plain dough. Lightly flatten each ball into a 2-inch disc. Place discs on the prepared baking sheet about 3 inches apart. Press several marshmallows into the top of each disc.
- Bake the cookies one sheet at a time on the center oven rack for 18–20 minutes, rotating the baking sheet halfway through baking for even browning. For a flatter, chewier cookie, you may (optionally) give the baking sheet a firm slap onto the oven rack every few minutes after the cookies have baked for about 10 minutes. Remove the cookies when the tops look slightly glossy and are just set (they will firm as they cool). Do not overbake.
- Allow the baked cookies to cool on the baking sheet for about 10 minutes, then transfer them to a wire rack to cool completely.
- Store cooled cookies in an airtight container at room temperature for up to 5 days, or freeze for up to 4 months. Unbaked cookie dough balls can also be frozen in an airtight container or zip-top bag for up to 4 months; when baking from frozen, add 1–2 minutes to the baking time.
Equipment
- stand mixer or handheld mixer
- paddle attachment
- Mixing bowls
- Baking Sheets
- Parchment Paper
- Cookie Scoop
- Wire Rack
Notes
*
Marshmallow Fluff
adds extra chewiness
to these Saint Patrick’s Day themed cookies. However, if you don’t have it you can omit it noting the overall chewiness of the Lucky Charm cookies will be decreased. I have only tested the cookies with Marshmallow Fluff however it’s likely that
Marshmallow Creme
is a fine substitution.
**When crushing the Lucky Charms cereal, it
doesn’t need to be a pulverized powder. Some powder with little bits of cereal is fine.
Add about one cup of dry cereal to a large ziptop bag and crush with a rolling pin or whiz it in a blender. Then measure out two-thirds of a cup of crushed cereal and add it to the dough.
Don’t start with only 2/3-cup of whole cereal and then crush it because after you crush it, it will be less than you need.


