
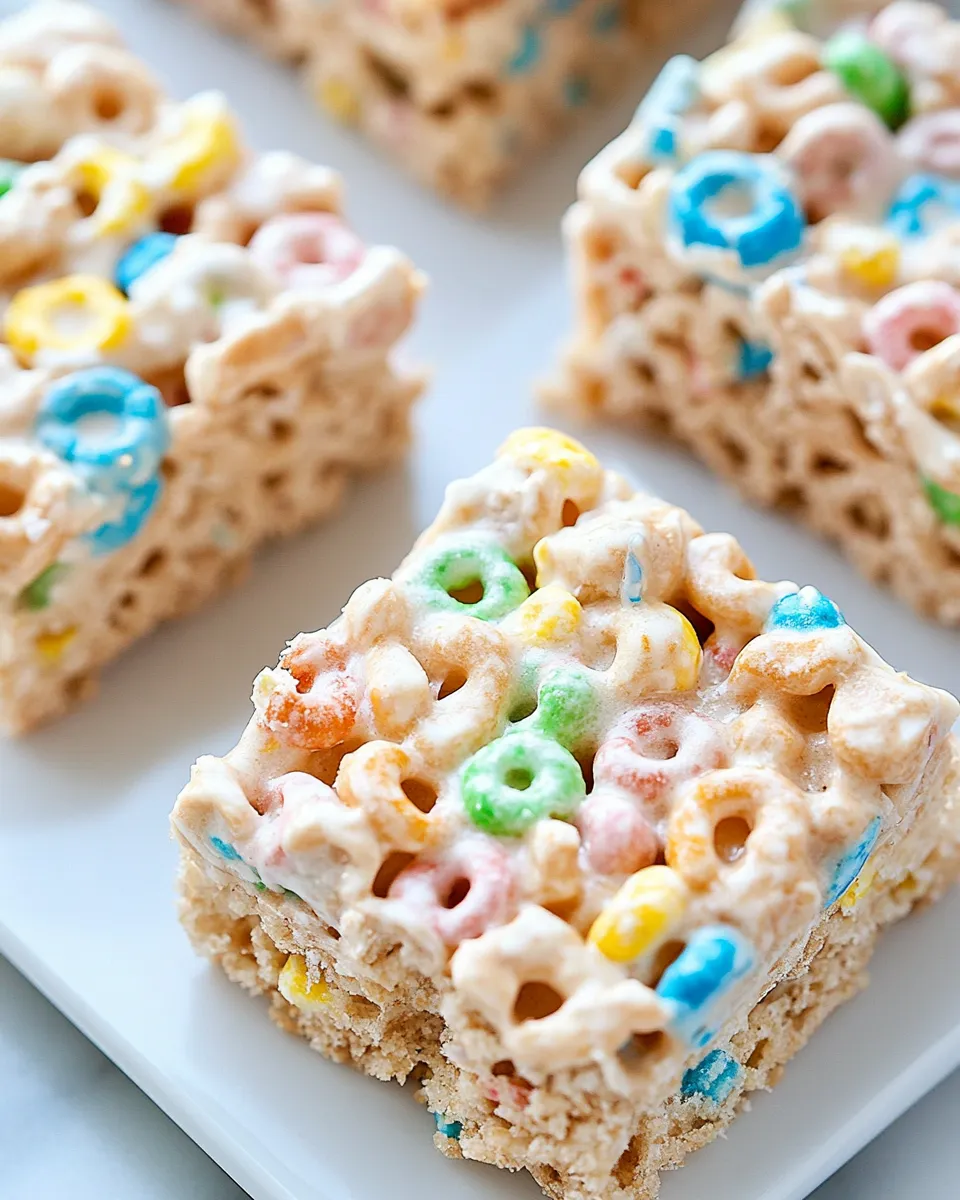
These Lucky Charms Treats are one of those recipes that lands between childhood nostalgia and snack-table hero. They’re simple: cereal, marshmallows, a little butter and vanilla. They come together fast and they please a crowd, whether you’re feeding a pile of small hands or bringing a bright dessert to a potluck.
I test a lot of easy sweets in my kitchen, and this version is faithful to the classic technique that gives you bars with a soft, chewy interior and those colorful marshmallow bits scattered through. There’s room to refine texture and flavor in a few practical ways, which I’ll cover below, but the base method is reliable and quick.
Below you’ll find the exact ingredients and the exact method to make these treats. I also include troubleshooting tips, storage guidance, and a handful of variations so you can adapt the recipe for holidays, kids’ parties, or a late-night craving.
What Goes Into Lucky Charms Treats

Ingredients
- 10.5 ounce (7 cups) Lucky Charms cereal — the crunchy, marshmallow-forward base; measure loosely so the bars stay light.
- 12 ounces (340 g) marshmallows — provides the sticky, binding sweetness and the classic chewy texture.
- 3 tablespoons unsalted butter — helps melt and smooth the marshmallows and keeps the mixture from sticking; reserve a small amount for greasing.
- 1 teaspoon pure vanilla extract — brightens the marshmallow flavor; stir in off the heat to keep the flavor fresh.
- ¼ teaspoon salt — balances the sweetness and rounds out the flavor.
Make Lucky Charms Treats: A Simple Method
- Use a small amount of the 3 tablespoons unsalted butter to lightly grease a large mixing bowl and a 9×13-inch pan; set both aside and keep the remaining butter for melting.
- Place 7 cups (10.5 ounces) Lucky Charms cereal in the greased large bowl; set aside.
- In a medium saucepan over low–medium heat, melt the remaining butter.
- Add 12 ounces (340 g) marshmallows to the melted butter and stir continuously until the marshmallows are fully melted and smooth.
- Remove the saucepan from the heat and immediately stir in 1 teaspoon pure vanilla extract and 1/4 teaspoon salt until combined.
- Pour the hot marshmallow mixture evenly over the cereal in the greased bowl. Using a spatula, gently but quickly stir until the cereal is evenly coated with the marshmallow mixture.
- Transfer the coated cereal mixture into the prepared 9×13-inch pan. Lightly press the mixture into an even layer using the back of a spatula or lightly buttered hands (use a little of the reserved butter if needed).
- Let the treats cool at room temperature until set, then cut into squares and serve.
What You’ll Love About This Recipe
First, the speed. From butter to cutting squares this is a half-hour project at most, and much of that is just waiting for the treats to set. That makes it perfect for last-minute snacks or a quick dessert rescue.
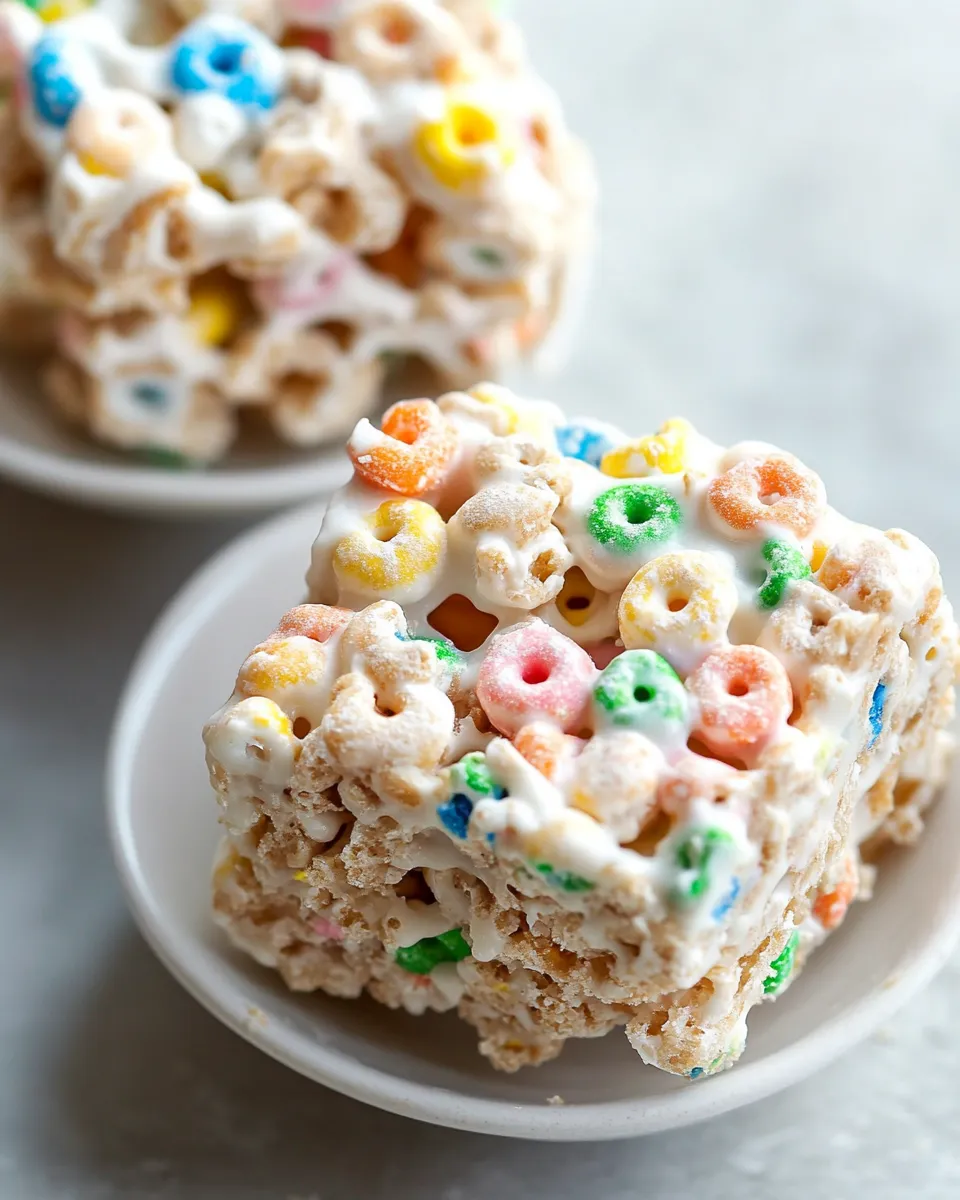
Second, the texture. Properly mixed and gently pressed, these come out chewy without being gummy. The pockets of marshmallow melt into the cereal and leave just enough structure to hold bars together without turning soggy.
Third, the visual and nostalgic appeal. The colorful marshmallows are the star. They make the bars cheerful, which is especially fun for kids’ events. And they trigger that simple, happy memory that makes a plain ingredient list feel like a treat.
If You’re Out Of…
- If you’re out of Lucky Charms cereal — swap in another sweet, marshmallow-style cereal in the same quantity. The texture will be similar; flavor will shift slightly but remain crowd-pleasing.
- If you’re out of butter — you can use the same amount of neutral oil (like vegetable oil) in a pinch, but the flavor will be less rich and the surface might be slightly stickier. Unsalted butter is preferred.
- If you’re out of marshmallows — do not attempt to substitute an unrelated ingredient. Marshmallows are the structural binder; you need the same amount of regular marshmallows for this method to work.
- If you’re out of vanilla extract — you can omit it. The treats will still be sweet and marshmallow-forward, though vanilla adds a rounded aroma.
Kitchen Gear Checklist
- Large mixing bowl — greased so the cereal doesn’t stick while you coat it.
- 9×13-inch pan — for shaping and cooling the treats into bars.
- Medium saucepan — to melt butter and marshmallows evenly.
- Rubber spatula — a wide, heatproof spatula is essential for folding and pressing without tearing the cereal.
- Measuring cups and spoons — for the cereal, butter, vanilla, and salt.
- Optional: parchment paper — lines the pan for easier removal and cleaner cuts.
Troubles You Can Avoid
Sticky, overly dense bars usually come from overheating the marshmallows or packing the mixture too tightly into the pan. Stir gently and remove the pan from heat as soon as the marshmallows are melted and smooth.
If the marshmallows start to scorch, you were cooking at too high a temperature. Use low–medium heat and stir continuously. If you catch a burned smell, discard and start over; burnt marshmallow flavor is difficult to mask.
Bars that fall apart often didn’t get enough marshmallow coating, or the coated mixture wasn’t pressed evenly. Make sure you pour the marshmallow mixture over the cereal in one go and stir quickly to coat every bit. Use lightly buttered hands or the back of a spatula to press — firm but not aggressive.
Variations by Season
Spring / Easter: Add a few drops of pastel food coloring to the melted marshmallows before combining with the cereal for a soft tint. Or press mini chocolate eggs lightly into the top after pressing into the pan for a festive look.
Summer: Fold in a handful of freeze-dried fruit pieces (strawberry or banana) right after coating. The fruit adds bright flavor and a little chew without compromising the structure.
Fall: Stir in a pinch of cinnamon or pumpkin pie spice into the melted marshmallow for warmth. Top with crushed graham crackers for a toasty finish.
Winter / Holidays: Swap the vanilla for a teaspoon of peppermint extract (use less — start with ½ teaspoon) or add a dusting of finely chopped toasted nuts on top for contrast if serving to adults. Keep in mind peppermint is potent, so use sparingly.
Pro Tips & Notes
Texture control
For softer, chewier bars: don’t over-press the mixture into the pan. Lightly smoothing with the spatula is enough. Over-compressing packs out air and yields a denser bar.
Cutting clean squares
Wait until the bars are fully set at room temperature before slicing. For clean edges, use a sharp knife dipped in hot water and wiped dry between cuts. Parchment paper lining the pan helps remove the slab intact.
Flavor tweaks
A small amount of salt (the recipe’s ¼ teaspoon) is enough to balance the sweetness. You can toast the cereal very briefly in a dry skillet for a nuttier note, but do this carefully — the marshmallows will still be the dominant flavor.
Hands-on technique
Work quickly when pouring and mixing. The marshmallow mixture sets as it cools, and you want the cereal evenly coated before it starts to firm up. If the mixture gets too stiff to work, warm it gently in the pan over low heat for a few seconds and stir to soften.
Refrigerate, Freeze, Reheat
Refrigerate: Store in an airtight container at room temperature for up to 3 days. Refrigeration isn’t necessary and can make the bars firmer; if you prefer a slightly firmer bite, a short chill is fine.
Freeze: Wrap individual squares in plastic wrap and place in an airtight freezer bag for up to 2 months. Thaw at room temperature for 20–30 minutes before serving to restore chewiness.
Reheat: You typically don’t need to reheat these. If they’ve been chilled and are too firm, hold a square in your hand for a minute or microwave a single piece for 5–7 seconds to soften — watch closely so it doesn’t melt into syrup.
FAQ
Can I make these ahead? Yes. They keep well for several days at room temperature if stored airtight. For longer storage use the freezer method above.
Can I use margarine or a butter substitute? You can use a neutral oil or margarine in a pinch, but unsalted butter gives the most familiar flavor and mouthfeel. If you use salted butter, reduce or omit the added salt.
What if my cereal gets soggy? Sogginess comes from excess moisture or overmixing. Work briskly and avoid pressing too firmly. Also, make and store them in a cool, dry place rather than near steam or humidity.
Can I add mix-ins? Small additions like a handful of mini chocolate chips or crushed pretzels can work, added right after coating. Be mindful: heavy mix-ins can weigh the mixture down and make bars less cohesive.
Let’s Eat
Cut the slab into squares and serve at room temperature. These are easy to pack for school lunches, picnics, or a last-minute bake sale. They’re bright, chewy, and unmistakably fun — exactly the kind of simple treat that makes a busy day feel a little celebratory.
If you try a variation, tell me what you changed and how it turned out. I love practical swaps that actually improve the snack table, not just theoretical ones. Enjoy these while they’re fresh for the best texture and flavor.
Lucky Charms Treats
Ingredients
Ingredients
- ?10.5 ounce 7 cupsLucky Charms cereal
- ?12 ounces 340 gmarshmallows
- ?3 tablespoonsunsalted butter
- ?1 teaspoonpure vanilla extract
- ?1/4 teaspoonsalt
Instructions
Instructions
- Use a small amount of the 3 tablespoons unsalted butter to lightly grease a large mixing bowl and a 9×13-inch pan; set both aside and keep the remaining butter for melting.
- Place 7 cups (10.5 ounces) Lucky Charms cereal in the greased large bowl; set aside.
- In a medium saucepan over low–medium heat, melt the remaining butter.
- Add 12 ounces (340 g) marshmallows to the melted butter and stir continuously until the marshmallows are fully melted and smooth.
- Remove the saucepan from the heat and immediately stir in 1 teaspoon pure vanilla extract and 1/4 teaspoon salt until combined.
- Pour the hot marshmallow mixture evenly over the cereal in the greased bowl. Using a spatula, gently but quickly stir until the cereal is evenly coated with the marshmallow mixture.
- Transfer the coated cereal mixture into the prepared 9×13-inch pan. Lightly press the mixture into an even layer using the back of a spatula or lightly buttered hands (use a little of the reserved butter if needed).
- Let the treats cool at room temperature until set, then cut into squares and serve.
Equipment
- Saucepan
- Spatula
- Large Bowl
- 9x13-inch pan
Notes
Use Fresh Marshmallows.Old marshmallows that are dried out don’t melt well, so make sure to use fresh ones that won’t melt into a large blobb!
Keep Stirring.When melting marshmallows with butter, make sure that the saucepan is on low-medium heat (not high!), and do not leave the stove, keep stirring until the mixture is fully melted and smooth.
Work Quickly.It is very important that you work quickly as the marshmallow mixture will set very quickly, and will be difficult to work with once it sets.
When pressing the cereal mixture into the pan, LIGHTLY press it into the pan.Pressing too hard will result in very hard treats.
Storing: Store at room temperature for up to 5 days. If you want them to last longer, store them in the fridge for up to 10 days. These bars can also be frozen. Wrap them tightly in plastic wrap, place in Ziploc bags and freeze for up to a month.


