
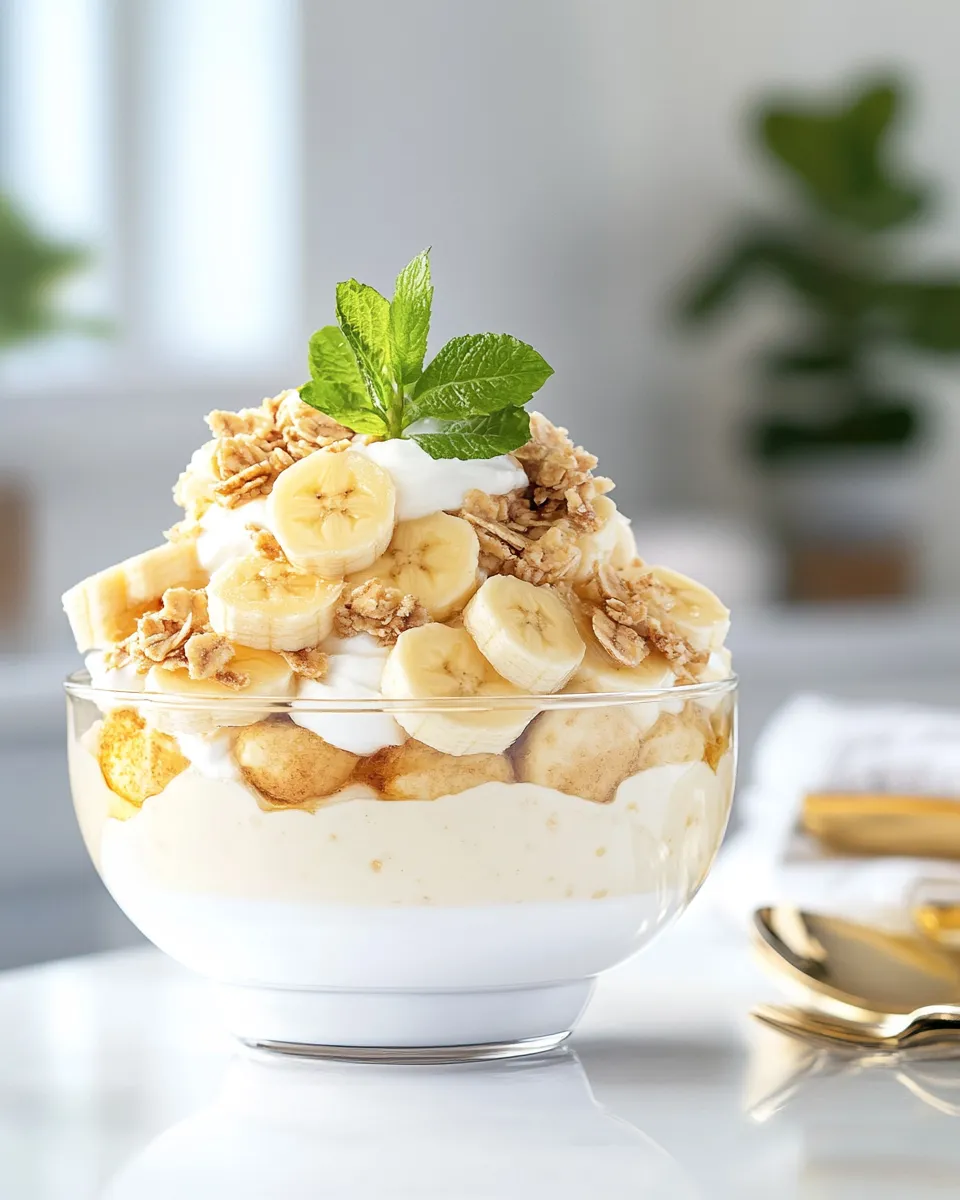
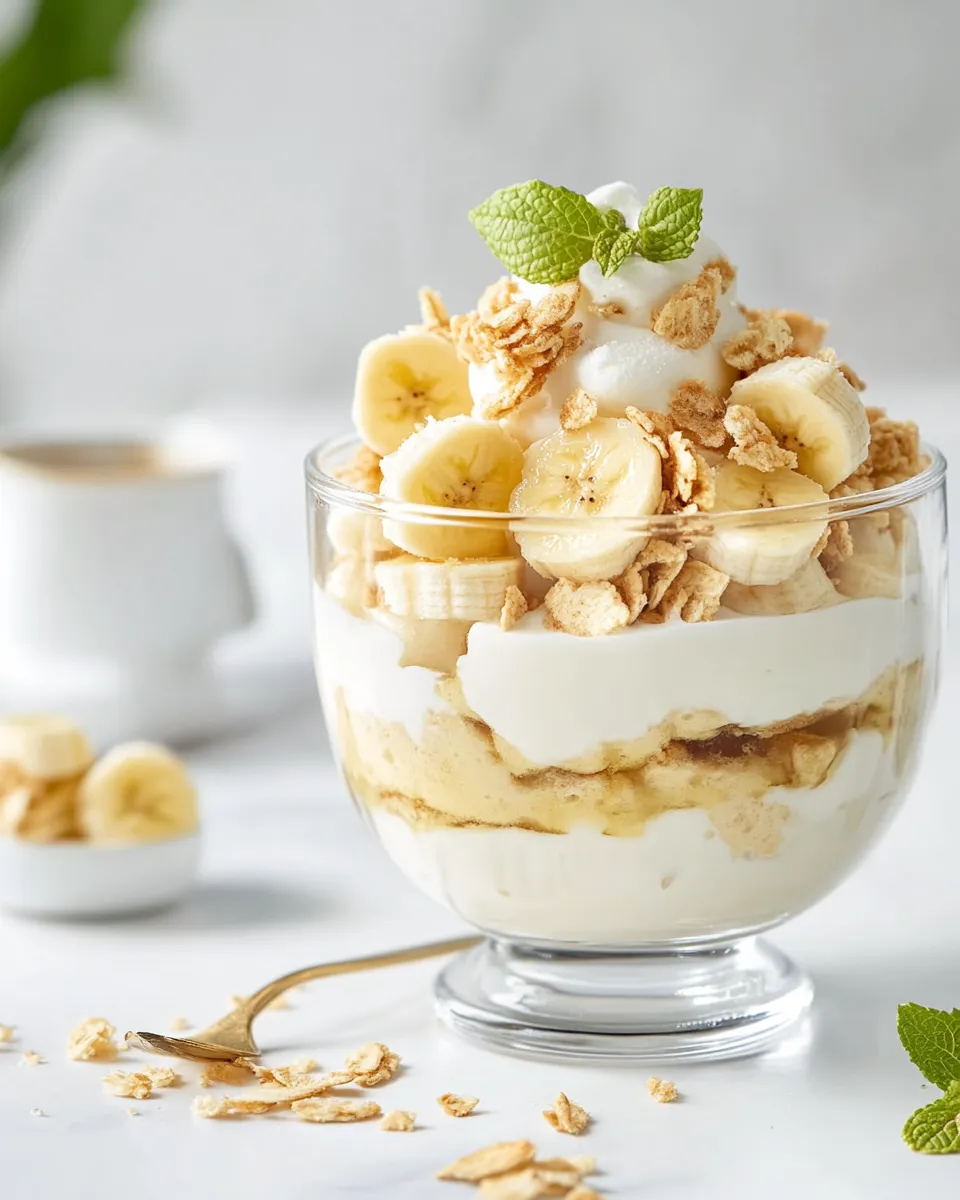
This is the banana pudding recipe everyone asks for when I bring a dessert to a neighborhood potluck. It’s the sort of thing that feels fussy but isn’t — a few straight-forward components that come together into something silky, sweet, and nostalgic. Magnolia’s version leans on instant pudding and whipped cream for a fluffy, make-ahead filling, with vanilla wafers and sliced bananas giving you texture and the classic flavor everyone expects.
I test and retest this one when I want a crowd-pleaser that’s reliable. The assembly is forgiving: the pudding sets in the fridge, the whipped cream lightens it, and the wafers soften into tender layers. Timing matters for freshness, though — I’ll note when to make this in advance and when to hold off slicing extra bananas until serving.
Below you’ll find the ingredient list exactly as used, step-by-step directions from start to finish, and practical tips I use in my own kitchen so you get the same dependable result every time. No unnecessary substitutions unless you need them — just clear notes, troubleshooting, storage guidance, and a few small tricks that save time without changing the recipe.
What’s in the Bowl

Ingredients
- 114-ounce can sweetened condensed milk — the sweet base that binds and flavors the pudding; chill it beforehand if you can.
- 1½ cups ice cold water — hydrates the instant pudding mix; ice-cold liquid helps the pudding firm correctly.
- 13.4-ounce package instant vanilla pudding mix (Jell-O brand is recommended) — provides the vanilla flavor and structure; whisk in slowly to avoid lumps.
- 3 cups heavy cream — whipped to stiff peaks and folded in to lighten the pudding into a creamy mousse.
- 111-ounce box vanilla wafers (Nabisco Nilla Wafers are recommended) — the crisp layer that softens into cake-like bites; divide evenly for the layers.
- 6 ripe large bananas sliced — ripe but not overripened; slice and chill until assembly to keep them bright.
Directions: Magnolia Bakery Banana Pudding
- In a medium bowl, whisk together the 114-ounce can sweetened condensed milk and the 1½ cups ice cold water until combined.
- In a separate bowl, pour in the 13.4-ounce package instant vanilla pudding mix. Slowly whisk the liquid mixture into the pudding mix until smooth and lump-free, about 1 minute.
- Cover the pudding mixture and refrigerate for at least 1 hour, or overnight, until firm.
- Meanwhile, slice the 6 ripe large bananas and chill them until ready to assemble.
- Whip the 3 cups heavy cream in a cold bowl until stiff peaks form.
- Fold the chilled, set pudding mixture into the whipped cream with a spatula until uniform and no streaks remain.
- To assemble in a trifle dish or wide glass bowl: divide the pudding-cream mixture into three equal portions. Divide the 111-ounce box vanilla wafers into three equal portions. Use two of the sliced bananas per layer (six bananas total).
- Spread one-third of the pudding-cream mixture over the bottom of the bowl. Arrange one-third of the vanilla wafers in a single layer over the pudding, then top with the sliced banana pieces from two bananas to cover the wafer layer.
- Repeat the previous step two more times: pudding-cream, one-third of the wafers, and two bananas’ worth of slices. Finish with the final one-third of the pudding-cream mixture spread evenly on top.
- Cover the bowl with plastic wrap and refrigerate the assembled pudding for 4 to 6 hours before serving. It is recommended to serve the dessert within 12 hours. Just before serving, add any additional sliced bananas for garnish if desired.
Why It’s My Go-To

I reach for this pudding because it delivers the comfort of a bakery classic with minimal stress. The steps are straightforward: hydrate, set, whip, fold, and layer. The most time-consuming part is chilling, which you can turn into an advantage — make the base the day before and assemble the next day for easy entertaining.
Texture is the winning element here. The whipped cream keeps the filling cloud-light, while the sweet condensed milk and instant pudding give you that unmistakable glossy, creamy bite Magnolia is known for. The wafers and banana slices give you pockets of contrasting texture, so every spoonful is balanced.
Ingredient Flex Options
If you’re working with what you have, here are careful ways to adapt without changing the recipe’s spirit. All suggestions work within the structure of these ingredients rather than replacing them outright.
- Use slightly firmer bananas if you plan to assemble early; they hold shape longer and resist browning.
- If your heavy cream is close to its best-by date, chill it well and use the coldest bowl you have for whipping to reach stiff peaks faster.
- Divide the vanilla wafers into equal portions for even layering; if the box count varies, aim for three even layers by weight rather than count.
Gear Up: What to Grab
- Medium mixing bowl for the condensed milk and water.
- Separate bowl for the instant pudding powder and whisking.
- Cold mixing bowl and handheld mixer or stand mixer to whip the heavy cream to stiff peaks.
- Spatula for folding the pudding into the whipped cream.
- Trifle dish or a wide glass bowl so your layers are visible and attractive.
- Plastic wrap to cover the assembled pudding while it chills.
- Sharp knife and cutting board for slicing bananas just before assembly.
Missteps & Fixes
Even simple recipes can go sideways. Here are the common issues I see and what I do to fix them quickly.
- Runny filling: if your pudding doesn’t firm up after refrigeration, check that your pudding mix and liquid were properly combined. You can chill longer — overnight works — or fold in a touch more whipped cream that’s been whipped firmer. Avoid adding liquid.
- Whipped cream won’t whip: the bowl or cream wasn’t cold enough. Pop the bowl and whisk in the fridge for 10–15 minutes, then try again with well-chilled cream.
- Bananas brown quickly: slice them right before assembly and keep them chilled. If you must slice early, toss slices briefly in a tiny amount of citrus juice — but note this introduces extra flavor.
- Wafers too soggy: use a shallower bowl so layers are thinner, or shorten the chilled resting time before serving. The wafers will soften — that’s intended — but collapsing layers can be minimized with slightly firmer assembly.
Dietary Customizations
Magnolia’s banana pudding is rich and dairy-forward. If you need to make adjustments, focus on method rather than replacing core ingredients outright.
- Lighten it up by reducing the number of wafers or serving smaller portions — the richness comes mostly from the heavy cream and sweetened condensed milk.
- For fewer bananas per layer, use one banana per layer instead of two; this will slightly change the banana-to-cream ratio but keeps all original ingredients.
- If someone in your crowd needs a gluten-free option, serve portions with gluten-free cookies on the side rather than changing the main batch.
Behind-the-Scenes Notes
I treat the chill times in this recipe as non-negotiable: the pudding needs at least an hour to set, and the assembled dessert benefits from 4 to 6 hours in the fridge. This timing lets the flavors meld and the wafers soften to the perfect texture. If you want deeper flavor, make the pudding base the night before and fold in the whipped cream just before assembly.
The order of folding matters. You want the pudding uniformly incorporated into the whipped cream without overworking it. Gentle, wide turns with a spatula keep the mixture airy. Also, use a shallow trifle dish if you want neat layers that show through the glass; a wide bowl is more rustic but equally delicious.
Storage Pro Tips
Plan to serve within the recommended window. The directions say it’s best served within 12 hours, and I stand by that — bananas and texture are freshest then.
- Cover the assembled pudding tightly with plastic wrap and refrigerate; keep it level so layers don’t shift.
- Leftovers: store covered for up to 24 hours in the refrigerator, but expect the wafers to continue softening and the bananas to brown. If you must hold longer, remove any banana garnish and add fresh slices at serving.
- Freezing is not recommended; the texture of the cream and puddings changes dramatically when frozen and thawed.
Ask the Chef
Q: Can I make the pudding base a day ahead?
A: Yes. The recipe notes you can refrigerate the pudding mixture for at least 1 hour or overnight. I often make the base the evening before and whip the cream the next morning so assembly is fast.
Q: What if my whipped cream becomes grainy?
A: That’s usually overwhipping. Stop when you have firm, glossy peaks. If it goes grainy, gently fold in a tablespoon or two of the chilled pudding mixture to smooth it out, or start fresh if it’s too far gone.
Q: Can I use a different brand of pudding or wafers?
A: The directions recommend specific brands, but the method works with like-for-like products. If you swap brands, keep the same package sizes and follow the same assembly steps.
In Closing
This Magnolia Bakery Banana Pudding is a faithful, straightforward take on a dessert that feels celebratory and familiar. Follow the steps as written, pay attention to chilling times, and slice bananas close to assembly for the best presentation. Make it ahead when you need a no-fuss centerpiece; it will reward you with bright banana flavor and a satisfyingly creamy texture.
If you try it, tell me how you layered yours — trifle bowl or wide glass? Did you add an extra garnish? Small notes like those help me tweak technique for the next batch. Happy baking, and enjoy every spoonful.
Magnolia Bakery Banana Pudding
Ingredients
Ingredients
- 114- ounce can sweetened condensed milk
- 1 1/2 cupsice cold water
- 13.4- ounce package instant vanilla pudding mix Jell-O brand is recommended
- 3 cupsheavy cream
- 111- ounce box vanilla wafers Nabisco Nilla Wafers are recommended
- 6 ripe large bananassliced
Instructions
Instructions
- In a medium bowl, whisk together the 114-ounce can sweetened condensed milk and the 1½ cups ice cold water until combined.
- In a separate bowl, pour in the 13.4-ounce package instant vanilla pudding mix. Slowly whisk the liquid mixture into the pudding mix until smooth and lump-free, about 1 minute.
- Cover the pudding mixture and refrigerate for at least 1 hour, or overnight, until firm.
- Meanwhile, slice the 6 ripe large bananas and chill them until ready to assemble.
- Whip the 3 cups heavy cream in a cold bowl until stiff peaks form.
- Fold the chilled, set pudding mixture into the whipped cream with a spatula until uniform and no streaks remain.
- To assemble in a trifle dish or wide glass bowl: divide the pudding-cream mixture into three equal portions. Divide the 111-ounce box vanilla wafers into three equal portions. Use two of the sliced bananas per layer (six bananas total).
- Spread one-third of the pudding-cream mixture over the bottom of the bowl. Arrange one-third of the vanilla wafers in a single layer over the pudding, then top with the sliced banana pieces from two bananas to cover the wafer layer.
- Repeat the previous step two more times: pudding-cream, one-third of the wafers, and two bananas' worth of slices. Finish with the final one-third of the pudding-cream mixture spread evenly on top.
- Cover the bowl with plastic wrap and refrigerate the assembled pudding for 4 to 6 hours before serving. It is recommended to serve the dessert within 12 hours. Just before serving, add any additional sliced bananas for garnish if desired.
Equipment
- Silicone Spatula Set
- Mixing bowl set
- KitchenAid stand mixer
Notes
From Magnolia Bakery via Today.com


