
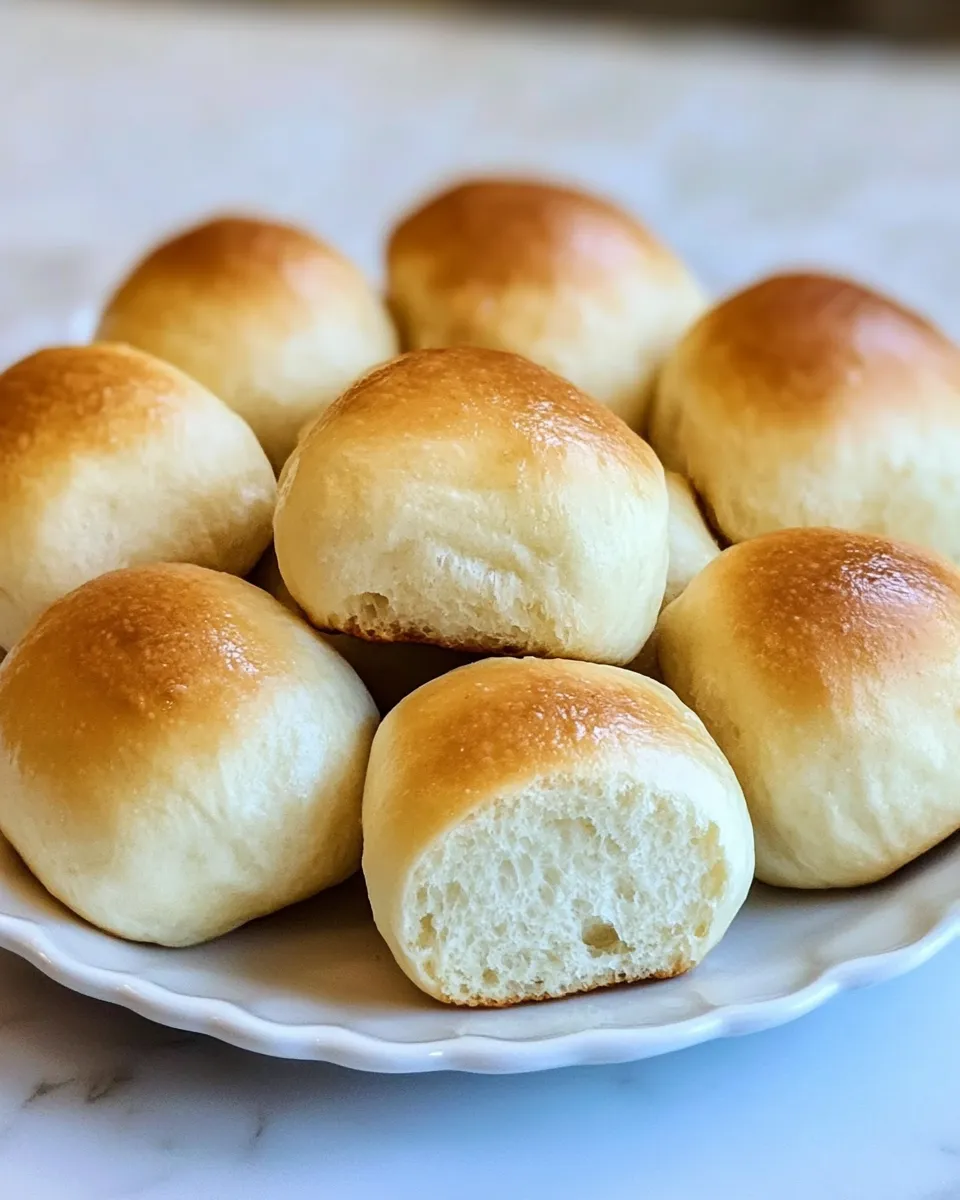
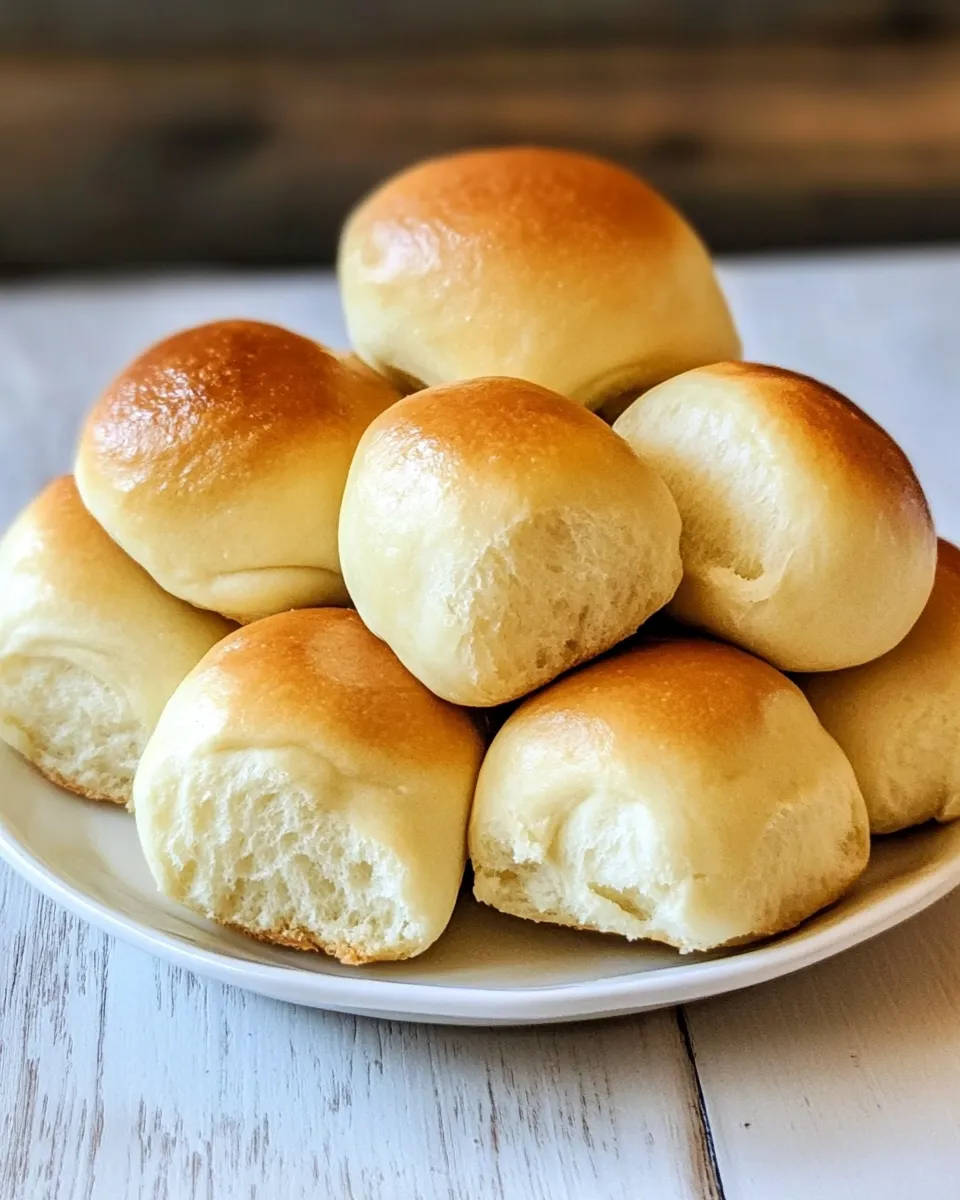
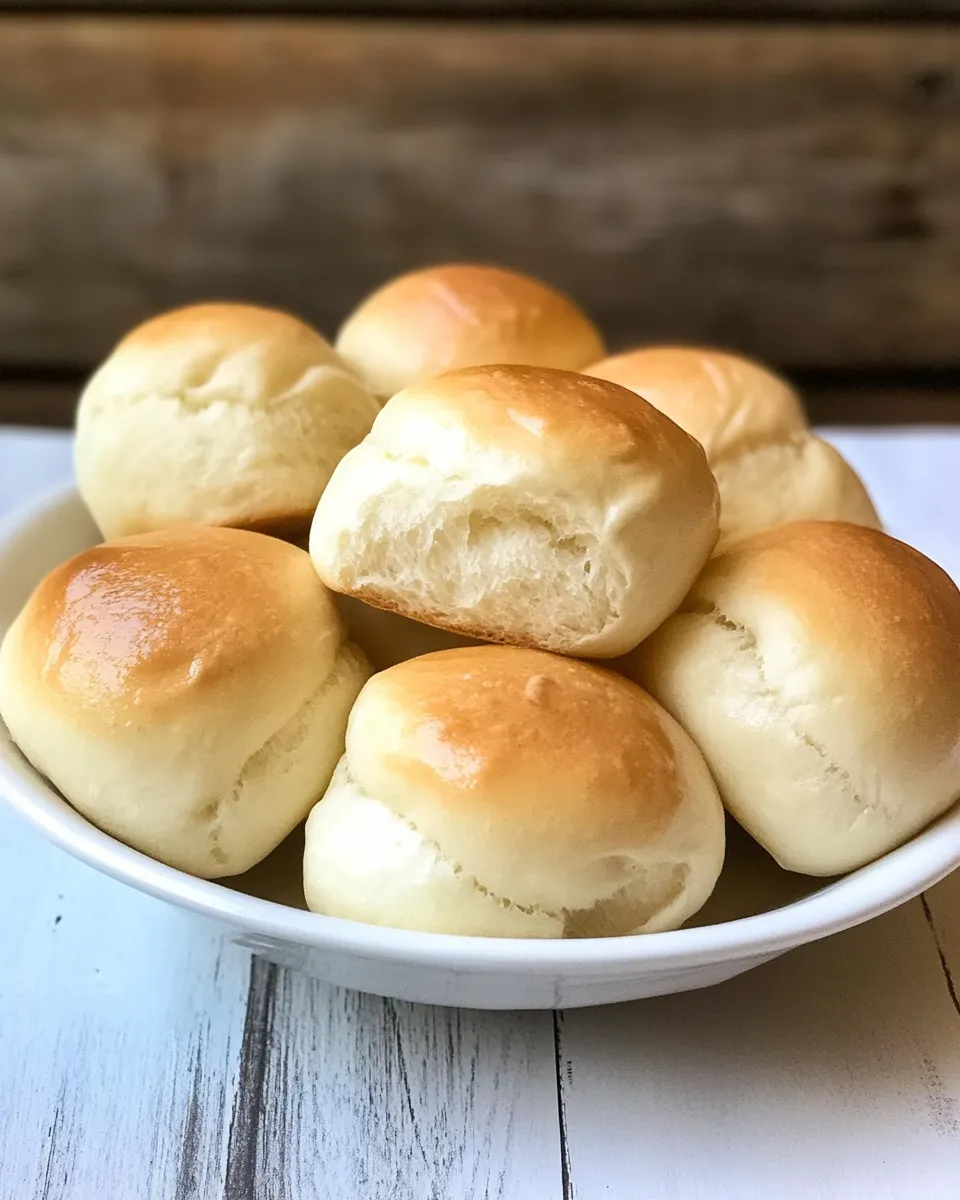
These mini milk bread rolls are exactly the kind of thing I bake when I want soft, slightly sweet bread that disappears fast at the table. They come from a simple formula — flour, yeast, a little honey and oil, and milk — but the technique makes the difference between so-so rolls and ones that are pillowy, shiny, and tender. The recipe is forgiving, and the dough gives you options: bake them close together for pull-apart rolls or space them out for individual buns.
I work with this dough whenever I need dinner rolls for a weeknight roast, a picnic, or a breakfast tray. It proofs quickly at room temperature, or you can slow-prove it overnight in the fridge if you want hands-off timing. The shaping is straightforward: small walnut-sized pieces formed into smooth balls. A short bake time gives a golden crust and a soft crumb.
No special flour or techniques are required, but there are small details that yield a better result — how warm the milk should be, how long to knead, and how tightly to shape each roll. Below you’ll find the exact ingredient list and a step-by-step method that follows the recipe precisely, plus practical tips, troubleshooting, and storage advice so you get consistent results every time.
Ingredient Breakdown
- 600 g plain flour — the main structure; provides gluten for a soft but resilient crumb.
- 3 teaspoon instant yeast — leavening power; instant yeast works straight into the flour with no proofing needed.
- 1 teaspoon salt — balances flavor and tightens the dough’s structure.
- 1 tablespoon oil — tenderizes the crumb and adds moisture.
- 1 tablespoon honey — mild sweetness and helps with browning; using the same spoon for oil then honey makes it easier to transfer the sticky honey.
- 375 ml milk — hydrates and enriches the dough for that characteristic soft, milky crumb.
Make Mini Milk Bread Rolls: A Simple Method
- Put 600 g plain flour, 3 teaspoons instant yeast and 1 teaspoon salt into a large mixing bowl or the bowl of a stand mixer and stir briefly to combine the dry ingredients.
- Measure 1 tablespoon oil, then use the same spoon to measure 1 tablespoon honey (this helps the honey glide off). Add the oil and honey to the dry ingredients.
- Warm 375 ml milk to lukewarm (about 35–40°C). Pour the milk into the bowl.
- If using a stand mixer: fit the dough hook, start the mixer on low until the ingredients come together, then increase to medium and knead for 10 minutes, until the dough is smooth and silky. If mixing by hand: use a fork to bring the mixture together, turn out onto a lightly floured surface and knead for 10–15 minutes until smooth and silky.
- Transfer the dough to a large bowl, cover with clingfilm and leave to prove in a warm place for about 1 hour (or place in the fridge to prove slowly overnight).
- Preheat the oven to 220°C (200°C fan) / Gas mark 7 while the dough is finishing its first prove.
- Punch the air out of the dough and give it a quick knead. Break off small pieces about the size of a walnut (this batch yields roughly 36 mini rolls). Shape each piece into a smooth ball by pulling the dough over your finger to create a smooth top and pinching the bottom to seal.
- Place the shaped rolls on a baking sheet lined with baking paper. Place them almost touching if you want pull-apart rolls, or leave at least 2 cm between them for separate rolls.
- Bake for 12–15 minutes until the rolls are golden brown and sound hollow underneath when tapped. Remove from the oven and allow to cool for 5 minutes before serving.
What You’ll Love About This Recipe
These rolls bake quickly and keep their softness for a couple of days if stored properly. They have a delicate, slightly milky flavor that pairs well with butter, jam, soups, or as a sandwich base. Because the dough is enriched with milk, oil, and honey, the crumb stays tender and the crust browns evenly without becoming hard.
The recipe scales well — you can halve it for a smaller batch or double it for a party — and the dough responds well to different proving schedules. If you need rolls first thing in the morning, mix the dough the night before and let it prove in the fridge overnight. This flexibility makes the recipe practical for real-life cooking, not just for weekend baking.
Smart Substitutions

- Milk: swap whole milk for a lower-fat milk or plant milk (oat or soy) if you need a dairy-free option; texture will be slightly different but still soft.
- Honey: use maple syrup or agave for a vegan alternative, or simple granulated sugar if you prefer — choose a liquid sweetener if you want the same mixing behavior as honey.
- Oil: any neutral-flavored oil (vegetable, light olive oil) works. For a richer flavor, use melted butter at the same stage, but omit nothing from the recipe.
- Yeast: the recipe uses instant yeast directly mixed with the flour. If you only have active dry yeast, proof it in part of the lukewarm milk with a pinch of sugar first and adjust handling time slightly.
Tools & Equipment Needed
- Large mixing bowl or stand mixer with a dough hook — the mixer reduces kneading time and keeps your hands clean.
- Measuring spoons and a kitchen scale — grams and milliliters are included in the recipe for consistent results.
- Clingfilm or a clean tea towel — to cover the dough during proving.
- Baking sheet and baking paper — for even baking and easy cleanup.
- Thermometer (optional) — to check milk temperature if you’re unsure about ‘lukewarm’ (aim for 35–40°C).
Pitfalls & How to Prevent Them
Under-kneading: dough that hasn’t developed gluten will be slack and won’t hold shape. Knead until smooth and silky — about 10 minutes in a stand mixer or 10–15 minutes by hand.
Overproofing: if left too long, the rolls can collapse or become overly gassy. Watch the first prove and aim for roughly a doubling in size. If you’re unsure, use the finger test — a gently pressed indentation should spring back slowly, leaving a faint mark.
Too-hot milk: if the milk is over 40°C it can kill the yeast or speed up fermentation too much. Aim for warm, not hot; a kitchen thermometer set to 35–40°C helps.
Dry or tight crust: baking at too low a temperature or for too long can create a tougher exterior. The recipe’s high starting temperature (220°C / 200°C fan) gives a quick, even color without overbaking.
Season-by-Season Upgrades
Spring/Summer: serve warm with herb butter (finely chopped chives or basil folded into softened butter) for garden lunches or picnics. The rolls are also perfect for mini sliders with light grilled fillings.
Autumn/Winter: pair the rolls with hearty stews, roasted root vegetables, or steamy bowls of soup. Adding a smear of spiced compound butter (a tiny pinch of cinnamon or nutmeg) complements cozy flavors without changing the base recipe.
Holidays: brush the tops with an egg wash (if you want a richer gloss) and sprinkle sesame or poppy seeds for decorative festive rolls. The core dough remains the same and adapts well to seasonal add-ins.
Little Things that Matter
Measure by weight: using grams and milliliters rather than cups keeps hydration consistent and repeatable, especially important with milk and flour variations from season to season.
Shape with intention: creating a smooth top by stretching the dough over your finger encourages even rising and a better crumb. Pinch the bottom to seal so the roll blooms on top instead of spreading out.
Arrangement on the tray: for pull-apart rolls place them almost touching; for individual buns leave at least 2 cm gap. This choice changes how they bake and how you serve them.
How to Store & Reheat
To store: once cooled to room temperature, place the rolls in an airtight container or resealable bag. They’ll stay fresh for 2 days at room temperature. For longer storage, freeze on a baking sheet then transfer to a freezer bag for up to 1 month.
To reheat: if frozen, thaw at room temperature for about 30–60 minutes, then warm in a 170°C oven for 5–8 minutes. For room-temperature rolls, warm them in the oven for 3–5 minutes or microwave one roll for 10–15 seconds to soften quickly. Brushing a little water on the tops before warming and wrapping loosely in foil helps retain moisture.
Popular Questions
- Can I use bread flour instead of plain flour? — Yes. Bread flour will give a slightly chewier structure because of higher protein; the rolls will still be soft but with more bite.
- Can I make these larger rolls? — Yes. Shape larger balls and adjust baking time upward (start checking around 15–18 minutes). The recipe notes the batch yields roughly 36 mini rolls at walnut size.
- Why does my dough feel sticky? — Humidity and the type of flour affect hydration. A slightly tacky dough is normal for enriched doughs; avoid adding too much extra flour while kneading or the rolls will become dense.
- Do I have to use honey? — Honey adds flavor and assists browning, but you can substitute another liquid sweetener or sugar if needed.
Next Steps
Once you’ve mastered these Mini Milk Bread Rolls, try varying the finishing touches: brush with melted butter and a sprinkle of flaky sea salt for savory rolls, or glaze with a light sugar syrup for a sweet breakfast treat. If you want to make a session of it, halve the recipe for weekday practice and double it when you host. The dough is forgiving and versatile — your basic skills here unlock a range of breads you’ll reach for again and again.
Mini Milk Bread Rolls
Ingredients
Ingredients
- 600 gplain flour
- 3 teaspooninstant yeast
- 1 teaspoonsalt
- 1 tablespoonoil
- 1 tablespoonhoney
- 375 mlmilk
Instructions
Instructions
- Put 600 g plain flour, 3 teaspoons instant yeast and 1 teaspoon salt into a large mixing bowl or the bowl of a stand mixer and stir briefly to combine the dry ingredients.
- Measure 1 tablespoon oil, then use the same spoon to measure 1 tablespoon honey (this helps the honey glide off). Add the oil and honey to the dry ingredients.
- Warm 375 ml milk to lukewarm (about 35–40°C). Pour the milk into the bowl.
- If using a stand mixer: fit the dough hook, start the mixer on low until the ingredients come together, then increase to medium and knead for 10 minutes, until the dough is smooth and silky. If mixing by hand: use a fork to bring the mixture together, turn out onto a lightly floured surface and knead for 10–15 minutes until smooth and silky.
- Transfer the dough to a large bowl, cover with clingfilm and leave to prove in a warm place for about 1 hour (or place in the fridge to prove slowly overnight).
- Preheat the oven to 220°C (200°C fan) / Gas mark 7 while the dough is finishing its first prove.
- Punch the air out of the dough and give it a quick knead. Break off small pieces about the size of a walnut (this batch yields roughly 36 mini rolls). Shape each piece into a smooth ball by pulling the dough over your finger to create a smooth top and pinching the bottom to seal.
- Place the shaped rolls on a baking sheet lined with baking paper. Place them almost touching if you want pull-apart rolls, or leave at least 2 cm between them for separate rolls.
- Bake for 12–15 minutes until the rolls are golden brown and sound hollow underneath when tapped. Remove from the oven and allow to cool for 5 minutes before serving.
Equipment
- Large Mixing Bowl
- stand mixer (optional)
- dough hook (if using stand mixer)
- Fork
- Baking Sheet
- Parchment Paper
- clingfilm (plastic wrap)
- Oven
Notes
This recipe makes approximately 36 mini rolls, I always try to get 36 so I can create a 6x6 square on my baking sheet 😳 but if you find you can only get 30 out they should still be cooked through in the 15 minutes. I have made these as much bigger breakfast rolls, but then they needed around 25 minutes in the oven.


