
I make these mini pavlovas whenever I want a dessert that looks special but doesn’t take all evening. Crisp shells, soft marshmallow centers and a small crown of whipped cream and fruit — they’re delicate, but surprisingly forgiving if you follow a few simple rules. They’re the kind of treat guests assume took hours, when really they take mostly hands-off time in the oven.
There’s a rhythm to making meringue: room-temperature whites, patient whipping, gentle folding. I’ll walk you through the exact steps I use, plus why each one matters and how to recover when things go sideways. Expect clear instructions, practical tips, and seasonal topping ideas.
If you’re new to pavlovas, start here. If you’ve been making them for years, you might still pick up a timing or temperature tweak that saves a batch. Either way, these mini pavlovas are built to impress without stressing you out.
Ingredient Breakdown
Ingredients
- 4 large egg whites (room temperature) — eggs provide the structure; room temperature whips up lighter and reaches volume more easily.
- 1 cup granulated sugar — the sugar stabilizes the meringue and gives the shell its glossy, crisp finish; add gradually for a non-grainy texture.
- 1 teaspoon white vinegar — acid stabilizes the egg proteins so the meringue holds its shape and resists weeping.
- ½ teaspoon vanilla extract — adds gentle flavor without weighing the meringue down.
- 1 teaspoon cornstarch — helps create a tender marshmallow center and prevents the shell from becoming too brittle.
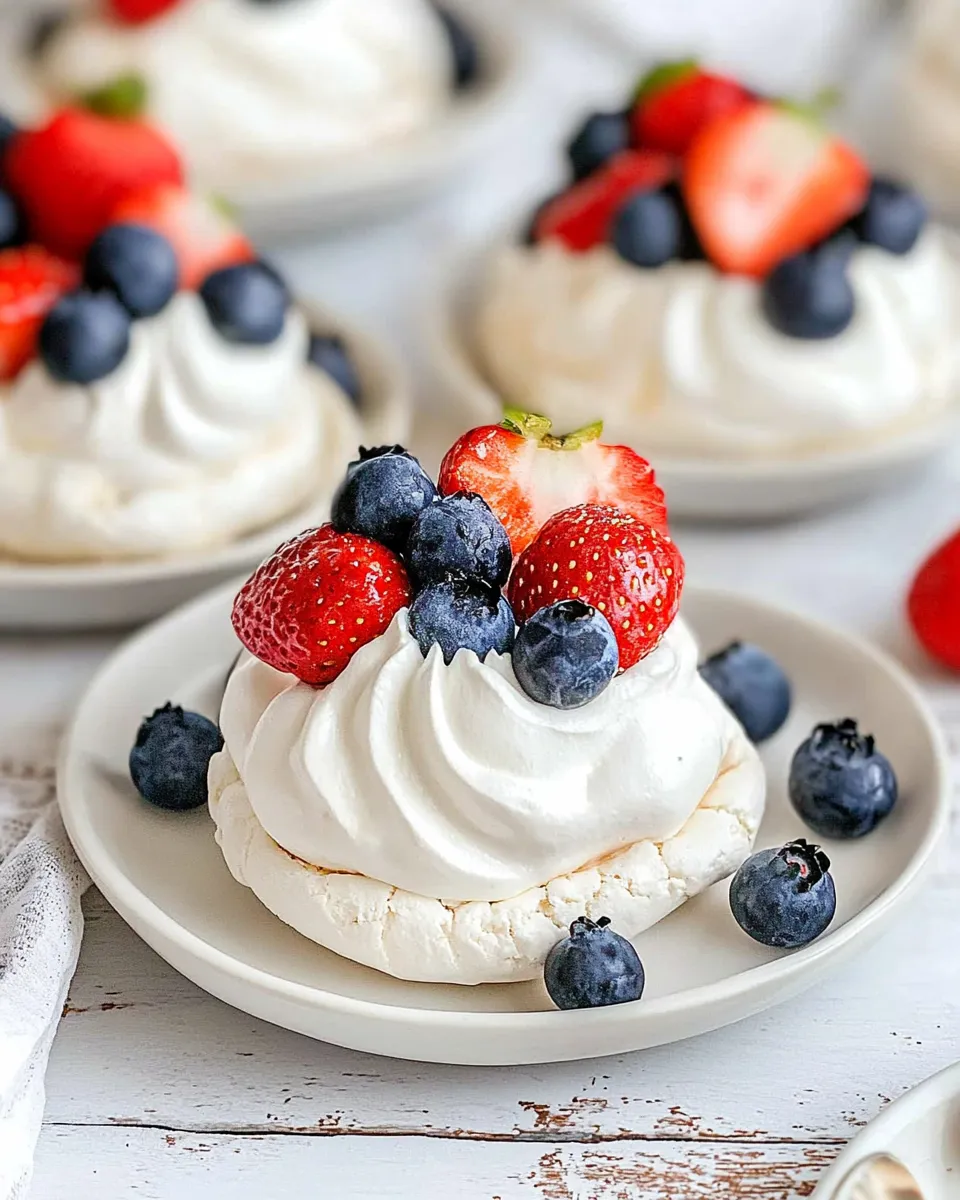
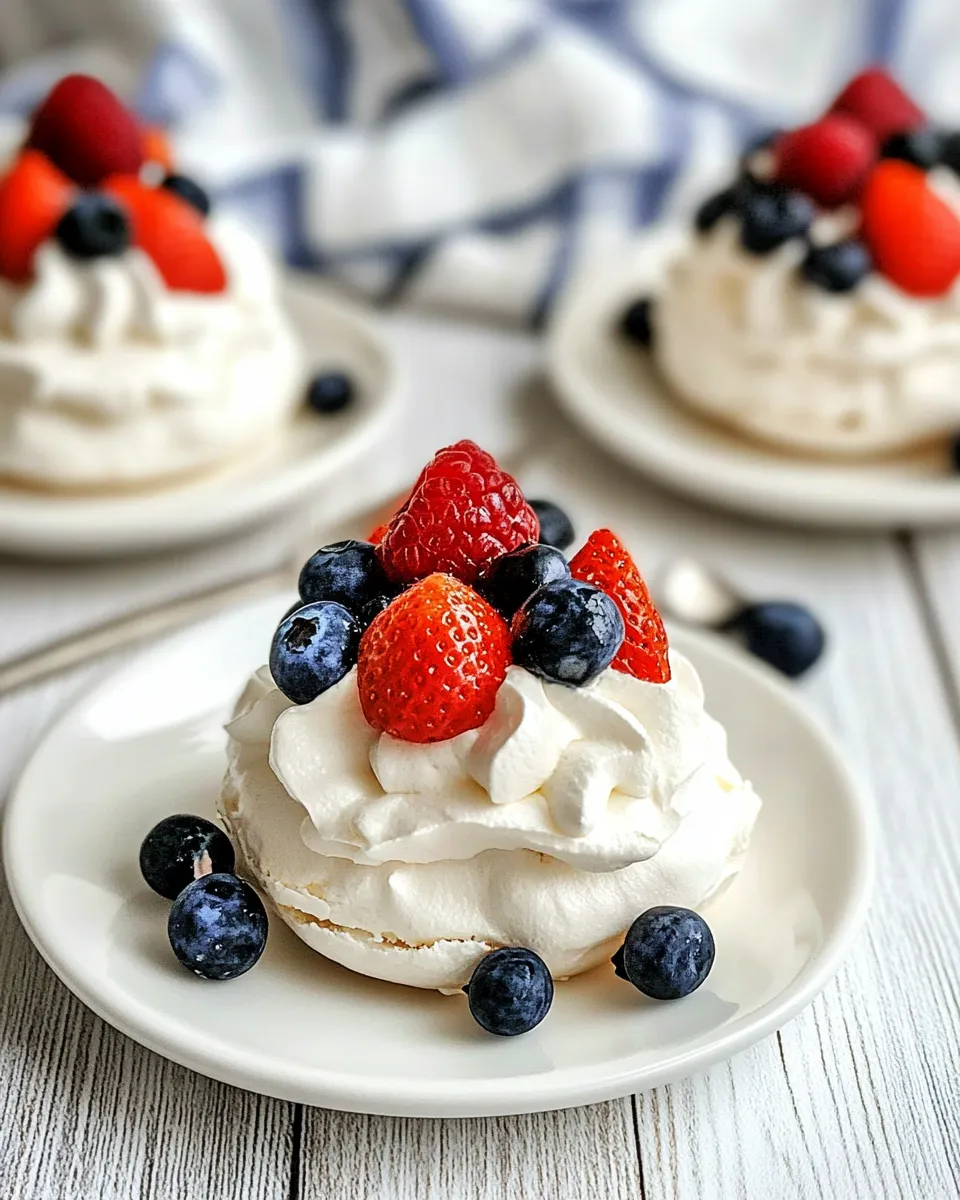
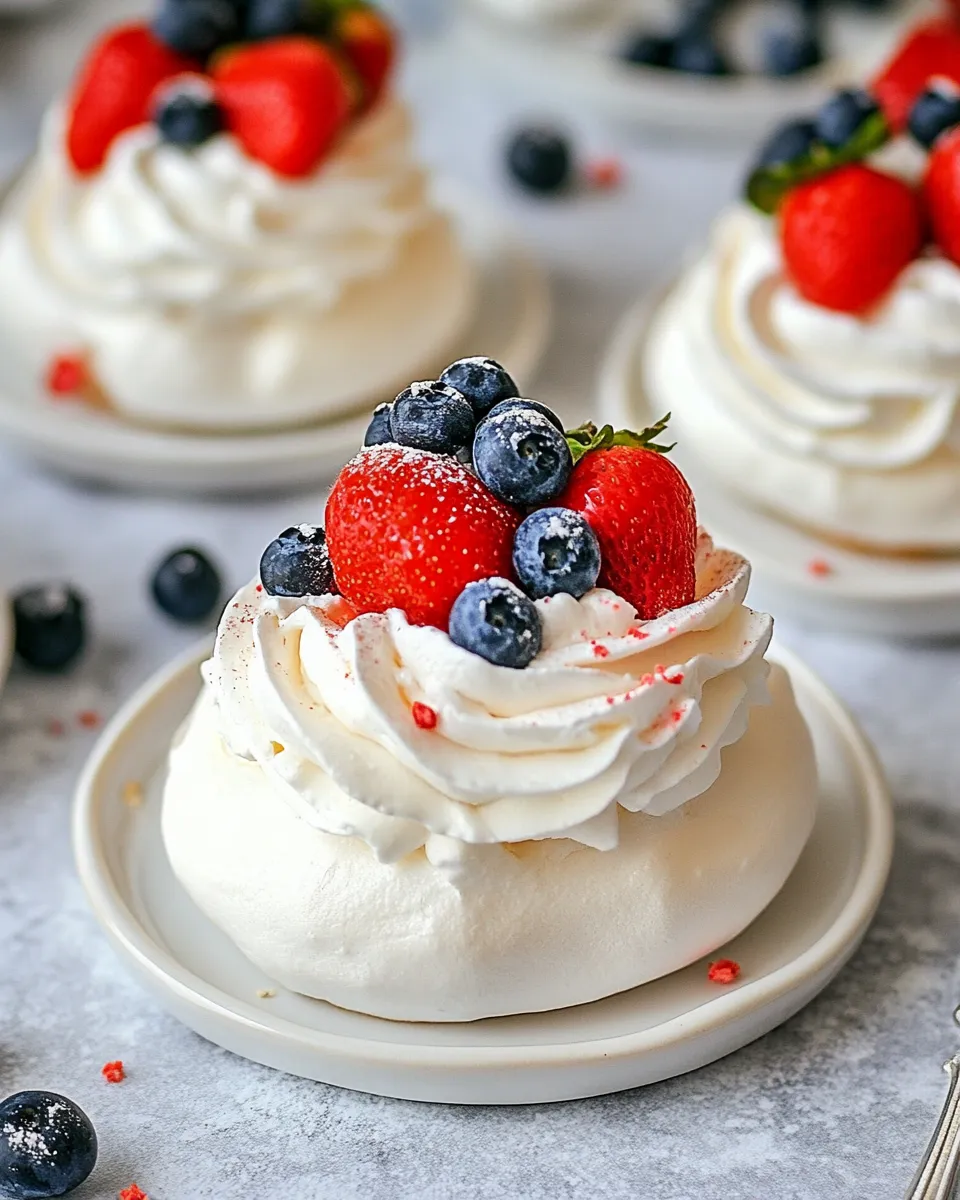
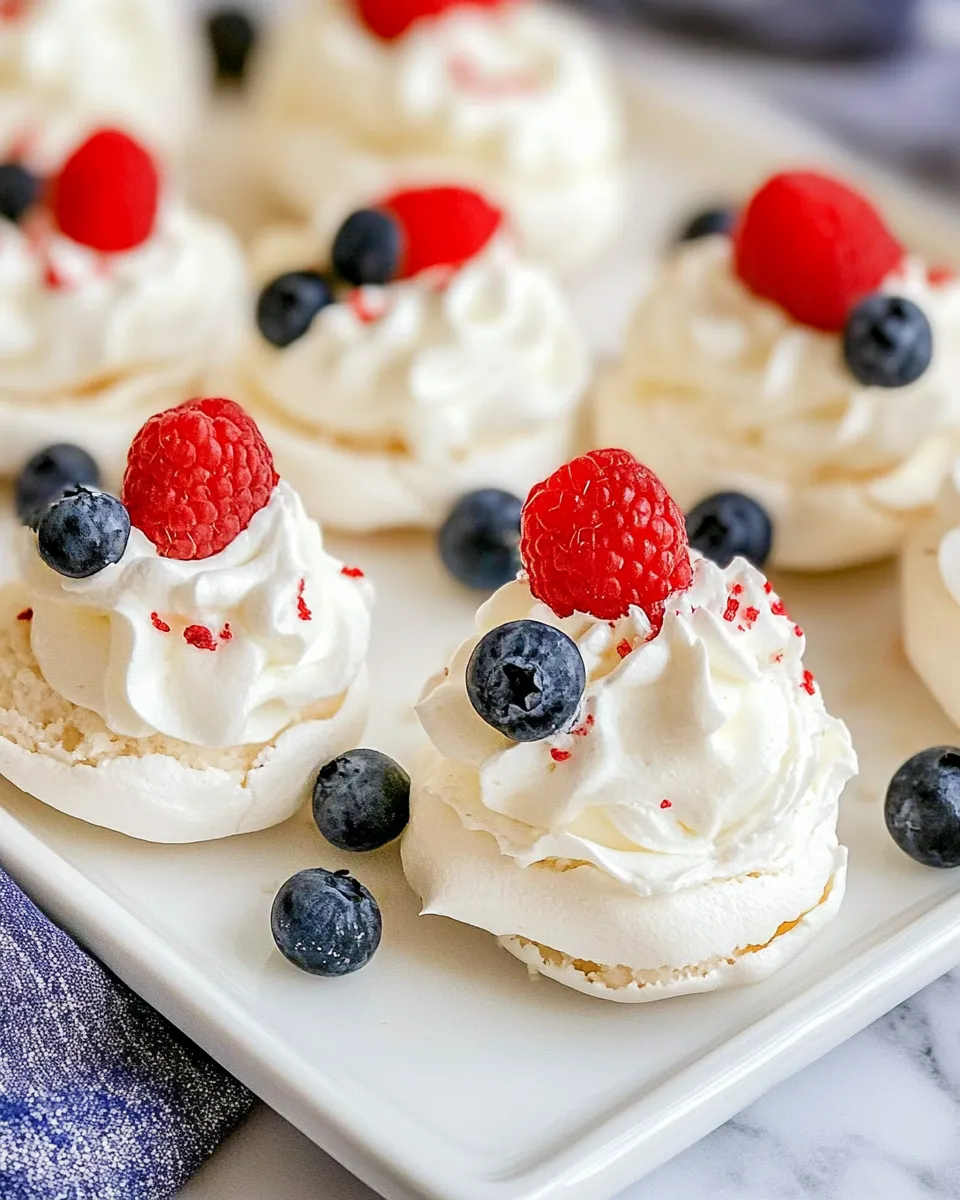
- fresh fruit (eg. strawberries, kiwi, passionfruit, blueberries) — brightens texture and flavor; choose ripe, colorful fruit for contrast.
- whipped cream — the final topping; lightly sweetened is best so it doesn’t overpower the meringue.
The Method for Mini Pavlovas
- Preheat the oven to 300°F (150°C). Line a baking sheet with parchment paper.
- In a clean, dry mixing bowl, add the 4 large egg whites (room temperature).
- Beat the egg whites on medium speed until soft peaks form.
- With the mixer running, gradually add the 1 cup granulated sugar a little at a time. Continue beating until the mixture is glossy and holds stiff peaks (the mixture should not look grainy).
- Gently fold in the ½ teaspoon vanilla extract, 1 teaspoon white vinegar, and 1 teaspoon cornstarch, using a spatula and lifting motions so you do not deflate the egg whites.
- Transfer the meringue to a piping bag or use spoons to place 6–8 mounds on the prepared baking sheet (size as desired). Use the back of a spoon to make a shallow well in the center of each mound to hold the filling.
- Put the baking sheet in the oven and immediately reduce the oven temperature to 250°F (120°C). Bake for 50–60 minutes, until the pavlovas are dry to the touch and can be lifted easily from the parchment.
- Turn off the oven and leave the pavlovas inside with the oven door slightly ajar to cool completely (this helps prevent cracking).
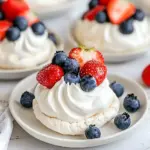
- Just before serving, fill each pavlova’s center with whipped cream and top with fresh fruit.
Why This Recipe Is Reliable
Every ingredient and step exists to balance structure with tenderness. Egg whites provide the framework. Sugar stabilizes and gives the shell that characteristic glossy surface. The tiny amounts of cornstarch and vinegar are the secret to a marshmallow-like interior and a crack-resistant exterior.
Two temperature steps — starting at 300°F and immediately lowering to 250°F — reduce shock to the meringue while ensuring moisture leaves the shells slowly. Cooling in the oven prevents sudden temperature changes that cause splitting. Those are the small, consistent choices that turn a fragile dessert into a repeatable one.
No-Store Runs Needed
One of the best things about these mini pavlovas is how little they require beyond basic staples. If you have egg whites, sugar, a little cornstarch and vinegar, and cream and fruit for topping, you’re good. Fresh fruit can be any of the examples listed or whatever you already have on hand.
Whipped cream can be homemade or store-bought. If you don’t have a piping bag, two spoons work perfectly for creating mounds. The recipe is designed to be flexible in tools and forgiving in timing, so you can usually avoid an extra trip to the shop.
Hardware & Gadgets
- Stand mixer or hand mixer — for reliably stiff, glossy egg whites.
- Mixing bowl — must be clean and completely dry; metal or glass is best.
- Spatula — for gentle folding.
- Piping bag or two spoons — for portioning mounds.
- Baking sheet and parchment paper — essential for even baking and easy removal.
- Oven thermometer (optional) — helpful if your oven runs hot or cold.
Things That Go Wrong
- Meringue won’t whip to stiff peaks: Bowl or beaters may have grease or water. Use a clean, dry bowl and make sure egg whites are free from yolk. Room temperature whites whip more easily.
- Grainy texture after adding sugar: You added sugar too fast. Add sugar gradually while mixing; it dissolves as you go. Finish mixing until glossy and smooth.
- Cracked pavlovas: Cooling too quickly causes cracks. Leave them in the turned-off oven with the door ajar to cool slowly. Also avoid high oven temperatures.
- Sticky or weepy topping: If fruit is very juicy, it can release liquid. Pat fruit dry or add it right before serving. Keep whipped cream lightly sweetened and cold.
- Soggy bottoms: Bake fully until dry to the touch and lift cleanly from the paper. Undercooking traps moisture and gives a chewy underside.
Spring–Summer–Fall–Winter Ideas
Mini pavlovas are a canvas for seasonal fruit. In spring, use bright berries like the strawberries and blueberries listed in the ingredients — they’re clean and lively. Summer calls for tropical or tart fruit; passionfruit’s seeds and juice are excellent for contrast. In fall, choose any late-season berries or the ripest fruit you can find; lighter toppings and less-sweet cream work best as fruit gets sweeter. In winter, focus on presentation: a mix of fruit makes the pavlova feel festive even if it’s out of season.
Keep the approach the same: assemble just before serving, so the pastry stays crisp and the fruit looks fresh. Mini pavlovas are ideal for plated desserts at holiday dinners because each portion is already individually sized.
Cook’s Notes
Use a clean bowl and beaters. Any trace of fat or water will slow or prevent the egg whites from whipping. Separate eggs while cold (easier to do without breaking yolks), then bring the whites to room temperature for 20–30 minutes before whipping.
Gradual sugar addition is non-negotiable. If the meringue looks grainy after all the sugar is added, keep beating — the texture should become glossy and smooth. If it remains grainy, the sugar may not have dissolved; keep at medium speed for a minute or two longer.
Piping creates uniform shapes and is worth the small extra effort. If you prefer rustic mounds, two spoons and a steady hand produce charming, uneven tops — which are perfectly acceptable.
Refrigerate, Freeze, Reheat
Assembled mini pavlovas do not travel well into the refrigerator for long periods; the cream and fruit will make shells soggy. Assemble just before serving. If you need to store components:
- Store baked, cooled pavlova shells in an airtight container at room temperature for up to 3 days. They’ll keep their crispness when dry.
- Whipped cream: store refrigerated for up to 24 hours. Re-whip lightly if it softens.
- Fruit: wash and slice just before serving. If prepped ahead, store in the fridge and pat dry before topping.
- Freezing: Meringue shells freeze well. Freeze fully cooled shells in an airtight container for up to 2 months. Thaw at room temperature and assemble with fresh whipped cream and fruit.
- Reheating: Avoid reheating assembled pavlovas. If shells feel slightly soft after storage, briefly crisp them in a very low oven (200°F/95°C) for 5–8 minutes, watching closely.
Ask & Learn
Q: Can I make the pavlovas ahead of time?
A: Yes. Bake the shells and store them in an airtight container at room temperature for up to 3 days, or freeze for longer. Fill with whipped cream and fruit right before serving.
Q: Why add cornstarch and vinegar?
A: Cornstarch helps keep the inside tender and slightly marshmallowy. Vinegar stabilizes the egg whites and reduces the chance of weeping and collapse. Together they balance crispness and soft interior.
Q: How do I get a glossy, non-grainy meringue?
A: Add sugar slowly and keep beating until it dissolves and the mixture looks smooth and glossy. Rub a little of the mixture between your fingers to check for graininess — it should feel smooth.
Time to Try It
Gather your ingredients, preheat your oven, and give yourself an hour and a half from start to finish for a relaxed pace. The actual hands-on time is minimal: whipping, folding, and portioning are short, focused tasks. Most of the time is in the oven where the meringue does its work.
Make a batch this week. Start small — six pavlovas is a good practice run — and experiment with the fruit combinations you already have. Take note of times and oven behavior; once you dial it in, you’ll be able to reproduce the same crisp shells and pillowy centers every time.
Mini Pavlovas
Ingredients
Ingredients
- 4 largeegg whites room temperature
- 1 cupgranulated sugar
- 1 teaspoonwhite vinegar
- 1/2 teaspoonvanilla extract
- 1 teaspooncornstarch
- fresh fruit eg. strawberries, kiwi, passionfruit, blueberries
- whipped cream
Instructions
Instructions
- Preheat the oven to 300°F (150°C). Line a baking sheet with parchment paper.
- In a clean, dry mixing bowl, add the 4 large egg whites (room temperature).
- Beat the egg whites on medium speed until soft peaks form.
- With the mixer running, gradually add the 1 cup granulated sugar a little at a time. Continue beating until the mixture is glossy and holds stiff peaks (the mixture should not look grainy).
- Gently fold in the ½ teaspoon vanilla extract, 1 teaspoon white vinegar, and 1 teaspoon cornstarch, using a spatula and lifting motions so you do not deflate the egg whites.
- Transfer the meringue to a piping bag or use spoons to place 6–8 mounds on the prepared baking sheet (size as desired). Use the back of a spoon to make a shallow well in the center of each mound to hold the filling.
- Put the baking sheet in the oven and immediately reduce the oven temperature to 250°F (120°C). Bake for 50–60 minutes, until the pavlovas are dry to the touch and can be lifted easily from the parchment.
- Turn off the oven and leave the pavlovas inside with the oven door slightly ajar to cool completely (this helps prevent cracking).
- Just before serving, fill each pavlova’s center with whipped cream and top with fresh fruit.
Equipment
- 15×21-inch Baking Sheet
- KitchenAid Hand Mixer
- Large Piping Bag
- Open Star Pastry Tip .63” Opening Diameter
Notes
Sugar Incorporation:Add the sugar gradually to the egg whites to ensure it dissolves properly, avoiding a gritty texture.
Oven Watch:Keep an eye on the pavlovas while they bake. They should be crisp and dry to the touch, but not browned.
Cooling Process:Let the pavlovas cool down slowly in the oven (turned off) with the door slightly ajar to prevent cracking.
Assemble Just Before Serving:Assemble the pavlovas with whipped cream and fruit just before serving to maintain the meringue’s crispness.
Storage:Store any leftover meringue bases at room temperature in an airtight container. The cream and fruit should be refrigerated separately.
Freezing:You can freeze the meringue bases, but it’s best to add fresh cream and fruit after thawing when you’re ready to serve.


