

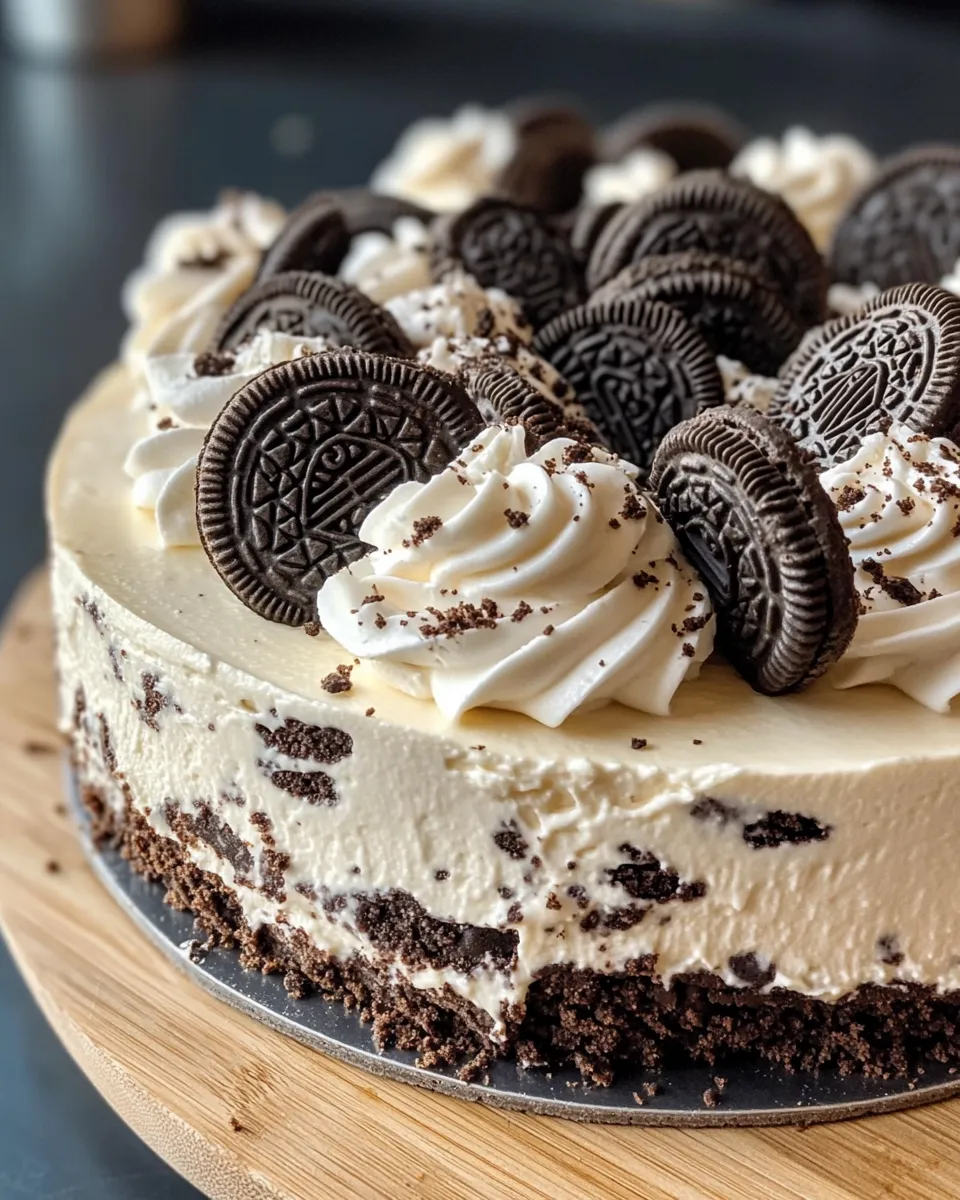
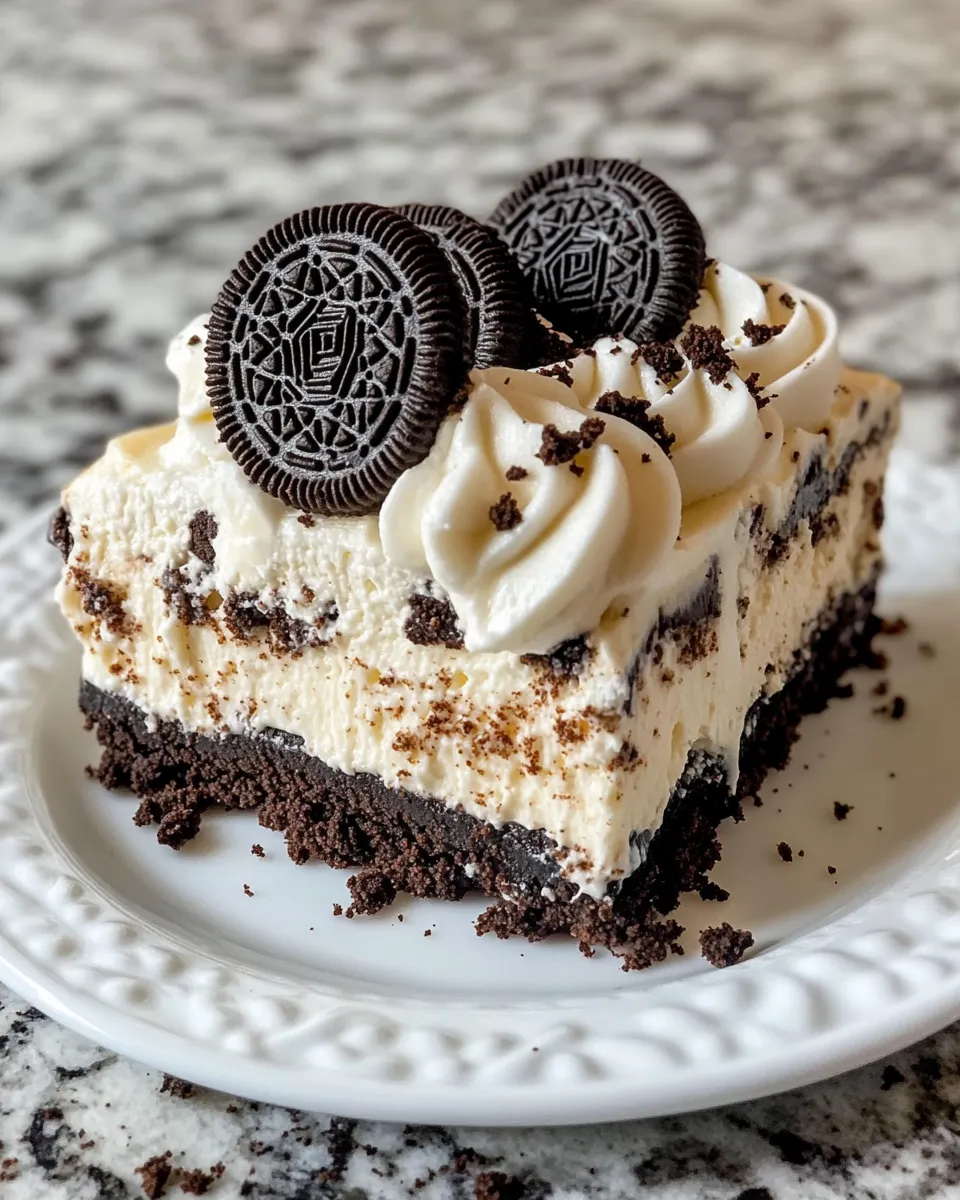
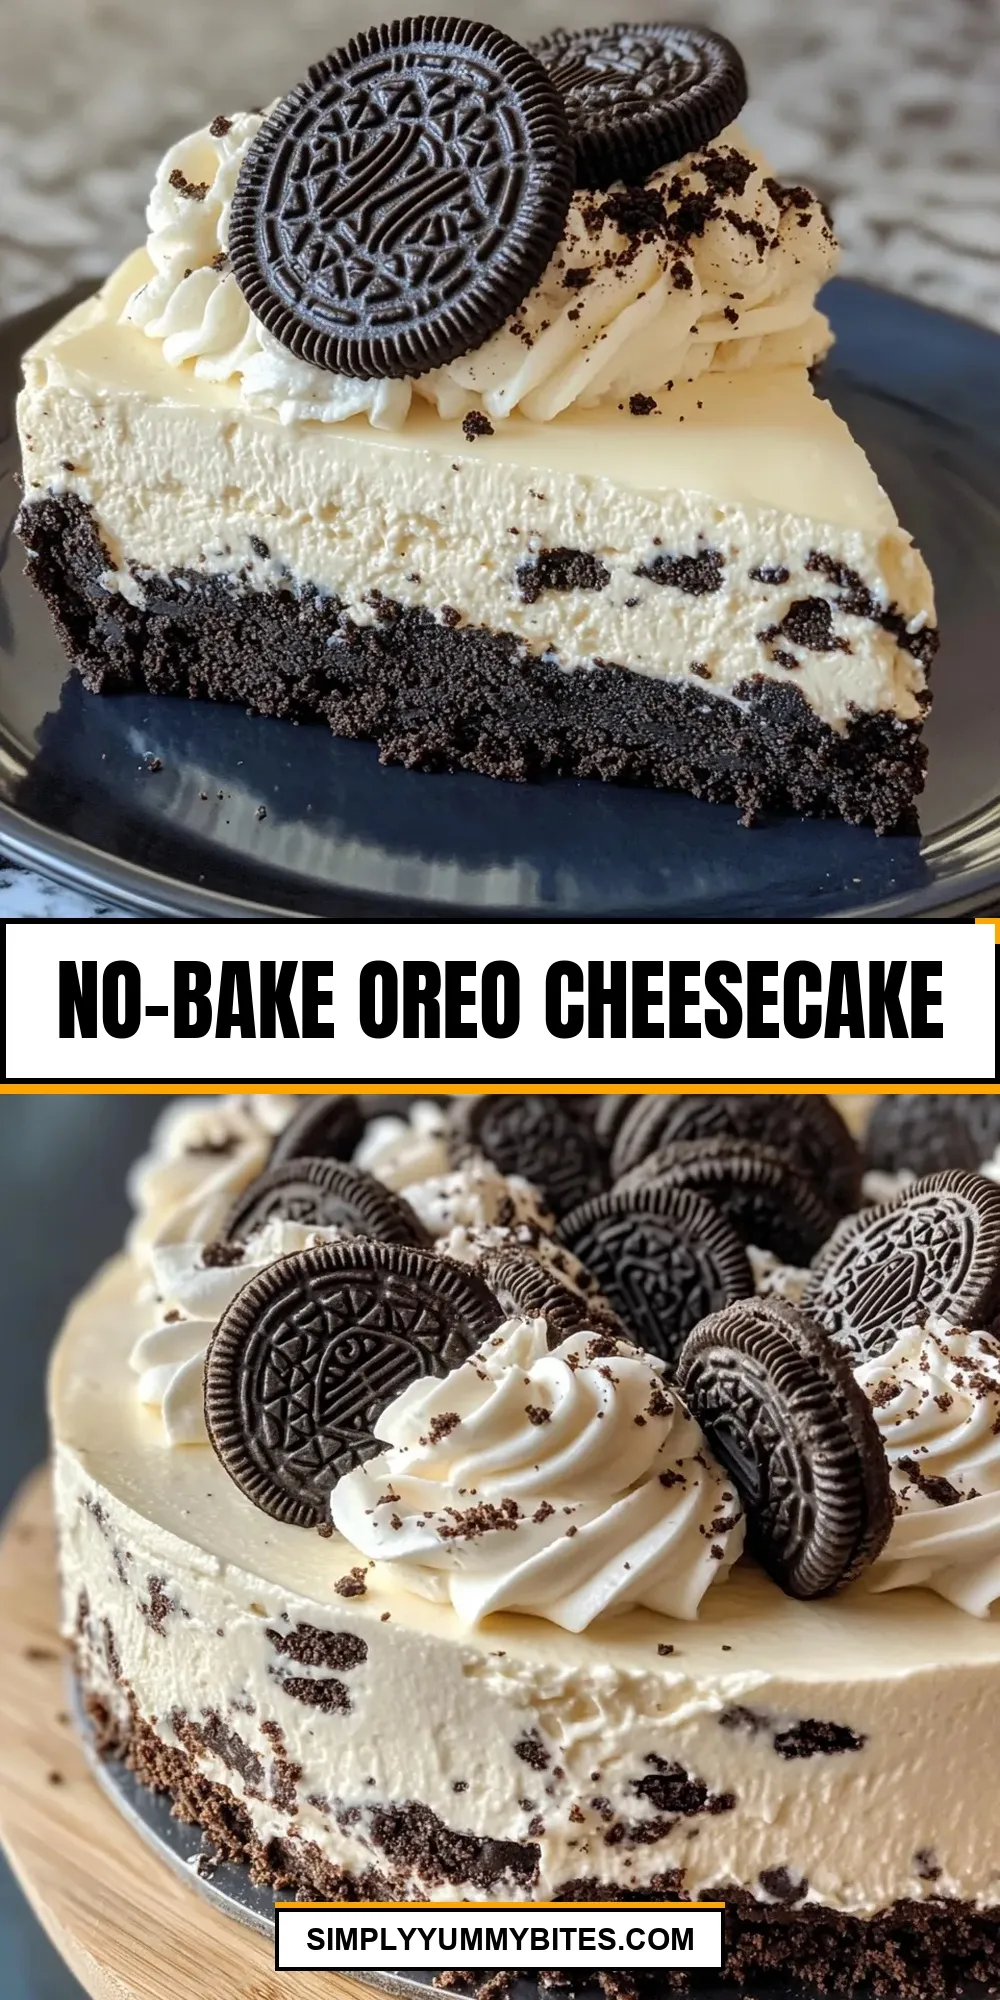
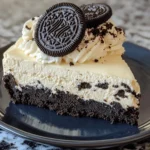
This No-Bake Oreo Cheesecake is the kind of recipe I reach for on busy evenings and when I want an impressive dessert without turning on the oven. The base is pure Oreo goodness: crunchy, chocolatey, and easy to press into a solid, sliceable crust. It sets quickly in the refrigerator or a little faster in the freezer, which is perfect when guests arrive earlier than planned.
I’m keeping this write-up focused and practical. Below you’ll find the exact crust method I use every time, plus tips on equipment, storage, common mistakes, and how to adapt the build for different diets. If you want to pair this crust with a filling, I’ll give guidance and troubleshooting notes so your finished cheesecake looks and slices cleanly.
Short on tools or short on time? I cover quick fixes and appliance swaps that still produce a sturdy crust. Read through the steps once, then follow them; the process is straightforward and forgiving when you stick to a few key details.
Ingredient Rundown
Ingredients
- 14 ounces Oreos, processed in a food processor — Provides the chocolate cookie crumb base and most of the structure for the crust; process until fine for an even pack.
- 8 tablespoons salted butter melted — Binds the crumbs into a cohesive crust and adds richness; melt and cool slightly so it mixes evenly.
Mastering No-Bake Oreo Cheesecake: How-To
- Spray a 9-inch springform pan with nonstick spray and set it on a flat work surface.
- In a medium bowl, combine the 14 ounces of processed Oreo crumbs with the 8 tablespoons of melted salted butter. Stir until the crumbs are evenly moistened and hold together when pressed.
- Pour the crumb mixture into the prepared springform pan. Use the bottom of a measuring cup or a flat glass to press the crumbs firmly and evenly across the bottom and up the sides to form a compact crust.
- Smooth the top of the crust so it is level. Refrigerate the crust for at least 30 minutes (or freeze 10–15 minutes) until it is firm.
- When the crust is firm, run a thin spatula or knife around the edge to loosen, then release the springform sides. Transfer the crust (on the pan bottom) to a serving plate if desired.
- Keep the crust refrigerated until you are ready to fill or serve.
Why You’ll Love This Recipe
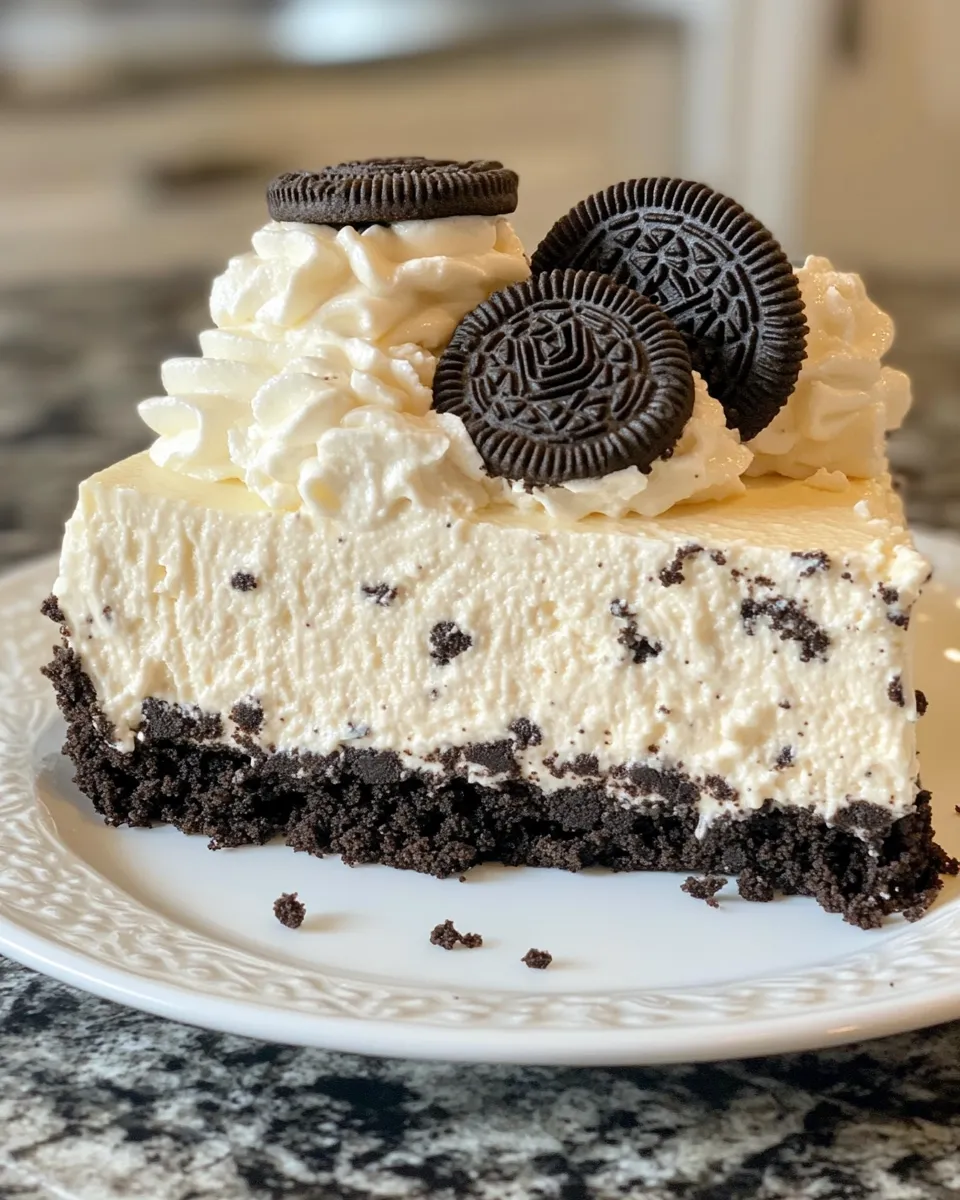
This crust is reliable and forgiving. The Oreos bring in both flavor and structure, so you don’t need extra ingredients to make a crust that slices well. The method is fast: the whole crust can be ready in under 20 minutes of active time, and it firms up quickly in the fridge or freezer. That makes it ideal when you’re prepping components in stages or assembling a dessert last-minute.
Texture-wise, it hits the balance most people want—crunchy enough to contrast a creamy filling, but compact enough to hold together on the plate. Because the base relies on melted butter as the binder, you get a slightly richer bite that complements vanilla or chocolate fillings equally well.
Vegan & Vegetarian Swaps
Vegetarian? This crust already works—no animal gelatin or meat products involved. Vegan adaptations are possible but require a couple of label checks and swaps. Choose a plant-based butter substitute that behaves like dairy butter when melted and cooled. If you’re strict about processed cookies, look for a vegan-certified chocolate sandwich cookie; many are available, but always check the label because formulations vary by brand and country.
When using vegan butter, use the same 8 tablespoons by volume and mix until the crumbs are evenly moistened. The setting behavior is similar, though chilling times can vary slightly depending on the fat composition of your butter substitute.
Appliances & Accessories
- 9-inch springform pan — Required for easy removal of the crust; it makes neat presentation simple.
- Food processor — Used to process the Oreos into fine crumbs; pulse to control texture.
- Measuring cup or flat glass — Perfect for pressing the crust evenly across the bottom and up the sides.
- Spatula or small offset knife — Helps smooth the top and loosen the crust after chilling.
- Refrigerator and freezer — The fridge firms the crust in about 30 minutes; the freezer accelerates it to 10–15 minutes.
Avoid These Traps
Pressing too lightly is the most common mistake. If the crumbs aren’t compacted, the crust will crumble when sliced. Use a flat-bottomed measuring cup or glass and press firmly, especially where the bottom meets the sides. Pressing in several passes and taking a moment to re-press the rim after leveling the top makes a big difference.
Another trap: using butter that’s too hot. If the melted butter is piping hot, it can make the crumbs greasy and harder to press evenly. Let the butter cool slightly so it’s warm but not steaming before combining with the processed crumbs.
Over-refrigerating the crust won’t hurt texture, but if you freeze it for longer than necessary, the crust can become extremely firm and more brittle when cutting. If you must freeze for storage, wrap the assembled and chilled crust tightly to prevent freezer burn, and plan to thaw slightly before slicing if needed.
Fit It to Your Goals
Need to scale up for a crowd? Make multiple crusts and layer them with filling in separate pans—or use a larger springform and adjust chilling time. Want smaller servings? Use a tart pan or individual springform pans and divide the crumb mixture evenly. The binding ratio (crumbs to butter) is forgiving on a small scale: focus on even moisture rather than exact weight changes.
Working on presentation? Press the crust higher up the sides for a taller edge that frames the filling. For a thinner base, press the crumbs only across the bottom and keep the sides low. Both approaches work; the method above gives you a sturdy, balanced crust good for slicing.
Pro Perspective
Small techniques that matter
Fully process the Oreos until the crumbs are uniform. A few coarser bits can be attractive, but uneven chunks make it harder to press a compact crust. When you combine crumbs and butter, use a spoon or spatula to fold and press rather than whisking. You want even coating without air incorporation.
Release and transfer
Don’t rush the release. When the crust is chilled, run a thin spatula or knife along the springform seam as instructed. If you release too early, the rim can warp or pull crumbs away from the edge. If you plan to move the crust to a serving plate, do it carefully: keep the pan base flat and slide it onto the plate rather than trying to lift the crust out of the pan.
Make Ahead Like a Pro
Make the crust up to 48 hours in advance and keep it refrigerated, covered tightly. For longer storage, you can freeze the assembled crust (wrapped well) for up to a month. Thaw overnight in the refrigerator before filling. If you plan to fill and then freeze the finished cheesecake, flash-freeze the filled cake uncovered for an hour so the top firms, then wrap it tightly to prevent condensation and freezer burn.
When assembling ahead, fill the crust no more than 24–48 hours before serving for best texture if using a fresh, no-bake filling. If your filling is particularly soft, give the finished cake a full overnight chill to let everything set and the flavors meld.
No-Bake Oreo Cheesecake FAQs
Q: Can I make this without a food processor?
A: You can, but the texture will be coarser. Place the Oreos in a heavy-duty zip-top bag and crush them with a rolling pin until fine. It takes a little elbow grease, and you’ll want to take care to reach a fairly uniform crumb for the best crust compactness.
Q: What if my crust crumbles when I slice the finished cheesecake?
A: It usually means the crumbs weren’t packed firmly or the butter ratio was slightly off. Press more firmly when forming the crust and ensure the crumbs are evenly moistened by the melted butter. Allow the filled cheesecake to chill thoroughly before slicing; a sharp, hot-dipped knife helps produce clean slices.
Q: Can I speed up the chilling time?
A: Yes. The instructions note you can freeze the crust for 10–15 minutes instead of refrigerating for 30 minutes. That gives you a firm base quickly. If you freeze, don’t leave it too long or it can become overly hard; check at the 10-minute mark and adjust.
Q: Is this crust suitable for warm climates?
A: In warmer kitchens, the melted-butter binder can soften faster. Keep the assembled crust chilled until you’re ready to fill and serve. Consider doing the pressing step in a cooler room or chilling your tools briefly to prevent the butter from becoming too soft while you work.
The Takeaway
This Oreo crust method is straightforward, fast, and reliable. It gives you a chocolatey, sliceable base that supports a variety of no-bake fillings or chilled cheesecakes. Follow the precise steps for processing, mixing, pressing, and chilling the crumb mixture, and you’ll have a crust that looks and bites like you spent hours on it—even when you didn’t.
Keep the essential tools handy: a food processor, a 9-inch springform pan, and something flat for pressing. Those small investments in technique and equipment pay off every time. Happy assembling—and if you pair this crust with a filling, give the filled cake sufficient chill time so every slice comes out clean and confident.
No-Bake Oreo Cheesecake
Ingredients
Ingredients
- 14 ounces Oreos processed in a food processor
- 8 tablespoons salted butter melted
Instructions
Instructions
- Spray a 9-inch springform pan with nonstick spray and set it on a flat work surface.
- In a medium bowl, combine the 14 ounces of processed Oreo crumbs with the 8 tablespoons of melted salted butter. Stir until the crumbs are evenly moistened and hold together when pressed.
- Pour the crumb mixture into the prepared springform pan. Use the bottom of a measuring cup or a flat glass to press the crumbs firmly and evenly across the bottom and up the sides to form a compact crust.
- Smooth the top of the crust so it is level. Refrigerate the crust for at least 30 minutes (or freeze 10–15 minutes) until it is firm.
- When the crust is firm, run a thin spatula or knife around the edge to loosen, then release the springform sides. Transfer the crust (on the pan bottom) to a serving plate if desired.
- Keep the crust refrigerated until you are ready to fill or serve.
Equipment
- 9-inch springform pan
- nonstick spray
- Medium Bowl
- Food Processor
- Measuring Cup
- flat glass
- Spatula
- Knife
- Serving Plate
- Refrigerator
- Freezer


