
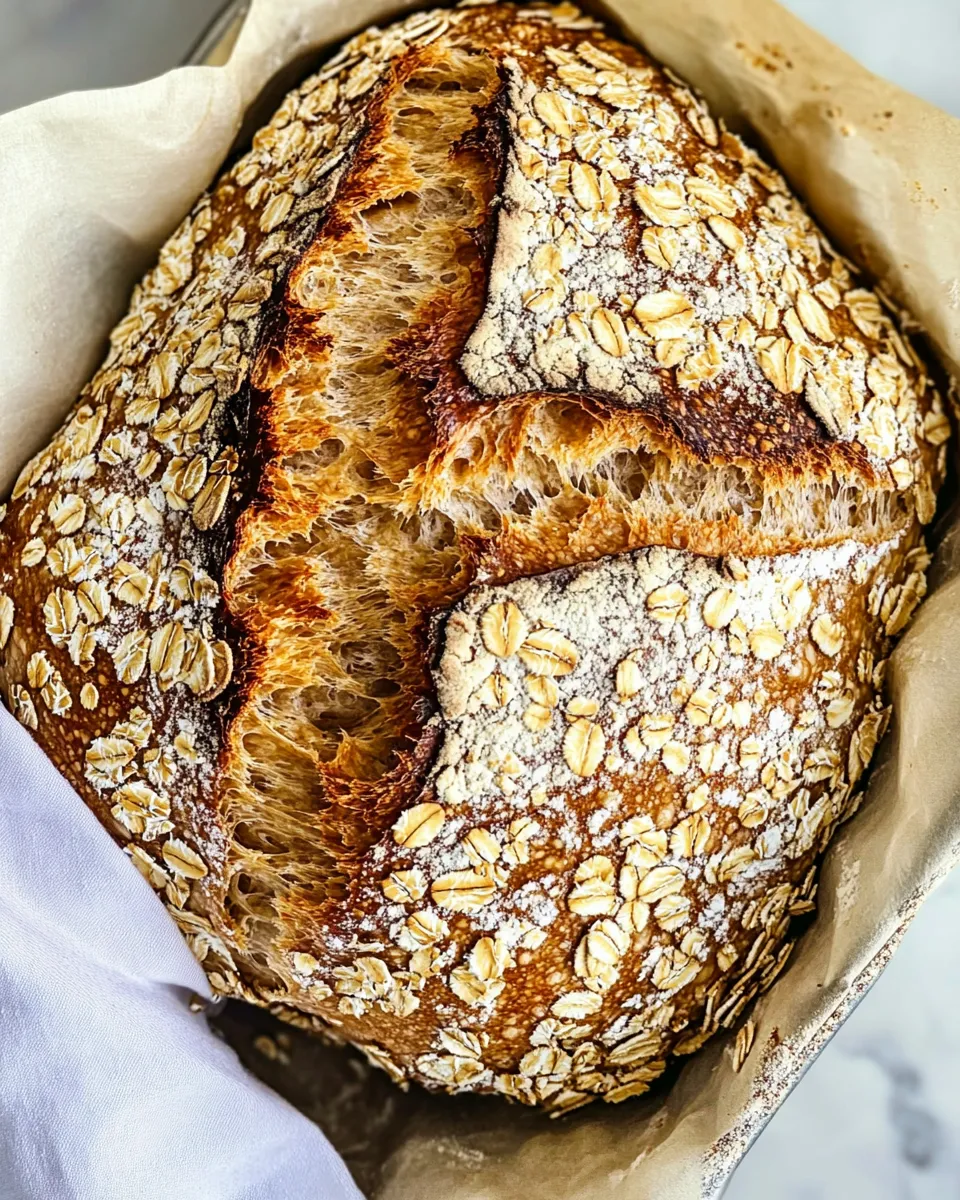
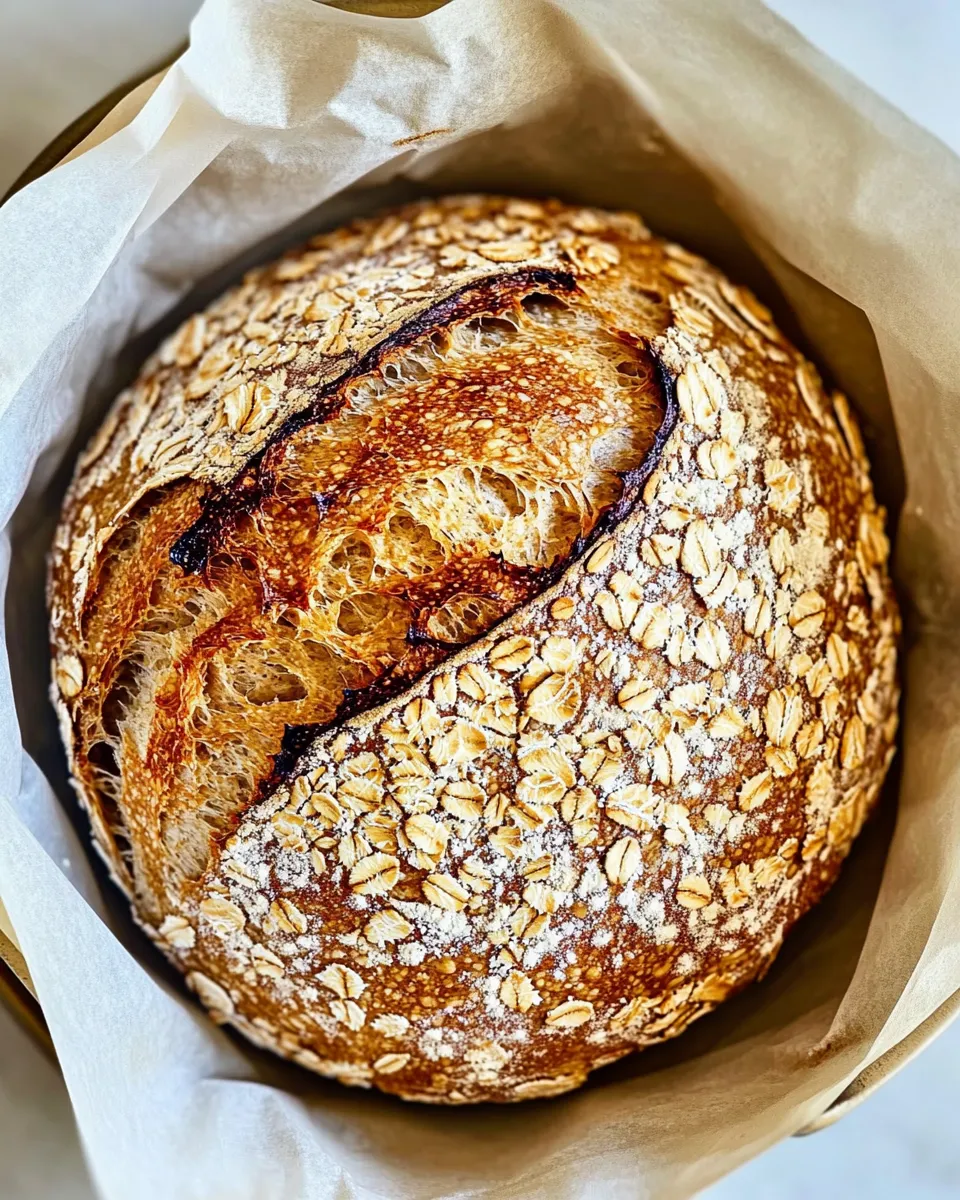
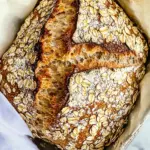
I bake this loaf nearly every week. It’s forgiving, straightforward, and gives a crisp, caramelized crust with a tender, oat-studded crumb. The honey adds subtle sweetness and helps the oats stay soft, while the long rest time builds flavor without any elbow grease.
This recipe is for anyone who wants fresh bread without kneading or a bulky mixer. You’ll mix, wait, and bake—simple steps that reward patience more than technique. The method fits into a busy schedule: assemble in the evening and bake the next day.
What You’ll Gather
Gather basic pantry staples and a few minutes of planning. The ingredient list is short and the tools are things most home cooks already own. Read through the steps once before you start so the timing fits your day.
Ingredients
- 3¾cupsall-purpose flour — provides structure; you can spoon and level for accuracy.
- 1cupoats — texture and fiber; reserve a few for topping if you like a rustic look.
- 1teaspoonsalt — balances the sweetness and strengthens the dough.
- 1teaspoonactive dry yeast — the rising agent; check the date to ensure activity.
- 2tablespoonshoney — flavor and browning; dissolve into the water so it spreads evenly.
- 2cupswarm water — hydrates the dough; “warm” means comfortably warm to the touch, not hot.
No Knead Honey Oat Bread, Made Easy
- In a large bowl, stir together 3¾ cups all-purpose flour, 1 cup oats, 1 teaspoon salt, and 1 teaspoon active dry yeast until evenly combined.
- In a separate container, dissolve 2 tablespoons honey into 2 cups warm water. Pour the honey-water into the dry ingredients.
- Using a spatula or wooden spoon, mix until the ingredients are fully incorporated and form a shaggy, sticky dough. Do not knead.
- Cover the bowl tightly with plastic wrap. Let the dough rest at room temperature (or inside an unheated oven) for 12 to 24 hours.
- When the dough has rested, preheat your oven to 450°F (232°C) and place a lidded cast-iron pot (Dutch oven) inside to heat with the oven.
- Lightly flour your hands and sprinkle a little flour over the dough. Gently remove the dough from the bowl and shape it roughly into a ball on a sheet of parchment paper.
- If desired, score the top of the dough with a sharp knife and optionally sprinkle a few of the measured oats over the top.
- When the oven and pot are fully preheated (450°F), carefully remove the hot pot using oven mitts. Keep the lid nearby.
- Lift the parchment with the dough and lower it (parchment and all) into the hot pot. Cover the pot with its lid and return it to the oven.
- Bake covered for 30 minutes.
- Remove the lid and continue baking for another 15 to 20 minutes, until the crust is deep golden brown.
- Remove the bread from the pot (it should release easily), transfer to a cooling rack, and let cool completely before slicing.
Why No Knead Honey Oat Bread is Worth Your Time
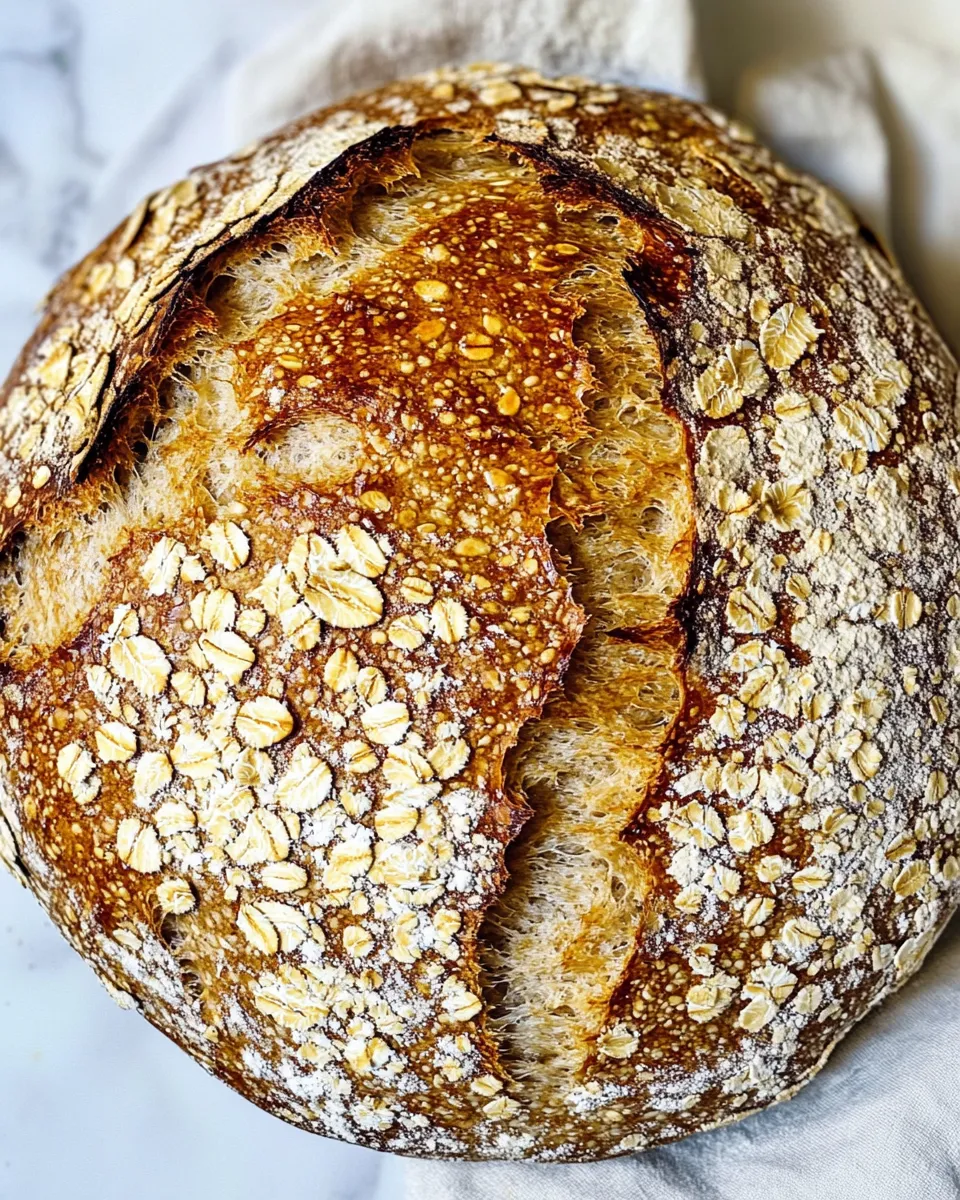
This loaf gives you the comfort of homemade bread with minimal hands-on time. The long, slow rest develops flavor similar to a longer fermentation without requiring a sourdough starter or complicated timing. Honey and oats make the crumb tender and slightly sweet—great for breakfast toast or sandwiches.
It’s also reliable. The method tolerates small variations in temperature and time, so if you let it rest 14 hours instead of 12, the result is still excellent. And because you’re not kneading, the dough remains open and airy, giving a pleasing irregular crumb.
Swap Guide
Substitutions are possible but keep them modest so you don’t upset hydration or structure.
- Flour — You can try part whole-wheat flour (up to 25% of the total) but expect a denser loaf and possibly need a touch more water.
- Oats — Rolled oats work best. Quick oats will function but change texture slightly.
- Honey — Maple syrup or agave can replace honey at a 1:1 ratio; flavor will shift.
- Yeast — Instant yeast can be used; mix directly into the dry ingredients without dissolving first.
Equipment & Tools
You don’t need fancy gear. The right basic tools make the process smooth.
- Large mixing bowl — big enough for a sticky, expanding dough.
- Spatula or wooden spoon — for mixing a shaggy dough without kneading.
- Plastic wrap — to seal the dough during its long rest.
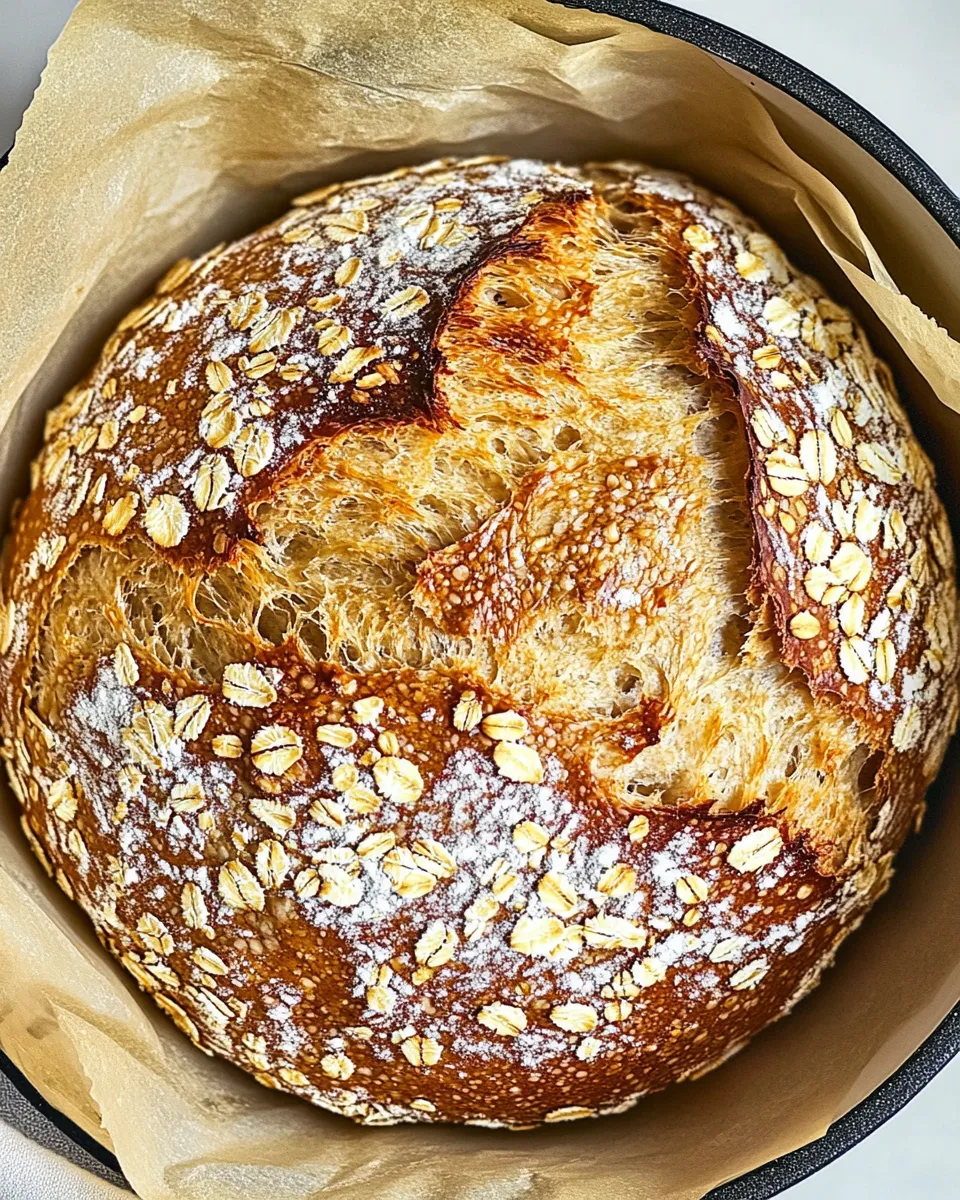
- Lidded cast-iron pot (Dutch oven) — essential for trapping steam and developing a crisp crust.
- Sheet of parchment paper — to transfer the dough into the hot pot without burns.
- Oven mitts and cooling rack — for safe handling and proper cooling.
Watch Outs & How to Fix
Even simple recipes can go sideways. Here are the common missteps and quick fixes.
- Too dense — Likely under-proofed or too much flour. For next time, loosen the flour measurement (spoon flour into the cup, don’t scoop) and ensure a full 12–24 hour rest.
- Not rising — Check your yeast. If the dough shows no bubbles after an hour at room temp, your yeast may be dead. Start over with fresh yeast.
- Gummy crumb — If the center is underbaked, return the loaf to the oven without the lid for 5–10 minutes. If very underdone, bake on a baking sheet at 375°F until set.
- Burned crust — Your oven runs hot. Reduce the final uncovered bake time by a few minutes or lower the oven by 10–15°F next time.
- Sticking to pot — Ensure the pot is very hot and use parchment under the dough. If it sticks slightly, run a thin spatula carefully around the edge to loosen.
Make It Fit Your Plan
Timing is flexible. Make the dough in the evening and bake the next morning. If you need the loaf same-day, start early and allow at least 8–10 hours; the flavor will be milder but the loaf will still be good.
If you want to split the recipe, halve everything and use a smaller bowl and pot. Cooking times will be slightly shorter—start checking crust color at the lower end of the bake time.
Behind-the-Scenes Notes
This method borrows from classic no-knead techniques: long fermentation at room temperature extracts flavor and strengthens gluten without manual work. The oats contribute both flavor and a softer crumb. Honey does double duty—feeding the yeast and encouraging a deep crust color.
The visible crust forms because the hot, lidded pot traps steam, keeping the surface moist during the initial bake. Removing the lid in the final stage lets the crust dry and caramelize. That lift in flavor and texture is what makes the method shine.
Shelf Life & Storage
Store the cooled loaf at room temperature, wrapped in a clean kitchen towel or a paper bag, for up to 2 days. For longer storage, slice and freeze in a sealed bag for up to 3 months. Toast frozen slices directly from the freezer.
Avoid refrigeration; it dries out bread quickly. If the crust softens after storage, refresh slices in a 350°F oven for 5–8 minutes to revive crunch.
Handy Q&A
Q: Can I use instant yeast instead of active dry?
A: Yes. Instant yeast can be mixed directly with the dry ingredients; keep the same quantity.
Q: My dough spread flat—what happened?
A: The dough may have over-relaxed or been too wet. Next time, reduce water slightly or shorten the resting time. Also shape the dough gently but firmly into a tighter ball before the final proof on parchment.
Q: Can I add seeds or nuts?
A: Yes. Fold in up to ½ cup of seeds or chopped nuts during the initial mix or sprinkle on top before baking. They will change texture but not the hydration significantly.
Q: How do I tell when the bread is done?
A: The crust should be deep golden brown and sound hollow when tapped on the bottom. Internal temperature, if you use a thermometer, should be around 200–205°F for a fully baked crumb.
Bring It to the Table
This bread works for breakfast, sandwiches, or as an everyday companion to soup. I love thick slices spread with butter and a touch of jam, or toasted and topped with avocado and flaky salt. Let it cool fully before slicing to avoid a gummy texture—patience pays off.
Serving notes
- Warm slices — gentle toasting brings out the honey flavor; serve with butter.
- Sandwiches — the oats hold up well to fillings; slice about ¾-inch thick.
- Pairings — cheeses, honey, or hearty soups complement the oat texture and mild sweetness.
No Knead Honey Oat Bread
Ingredients
Ingredients
- 3 3/4 cupsall-purpose flour
- 1 cupoats
- 1 teaspoonsalt
- 1 teaspoonactive dry yeast
- 2 tablespoonshoney
- 2 cupswarm water
Instructions
Instructions
- In a large bowl, stir together 3¾ cups all-purpose flour, 1 cup oats, 1 teaspoon salt, and 1 teaspoon active dry yeast until evenly combined.
- In a separate container, dissolve 2 tablespoons honey into 2 cups warm water. Pour the honey-water into the dry ingredients.
- Using a spatula or wooden spoon, mix until the ingredients are fully incorporated and form a shaggy, sticky dough. Do not knead.
- Cover the bowl tightly with plastic wrap. Let the dough rest at room temperature (or inside an unheated oven) for 12 to 24 hours.
- When the dough has rested, preheat your oven to 450°F (232°C) and place a lidded cast-iron pot (Dutch oven) inside to heat with the oven.
- Lightly flour your hands and sprinkle a little flour over the dough. Gently remove the dough from the bowl and shape it roughly into a ball on a sheet of parchment paper.
- If desired, score the top of the dough with a sharp knife and optionally sprinkle a few of the measured oats over the top.
- When the oven and pot are fully preheated (450°F), carefully remove the hot pot using oven mitts. Keep the lid nearby.
- Lift the parchment with the dough and lower it (parchment and all) into the hot pot. Cover the pot with its lid and return it to the oven.
- Bake covered for 30 minutes.
- Remove the lid and continue baking for another 15 to 20 minutes, until the crust is deep golden brown.
- Remove the bread from the pot (it should release easily), transfer to a cooling rack, and let cool completely before slicing.
Equipment
- 6 Quart Dutch Oven
- Danish Dough Whisk
Notes
Let the dough riseat least 12 hoursfor best texture and flavor.
Use old-fashioned oats for best texture; avoid steel-cut oats.
For easier freezing, slice the bread first, then wrap tightly.
A preheated Dutch oven gives you that signature crackly crust.


