

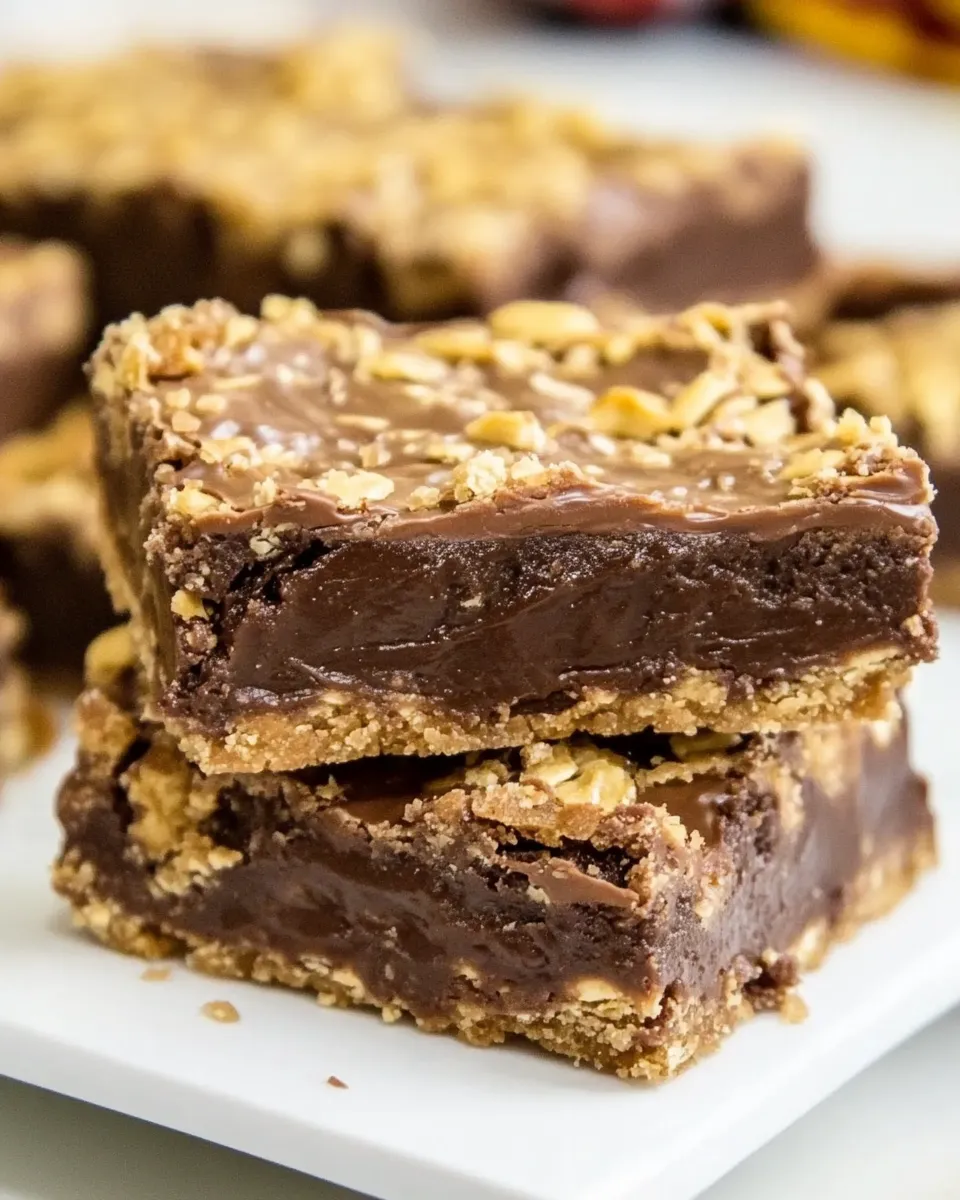
These Nutella Fudge Bars are the kind of recipe I keep on hand for when I want something impressive with minimal fuss. They have a buttery oat crust, a dense, silky Nutella-chocolate filling, and a crumbly topping that bakes to a gentle golden finish. You get texture, chocolate, and that irresistible hazelnut spread in every bite.
I like that this recipe is straightforward: pantry-friendly dry ingredients, softened butter, a little cream to loosen chocolate, and one generous jar of Nutella. The assembly is predictable and forgiving—press, pour, sprinkle, bake—so you can focus on timing and cooling, which are the real keys to neat squares.
Below you’ll find everything from an exact ingredients list to step-by-step directions, equipment notes, and practical tips I use in my kitchen to get clean cuts and consistent results. No fluff—just practical guidance to make these bars reliably delicious.
What You’ll Gather

Ingredients
- 2 cups all-purpose flour — provides structure for the crust and the crumb topping.
- 2 cups old-fashioned oats, or quick-cooking — adds chew and texture; old-fashioned gives a heartier bite.
- 1 1/4 cups packed light brown sugar — sweetens and keeps the crumb tender and slightly caramelized.
- 1 teaspoon baking soda — a small lift to keep the crumb from compressing during baking.
- 1/2 teaspoon salt — balances sweetness and enhances overall flavor.
- 1 1/4 cups butter, softened — binds the dry mix into a pressable crust and makes the topping crisp and golden.
- 1 cup semi-sweet chocolate chips — melts into a rich chocolate base for the Nutella filling.
- 1/2 cup heavy cream — thins and smooths the melted chocolate for a ganache-like texture.
- 1 (13-ounce) jar Nutella, or 1 heaping cup — the star: adds hazelnut flavor and chew to the filling.
- 1 cup confectioners’ sugar — sweetens and slightly stabilizes the Nutella-chocolate filling.
From Start to Finish: Nutella Fudge Bars
- Preheat oven to 350°F (175°C) and grease a 9×13-inch pan.
- In a large bowl combine 2 cups all-purpose flour, 2 cups old-fashioned or quick-cooking oats, 1 1/4 cups packed light brown sugar, 1 teaspoon baking soda, and 1/2 teaspoon salt.
- Add 1 1/4 cups softened butter to the dry ingredients and use an electric mixer to blend until the mixture is crumbly and evenly moistened.
- Divide the crumb mixture in half. Press one half firmly and evenly into the bottom of the prepared pan to form the crust. Reserve the other half for the topping.
- For the filling, place 1 cup semi-sweet chocolate chips and 1/2 cup heavy cream in a heavy-bottom saucepan. Heat over low heat, stirring constantly, until the chocolate is completely melted and the mixture is smooth. Remove the pan from the heat.
- Whisk in the Nutella in two additions: add about half the 13-ounce jar first and whisk until incorporated, then add the remaining Nutella and whisk until smooth.
- Whisk in 1 cup confectioners’ sugar until the filling is fully combined and smooth.
- Pour the filling over the pressed crust and spread into an even layer.
- Sprinkle the reserved crumb mixture evenly over the filling.
- Bake for 40 to 45 minutes at 350°F, until the top is set and the edges are lightly golden.
- Remove from the oven and let the bars cool completely in the pan before cutting into squares.
What You’ll Love About This Recipe

First, the balance of textures: a tender, slightly crunchy oat crust, a smooth, fudgy center, and a crumbly topping that adds a rustic finish. That contrast makes these bars feel layered and thoughtful even though the recipe is simple.
Second, the method is easy to scale mentally. The crumb halves form crust and topping with minimal fuss, so you can make an extra-large pan or halve the batch without changing technique. The filling is essentially a quick ganache boosted with Nutella and confectioners’ sugar, which means it sets up nicely but stays soft enough to slice cleanly after cooling.
Finally, the ingredient list reads like a pantry-friendly dessert. If you keep Nutella and chocolate on hand, you’ve got a special dessert ready with about 15–20 minutes of active time.
No-Store Runs Needed
One of the best things about this recipe is how many of the ingredients are pantry standards. Flour, oats, brown sugar, baking soda, salt, butter, and confectioners’ sugar are cupboards staples. Semi-sweet chocolate chips and a jar of Nutella are great to have on hand for last-minute treats, and heavy cream can often be found in the fridge if you bake regularly.
If you do discover you’re missing one item, check your freezer or fridge for substitutes you already own: extra butter from another recipe, a jar of spread you already use for sandwiches, or a bag of oats tucked away. The recipe intentionally allows either old-fashioned or quick-cooking oats, so you don’t need a special variety.
Must-Have Equipment
- 9×13-inch baking pan — the recipe’s timing and depth depend on this size.
- Electric mixer — speeds mixing the butter into the dry ingredients; you can use a sturdy fork or pastry cutter if needed, but the texture will be easier to achieve with a mixer.
- Heavy-bottom saucepan — for melting chocolate and cream gently and evenly.
- Rubber spatula — for scraping the pan clean and spreading the filling smoothly.
- Measuring cups and spoons — accurate amounts matter for consistent texture.
Easy-to-Miss Gotchas
Temperature of the butter
Softened butter is the key to getting a crumbly, pressable crust. If the butter is too cold you won’t get even crumbs; if it’s too warm the mixture will become pasty and won’t hold a clean crust or topping. Aim for softened but still cool — give it 20–30 minutes on the counter if refrigerated.
Melting the chocolate
Heat the chocolate chips and cream over low heat and stir constantly. Chocolate scalds quickly if the pan is too hot, which can cause graininess. Once the chips are fully melted and the mixture is smooth, remove from heat immediately before adding Nutella.
Adding the Nutella
Whisk the Nutella in two additions as directed. Adding it all at once can make it harder to incorporate evenly, especially if the chocolate mixture has cooled slightly. The two-step addition ensures a glossy, homogeneous filling.
Cool before cutting
These bars firm up as they cool. Cutting them while still warm will produce messy, soft squares. Allow them to cool completely in the pan—an hour or more at room temperature depending on your kitchen—before slicing.
Year-Round Variations
Because the recipe is built around a few flexible components, you can vary textures and minor flavor notes without changing ingredients. Use old-fashioned oats for a heartier, chewier bar in cooler months; switch to quick-cooking oats for a slightly more uniform, tender crumb when you want a softer bar.
Adjust the browning of the top by watching bake time carefully: 40 minutes yields a softer top and more fudgy center, while toward 45 minutes the crumb topping will take on a light golden color for a bit more crunch. The filling sets as it cools, so for a fudgier interior, lean toward the shorter time and be sure to cool thoroughly.
Recipe Notes & Chef’s Commentary
I treat this recipe like a simple assembly of three elements: crust, filling, and crumble. The crust and crumble are the same mixture, saving time and keeping flavor consistent. Pressing the crust firmly and evenly is worth a minute of extra attention—use the bottom of a measuring cup for an even press.
The filling is essentially a Nutella-enhanced chocolate ganache sweetened further with confectioners’ sugar. I prefer to sift the confectioners’ sugar before adding it if it’s lumpy; the goal is a perfectly smooth filling. Stirring in the sugar off heat keeps the texture glossy and prevents it from cooking into lumps.
When spreading the filling, work quickly but gently. If the filling cools too much before the crumbs are added, the crumbs won’t adhere. Conversely, if the filling is too hot, the crumb topping can sink—so aim for warm but spreadable.
For slicing after cooling, run a sharp knife under hot water, dry it quickly, and make clean, decisive cuts. Wiping the blade between cuts keeps the edges tidy.
Storage Pro Tips
Store the cooled bars in an airtight container at room temperature for up to 2 days. If your kitchen is warm, move the container to the fridge to prevent softening; chilled bars will be firmer but still delicious. Between parchment layers they won’t stick together.
For longer storage, freeze the bars after cutting. Place them single layer on a baking sheet until frozen, then transfer to a sealed container or freezer bag. Thaw in the fridge or at room temperature when ready to serve. These freeze and thaw well because the filling is ganache-like and holds up to temperature changes.
Nutella Fudge Bars Q&A
Q: Can I use margarine or a butter substitute?
A: I recommend real butter for texture and flavor. Margarine or substitutes can change how the crumb sets and may result in a softer or greasier topping.
Q: Will the bars be fudgy or cakey?
A: They’re fudgy in the center because of the chocolate-and-Nutella filling, but the oat crust and crumb add a tender, slightly crumbly contrast. Baking toward the shorter end keeps the interior fudgier.
Q: Can I make this in a smaller pan?
A: The recipe is developed for a 9×13-inch pan. Using a smaller pan will change the depth and baking time; if you must, reduce bake time monitoring closely, but expect a thicker bar that will take longer to set.
Q: Do I need to chill the bars before cutting?
A: Cooling completely at room temperature is usually sufficient. If you want very clean, firm slices, refrigerate for an hour before cutting.
Q: My filling separated—what happened?
A: Separation usually means the chocolate was overheated or the cream temperature didn’t match the chocolate when combined. Use low heat, stir constantly, and whisk in the Nutella while the mixture is smoothly emulsified.
Final Bite
Nutella Fudge Bars hit that sweet spot between easy and indulgent: simple technique, standout flavor. Follow the steps—softened butter, even crumbs, gentle melting, two-stage Nutella addition, and complete cooling—and you’ll end up with neat squares that travel well, slice cleanly, and earn compliments without drama. Make a batch, keep extras in the freezer, and pull them out whenever you need a reliable treat.

Nutella Fudge Bars
Ingredients
Ingredients
- 2 cupsall-purpose flour
- 2 cupsold-fashioned oats or quick-cooking
- 1 1/4 cupspacked light brown sugar
- 1 teaspoonbaking soda
- 1/2 teaspoonsalt
- 1 1/4 cupsbutter ,softened
- 1 cupsemi-sweet chocolate chips
- 1/2 cupheavy cream
- 1 13-ouncejar Nutella, or 1 heaping cup
- 1 cupconfectioners’ sugar
Instructions
Instructions
- Preheat oven to 350°F (175°C) and grease a 9x13-inch pan.
- In a large bowl combine 2 cups all-purpose flour, 2 cups old-fashioned or quick-cooking oats, 1 1/4 cups packed light brown sugar, 1 teaspoon baking soda, and 1/2 teaspoon salt.
- Add 1 1/4 cups softened butter to the dry ingredients and use an electric mixer to blend until the mixture is crumbly and evenly moistened.
- Divide the crumb mixture in half. Press one half firmly and evenly into the bottom of the prepared pan to form the crust. Reserve the other half for the topping.
- For the filling, place 1 cup semi-sweet chocolate chips and 1/2 cup heavy cream in a heavy-bottom saucepan. Heat over low heat, stirring constantly, until the chocolate is completely melted and the mixture is smooth. Remove the pan from the heat.
- Whisk in the Nutella in two additions: add about half the 13-ounce jar first and whisk until incorporated, then add the remaining Nutella and whisk until smooth.
- Whisk in 1 cup confectioners’ sugar until the filling is fully combined and smooth.
- Pour the filling over the pressed crust and spread into an even layer.
- Sprinkle the reserved crumb mixture evenly over the filling.
- Bake for 40 to 45 minutes at 350°F, until the top is set and the edges are lightly golden.
- Remove from the oven and let the bars cool completely in the pan before cutting into squares.
Equipment
- Hand-held electric mixer
- 9x13 inch Baking Dish
- Heavy-bottom saucepan
Notes
Bars can be stored in an airtight container at room temperature for 4 days or in the refrigerator for 1 week.
Nutritional Info is provided as an estimate only and can vary based on brands or products used and measuring techniques.


