
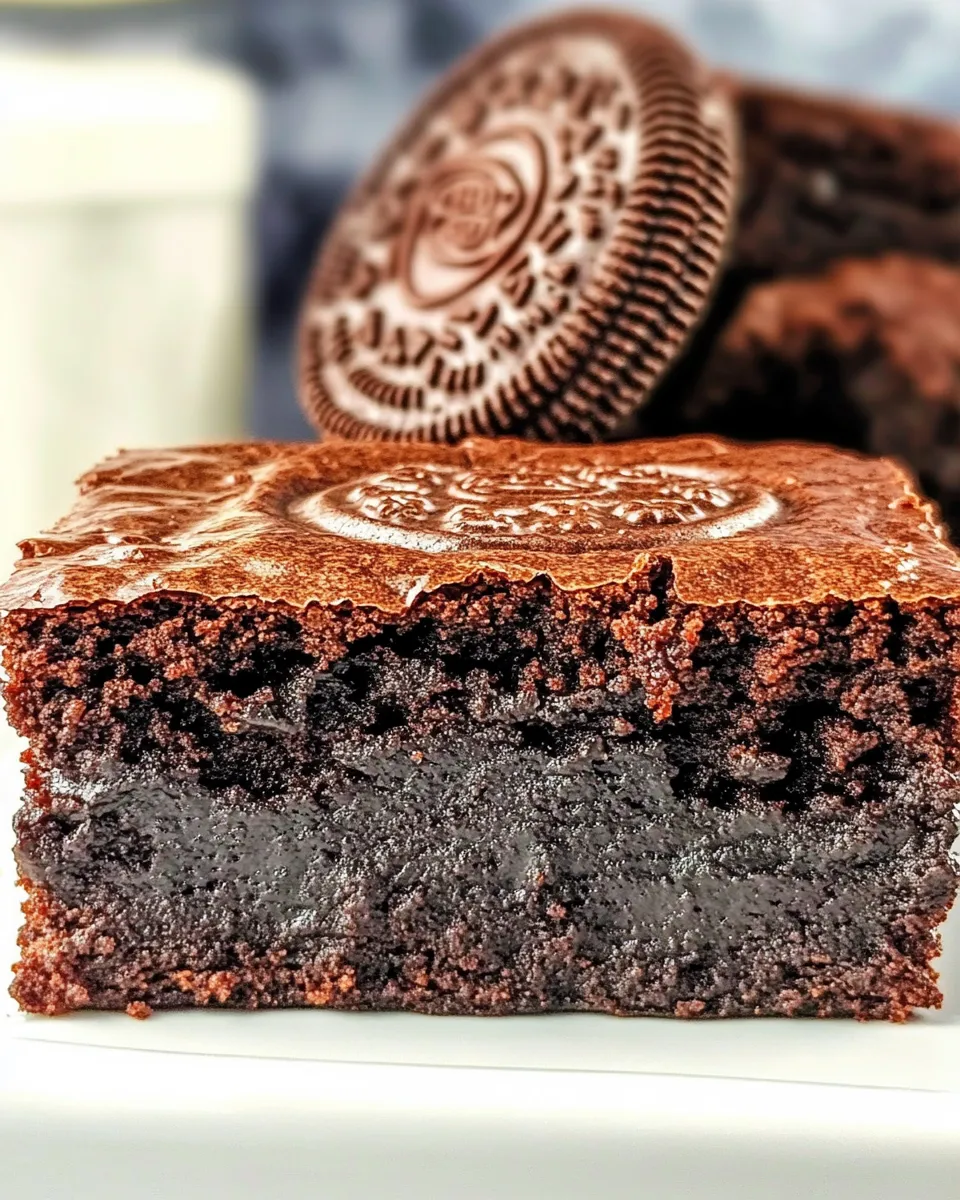
These Oreo Truffle Brownies are the kind of recipe that stops conversation in its tracks. Dense chocolate brownies form the base, a creamy Oreo–cream cheese truffle layer sits in the middle, and a glossy chocolate finish holds it all together. They feel decadent but they’re straightforward to make—no tempering, no complicated fillings, just careful layering and a short chill.
I test recipes with a busy kitchen in mind: clear steps, predictable results, and a few practical tips so you can repeat the good ones. This one is ideal when you want a show-stopping dessert that assembles quickly and keeps well in the fridge. If you’re bringing something to a gathering, these slice neatly and travel without drama when chilled.
If you like deep chocolate, a slight crumbly edge, and a creamy, cookie-packed center, you’ll find these brownies satisfying and reliable. Below I’ve listed everything you need, the exact steps to follow, substitutions that work, and common mistakes to avoid so your pan comes out exactly how you want it.
Shopping List

- ⅔ cup (158 ml) vegetable oil
- 1 ⅓ cups (267 g) granulated sugar
- ⅔ cup (54 g) unsweetened cocoa powder
- 2 large eggs
- 1 teaspoon vanilla extract
- ½ teaspoon salt
- ½ cup (62 g) all-purpose flour
- 25 (286 g) Oreo Cookies
- 4 ounces (113 g) cream cheese
- 1 cup (170 g) chocolate chips
- 1 tablespoon vegetable oil
Ingredients
- ⅔ cup (158 ml) vegetable oil — provides moisture and keeps the brownie dense and fudgy.
- 1 ⅓ cups (267 g) granulated sugar — sweetens and helps create a slightly glossy crust while baking.
- ⅔ cup (54 g) unsweetened cocoa powder — the main chocolate flavor; use Dutch-process or natural as you prefer, same amount.
- 2 large eggs — bind the batter and add structure; room temperature eggs mix more evenly.
- 1 teaspoon vanilla extract — rounds the chocolate flavor and lifts the other ingredients.
- ½ teaspoon salt — balances sweetness and deepens flavor.
- ½ cup (62 g) all-purpose flour — barely enough flour for a dense, fudgy texture; do not overmix.
- 25 (286 g) Oreo Cookies — crushed for the truffle layer; the filling gets mixed with cream cheese.
- 4 ounces (113 g) cream cheese — softens and binds the crushed Oreos into a truffle-like spread.
- 1 cup (170 g) chocolate chips — melts into the glossy top; semi-sweet works well.
- 1 tablespoon vegetable oil — thins the melted chocolate for a smooth pour and shine.
Oreo Truffle Brownies in Steps
- Preheat oven to 350°F (177°C). Line a 9×9-inch pan with foil, leaving some overhang for easy removal, and spray the foil with nonstick cooking spray.
- In a large bowl, combine 2/3 cup vegetable oil, 1 1/3 cups granulated sugar, and 2/3 cup unsweetened cocoa powder. Stir until smooth.
- Add 2 large eggs, 1 teaspoon vanilla extract, and 1/2 teaspoon salt to the bowl. Stir to combine.
- Slowly add 1/2 cup all-purpose flour and mix until just incorporated. The batter will be thick.
- Spread the batter evenly into the prepared 9×9 pan.
- Bake 21–25 minutes, or until the brownies just lose their glossy sheen around the edges and a toothpick inserted 1 inch from the edge comes out clean. Remove from oven and cool completely in the pan.
- While the brownies cool, place all 25 Oreo cookies in a food processor and pulse until finely crushed. Remove and reserve 2 tablespoons of the crumbs for topping.
- Add 4 ounces cream cheese to the remaining crushed Oreos in the food processor and pulse until the mixture is combined and smooth, scraping down the sides as needed.
- Spread the Oreo–cream cheese mixture evenly over the cooled brownies and press gently to compact.
- In a microwave-safe bowl, combine 1 cup chocolate chips and 1 tablespoon vegetable oil. Microwave on high in 30-second increments, stirring between each, until melted and smooth.
- Pour and spread the melted chocolate evenly over the Oreo truffle layer. Sprinkle the reserved 2 tablespoons of Oreo crumbs over the chocolate.
- Chill the pan until the chocolate is set. Use the foil overhang to lift the brownies from the pan and slice into bars.
What You’ll Love About This Recipe

These bars balance textures: a chewy, fudgy brownie base, a soft and creamy Oreo truffle mid-layer, and a smooth chocolate top that snaps cleanly when chilled. It’s a trio of contrasts, but nothing here is fussy. The brownie batter mixes in one bowl, the Oreo layer is pulsed in a food processor, and the chocolate is melted simply in the microwave.
They’re also excellent for sharing. Chill the pan, slice into neat bars, and they hold their shape. The recipe scales well—double it for a crowd and bake in a sheet pan—but the 9×9 format gives reliably even baking and easy portion control.
Ingredient Swaps & Substitutions
- Vegetable oil — can be swapped 1:1 with neutral oil like canola. Avoid strong-flavored oils that will fight the chocolate.
- Granulated sugar — you can substitute light brown sugar for a deeper, molasses-kissed flavor, but the texture will be slightly softer.
- Cocoa powder — Dutch-process or natural both work; if you swap, taste and expect a small shift in acidity and depth.
- All-purpose flour — for a slightly denser result, you could try a 1:1 gluten-free flour blend, but results vary by brand.
- Oreos — any chocolate sandwich cookie works, but flavor and texture of the truffle layer will vary with different cookies.
- Cream cheese — full-fat gives the best texture; reduced-fat versions may make the truffle layer softer and less stable.
- Chocolate chips — use semi-sweet, dark, or milk, depending on sweetness preference. If using a high-cocoa dark chocolate, reduce the salt a touch in the batter if needed.
Essential Tools for Success
- 9×9-inch baking pan lined with foil — the foil overhang is the easiest way to lift the whole slab out for clean slicing.
- Food processor or a sturdy plastic bag and rolling pin — required for finely crushing Oreos and combining with cream cheese.
- Microwave-safe bowl — for melting the chocolate chips with oil; a double boiler will also work.
- Spatula and offset spatula — for spreading the batter, the truffle layer, and the melted chocolate smoothly.
- Toothpick — to check the brownie doneness near the edge as described in the steps.
Frequent Missteps to Avoid
- Overbaking the brownies — watch for the glossy sheen to go dull at the edges; that visual cue matters more than a timer. Overbaked brownies become cakey and dry.
- Mixing flour too long — the batter needs just enough mixing to incorporate flour. Overmixing adds air and leads to a lighter, less fudgy brownie.
- Using cold cream cheese — it’s harder to incorporate and you’ll end up with streaks. Let the cream cheese sit at room temperature for 20–30 minutes if possible.
- Skipping the reserved Oreo crumbs — that little sprinkle on top adds contrast and signals what’s inside; it’s worth reserving the 2 tablespoons.
- Slicing while the chocolate is warm — cutting too soon gives messy edges. Chill until fully set for clean slices.
Better-for-You Options
If you want a lighter take, you can make a few adjustments while understanding the trade-offs. Replacing half the vegetable oil with applesauce will reduce saturated fat but will also change the crumb and chew. Using a dark chocolate with higher cocoa content reduces sugar in the topping. Swapping brown sugar for part of the white sugar adds moisture and a slightly richer flavor.
Remember: these changes alter texture. The original is designed for fudgy richness; “healthier” versions will be different but still tasty.
Insider Tips
Assembly and texture
Let the brownies cool completely before adding the Oreo–cream cheese layer. If the brownie is even slightly warm, the cream cheese mixture can melt and become runny. I like to cool on the counter for a half hour, then put the pan in the fridge while I crush cookies and make the truffle mixture.
Chocolate finish
For the smoothest, shiniest top, stir the chocolate often as it melts and add the tablespoon of oil at the end. That small amount is enough to loosen the chips and give you a glossy sheen. If your melted chocolate seems thick, let it sit for a minute off heat and stir; residual warmth often levels it out.
Slicing
Chill the set pan well, then run a sharp knife under hot water, dry it, and make a clean cut. Repeat warming the knife between cuts for the neatest bars.
Storage & Reheat Guide
Store the brownies in an airtight container in the refrigerator for up to 5 days. Chilling keeps the truffle center firm and the top shiny. For longer storage, you can freeze the uncut slab wrapped tightly in plastic and foil for up to 2 months. Thaw overnight in the refrigerator before slicing.
If you prefer the texture a little softer, let slices sit at room temperature for 10–20 minutes before serving. I don’t recommend microwaving slices; the filling can get gooey and the chocolate dulls rather than improves.
Reader Q&A
- Q: Can I make the Oreo layer ahead? — Yes. You can prepare the crushed Oreos and cream cheese mixture a day ahead, covered tightly in the fridge, then spread over the cooled brownies when ready.
- Q: Can I use homemade sandwich cookies? — Yes, any chocolate sandwich cookie can be used. Keep in mind different cookies vary in sweetness and crunch; you may want to reserve a few extra crumbs if your cookies are less crumbly.
- Q: My chocolate got grainy—what happened? — Overheating chips, especially in the microwave, can cause graininess. Heat in short bursts, stir well, and stop while a few bits remain; stirring will finish the melt from residual heat.
See You at the Table
If you make these Oreo Truffle Brownies, give them the full chill time and slice with a warmed knife. They’re perfect for potlucks, birthdays, or any time you want a reliable, crowd-pleasing dessert. Leave a note about how you changed it—did you try a different cookie or chocolate? I love hearing what works for home kitchens, and small tweaks often lead to even better versions.
Happy baking—keep it simple, follow the steps, and enjoy every bite.
Oreo Truffle Brownies
Ingredients
Ingredients
- 2/3 cup 158 ml vegetable oil
- 1 1/3 cups 267 g granulated sugar
- 2/3 cup 54 g unsweetened cocoa powder
- 2 large eggs
- 1 teaspoonvanilla extract
- 1/2 teaspoonsalt
- 1/2 cup 62 g all-purpose flour
- 25 286 g Oreo Cookies
- 4 ounces 113 g cream cheese
- 1 cup 170 g chocolate chips
- 1 tablespoonvegetable oil
Instructions
Instructions
- Preheat oven to 350°F (177°C). Line a 9×9-inch pan with foil, leaving some overhang for easy removal, and spray the foil with nonstick cooking spray.
- In a large bowl, combine 2/3 cup vegetable oil, 1 1/3 cups granulated sugar, and 2/3 cup unsweetened cocoa powder. Stir until smooth.
- Add 2 large eggs, 1 teaspoon vanilla extract, and 1/2 teaspoon salt to the bowl. Stir to combine.
- Slowly add 1/2 cup all-purpose flour and mix until just incorporated. The batter will be thick.
- Spread the batter evenly into the prepared 9×9 pan.
- Bake 21–25 minutes, or until the brownies just lose their glossy sheen around the edges and a toothpick inserted 1 inch from the edge comes out clean. Remove from oven and cool completely in the pan.
- While the brownies cool, place all 25 Oreo cookies in a food processor and pulse until finely crushed. Remove and reserve 2 tablespoons of the crumbs for topping.
- Add 4 ounces cream cheese to the remaining crushed Oreos in the food processor and pulse until the mixture is combined and smooth, scraping down the sides as needed.
- Spread the Oreo–cream cheese mixture evenly over the cooled brownies and press gently to compact.
- In a microwave-safe bowl, combine 1 cup chocolate chips and 1 tablespoon vegetable oil. Microwave on high in 30-second increments, stirring between each, until melted and smooth.
- Pour and spread the melted chocolate evenly over the Oreo truffle layer. Sprinkle the reserved 2 tablespoons of Oreo crumbs over the chocolate.
- Chill the pan until the chocolate is set. Use the foil overhang to lift the brownies from the pan and slice into bars.
Equipment
- 9x9-inch pan
- Foil
- Nonstick Cooking Spray
- Large Bowl
- Spoon
- Food Processor
- Microwave-safe Bowl


