
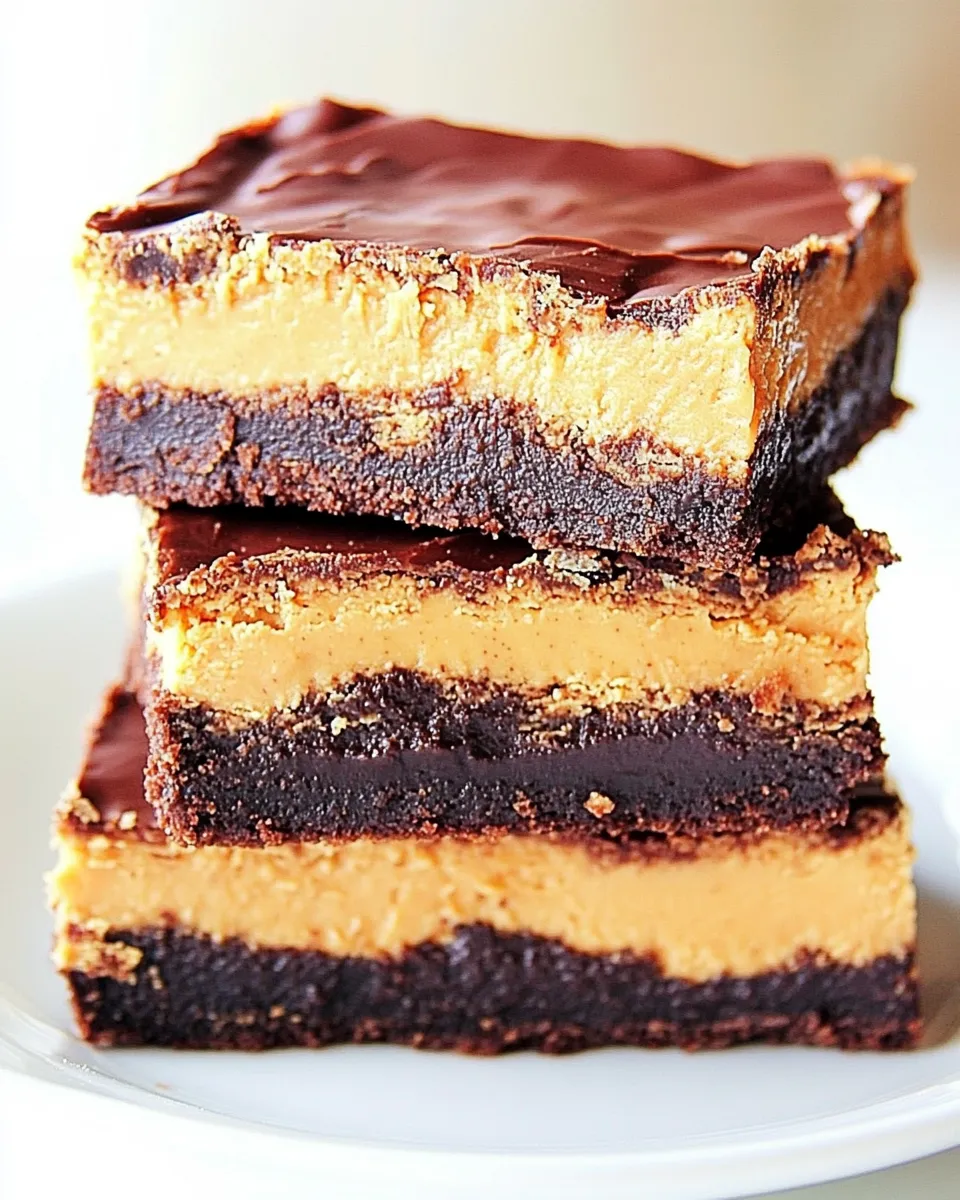
These bars combine everything I reach for when I want something seriously chocolatey and a little bit nostalgic: a fudgy brownie layer, a peanut-buttery middle with Rice Krispies for snap, and a glossy chocolate top. They’re built in a food processor, pressed into a pan, chilled, and cut into tidy squares — no baking required for the middle or top, and just a tiny bit of melting for the ganache-like finish. Practical, quick, and very satisfying.
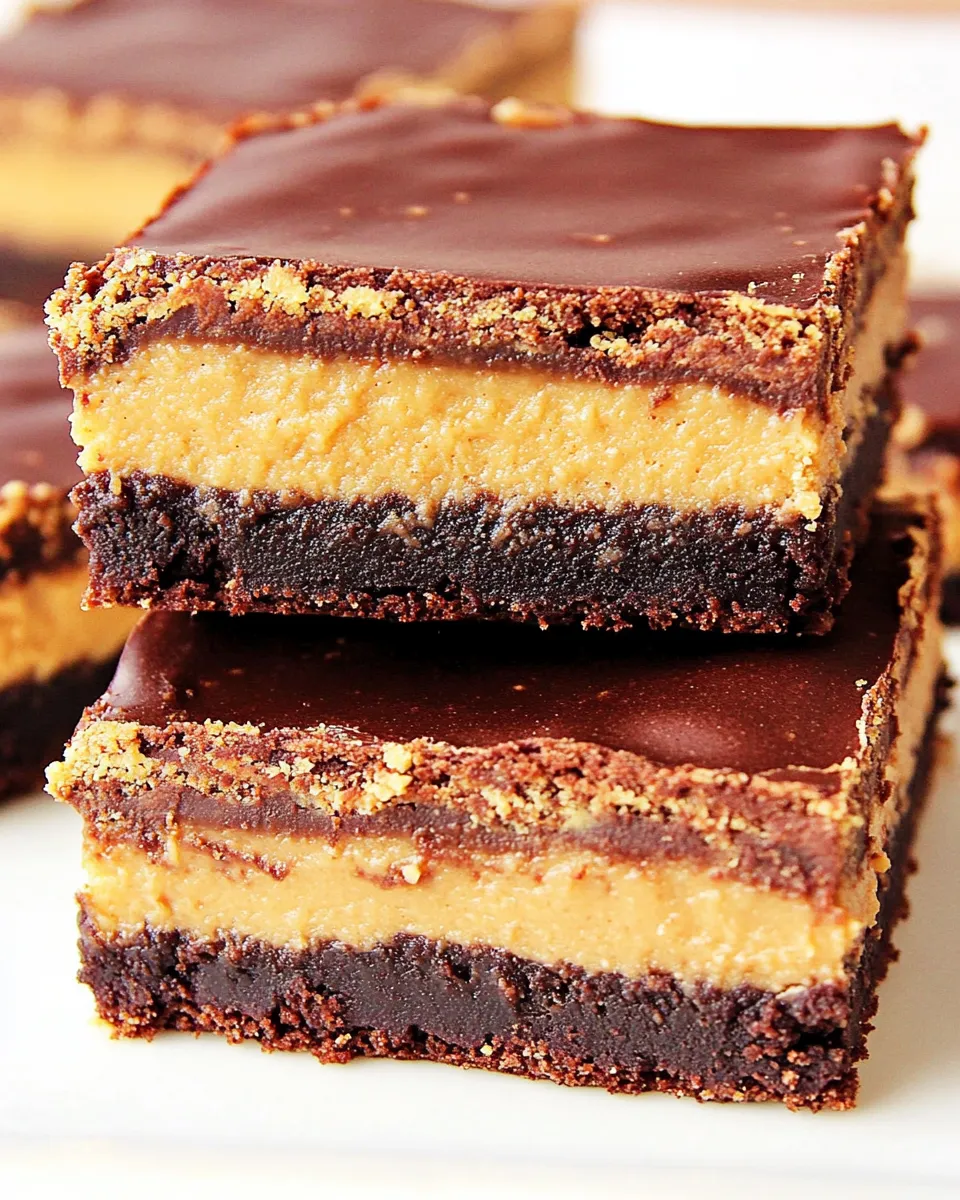
I like keeping this recipe in the fridge and pulling a square when cravings hit. The texture is layered and deliberate: dense brownie, creamy peanut butter with crunch, and a firm chocolate cap. It’s the kind of bar that transports well to potlucks and keeps its shape in a lunchbox.
Below you’ll find the exact ingredients and the method I follow every time. I’ve also added notes on swaps, gear, and storage so you can make these your own without losing what makes them work.
What’s in the Bowl
Ingredients
- ⅜ cup unsweetened cocoa powder — provides the deep chocolate flavor for the brownie base.
- ½ cup granulated sugar — balances the cocoa and helps the brownie layer hold together.
- ¼ cup packed light brown sugar — adds a hint of molasses and chew to the brownie layer.
- dash of salt — brightens the chocolate and balances sweetness.
- ⅜ cup all-purpose flour — gives structure to the brownie dough so it presses into a solid base.
- 1 teaspoon vanilla extract — adds warmth and rounds the chocolate notes in the brownie layer.
- 6 tablespoons unsalted butter, melted — binds the brownie ingredients and delivers richness.
- 1 cup creamy peanut butter — the star of the middle layer; choose a smooth variety for an even texture.
- 1 cup Rice Krispies cereal — brings light crunch and contrast to the creamy peanut butter layer.
- 1 cup powdered sugar — sweetens and thickens the peanut butter layer so it holds its shape.
- ½ teaspoon vanilla extract — lifts the peanut butter layer with a subtle aromatic note.
- 3 tablespoons unsalted butter — adds silkiness to the peanut butter mixture.
- 1 cup semi-sweet chocolate chips or chocolate candy coating — melted to form the firm chocolate top.
Make Peanut Butter Brownie Truffle Bars: A Simple Method
- Line an 8″ square baking dish with parchment paper or aluminum foil, leaving an overhang on two sides for easy removal. Set aside.
- In a food processor, add the ⅜ cup unsweetened cocoa powder, ½ cup granulated sugar, ¼ cup packed light brown sugar, a dash of salt, ⅜ cup all-purpose flour, and 1 teaspoon vanilla extract. Pulse a few times to combine.
- With the food processor running, drizzle in the 6 tablespoons melted unsalted butter until the mixture comes together and forms a cohesive dough ball.
- Scoop the brownie dough into the prepared pan and press it evenly into the bottom to form a compact layer. Do not wash the food processor bowl.
- In the same food processor bowl, add 1 cup creamy peanut butter, 1 cup powdered sugar, ½ teaspoon vanilla extract, and 3 tablespoons unsalted butter. Process until the mixture is smooth and starts to hold together.
- Add the 1 cup Rice Krispies cereal to the peanut butter mixture and pulse just until the cereal is evenly distributed but still retains some crunch.
- Scoop the peanut butter layer onto the pressed brownie layer and press it down evenly and smoothly with the back of a spoon or an offset spatula.
- Melt the 1 cup semi-sweet chocolate chips (or chocolate candy coating) in a heatproof bowl set over simmering water (double boiler), stirring until smooth. Remove from heat and let cool 1–2 minutes.
- Pour the melted chocolate over the peanut butter layer and spread it into an even layer with an offset spatula or the back of a spoon.
- Chill the bars in the refrigerator until the chocolate is set, at least 2 hours.
- Use the parchment/foil overhang to lift the bars from the pan, cut into squares, and serve. Store leftovers refrigerated.
What You’ll Love About This Recipe
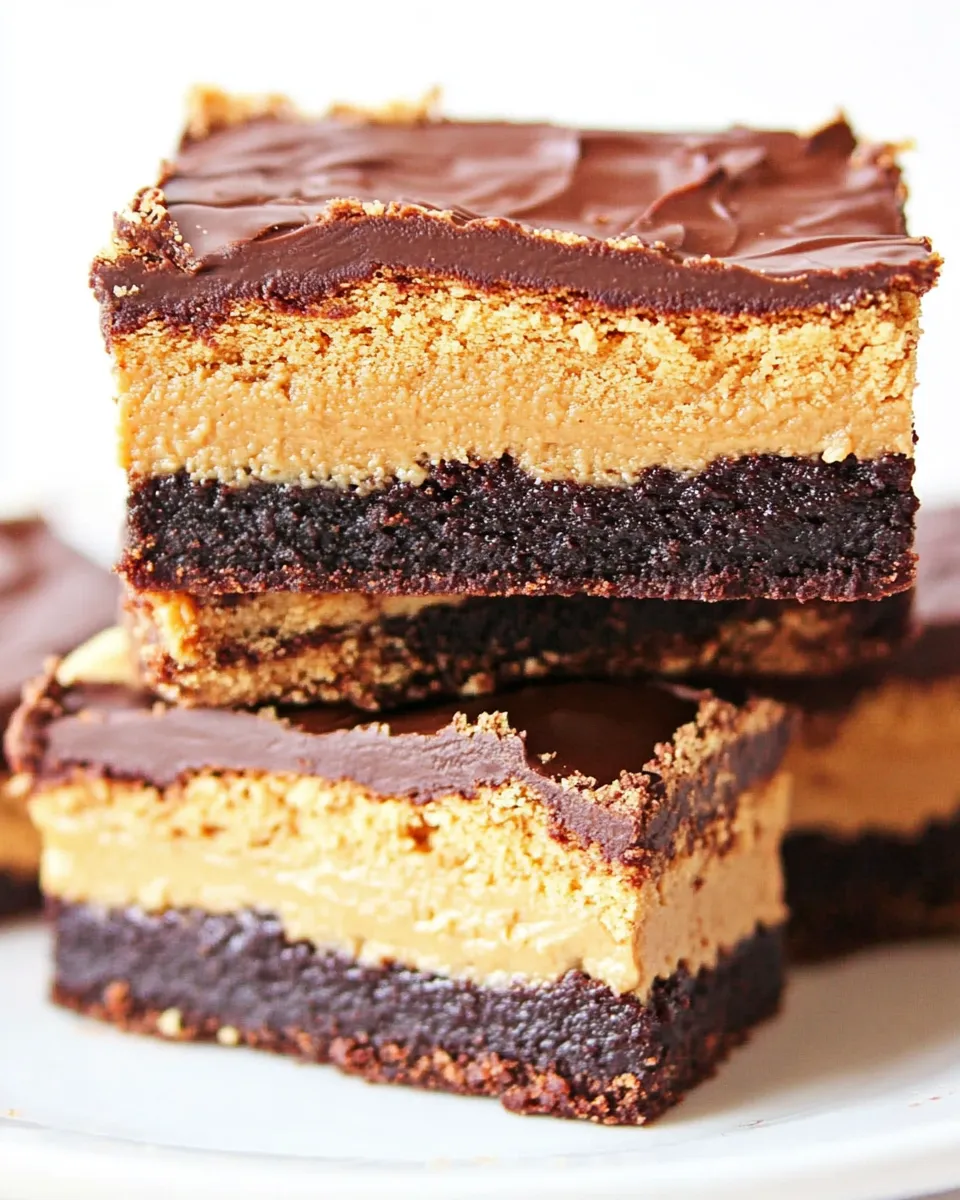
Every bite is layered: the brownie base gives a concentrated chocolate hit, the peanut butter middle is creamy but not limp, and the Rice Krispies add a nostalgic, satisfying crunch. The top chocolate seals everything together and gives a clean bite when you cut the squares.
There’s very little hands-on time. The food processor does most of the work, and you avoid long baking steps or complicated tempering. It’s a great make-ahead treat — chill overnight and slice right before serving. These bars also travel well for picnics, parties, and lunchboxes.
Substitutions by Category
Chocolate & Coating
– If you don’t have semi-sweet chocolate chips, chocolate candy coating works as noted. Candy coating melts smoother and firms up faster; real chocolate gives richer flavor. Avoid low-quality chips that contain vegetable oils if you want the best texture.
Nut Butter
– Creamy peanut butter is specified for texture. If you prefer, use natural smooth peanut butter, but expect a slightly looser middle — you may need to press it more firmly. Do not swap in chunky peanut butter unless you want extra crunch in the filling.
Cereal & Crunch
– Rice Krispies deliver a light snap. If you need a gluten-free option, use a certified gluten-free puffed rice cereal with a similar texture. Avoid granola; it’s heavier and will weigh down the layer.
Sugars and Sweeteners
– The recipe uses both granulated and brown sugar for the brownie layer and powdered sugar for the filling. Powdered sugar is important here because it dissolves into the peanut butter and stabilizes the layer; substituting with granulated sugar will make the filling gritty.
Gear Checklist
- 8″ square baking dish — the size keeps the bars thick and tidy.
- Food processor — required for quick, even mixing and forming the dough and filling.
- Heatproof bowl and saucepan for a double boiler — to melt the chocolate gently.
- Parchment paper or aluminum foil — makes lifting the bars simple.
- Offset spatula or the back of a spoon — helps smooth each layer evenly.
- Sharp knife — for clean slicing after chilling.
- Refrigerator space — chilling for at least 2 hours is necessary for setting.
Steer Clear of These
– Don’t skip the parchment/foil overhang. Trying to cut bars directly in the pan makes wedges and uneven edges. The overhang guarantees clean removal.
– Don’t over-process the Rice Krispies into dust. The recipe asks to pulse just until evenly distributed — you want pockets of crispness.
– Avoid overheating the chocolate. If it gets too hot it can go grainy or seize; melt gently over simmering water and remove when it’s smooth but still warm.
– Don’t press the brownie layer too thin. The brownie base needs enough substance to balance the peanut butter layer; press evenly but keep it compact and substantial.
Spring to Winter: Ideas
Spring: Cut into smaller squares and serve with fresh strawberries or a simple berry compote. The fruity acidity pairs nicely with the richness.
Summer: Keep chilled and serve alongside cold brew coffee or an espresso affogato (a small scoop of vanilla ice cream with a shot of espresso poured over a bar). The contrast of cold and rich works beautifully.
Autumn: Add a sprinkle of flaky sea salt on the melted chocolate and serve with warm apple slices for dipping — salt deepens the chocolate and peanut butter notes.
Winter: Pair a dense square with a mug of hot cocoa or mulled wine for a cozy dessert. If you like, add a dusting of cocoa over the top for a festive look.
Behind-the-Scenes Notes
Why the food processor? It compresses the dry ingredients into a cohesive dough without overworking. The melted butter binds the cocoa, sugars, and flour into a dough ball that’s easy to press. Leaving the food processor bowl unwashed between the brownie and peanut butter layers saves time and keeps the textures compatible.
Rice Krispies are added last and pulsed briefly to protect the crisp texture. If they’re pulverized, the filling loses its character. The peanut butter and powdered sugar mixture holds thanks to the powdered sugar absorbing oils and moisture — that’s why it’s important to use powdered sugar rather than granulated in the center layer.
Chilling sets the chocolate top and firms the bars for a clean slice. Cutting too early will make the squares messy and sticky. Give them at least two hours to chill, or overnight if you can.
Store, Freeze & Reheat
Store: Keep leftovers refrigerated in an airtight container for up to 5 days. The chocolate stays firm in the fridge and the layers keep their contrast.
Freeze: Wrap individual squares in plastic wrap and place in a freezer-safe bag or container for up to 2 months. Thaw in the refrigerator overnight before serving — this preserves texture better than thawing at room temperature.
Reheat: These bars are best served chilled or at cool room temperature. If you prefer a slightly softer middle, hold a bar in your hand for a few minutes before eating; avoid microwaving as it will melt the chocolate and soften the layers unevenly.
FAQ
Can I use natural peanut butter? Yes. Natural peanut butter will work, but it can be looser. If the filling seems too soft, press it more firmly in the pan and chill longer before adding the chocolate.
Do I have to use a double boiler? Using a double boiler is the safest way to melt the chocolate smoothly. If you melt chocolate in the microwave, heat in short 15–20 second bursts, stirring between each, to avoid overheating.
Can I make these nut-free? Swap the peanut butter for a seed butter like sunflower butter and use a certified allergy-safe cereal. Note: flavor and texture will change slightly.
What’s the best way to get clean cuts? Chill thoroughly, then run a sharp knife under hot water, dry it, and cut in a single smooth stroke. Wipe the knife between cuts for the cleanest edges.
Can I double the recipe? Yes, scale up and use a larger pan. Keep layer thickness similar for consistent texture.
Final Bite
If you like desserts that hit chocolate and peanut butter with texture and attitude, these Peanut Butter Brownie Truffle Bars are an easy, reliable go-to. They come together quickly, store well, and give you that perfect balance of creamy, crunchy, and chocolatey in every square. Make them for a weeknight treat or a crowd — they’ll disappear fast.
When you try them, keep a note of any small tweaks (a pinch of flaky salt, a swap of cereal) so the recipe becomes yours. And then make them again — they’re that good.
Peanut Butter Brownie Truffle Bars Recipe
Ingredients
Ingredients
- 3/8 cunsweetened cocoa powder
- 1/2 cgranulated sugar
- 1/4 cpacked light brown sugar
- dash of salt
- 3/8 call-purpose flour
- 1 teaspoonvanilla extract
- 6 tablespoonunsalted buttermelted
- 1 ccreamy peanut butter
- 1 crice krispies cereal
- 1 cpowdered sugar
- 1/2 teaspoonvanilla extract
- 3 tablespoonunsalted butter
- 1 csemi-sweet chocolate chips or chocolate candy coating
Instructions
Instructions
- Line an 8" square baking dish with parchment paper or aluminum foil, leaving an overhang on two sides for easy removal. Set aside.
- In a food processor, add the ⅜ cup unsweetened cocoa powder, ½ cup granulated sugar, ¼ cup packed light brown sugar, a dash of salt, ⅜ cup all-purpose flour, and 1 teaspoon vanilla extract. Pulse a few times to combine.
- With the food processor running, drizzle in the 6 tablespoons melted unsalted butter until the mixture comes together and forms a cohesive dough ball.
- Scoop the brownie dough into the prepared pan and press it evenly into the bottom to form a compact layer. Do not wash the food processor bowl.
- In the same food processor bowl, add 1 cup creamy peanut butter, 1 cup powdered sugar, ½ teaspoon vanilla extract, and 3 tablespoons unsalted butter. Process until the mixture is smooth and starts to hold together.
- Add the 1 cup Rice Krispies cereal to the peanut butter mixture and pulse just until the cereal is evenly distributed but still retains some crunch.
- Scoop the peanut butter layer onto the pressed brownie layer and press it down evenly and smoothly with the back of a spoon or an offset spatula.
- Melt the 1 cup semi-sweet chocolate chips (or chocolate candy coating) in a heatproof bowl set over simmering water (double boiler), stirring until smooth. Remove from heat and let cool 1–2 minutes.
- Pour the melted chocolate over the peanut butter layer and spread it into an even layer with an offset spatula or the back of a spoon.
- Chill the bars in the refrigerator until the chocolate is set, at least 2 hours.
- Use the parchment/foil overhang to lift the bars from the pan, cut into squares, and serve. Store leftovers refrigerated.
Equipment
- 8" square baking dish
- Parchment paper or aluminum foil
- Food Processor
- heatproof bowl (for double boiler)
- offset spatula or spoon


