
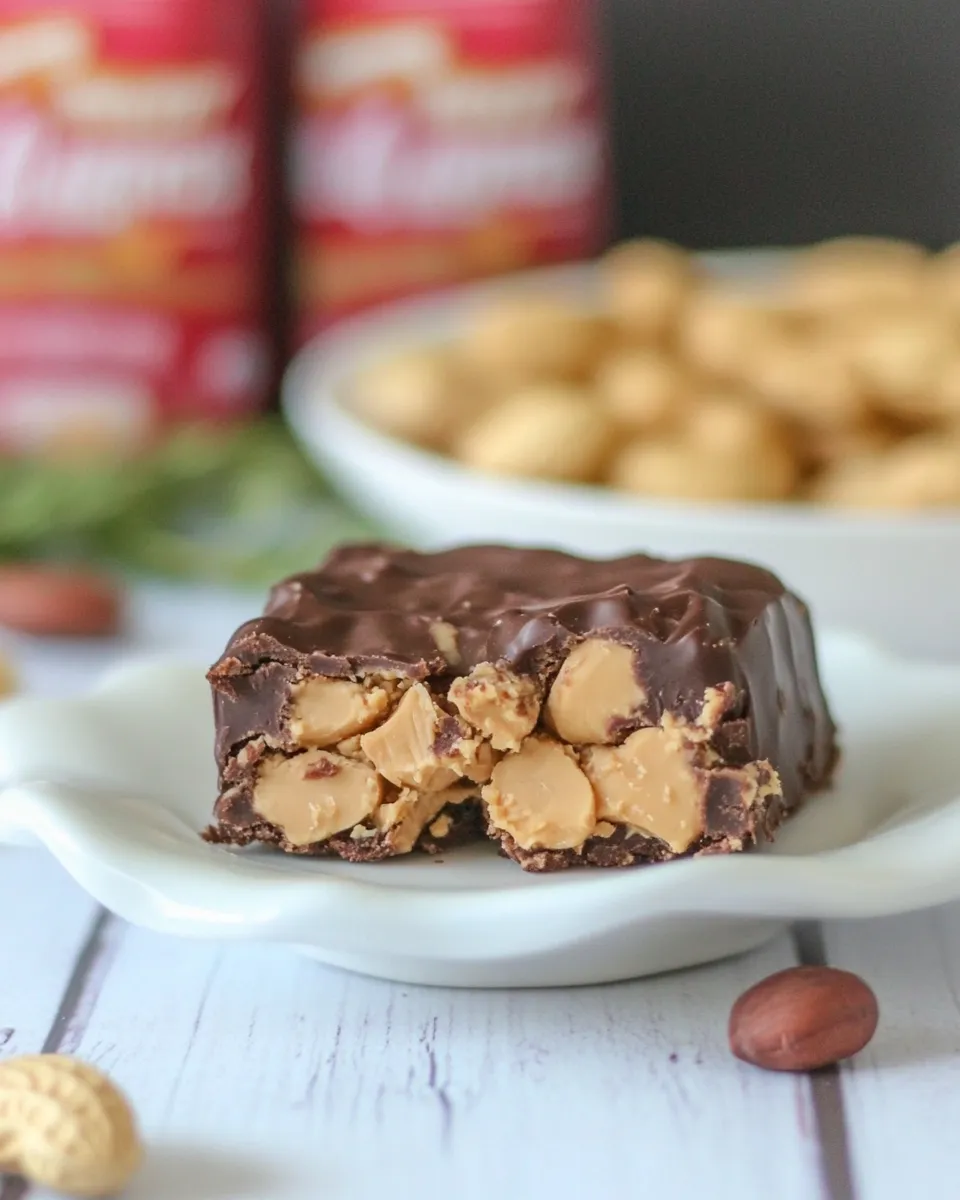
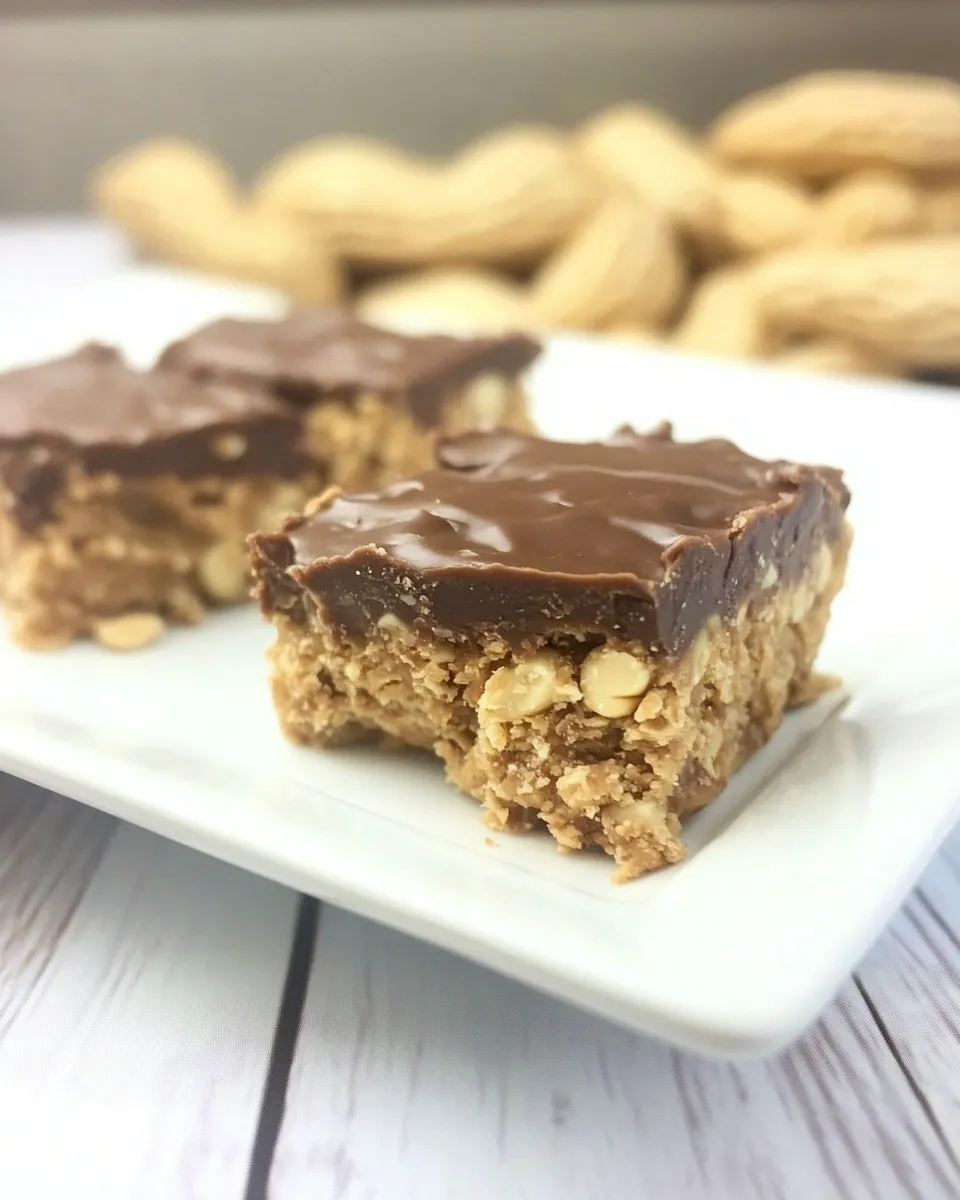
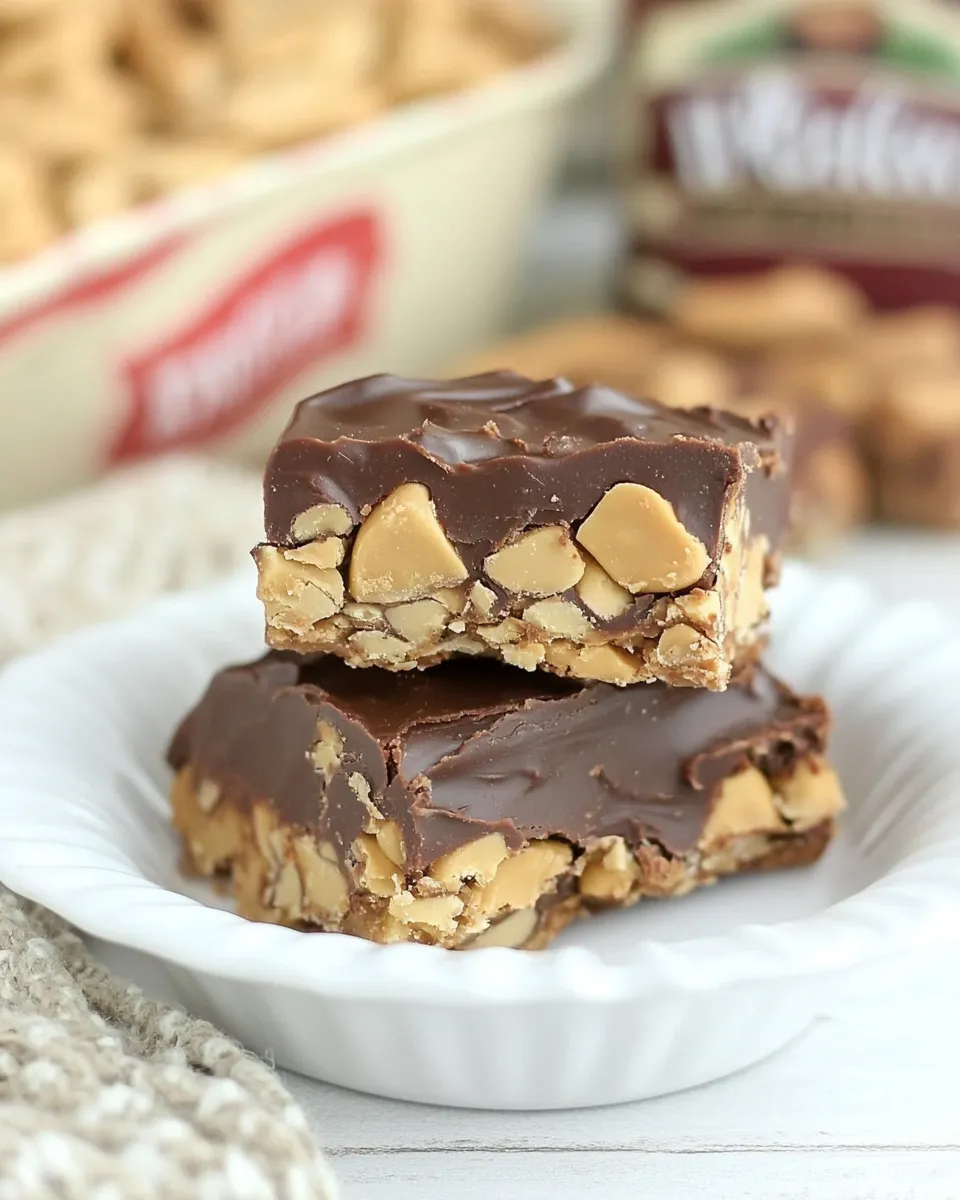
If you’re a fan of sweet, rich, and creamy desserts, then Peanut Butter Mountain Bars are about to become your new favorite treat! These bars combine the irresistible flavors of peanut butter and chocolate, creating a dessert that is both indulgent and satisfying. With a few simple ingredients and easy steps, you can whip up a batch that’s perfect for sharing at parties, potlucks, or simply enjoying at home. Let’s dive into what makes these bars so special!
Why You’ll Love This Recipe
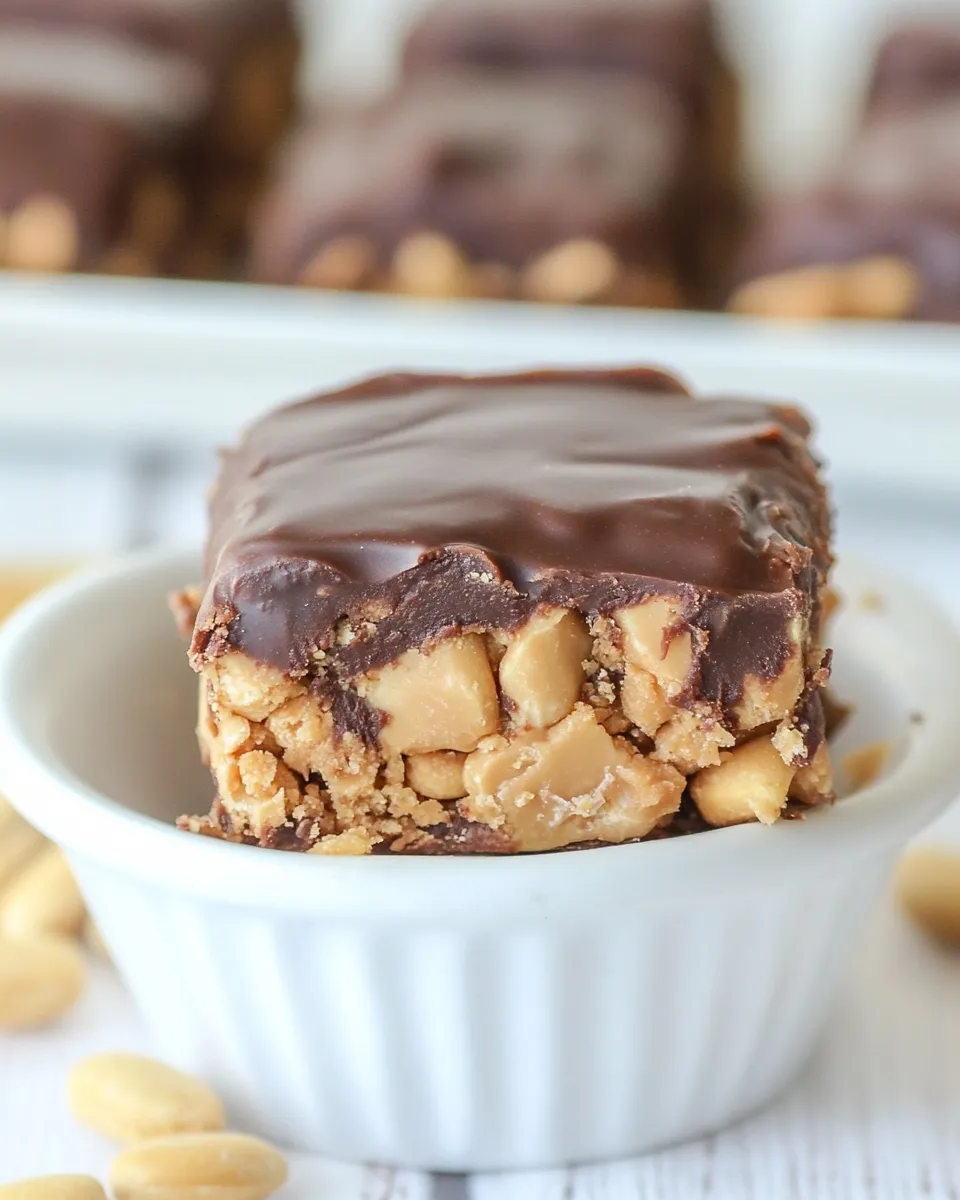
Peanut Butter Mountain Bars are not only delicious but also incredibly easy to make. The creamy peanut butter base is balanced perfectly with a smooth chocolate topping, making for a delightful combination that will have you reaching for more. These bars are perfect for satisfying your sweet tooth without too much fuss in the kitchen. Plus, they can be made ahead of time and stored, making them a great option for meal prepping or last-minute gatherings.
Ingredient Checklist
To make your own Peanut Butter Mountain Bars, you will need the following ingredients:
- 3/4 cup creamy peanut butter – This will form the rich base of our bars.
- 2 tablespoons butter, melted – Adds a touch of richness.
- 1 teaspoon vanilla extract – Enhances the flavor profile.
- 1 cup powdered sugar – Sweetness that binds everything together.
- 16 ounces chocolate Candiquik or Almond Bark or Candy Melts – This will create a luscious chocolate layer.
- 1/2 cup finely chopped peanuts – For added crunch and flavor.
Prep & Cook Tools
Before you get started, gather the following tools to make the process smooth:
- Mixing bowls – For combining the ingredients.
- Spatula – To mix and spread the peanut butter mixture.
- 9×9-inch baking pan – To set your bars in; line it with parchment paper for easy removal.
- Microwave-safe bowl – For melting the chocolate.
- Knife or pizza cutter – To cut the bars into squares once they are set.
Make Peanut Butter Mountain Bars: A Simple Method
Creating your delicious Peanut Butter Mountain Bars is a breeze! Follow these steps:
Step 1: Prepare the Baking Pan
Start by lining your 9×9-inch baking pan with parchment paper, leaving some overhang on the sides for easy removal later. This will help you lift the bars out easily once they have cooled.
Step 2: Make the Peanut Butter Base
In a mixing bowl, combine the creamy peanut butter, melted butter, vanilla extract, and powdered sugar. Use a spatula to mix until the ingredients are well-combined and form a thick, smooth mixture.
Step 3: Spread the Peanut Butter Mixture
Transfer the peanut butter mixture to the prepared baking pan. Use the spatula to spread it evenly across the bottom. Press it down lightly to ensure it adheres to the pan.
Step 4: Melt the Chocolate
In a microwave-safe bowl, melt the chocolate Candiquik or Almond Bark according to the package instructions. Stir every 30 seconds until smooth and fully melted.
Step 5: Add the Chocolate Layer
Once melted, pour the chocolate over the peanut butter layer in the baking pan. Use a spatula to spread it evenly, ensuring complete coverage.
Step 6: Sprinkle with Chopped Peanuts
Before the chocolate sets, sprinkle the finely chopped peanuts evenly over the top. This will add an extra crunch to your bars.
Step 7: Chill and Set
Place the baking pan in the refrigerator and let the bars chill for at least 2 hours or until the chocolate is fully set.
Step 8: Cut and Serve
Once the chocolate is firm, lift the bars out of the pan using the parchment paper overhang. Place them on a cutting board and cut them into squares. Enjoy your delicious Peanut Butter Mountain Bars!
Better-for-You Options
If you’re looking to lighten up these bars or make them a bit healthier, consider the following options:
- Use natural peanut butter with no added sugar or oils for a healthier alternative.
- Substitute coconut oil for butter for a dairy-free version.
- Replace powdered sugar with a sugar substitute like powdered erythritol for a low-sugar treat.
- Incorporate ground flaxseed or chia seeds for added nutrition.
Avoid These Mistakes
To ensure your Peanut Butter Mountain Bars turn out perfectly, be mindful of these common mistakes:
- Not letting the chocolate cool slightly before pouring it over the peanut butter layer can cause it to mix, resulting in a marbled appearance.
- Skipping the refrigeration step can lead to bars that are too soft and difficult to cut.
- Using chunky peanut butter instead of creamy can affect the texture of the bars.
- Not measuring ingredients accurately can lead to an imbalance in flavor and texture.
Cooling, Storing & Rewarming
Once your Peanut Butter Mountain Bars are cut and ready to enjoy, here’s how to store and reheat them:
- Store the bars in an airtight container in the refrigerator for up to one week.
- If you want to keep them longer, they can be frozen for up to 3 months. Just make sure to wrap them well in plastic wrap before placing them in a freezer bag.
- To reheat, simply let them sit at room temperature for a few minutes, or microwave for a few seconds to soften slightly.
Quick Questions
Can I use crunchy peanut butter instead of creamy?
While you can use crunchy peanut butter, it will change the texture of the bars. Creamy peanut butter is recommended for a smooth consistency.
How thick should the layers be?
The peanut butter layer should be about 1/2 inch thick, while the chocolate layer can be slightly thinner, around 1/4 inch, for better balance.
Can I substitute the chocolate for something else?
Yes! You can use dark chocolate, white chocolate, or even a dairy-free chocolate option depending on your preference.
What if I don’t have powdered sugar?
If you don’t have powdered sugar, you can make your own by blending granulated sugar in a blender until fine, though this may slightly alter the texture.
If you enjoyed making , try these delicious recipes next:
Before You Go
Thank you for joining me on this sweet journey to create Peanut Butter Mountain Bars. These bars are sure to impress with their rich flavors and creamy textures. Whether you’re treating yourself or sharing with friends, they are bound to be a hit. Don’t forget to share your creations and tag your friends who would love to try these out! Happy baking!

Peanut Butter Mountain Bars
Ingredients
- 3/4 cup creamy peanut butter
- 2 tablespoons butter melted
- 1 teaspoon vanilla extract
- 1 cup powdered sugar
- 16 ounces chocolate Candiquik or Almond Bark or Candy Melts
- 1/2 cup finely chopped peanuts
Instructions
- Start by lining your 9x9-inch baking pan with parchment paper, leaving some overhang on the sides for easy removal later.
- In a mixing bowl, combine the creamy peanut butter, melted butter, vanilla extract, and powdered sugar. Mix until well-combined.
- Transfer the peanut butter mixture to the prepared baking pan and spread it evenly across the bottom.
- In a microwave-safe bowl, melt the chocolate Candiquik or Almond Bark according to the package instructions, stirring every 30 seconds until smooth.
- Pour the melted chocolate over the peanut butter layer in the baking pan and spread it evenly.
- Sprinkle the finely chopped peanuts evenly over the top before the chocolate sets.
- Place the baking pan in the refrigerator and let the bars chill for at least 2 hours or until the chocolate is fully set.
- Once the chocolate is firm, lift the bars out of the pan using the parchment paper overhang and cut them into squares.
Equipment
- Mixing bowls
- Spatula
- 9x9-inch Baking Pan
- Microwave-safe Bowl
- Knife or pizza cutter
Notes
- Store the bars in an airtight container in the refrigerator for up to one week.
- For longer storage, freeze them for up to 3 months, wrapped well.
- Let them sit at room temperature before serving or microwave for a few seconds to soften.


