
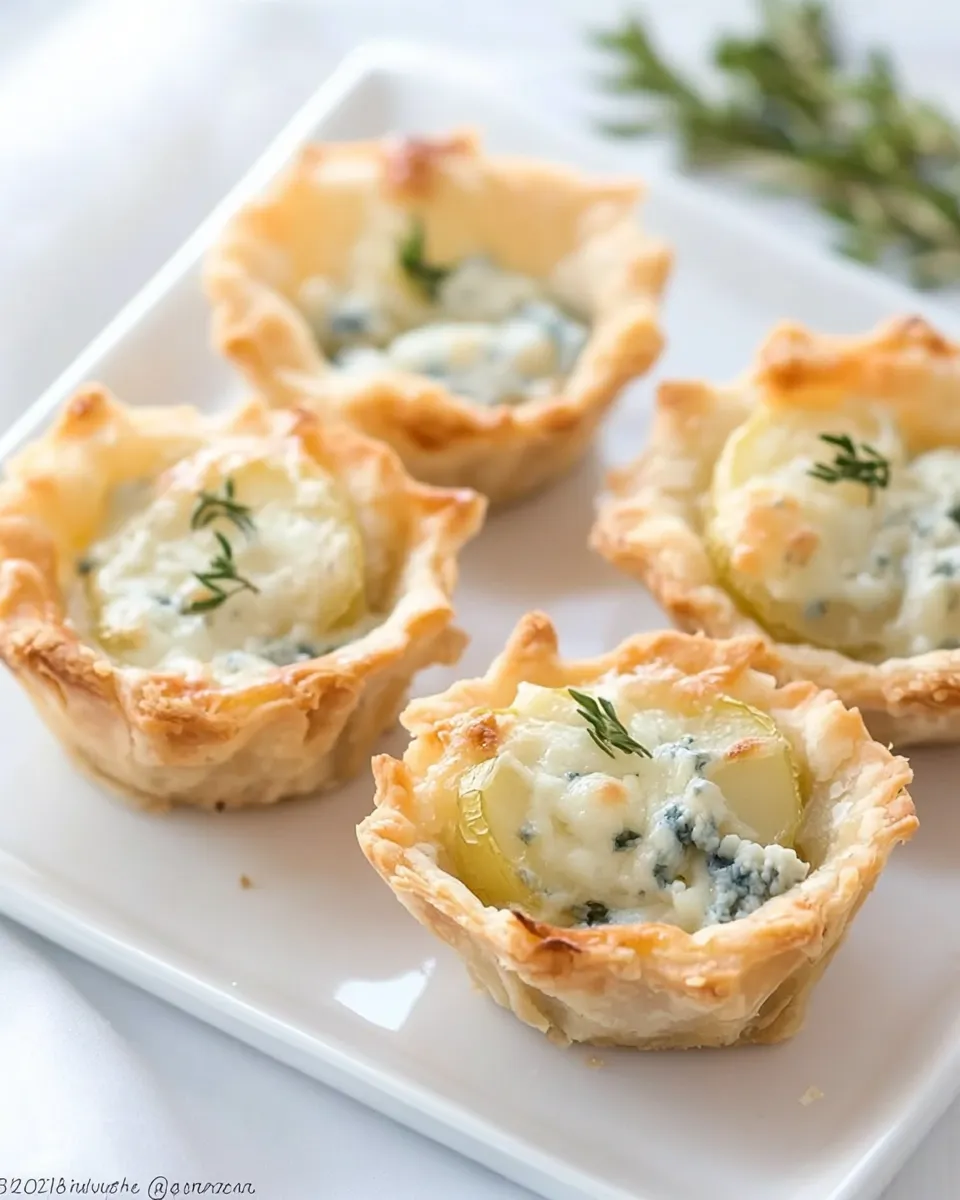
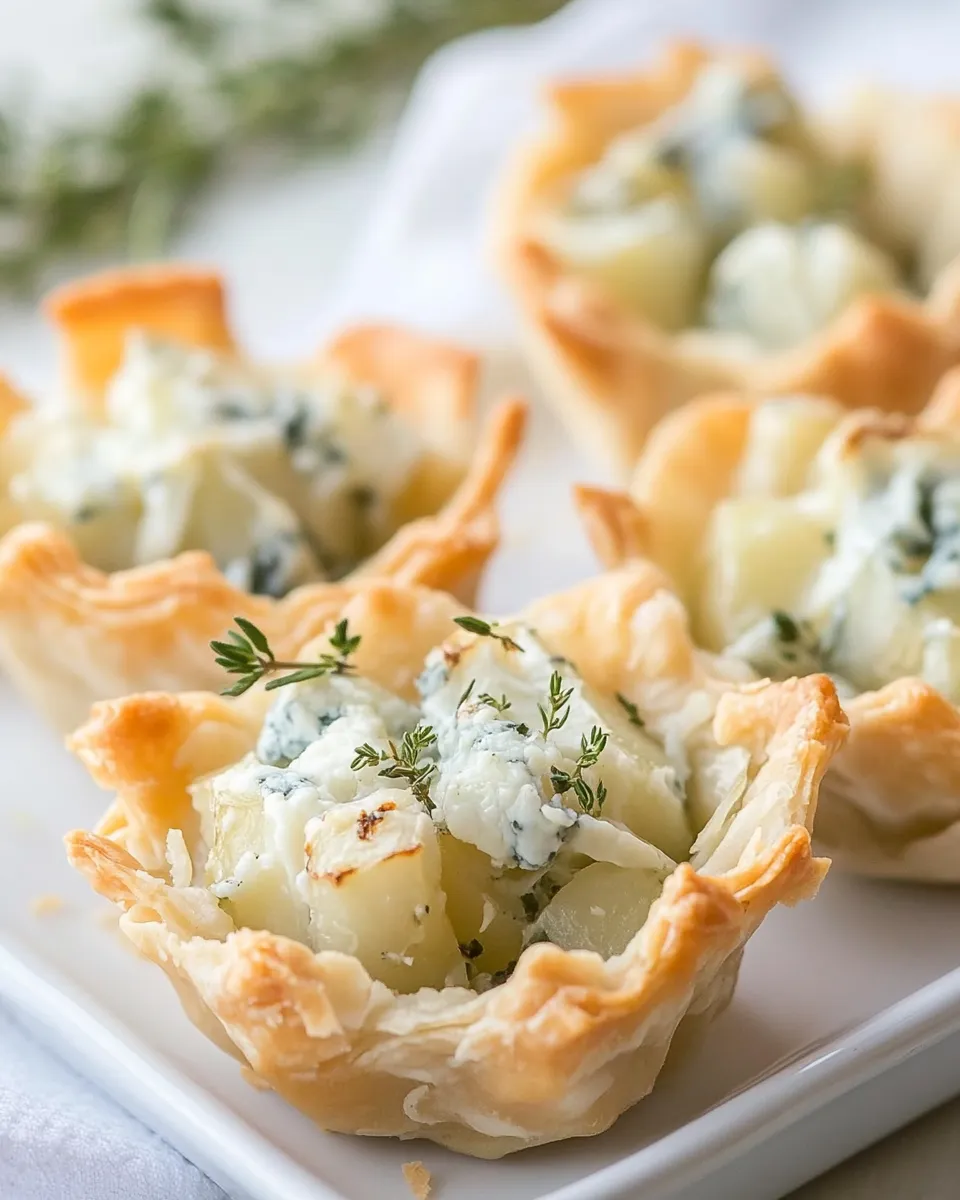
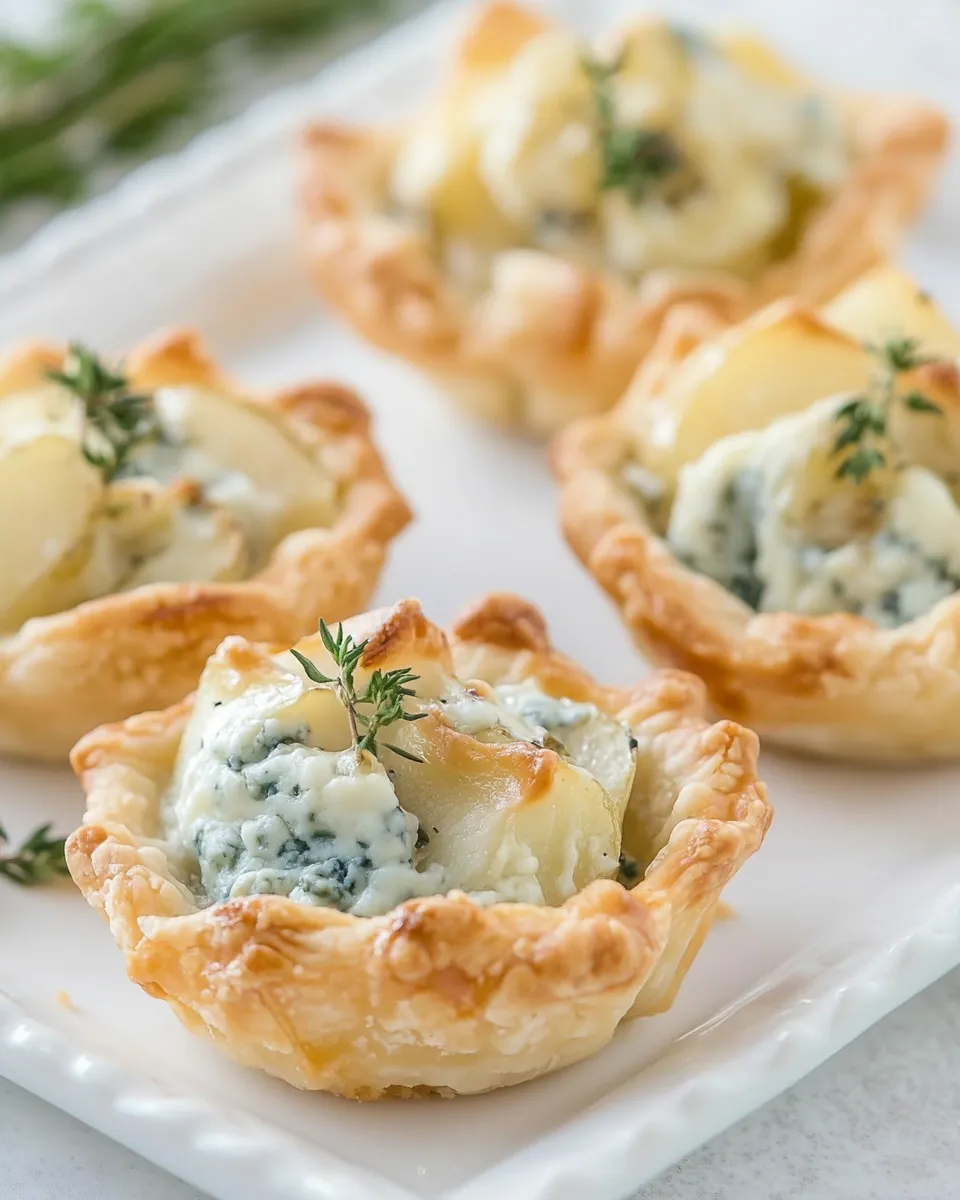
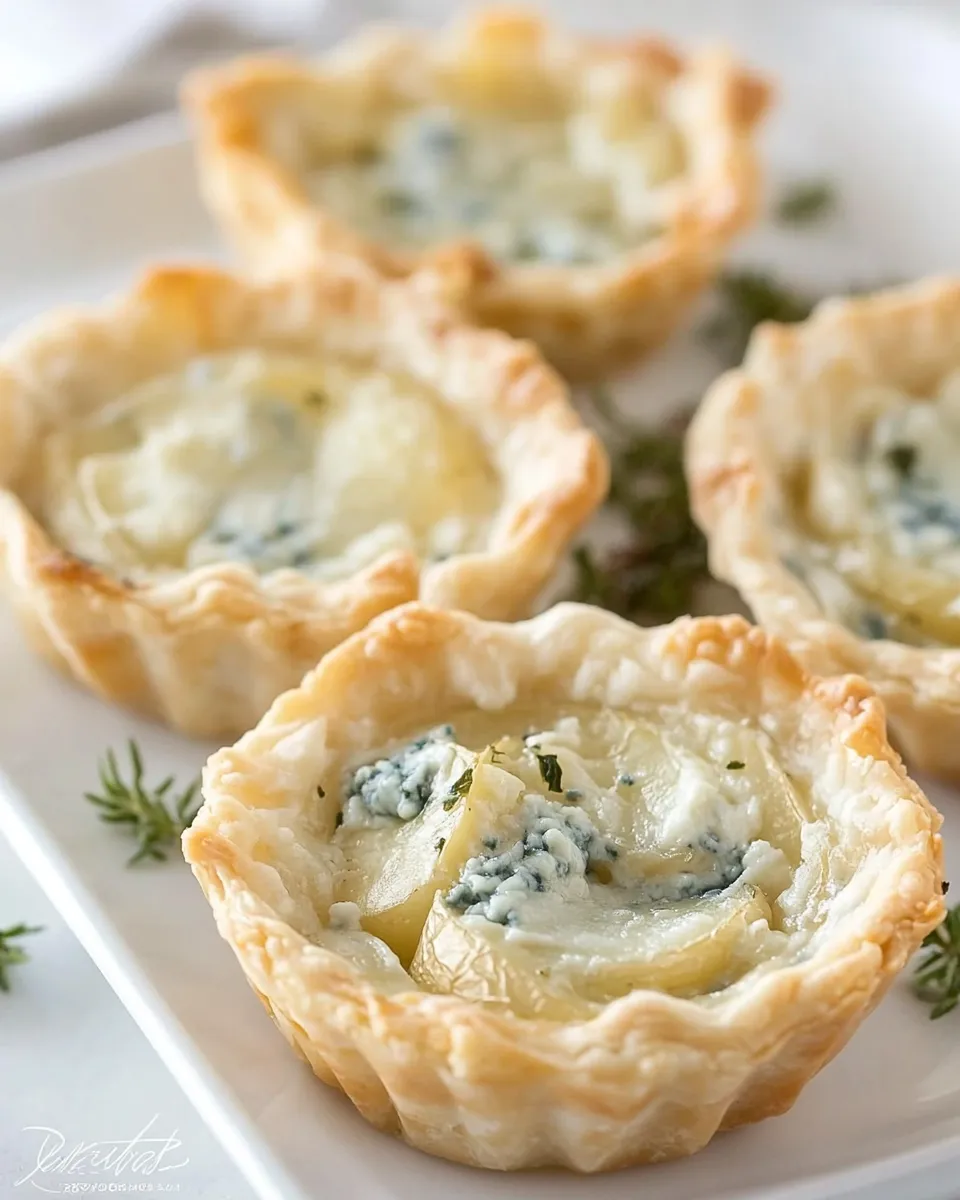
These little tartlets are one of those party tricks that look fancier than they are. Crisp fillo shells become the tidy vessels for savory fillings, and with a potato and blue cheese theme in mind you can assemble small bites that balance texture and punch. I keep a box of preformed fillo shells on hand for nights when I want something impressive, fast.
Here I focus only on the shell work—the part that determines whether your tartlets stay crisp or turn into soggy cups. Follow the shell-prep steps below and you’ll have a dependable base that can be filled with whatever potato- and blue-cheese inspired mixture you favor. The technique is unglamorous but precise: prebake, rest, press a well, cool, and store if needed.
No fancy equipment. No last-minute panic. If you do the shell prep right, the rest—assembly, roasting potatoes, melting blue cheese—becomes a breeze. Read through the whole post before starting so you know exactly how the shells behave and what to expect at each stage.
What You’ll Gather
Gather the shells and a couple of simple tools. The steps below are about treating the fillo shells with care so they keep their structure and crispness when filled. You don’t need extra ingredients for the shell work; just the packaged shells and a calm five to ten minutes at the right moments.
Ingredients
- 1 package Fillo Shells (Athens brand has 15 appetizer shells/box) — the structural base; prebake slightly under the package time so they remain crisp after filling.
Build (Potato Blue Cheese Tartlets) Step by Step
- Preheat the oven according to the fillo-shell package directions. Place the fillo shells on a baking sheet and prebake them exactly as the package instructs, but remove from the oven 2–3 minutes earlier than the package time so the shells are slightly underbaked.
- Remove the shells from the oven and let them sit on the baking sheet or a wire rack for about 5 minutes so they firm up but are still warm.
- Carefully press down the center of each shell to form a small well (the shells may have puffed up while baking). Press gently so the bottom remains intact.
- Let the prepared shells cool completely on a wire rack before filling or using in your recipe.
- If not using immediately, store cooled shells in an airtight container at room temperature until ready to fill.
Why It Works Every Time
The logic behind these steps is simple and practical. Removing the shells a couple of minutes earlier than the package calls for prevents them from becoming brittle and over-browned during the final bake. Slight underbaking keeps the shells pliable during the pressing step so they form a defined well without cracking.
Letting them rest for a short window while still warm stabilizes the layers. The pastry firms up enough to hold its shape but hasn’t set into a rigid shell that would shatter when pressed. Pressing the center at this stage creates a controlled cup—ideal for scooping in a dense potato-and-cheese filling—without compromising the bottom integrity.
Cooling completely before filling is the final guard against sogginess. Any residual steam or warmth trapped beneath a filling will condense and make the base limp. A cooled shell keeps its crisp edge and gives you the satisfying contrast between crunchy shell and soft filling.
No-Store Runs Needed
One of the best things about working with prepared fillo shells is that you can keep a box in the pantry for weeks. They’re long-lived and ready on short notice. If you’ve prepped the shells ahead of time, assembling tartlets for a crowd becomes a one-minute operation: spoon in your filling and serve.
Because the instructions rely exclusively on the packaged shells, you don’t need to run out for specialty pastry or last-minute tools. The entire shell prep is oven- and rack-based; any reasonable-sized sheet pan and a wire rack will do the job.
Prep & Cook Tools
- Baking sheet — for baking the shells and catching any crumbs or overflow.
- Wire cooling rack — essential for bringing the shells to room temperature and preventing steam buildup beneath them.
- Oven mitts or heat-safe gloves — the shells and baking sheet cool for only a short window and you’ll handle them while warm.
- Airtight container — for storing cooled shells at room temperature if you’re not filling them immediately.
- Small spoon or rounded press tool (optional) — to press the center of each shell gently; your fingertips work fine if you’re careful.
Troubles You Can Avoid
Common mistakes are easy to fix once you know what to watch for. First: overbaking. If the fillo becomes very dark during the prebake, it will be brittle and likely to crack when pressed. Remove a couple of minutes early and you’ll see the difference immediately.
Second: pressing too hard. The shells can tear if you apply pressure with a blunt edge or press before they firm up slightly. Wait the suggested five minutes until they’re warm but not hot, then press gently to form a well. If a shell cracks, set it aside for a different use—crumb topping on a salad or an improvised crumb crust for another dish.
Third: filling while warm. The temptation is to fill shells right away; don’t. Warm shells trap steam, and that steam will make the base soggy. Cooling completely on a rack prevents that. If you must fill immediately, use a very dry filling, but understand the trade-off: crispness will be reduced.
Seasonal Twists
Once your shells are prepped and reliable, think in broad strokes for seasonal ideas. Use a warm, starchy filling in cooler months and a lighter, refreshingly acidic component in warmer months. The shell is neutral and responsive; it plays well with hearty autumn flavors and bright spring accents alike.
If you want to change the experience without changing technique, vary the texture contrast and serving temperature. Hot fillings will soften the immediate interior but keep the rim crisp. Cold fillings preserve the shell’s entire crunch but create a different mouthfeel. Either approach works if the shells were prebaked and cooled correctly.
Cook’s Commentary
I make a box of prebaked shells whenever I know I’ve got evening guests. The work is front-loaded and forgiving. Shells that have been properly cooled and stored at room temperature maintain their crispness and are ready to receive whatever you have at hand—smashed warm potato with a crumble of blue cheese, a composed vegetable salad, or a protein-forward mixture.
My favorite practical trick: set up an assembly line. Place shells on a platter, position your fillings in small bowls, and let guests build their own. The shells are sturdy enough that diners can handle them without a second thought, provided they are cooled completely before filling.
Meal Prep & Storage Notes
Follow the storage guidance from the shell manufacturer and the steps above: once the shells are cooled completely, store them in an airtight container at room temperature until you’re ready to fill. That prevents moisture from creeping in and preserves the structure you just created.
If you prepare shells a day or two in advance, keep them in a single layer if possible, and avoid stacking heavy items on top. Handle them gently when transferring; they’re deceptively delicate once cooled even though they remain crisp.
Popular Questions
- Can I freeze prebaked shells? Freezing can introduce moisture when they thaw and often reduces crispness. If you choose to freeze, wrap them tightly and expect some loss of texture on thawing.
- What if a shell cracks when I press it? Small cracks are usually fine for filling and serving. If the bottom tears through, repurpose the piece for breadcrumbs or discard it. Gentle pressure and the brief warm-rest window reduce the risk.
- Can I press the shells before baking? No. The shells puff while they bake; pressing them before they firm up would prevent the structure from forming as intended. Follow the sequence: bake, rest for a few minutes, press, then cool.
- How important is cooling completely? Very. Filling warm shells traps steam and will turn the base soggy quickly. Cool on a wire rack until they reach room temperature before filling.
Next Steps
With the shells prepped using the steps above, you’re ready to build Potato Blue Cheese Tartlets exactly the way you like them. Roast or thinly slice potatoes, choose a blue cheese that suits your taste, and assemble just before serving for the best contrast in textures. If you want to make them ahead, prep the shells now and finish assembly right before your guests arrive.
Try the technique once and you’ll see how much easier the rest becomes. If you run into any of the issues described, come back to the troubleshooting section here. And when you get a batch that’s perfectly crisp and filled to your liking, tell me about it—what filling you used and how people reacted. I love hearing how readers adapt the method to their own kitchens.

Potato Blue Cheese Tartlets
Ingredients
Ingredients
- 1 package Fillo Shells Athens brand has 15 appetizer shells/box
Instructions
Instructions
- Preheat the oven according to the fillo-shell package directions. Place the fillo shells on a baking sheet and prebake them exactly as the package instructs, but remove from the oven 2–3 minutes earlier than the package time so the shells are slightly underbaked.
- Remove the shells from the oven and let them sit on the baking sheet or a wire rack for about 5 minutes so they firm up but are still warm.
- Carefully press down the center of each shell to form a small well (the shells may have puffed up while baking). Press gently so the bottom remains intact.
- Let the prepared shells cool completely on a wire rack before filling or using in your recipe.
- If not using immediately, store cooled shells in an airtight container at room temperature until ready to fill.
Equipment
- Oven
- Baking Sheet
- Wire Rack
- Airtight Container


