
If you’re a fan of chocolate and peanut butter, then this Reeses Cake will quickly become your go-to dessert. It’s rich, decadent, and combines the best of both worlds with layers of moist chocolate cake and a creamy peanut butter frosting. Perfect for birthdays, celebrations, or just a sweet treat at home, this cake is sure to impress family and friends alike.
Why You’ll Keep Making It
There’s something magical about the combination of chocolate and peanut butter, and this Reeses Cake captures that in every bite. The layers of chocolate cake are complemented by a smooth peanut butter frosting, topped with both regular and mini peanut butter cups for an extra pop of flavor. Not only is it delicious, but it’s also easy to make, whether you choose to use a box cake mix or whip up your own perfect chocolate cake from scratch. The recipe is versatile enough to fit any occasion, making it a staple in your dessert arsenal.
What You’ll Gather
- 1 recipe Perfect Chocolate Cake or 1 box chocolate cake mix
- 1/2 cup softened, unsalted butter
- 1/2 cup smooth peanut butter (not all-natural; use Skippy or Jif)
- 2 teaspoons vanilla extract
- 2 1/2 cups powdered sugar
- 1 tablespoon milk*
- Pinch of salt
- Regular size and mini peanut butter cups
- Chocolate sauce for garnish (optional)
Equipment & Tools
- Mixing bowls – For combining ingredients smoothly.
- Electric mixer – To achieve a fluffy frosting.
- Measuring cups and spoons – For accurate ingredient measurements.
- 9-inch round cake pans – To bake the cake layers evenly.
- Cooling rack – Essential for cooling the cake layers.
- Spatula – For spreading frosting easily.
Cook Reeses Cake Like This
Step 1: Prepare the Cake
If you’re using a box cake mix, follow the instructions on the package to prepare the batter. If you’re making the Perfect Chocolate Cake, combine the dry ingredients in a bowl, then mix in the wet ingredients according to your recipe.
Step 2: Bake
Preheat your oven to 350°F (175°C). Grease and flour your 9-inch round cake pans. Pour the batter evenly into the prepared pans and bake for about 25-30 minutes, or until a toothpick inserted in the center comes out clean. Once baked, let the cakes cool in the pans for 10 minutes before transferring them to a cooling rack.
Step 3: Make the Peanut Butter Frosting
In a large mixing bowl, cream together the softened butter and smooth peanut butter using an electric mixer. Add in the vanilla extract and mix until combined. Gradually add the powdered sugar, one cup at a time, mixing well after each addition. If the frosting is too thick, add a tablespoon of milk to reach your desired consistency. Finish with a pinch of salt to enhance the flavors.
Step 4: Assemble the Cake
Once the chocolate cake layers have completely cooled, place one layer on a serving plate. Spread a generous amount of peanut butter frosting on top. Add the second layer and frost the top and sides of the entire cake.
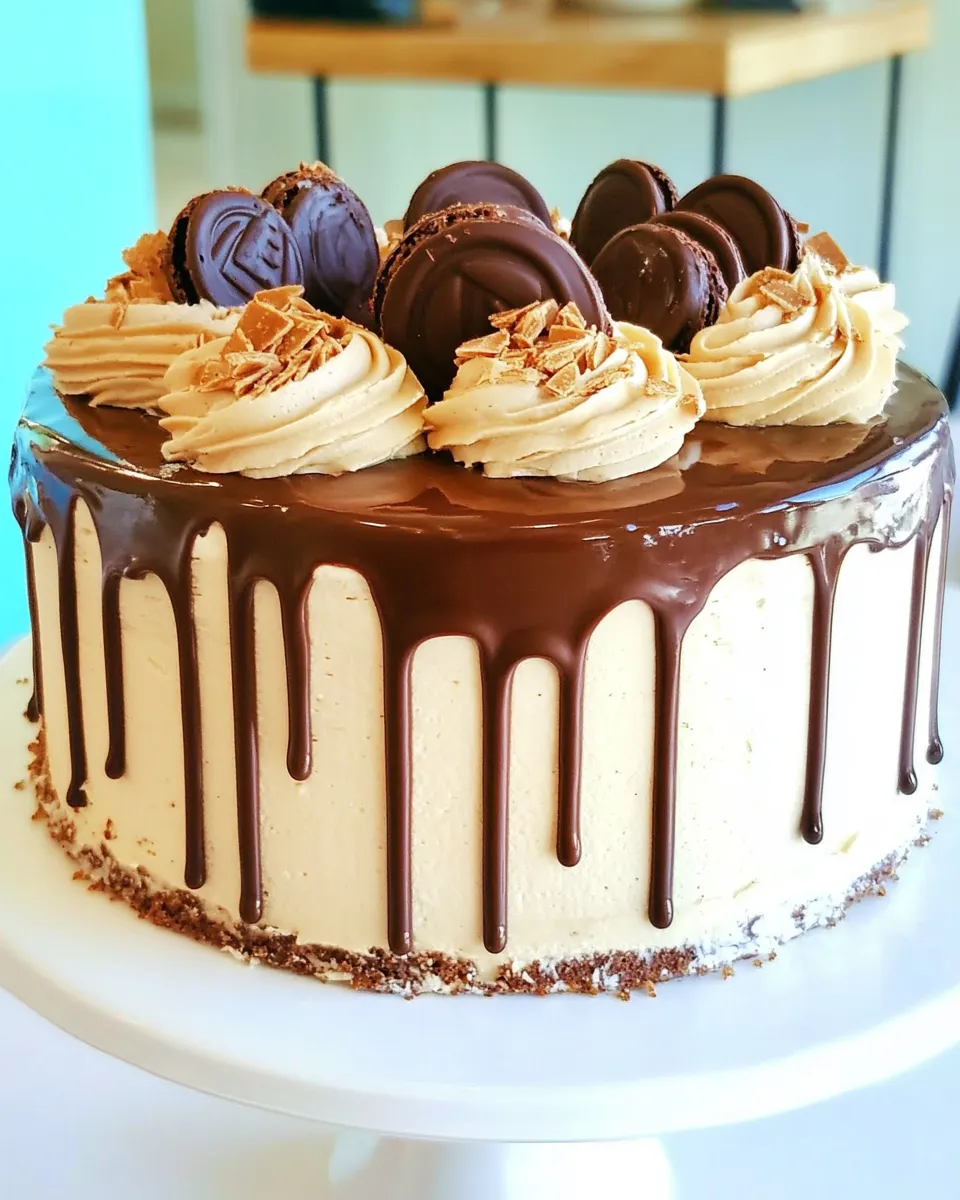
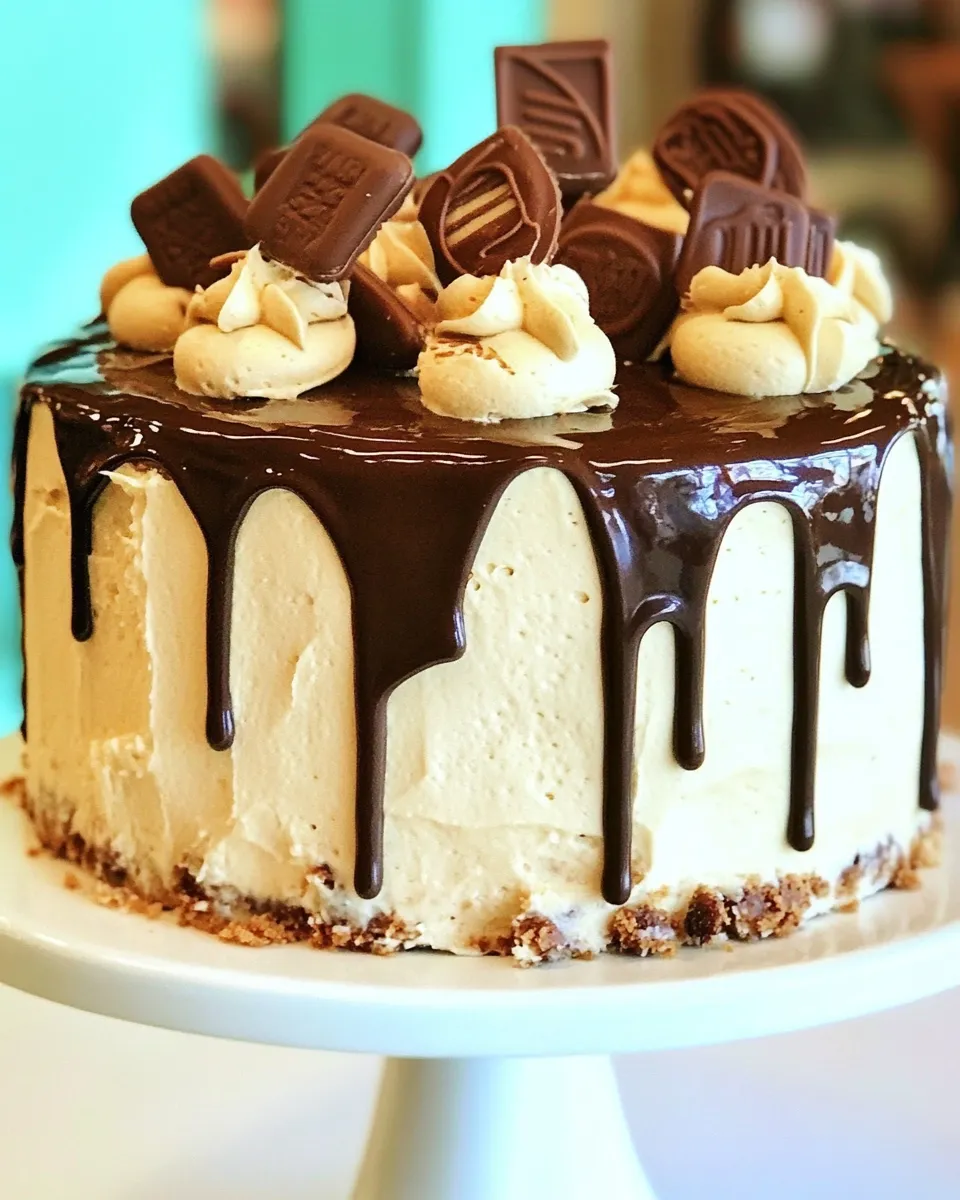
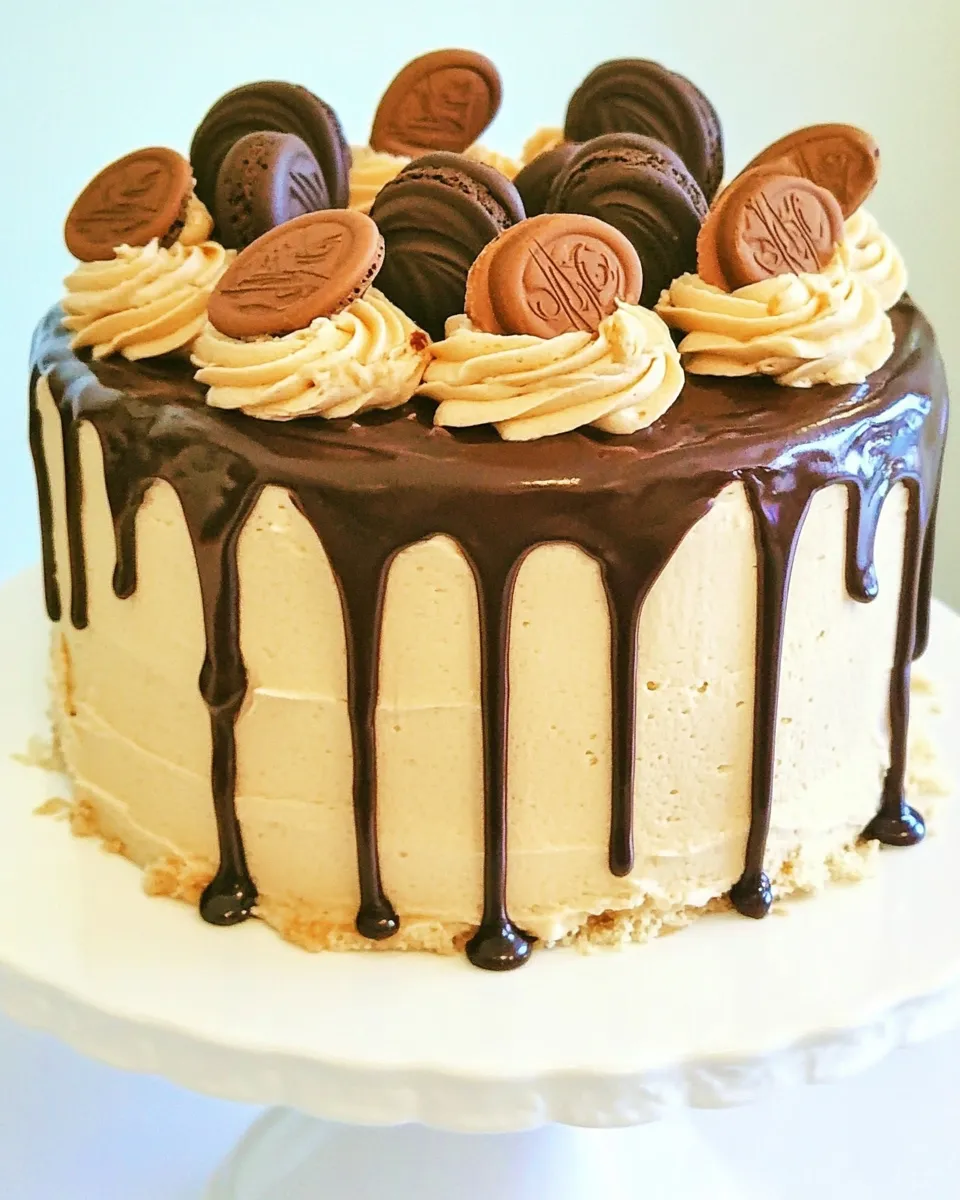
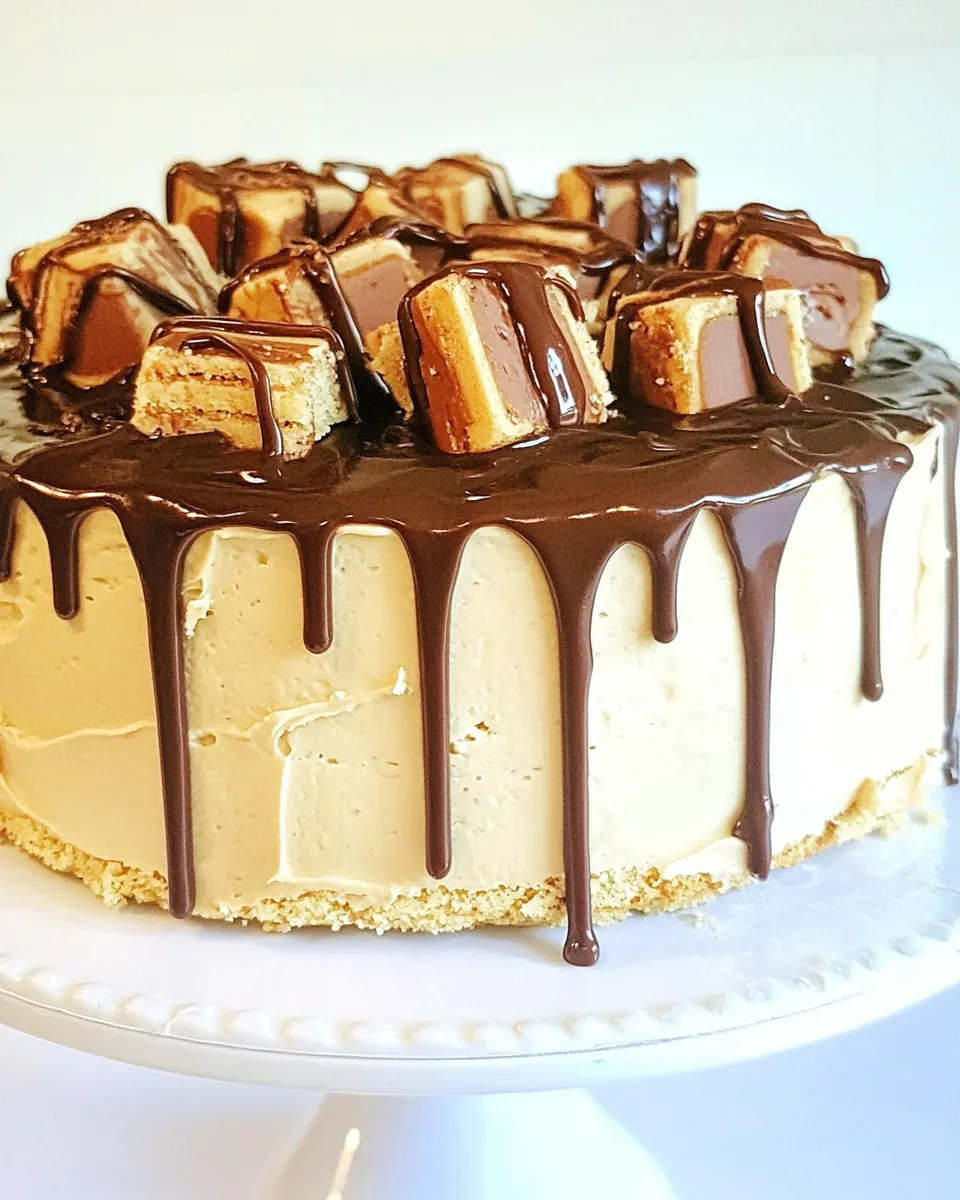
Step 5: Decorate
To elevate your Reeses Cake, top it with regular size and mini peanut butter cups. Drizzle chocolate sauce over the top for an extra touch of indulgence, if you desire.
Allergy-Friendly Swaps
- Gluten-Free: Use a gluten-free chocolate cake mix or substitute the flour in your homemade recipe with a gluten-free blend.
- Dairy-Free: Substitute the butter with dairy-free margarine and use a non-dairy milk alternative for the frosting.
- Nut-Free: Replace peanut butter with sun butter or a nut-free spread to cater to those with nut allergies.
Don’t Do This
- Don’t skip the cooling step. Frosting a warm cake will result in a melty mess.
- Don’t use all-natural peanut butter; it can be too oily and doesn’t yield the same creamy texture.
- Don’t rush the baking time. Make sure to test the cake with a toothpick to ensure it’s fully baked.
- Don’t forget to adjust the sweetness of the frosting according to your taste. You can always add more sugar if you prefer a sweeter frosting.
Shelf Life & Storage
This Reeses Cake can be stored at room temperature for up to 3 days, covered well to keep it moist. If you want to keep it longer, refrigerate it for up to a week. For longer storage, consider freezing individual slices. Wrap them tightly in plastic wrap and store in an airtight container for up to 3 months. Just thaw at room temperature before enjoying!
Common Qs About Reeses Cake
Can I use a different frosting?
Absolutely! If you’re not a fan of peanut butter, feel free to use a classic chocolate buttercream or even a cream cheese frosting.
What if I don’t have cake pans?
You can use a 9×13 inch baking dish instead. Just adjust the baking time, checking for doneness at around 30-35 minutes.
How can I make this cake ahead of time?
Both the cake layers and frosting can be made ahead of time. Store the layers in an airtight container and keep the frosting in the fridge. Assemble the cake the day you plan to serve it for the freshest taste.
Can I add other toppings?
Definitely! Try adding chopped nuts, chocolate shavings, or even a drizzle of caramel for an extra layer of flavor.
Time to Try It
Now that you have all the details to make this delicious Reeses Cake, it’s time to gather your ingredients and get baking! Whether you’re making it for a special occasion or simply indulging in a sweet treat at home, this cake is sure to be a hit. Enjoy every chocolatey, peanut buttery bite!

Reeses Cake
Ingredients
For the Cake:
- 1 recipe Perfect Chocolate Cake or 1 box chocolate cake mix
- 1/2 cup softened, unsalted butter
- 1/2 cup smooth peanut butter (not all-natural; use Skippy or Jif)
- 2 teaspoons vanilla extract
- 2 1/2 cups powdered sugar
- 1 tablespoon milk *optional
- 1 pinch salt
- Regular size and mini peanut butter cups
- Chocolate sauce for garnish (optional)
Instructions
Instructions
- Step 1: Prepare the Cake - If you're using a box cake mix, follow the instructions on the package to prepare the batter. If you're making the Perfect Chocolate Cake, combine the dry ingredients in a bowl, then mix in the wet ingredients according to your recipe.
- Step 2: Bake - Preheat your oven to 350°F (175°C). Grease and flour your 9-inch round cake pans. Pour the batter evenly into the prepared pans and bake for about 25-30 minutes, or until a toothpick inserted in the center comes out clean. Once baked, let the cakes cool in the pans for 10 minutes before transferring them to a cooling rack.
- Step 3: Make the Peanut Butter Frosting - In a large mixing bowl, cream together the softened butter and smooth peanut butter using an electric mixer. Add in the vanilla extract and mix until combined. Gradually add the powdered sugar, one cup at a time, mixing well after each addition. If the frosting is too thick, add a tablespoon of milk to reach your desired consistency. Finish with a pinch of salt to enhance the flavors.
- Step 4: Assemble the Cake - Once the chocolate cake layers have completely cooled, place one layer on a serving plate. Spread a generous amount of peanut butter frosting on top. Add the second layer and frost the top and sides of the entire cake.
- Step 5: Decorate - To elevate your Reeses Cake, top it with regular size and mini peanut butter cups. Drizzle chocolate sauce over the top for an extra touch of indulgence, if you desire.
Equipment
- Mixing bowls
- Electric Mixer
- Measuring cups and spoons
- 9-inch round cake pans
- Cooling rack
- Spatula
Notes
- Store the cake at room temperature for up to 3 days, covered well.
- For longer storage, refrigerate for up to a week or freeze individual slices for up to 3 months.
- Feel free to use a different frosting like chocolate buttercream or cream cheese frosting.


