
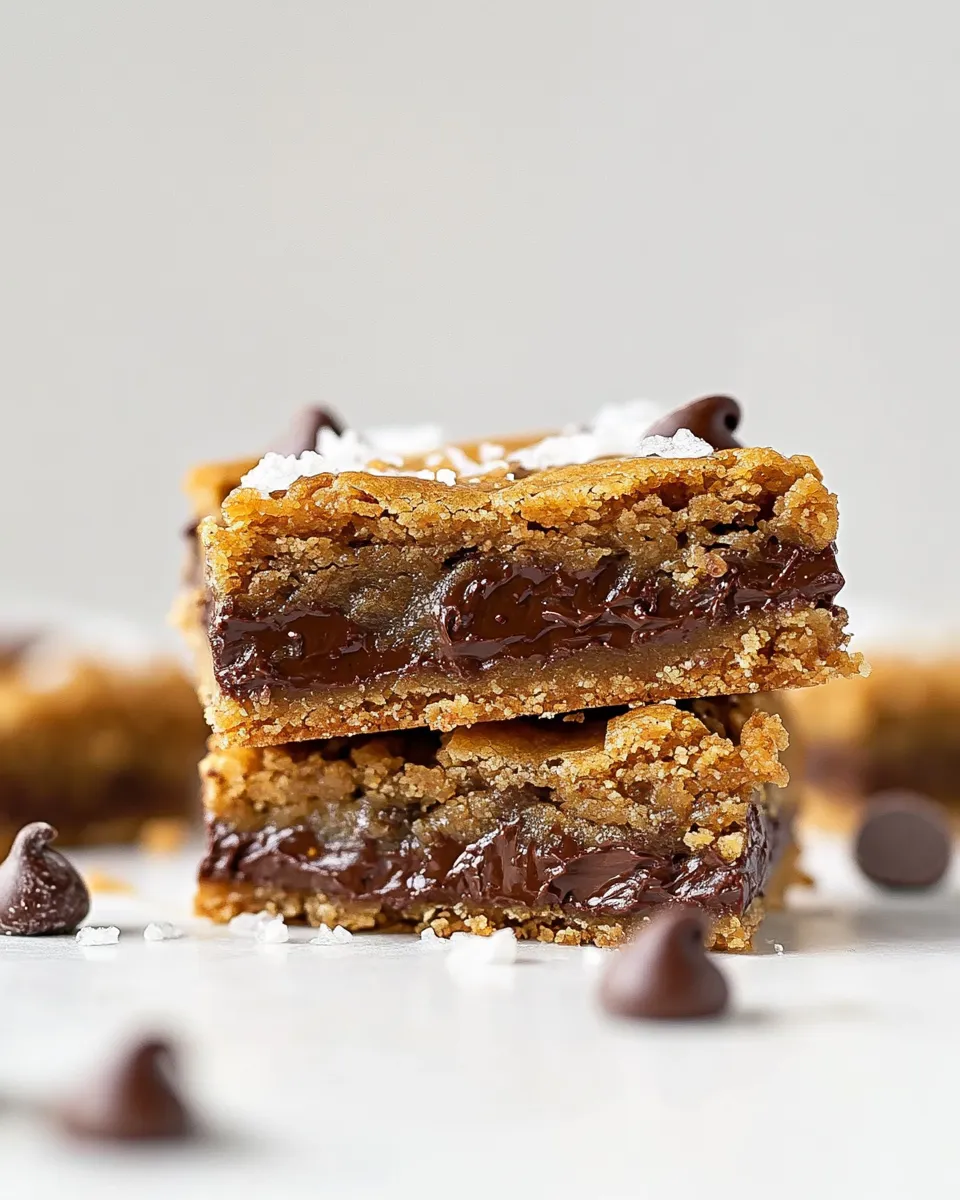
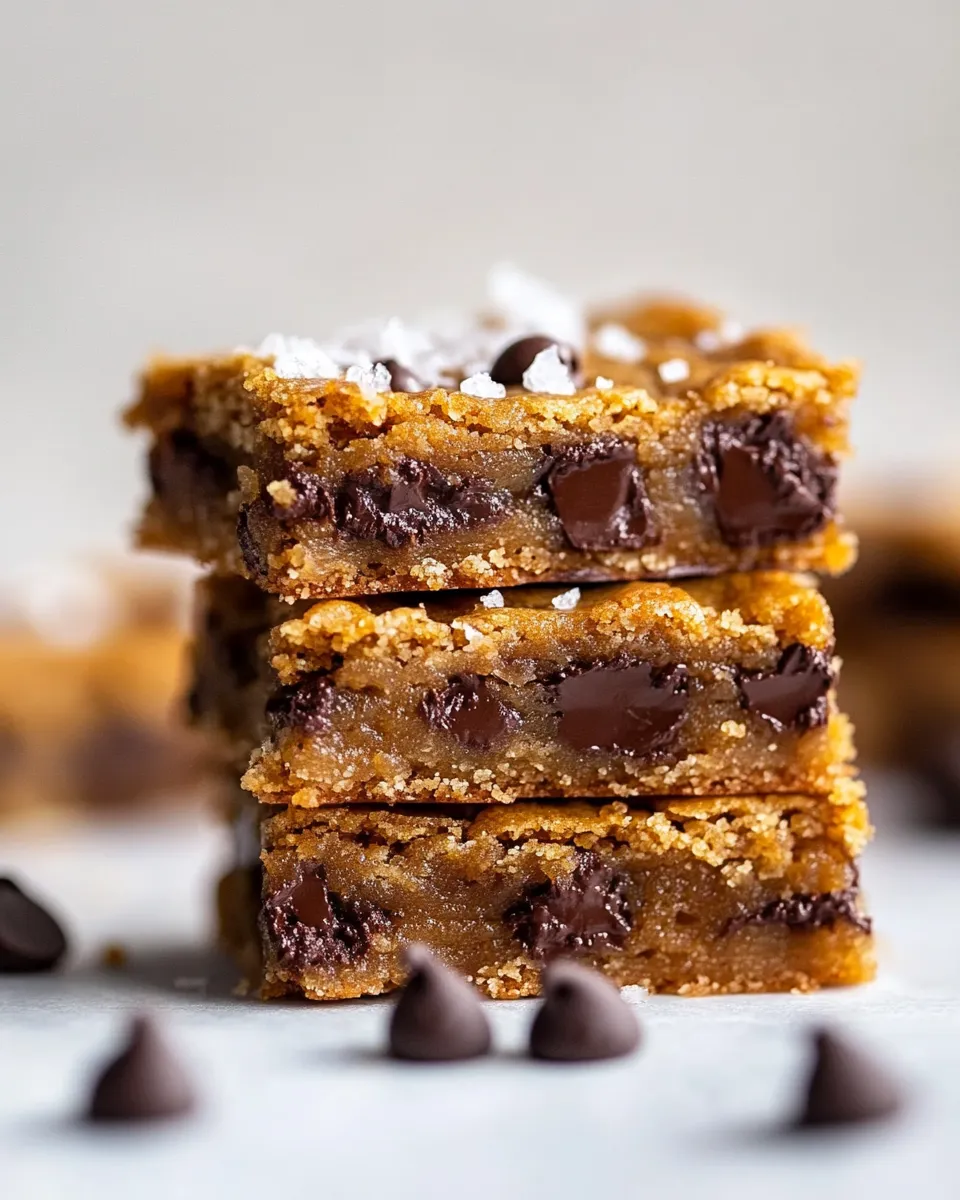
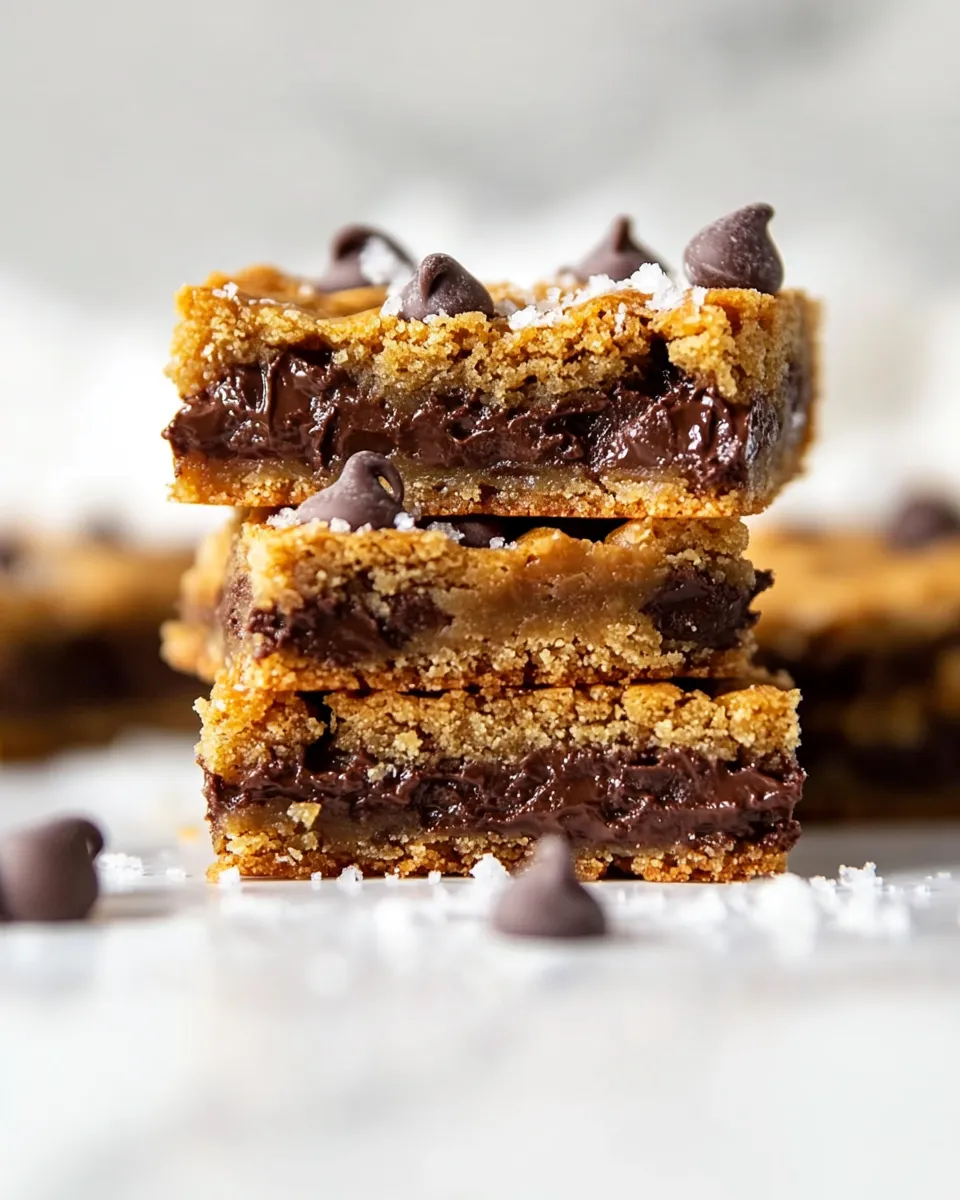
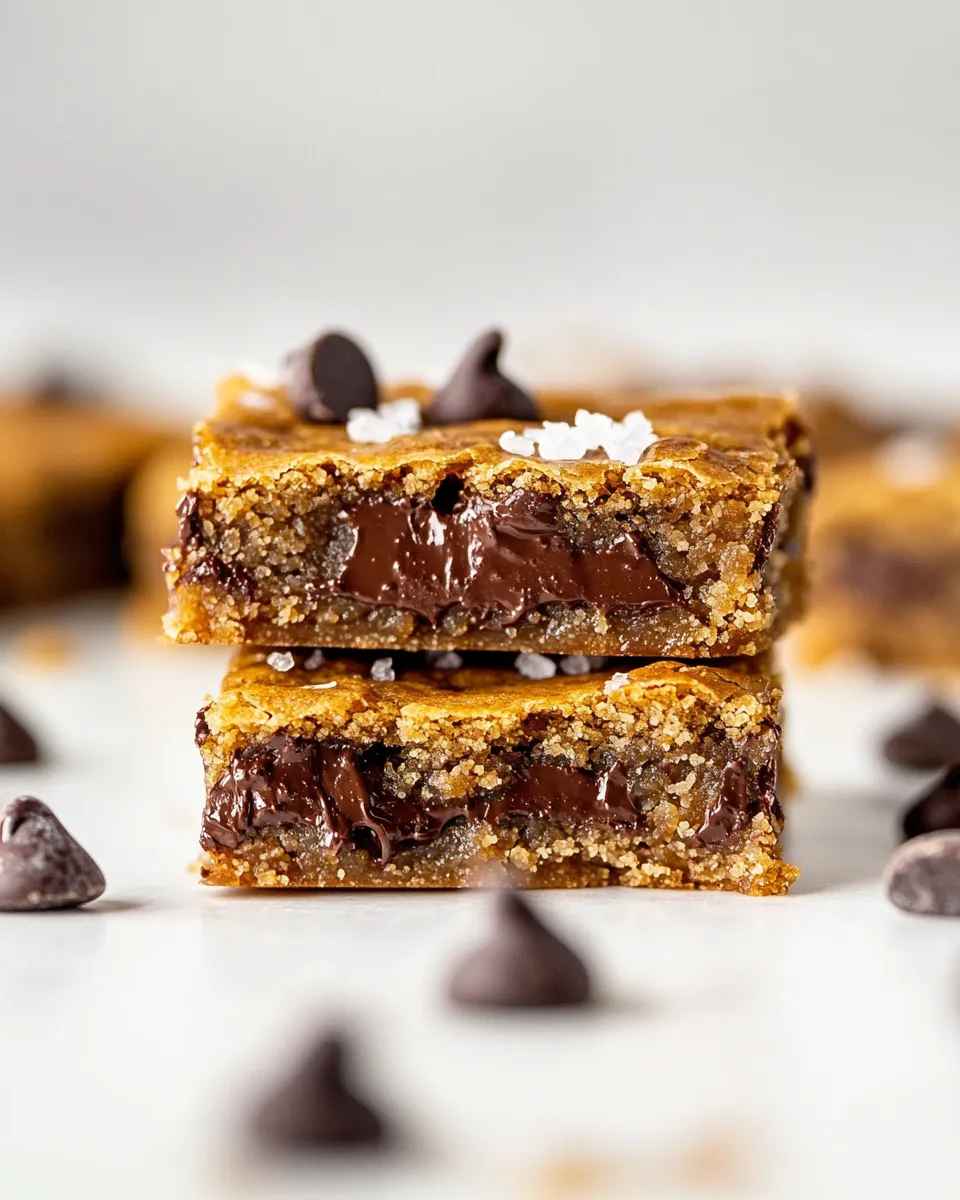
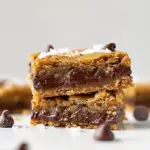
These Salted Brown Butter Chocolate Chip Cookie Bars are the kind of dessert I make when I want the comfort of a chocolate chip cookie with the convenience of a pan-of-bars. The brown butter gives a toasty, nutty backbone, and the Maldon flakes on top pull everything into sharp focus. They slice clean, transport well, and please a crowd.
I keep the process straightforward: brown the butter, mix the batter, press into a 9×13-inch pan, bake, and finish with a sprinkle of flaky salt. The technique is forgiving, which is why I can make these between errands or before guests arrive. They look polished but don’t require pastry school.
Read through the ingredient notes and the step-by-step section before you start. Timing matters for the brown butter and the cool-down, and I point out the little things that make these bars reliable every time.
What to Buy
Buy quality chocolate you actually like to eat. The recipe calls for both milk and dark chocolate chips; the contrast matters. Pick unsalted butter so you control the seasoning, and grab Maldon flaked salt for the finishing touch—it melts gently and adds a clean salt crunch.
Also make sure you have a 9×13-inch baking dish, a skillet for browning butter, and a wooden spoon. If you don’t already own flaked finishing salt, put it on the list; coarse table salt will work in a pinch, but it won’t give the same experience.
Ingredients
- 1 cup unsalted butter — for browning; unsalted lets you control the final salt level.
- 1 1/2 cups light brown sugar, loosely packed — adds moisture and a caramel note; loosely packed keeps the bar texture tender.
- 2 eggs, lightly beaten — binds the dough and adds structure.
- 1 tablespoon vanilla extract — rounds and brightens flavors.
- 2 cups all-purpose flour — the bulk of the bars; gives structure without toughness.
- ½ teaspoon baking soda — a little lift so the bars aren’t dense.
- ½ teaspoon salt — balances sweetness; this is in the batter in addition to finishing flakes.
- 1 cup milk chocolate chips — adds creaminess and sweetness pockets throughout.
- 1 cup dark chocolate chips — provides counterpoint and depth.
- Maldon flaked salt, for topping — finishing salt that delivers a clean burst when you bite in.
Salted Brown Butter Chocolate Chip Cookie Bars: Step-by-Step Guide
- Preheat the oven to 350°F. Have a 9×13-inch baking dish ready.
- In a small bowl whisk together 2 cups all-purpose flour, ½ teaspoon baking soda, and ½ teaspoon salt.
- Place 1 cup unsalted butter in a skillet over medium heat. Cook, stirring occasionally, until the butter foams and the milk solids turn golden brown and brown bits form on the bottom. Once brown bits appear, turn off the heat and continue stirring about 30 seconds. Remove from heat and let the brown butter cool until it is warm but not hot.
- Use a pastry brush or a piece of parchment to spread a little of the cooled brown butter over the bottom and sides of the 9×13-inch dish to grease it.
- Put 1 1/2 cups light brown sugar in a large bowl. Pour the remaining warm brown butter into the sugar and mix until combined and smooth—the sugar will partially dissolve.
- Add the 2 lightly beaten eggs one at a time, stirring after each addition so the eggs do not cook if the mixture is still warm. Stir in 1 tablespoon vanilla extract.
- Use a wooden spoon to stir in the dry ingredients from step 2 until they are almost combined. Do not overmix.
- Stir in 1 cup milk chocolate chips and 1 cup dark chocolate chips until evenly dispersed.
- Press the mixture evenly into the prepared 9×13-inch baking dish.
- Bake for 25–30 minutes, or until the top is golden brown and the center is set (a toothpick inserted in the center should come out with a few moist crumbs, not wet batter).
- Remove the pan from the oven and immediately sprinkle the top with Maldon flaked salt. Let the bars cool completely in the pan before slicing into squares.
Why This Recipe Belongs in Your Rotation
These bars are quick to assemble and scale well. One 9×13 batch feeds a crowd, and they travel easily. The brown butter elevates the familiar chocolate chip flavor into something richer and more interesting without adding extra fuss. The contrast of milk and dark chips gives each bite nuance—sweet pockets next to slightly bitter ones—so no single flavor dominates.
They’re forgiving. You don’t need precise creaming techniques or tempering. Browning the butter is the only technique step worth paying attention to; beyond that, it’s simple mixing, pressing, and baking. That makes these perfect for weeknight baking, potlucks, or a last-minute dessert plan.
What to Use Instead
If you need swaps, here are sensible options that keep the bars reliable. Use semi-sweet chocolate chips if you don’t have dark chips; they provide a similar balance. If you prefer a chunkier texture, chop a chocolate bar to mix in instead of chips—just keep the total chocolate quantity the same (2 cups total).
For butter alternatives: salted butter can be used but omit or reduce the ½ teaspoon salt in the dry ingredients and be cautious with the Maldon on top. If you’re short on brown sugar, a mix of white sugar plus a tablespoon or two of molasses will mimic the flavor, though the texture will shift slightly.
Cook’s Kit
Tools that make this straightforward: a heavy skillet for consistent browning, a wooden spoon for mixing, a whisk for dry ingredients, a pastry brush or parchment for greasing, and a reliable 9×13-inch baking dish. A fine spatula helps press the dough evenly into the pan. If you have a kitchen thermometer, you can tell when brown butter reaches about 250–275°F as a reference, but visual cues work perfectly.
Slip-Ups to Skip
Don’t rush the brown butter. If you stop too early you won’t get those toasty milk solids, and the flavor will be flat. If you let it sit too long after browning before using, it can cool down too much and solidify; aim to work with warm but not hot butter when combining with sugar.
Don’t overmix once you add the flour. Overworking develops gluten and makes the bars tough. Stir just until the dry ingredients are almost incorporated, then fold in the chips and transfer to the pan.
Don’t slice while warm. Cutting too soon leads to ragged bars and a gooey mess. Let them cool completely so they set and slice cleanly.
Season-by-Season Upgrades
Fall
Add 1 teaspoon ground cinnamon to the dry mix or fold in 1/2 cup chopped toasted pecans to echo autumn flavors. Swap half the milk chips for chopped caramel bits for a salted-caramel vibe.
Winter
Stir in 1/2 cup chopped toasted hazelnuts and swap milk chips for orange-flavored dark chocolate for a festive note. A light dusting of finely grated orange zest on top before serving brightens things up.
Spring
Fold in 1/2 cup dried cherries with the chips for a fruity lift. Use high-quality milk chocolate to keep the flavor gentle and fresh.
Summer
Serve with a scoop of vanilla ice cream on warm bars (if you don’t mind softer centers). For a picnic-friendly version, chill the bars fully and pack slices in a single layer.
Behind the Recipe
Browning butter concentrates its flavors by removing water and allowing the milk solids to toast. That nutty, caramel-like layer is why brown butter is such a powerful upgrade over plain melted butter. In a bar cookie format, that flavor distributes evenly through every bite rather than sitting mostly on the surface as it would in some cookie recipes.
Using both milk and dark chocolate chips is a deliberate contrast: milk chips bring cream and sweetness, while dark chips keep the chocolate presence from cloying. The finishing flake—Maldon—turns the bar from merely sweet to multidimensional, giving bright, salting points you notice with each chew.
Shelf Life & Storage
Room temperature: Store in an airtight container for up to 3 days. If your kitchen is warm, move them to the fridge to prevent the chips from softening too much.
Refrigerator: Keep in an airtight container for up to 7 days. Cool completely before sealing to avoid condensation.
Freezer: Wrap individual squares in plastic wrap and place in a freezer-safe container or bag for up to 2 months. Thaw at room temperature or warm briefly in a low oven (300°F) for 5–7 minutes to revive that just-baked feel.
Frequently Asked Questions
Q: Can I make these in a different sized pan? A: You can, but adjust baking time. A smaller pan will yield thicker bars and require more time; a larger pan will bake faster. Keep an eye on color and the toothpick test described in the steps.
Q: Can I skip the Maldon salt? A: You can, but the finishing salt lifts the flavors and balances sweetness. If you omit it, consider reducing the brown sugar by a tablespoon if you prefer less sweetness.
Q: My bars were too soft in the center—what happened? A: Either the oven needed more time, or the center was too thick. Check with a toothpick: it should come out with a few moist crumbs, not batter. Extend baking in 3–4 minute increments until done.
Bring It Home
These Salted Brown Butter Chocolate Chip Cookie Bars are a dependable, impressive treat that’s worth the two small technique steps: browning the butter and letting the pan cool before slicing. Make them for a potluck, a week of snack boxes, or a simple dessert after dinner. Keep the steps tight, watch the brown butter, and savor the way the flaked salt transforms each bite.
If you want to make this ahead, bake and cool fully, then freeze sliced bars individually; they thaw quickly and taste freshly baked with a few minutes in a warm oven. Enjoy—these are one of my go-to, unfussy recipes whenever I want a crowd-pleasing, elevated chocolate bar.
Salted Brown Butter Chocolate Chip Cookie Bars.
Ingredients
Ingredients
- 1 cupunsalted butter
- 1 1/2 cupslight brown sugar loosely packed
- 2 eggs lightly beaten
- 1 tablespoonvanilla extract
- 2 cupsall-purpose flour
- 1/2 teaspoonbaking soda
- 1/2 teaspoonsalt
- 1 cupmilk chocolate chips
- 1 cupdark chocolate chips
- maldon flaked salt for topping
Instructions
Instructions
- Preheat the oven to 350°F. Have a 9x13-inch baking dish ready.
- In a small bowl whisk together 2 cups all-purpose flour, ½ teaspoon baking soda, and ½ teaspoon salt.
- Place 1 cup unsalted butter in a skillet over medium heat. Cook, stirring occasionally, until the butter foams and the milk solids turn golden brown and brown bits form on the bottom. Once brown bits appear, turn off the heat and continue stirring about 30 seconds. Remove from heat and let the brown butter cool until it is warm but not hot.
- Use a pastry brush or a piece of parchment to spread a little of the cooled brown butter over the bottom and sides of the 9x13-inch dish to grease it.
- Put 1 1/2 cups light brown sugar in a large bowl. Pour the remaining warm brown butter into the sugar and mix until combined and smooth—the sugar will partially dissolve.
- Add the 2 lightly beaten eggs one at a time, stirring after each addition so the eggs do not cook if the mixture is still warm. Stir in 1 tablespoon vanilla extract.
- Use a wooden spoon to stir in the dry ingredients from step 2 until they are almost combined. Do not overmix.
- Stir in 1 cup milk chocolate chips and 1 cup dark chocolate chips until evenly dispersed.
- Press the mixture evenly into the prepared 9x13-inch baking dish.
- Bake for 25–30 minutes, or until the top is golden brown and the center is set (a toothpick inserted in the center should come out with a few moist crumbs, not wet batter).
- Remove the pan from the oven and immediately sprinkle the top with Maldon flaked salt. Let the bars cool completely in the pan before slicing into squares.
Equipment
- 9x13 inch Baking Dish
- Skillet
- Mixing Bowl
- Small Bowl
- Wooden Spoon
- Pastry Brush
- parchment
Notes
slightly adapted from
food network


