
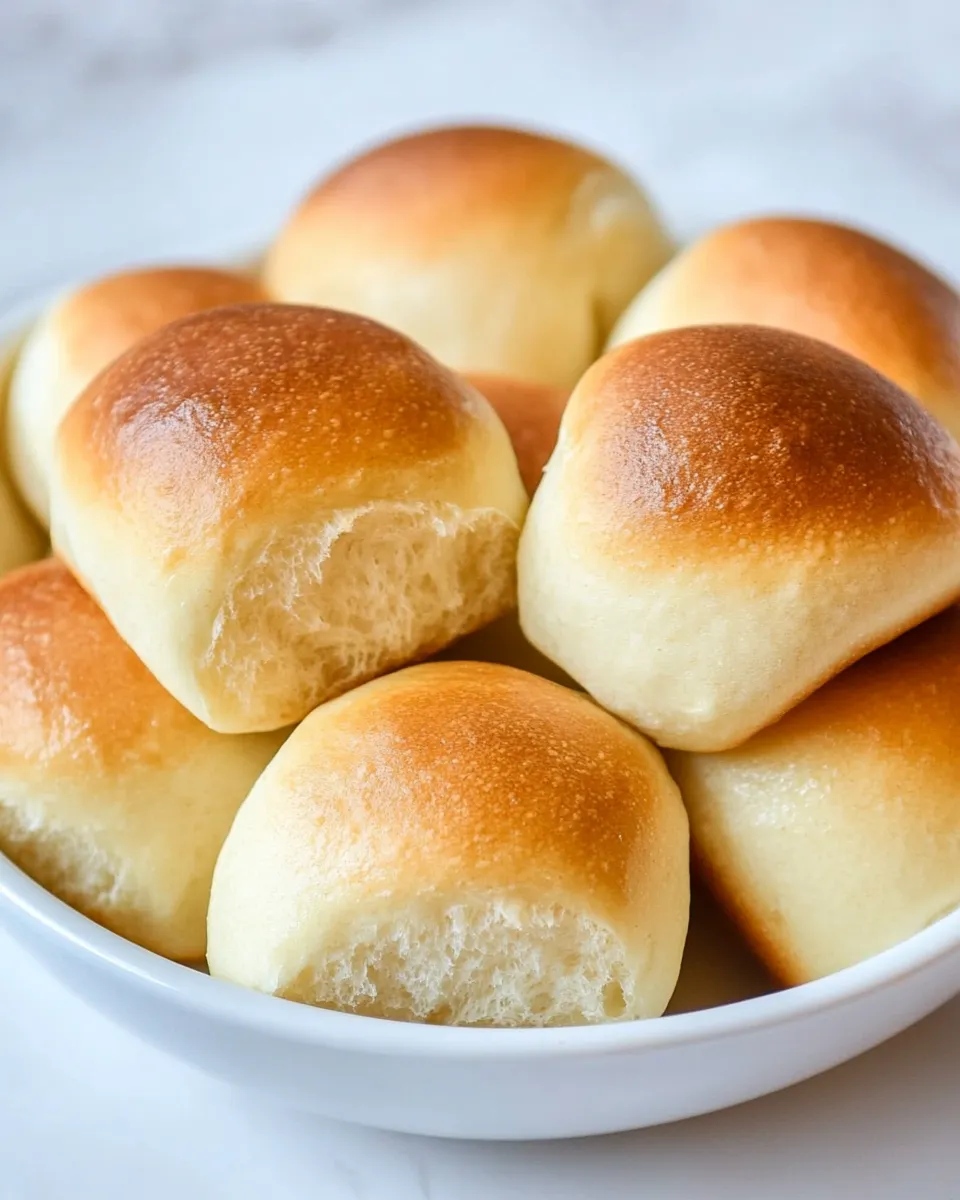
These sourdough dinner rolls are the kind of thing I make when I want soft, tangy bread that sings alongside butter, soup, or a simple roast. They take advantage of an overnight rise so the hands-on time is short and the flavor deepens without fuss. The crumb is tender; the crust is golden and slightly glossy after a final butter brush.
I like this recipe because it balances technique with approachability. You don’t need perfect temperatures or dramatic equipment — just a little patience and a fed starter. Follow the steps in order, and you’ll be rewarded with rolls that pull apart easily and toast up beautifully for leftovers.
Below you’ll find exactly what to gather, the step-by-step process pulled straight from the recipe, and practical notes for troubleshooting, substituting, and storing. I keep things pragmatic here: clear instructions, honest tips, and nothing unnecessary.
What You’ll Gather
Before you start, organize your space. Pull out the milk to warm to room temperature, melt a measured amount of butter, and give your starter a feed so it’s active. Counters cluttered with tools and ingredients make baking harder than it needs to be.
Ingredients
- 2Tbspunsalted butter,melted, plus more to brush the pan — enriches the dough and prevents sticking; reserve extra to butter the baking dish and coat the rolls after baking.
- 1cupwhole milk,room temperature — hydrates the flour and contributes tenderness; room temperature avoids shocking the starter.
- 2Tbspgranulated sugar — feeds the yeast activity and adds a touch of sweetness to balance sourness.
- 1tspfine sea salt — controls fermentation and seasons the dough; measure accurately for consistent texture and flavor.
- 3cupsbread flour,or all-purpose flour — provides structure; bread flour gives a chewier crumb, AP will work fine for a slightly softer texture.
- ½cupActive sourdough starter — the leavening and flavor base; make sure it’s active (bubbly and recently fed) for predictable rise.
- 1tspsalted butter,to brush over rolls — a finishing touch for shine and flavor after baking.
Cooking Sourdough Dinner Rolls: The Process
- Combine 1 cup room-temperature whole milk, 2 Tbsp melted unsalted butter, 2 Tbsp granulated sugar, and 1 tsp fine sea salt in the bowl of a stand mixer or a large mixing bowl; stir until the sugar is dissolved.
- Add 3 cups flour and ½ cup active sourdough starter to the milk mixture. Mix with the paddle attachment or a firm spatula until the ingredients are just combined into a shaggy dough.
- Cover the bowl with a damp kitchen towel and let the dough rest 30 minutes to relax the gluten.
- After the rest, switch to a dough hook and knead on speed 2 for 10–12 minutes until the dough is smooth and soft. If kneading by hand, knead 8–10 minutes until smooth and elastic.
- Lightly butter a clean mixing bowl with some of the additional unsalted butter. Transfer the kneaded dough to the buttered bowl, turn to coat, cover with a damp towel, and leave on the counter overnight (8–12 hours) until the dough has nearly doubled in size.
- Turn the risen dough out onto a lightly floured work surface. Divide it into 12 equal pieces (about 65 g each). Shape each piece into a tight ball by pinching the seams together, then cup your hand around each ball and roll on the surface to tighten the tops.
- Butter a 9×13-inch glass baking dish with the additional unsalted butter. Place the 12 rolls seam-side down in the dish, cover with a damp tea towel, and proof in a warm place (80–90°F) until about doubled, about 2 hours, or proof at room temperature for about 3-4 hours.
- About 10–15 minutes before baking, preheat the oven to 375°F and position a rack in the upper third of the oven.
- Bake the rolls on the top third of the oven for 25–30 minutes, until the tops are golden brown and the internal temperature reaches about 190°F.
- Remove the rolls from the oven and immediately brush the tops with the 1 tsp salted butter. Cool slightly, then serve.
Top Reasons to Make Sourdough Dinner Rolls
Flavor: The overnight fermentation adds a gentle tang and a depth store-bought rolls can’t match.
Texture: You get a tender, pull-apart crumb with a golden top that’s soft rather than crusty — ideal for sliding open and filling with butter.
Hands-off time: Active effort is concentrated in short bursts. The long rest and overnight proof reduce active kneading and checking.
Versatility: Serve them with soups, holiday meals, or split and toast as mini sandwiches. They hold up well to butter and dips.
Substitutions by Category
- Flour — Use all-purpose in place of bread flour for a slightly softer roll. If you only have bread flour, keep it; the higher protein gives better chew and structure.
- Dairy — Whole milk gives richness. You can try 2% in a pinch, but the rolls will be marginally less tender. I don’t recommend substituting non-dairy milk without trialing first.
- Fat — Unsalted butter is specified for control over salt; if you only have salted butter, reduce the added fine sea salt slightly to compensate.
- Leavening — This recipe depends on an active sourdough starter. If you don’t have one, convert to a commercial yeast recipe instead of substituting directly.
- Sugar — Granulated sugar can be swapped for light brown sugar for a touch of molasses flavor, but it will darken the crumb and top slightly.
Gear Checklist
- Stand mixer with paddle and dough hook (or a large mixing bowl and sturdy spatula for mixing, and your hands for kneading).
- 9×13-inch glass baking dish (butter it well) — alternative: similar-sized metal pan, adjust bake time if needed.
- Kitchen scale (helpful for dividing into 12 pieces of ~65 g each) — not mandatory but makes even rolls easy.
- Thermometer (probe or instant-read) to check internal temperature around 190°F.
- Clean mixing bowl for the overnight rise and a damp kitchen towel for covering.
Things That Go Wrong
The dough won’t rise enough overnight: your starter may have been inactive. Use an active, bubbly starter and keep the dough in a warm, draft-free spot. A dough that looks sluggish may still be usable; give it extra time or a slightly warmer spot but watch for overproofing.
Overproofed rolls that collapse: If your dough rises too long during the final proof, the structure weakens. You’ll see deflated tops or very flat rolls. If that happens, you can reshape and give them a short second proof, but results may vary.
Dense crumb after baking: This usually points to under-kneading or not enough fermentation. Make sure the dough becomes smooth and elastic during the knead (or 8–10 minutes by hand). Also allow the full overnight bulk rise — it’s doing flavor and lift work.
Tops brown too quickly while interiors are underdone: Move the rack lower or tent with foil during the final minutes. Also confirm oven temperature with a thermometer; home ovens often run hot.
Dietary Customizations
Lower-salt option: Reduce the 1 tsp fine sea salt by up to a quarter if you need a lower-sodium roll. Taste will be milder; consider finishing with unsalted butter instead of salted butter for the brush if you want to control sodium precisely.
Vegan approach: This recipe uses butter and whole milk; to veganize, try a tested swap such as plant-based butter and unsweetened oat or soy milk. Note: I haven’t altered hydration or times here, so expect some texture differences and test one batch first.
Gluten-free note: These rolls rely on gluten for structure. There is no straightforward one-to-one gluten-free substitution that will yield the same result without a complete recipe rebuild and specialized flours and binders.
Behind-the-Scenes Notes
Why the overnight rise? Long, cool fermentation (or room-temperature overnight in this case) improves flavor and texture. It lets enzymes act on the flour and the starter produce organic acids — that mild sour note is part of the charm.
Shaping matters more than you think. Tight balls create surface tension that helps the rolls hold shape and rise upward rather than spread outward. When you pinch seams and roll the tops, you’re building that tension.
Keeping the buttered bowl: Coating the dough with butter during bulk rise both adds flavor and keeps the dough surface from drying out. It’s a small step with outsized payoff in texture and ease of handling.
How to Store & Reheat
Room temperature: Store cooled rolls in an airtight container or sealed bag for up to 2 days. They’re best the first day but remain pleasant the second.
Refrigeration: You can refrigerate for up to 3–4 days, but refrigeration will firm the crumb. Reheat before serving to soften up.
Freezing: Wrap cooled rolls individually or as a batch in plastic wrap and freeze up to 2 months. Thaw at room temperature and reheat in a 325°F oven for 10–15 minutes, or microwave briefly covered to avoid drying.
Reheating: For a fresh-from-the-oven texture, sprinkle a little water on the rolls, cover with foil, and warm at 300–325°F for 8–12 minutes. Or split and toast the interior for a crisp finish.
Quick Q&A
Q: Can I speed up the overnight rise?
A: You can proof in a warmer spot, but speeding it too much will reduce flavor development. If you’re in a hurry, expect different taste and slightly different texture; I prefer following the timing as written.
Q: What if my starter is only mildly active?
A: Give it a feed and wait until it’s bubbly and has doubled before using. A sluggish starter yields a slow, unpredictable rise.
Q: Can I make smaller or larger rolls?
A: Yes. Adjust portion sizes and baking time — smaller rolls will bake in less time; larger rolls will need more. Use a thermometer and look for the 190°F internal temperature.
Before You Go
These Sourdough Dinner Rolls reward patience. Do the overnight rise, shape carefully, and don’t rush the final proof. If you follow the steps and keep a bit of flexibility with timing, you’ll end up with reliable, delicious rolls that work for everyday dinners and special meals alike.
Make a batch, freeze half, and enjoy the ease of homemade rolls on demand. If you have questions about timing, starter activity, or a substitution you want to try, drop a comment and I’ll help troubleshoot.

Sourdough Dinner Rolls
Ingredients
Ingredients
- 2 Tbspunsalted butter melted, plus more to brush the pan
- 1 cupwhole milk room temperature
- 2 Tbspgranulated sugar
- 1 tspfine sea salt
- 3 cupsbread flour or all-purpose flour
- 1/2 cupActive sourdough starter
- 1 tspsalted butter to brush over rolls
Instructions
Instructions
- Combine 1 cup room-temperature whole milk, 2 Tbsp melted unsalted butter, 2 Tbsp granulated sugar, and 1 tsp fine sea salt in the bowl of a stand mixer or a large mixing bowl; stir until the sugar is dissolved.
- Add 3 cups flour and ½ cup active sourdough starter to the milk mixture. Mix with the paddle attachment or a firm spatula until the ingredients are just combined into a shaggy dough.
- Cover the bowl with a damp kitchen towel and let the dough rest 30 minutes to relax the gluten.
- After the rest, switch to a dough hook and knead on speed 2 for 10–12 minutes until the dough is smooth and soft. If kneading by hand, knead 8–10 minutes until smooth and elastic.
- Lightly butter a clean mixing bowl with some of the additional unsalted butter. Transfer the kneaded dough to the buttered bowl, turn to coat, cover with a damp towel, and leave on the counter overnight (8–12 hours) until the dough has nearly doubled in size.
- Turn the risen dough out onto a lightly floured work surface. Divide it into 12 equal pieces (about 65 g each). Shape each piece into a tight ball by pinching the seams together, then cup your hand around each ball and roll on the surface to tighten the tops.
- Butter a 9×13-inch glass baking dish with the additional unsalted butter. Place the 12 rolls seam-side down in the dish, cover with a damp tea towel, and proof in a warm place (80–90°F) until about doubled, about 2 hours, or proof at room temperature for about 3–4 hours.
- About 10–15 minutes before baking, preheat the oven to 375°F and position a rack in the upper third of the oven.
- Bake the rolls on the top third of the oven for 25–30 minutes, until the tops are golden brown and the internal temperature reaches about 190°F.
- Remove the rolls from the oven and immediately brush the tops with the 1 tsp salted butter. Cool slightly, then serve.
Equipment
- Stand mixer
- paddle attachment
- dough hook
- Large Mixing Bowl
- 9x13 inch Baking Dish
- Kitchen Towel
- Measuring Cups
- Measuring Spoons
Notes
*
To Speed up Rising
– Slow overnight rising at room temperature will give you the best texture and rise along with better sourdough flavor, but you can speed up the rise by setting the dough in a warm place (such as the oven with the light on).
*
Make-Ahead Option:
As soon as the rolls are formed and placed in the baking dish, cover with a sheet of oiled plastic wrap and refrigerate for 8-24 hours. Remove from the refrigerator 3-5 hours before baking to bring to room temperature and proof until visibly puffed (they will puff faster in a warm place). Optionally, score the rolls before baking.


