
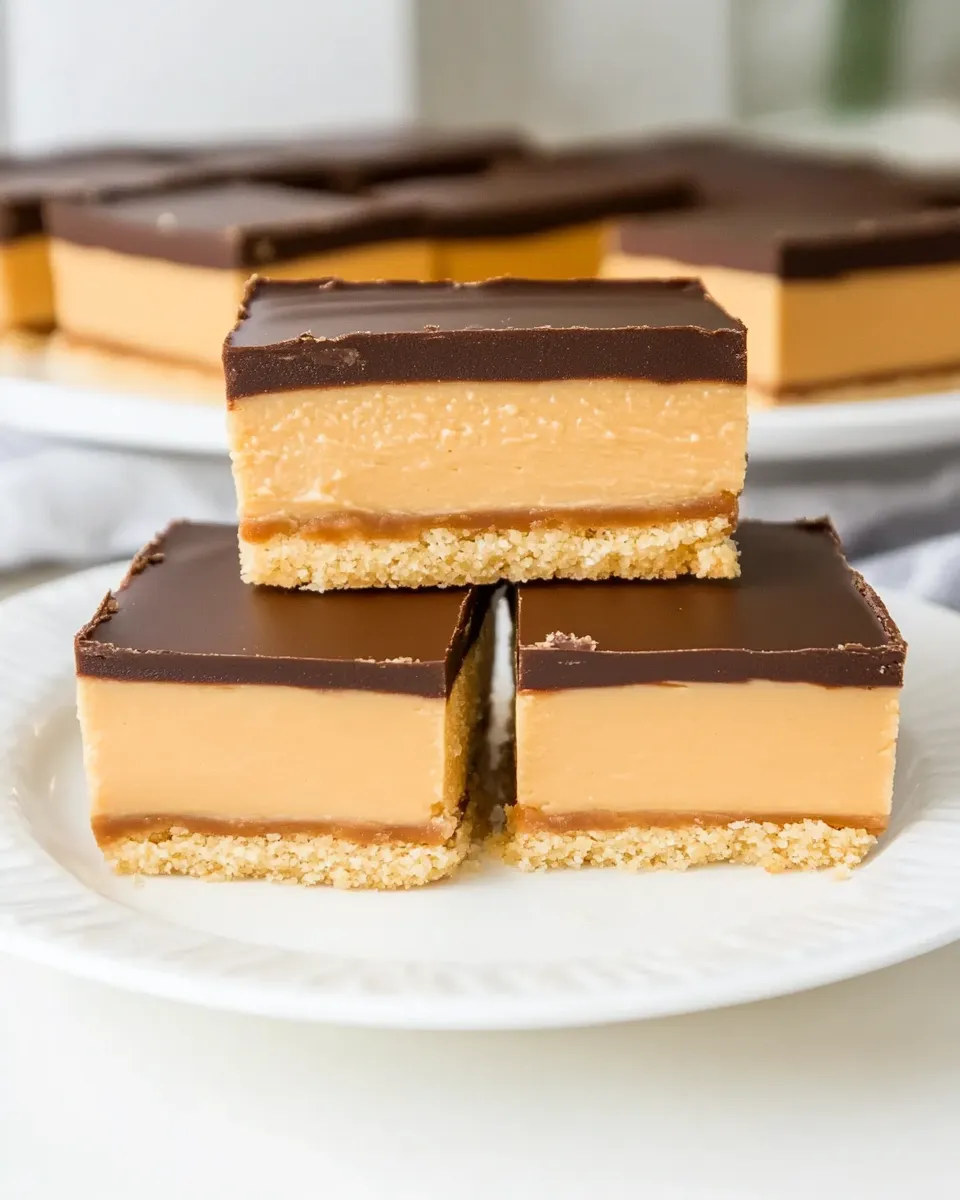
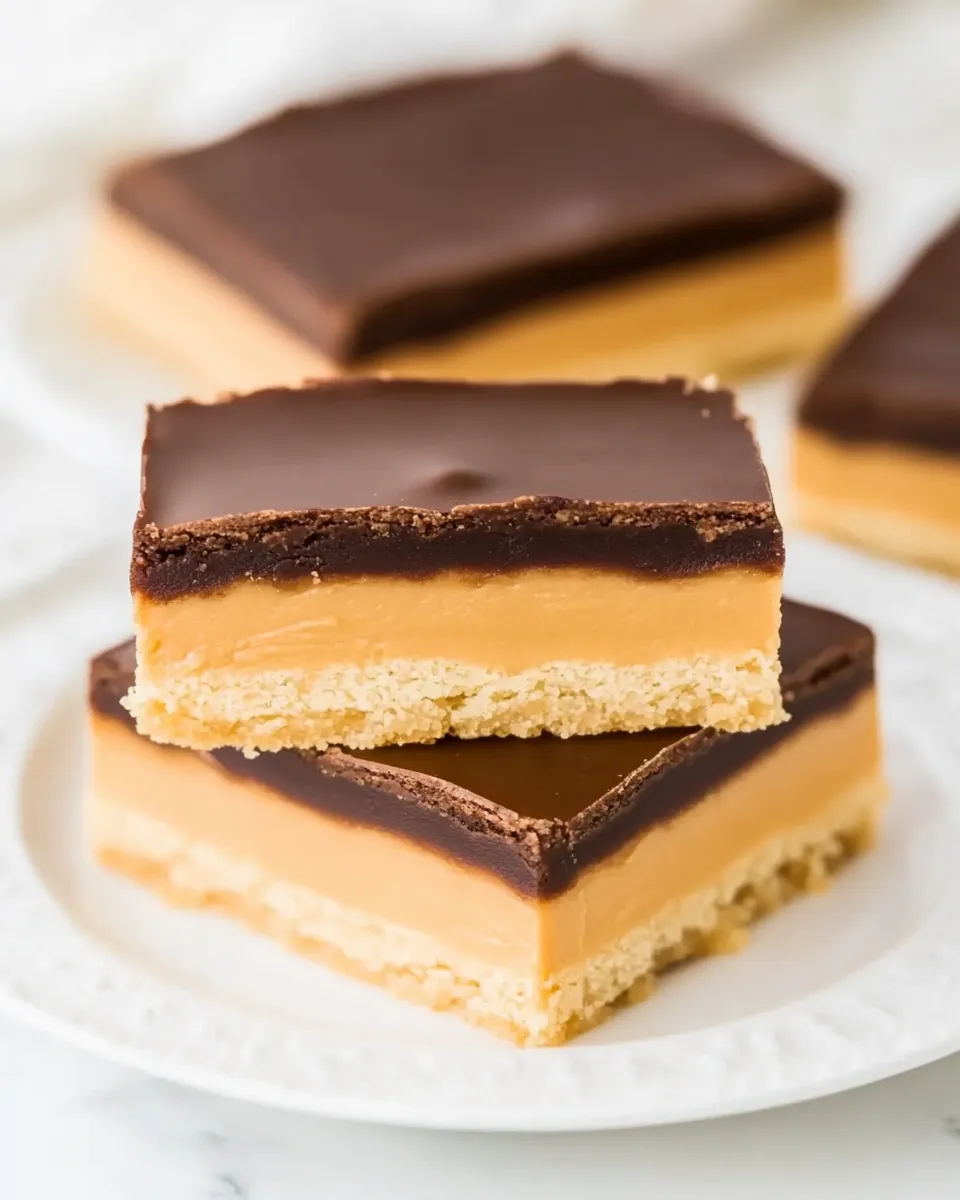
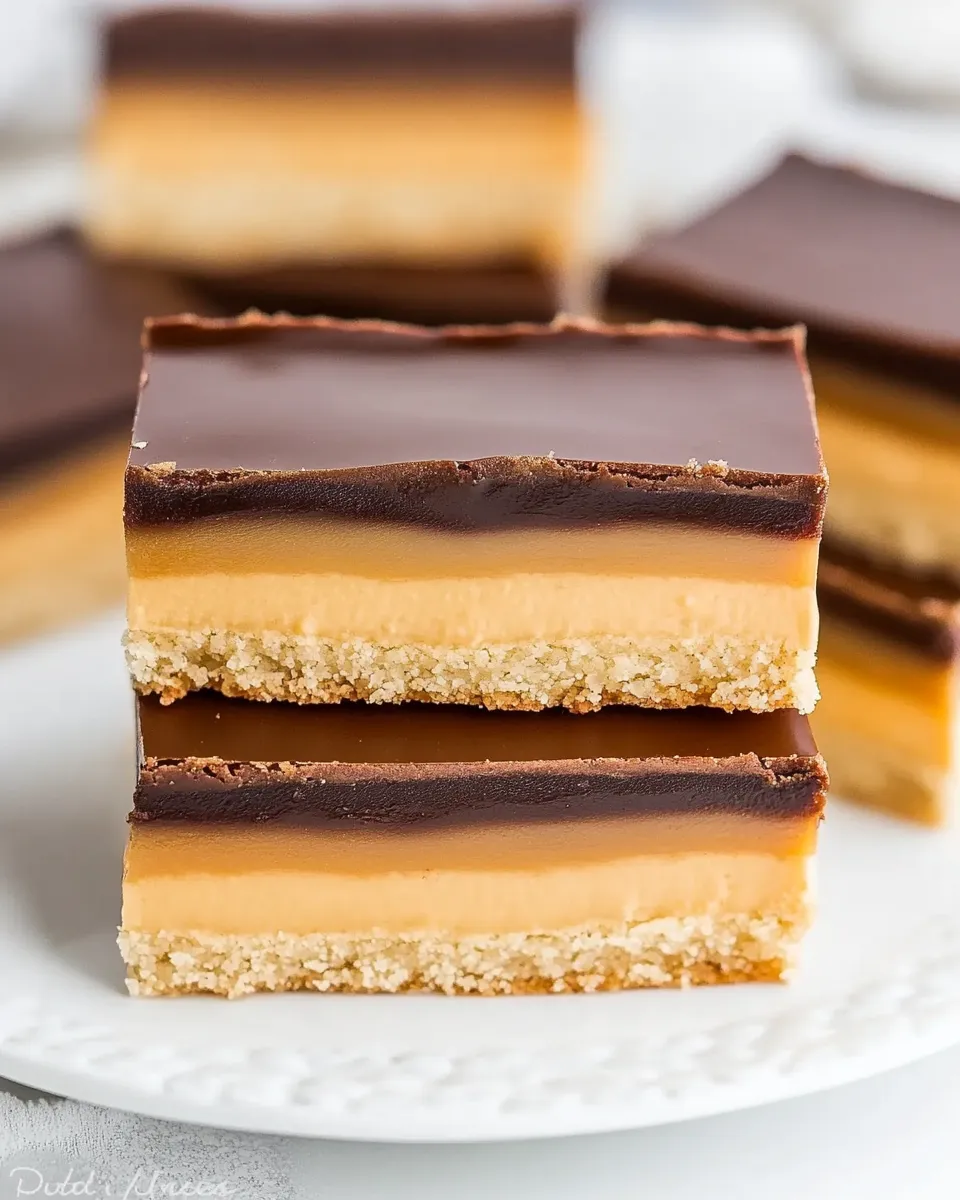
These Tagalongs Cookie Bars are an easy, old-school treat: a shortbread-like cookie base, a thick creamy peanut butter layer, and a glossy chocolate top. They hit the same sweet-salty spot as the Girl Scout cookie but in big, shareable squares. No tempering chocolate drama. No fussy equipment.
They’re straightforward to pull together on a weekend afternoon. The crust presses into an 8-inch pan, you spread a simple peanut butter filling, and finish with melted chocolate. Chill, slice, serve. They store well and freeze nicely, which makes them ideal for a make-ahead bake.
Below I keep the ingredient list and method exactly as written. Follow those steps for reliable results, then read on for the why, troubleshooting, and smart swaps so you can adapt them to your kitchen and diet.
Gather These Ingredients
Ingredients
- ½ cup unsalted butter, extremely soft (1 stick) — for the crust; very soft butter helps form a cohesive, crumbly shortbread base.
- 1 cup all-purpose flour — the structure for the crust; measure by spooning into the cup and leveling.
- ⅓ cup confectioners’ sugar — sweetens lightly and keeps the crust tender.
- 1 tablespoon cornstarch — adds delicacy and a little lift to the crust texture.
- 1 teaspoon vanilla extract — flavor boost for the crust; use pure vanilla if you have it.
- 2 tablespoons unsalted butter, melted — the start of the peanut butter filling; warm butter helps blend the filling smoothly.
- 1 heaping cup creamy peanut butter, not homemade or ‘natural’, it’s too thin and runny — the heart of the filling; use a thick, commercial creamy peanut butter for best set and texture.
- ½ cup confectioners’ sugar — sweetens and firms the peanut butter layer so it spreads cleanly.
- ½ teaspoon vanilla extract — rounds the peanut butter filling’s flavor.
- ¼ teaspoon salt, optional and to taste — balances sweetness; add if your peanut butter is unsalted or you like contrast.
- 1 heaping cup, about 8 ounces semi-sweet chocolate chips — the chocolate top; semi-sweet keeps the bars balanced, not overly sweet.
- 2 tablespoons vegetable shortening, optional but recommended so chocolate doesn’t set up overly firm and crack upon slicing — helps keep the chocolate layer glossy and sliceable without cracking.
The Method for Tagalongs Cookie Bars
- Preheat oven to 350°F (175°C). Line an 8-inch square baking pan with aluminum foil, leaving some overhang to lift the bars out later, and spray the foil with cooking spray; set the pan aside.
- In a large bowl combine 1 cup all-purpose flour, 1/3 cup confectioners’ sugar, and 1 tablespoon cornstarch. Stir to distribute evenly.
- Add 1/2 cup (1 stick) unsalted butter, extremely soft, and 1 teaspoon vanilla extract. Use a pastry cutter, two forks, or your fingertips to cut the butter into the dry ingredients until the mixture is sandy and crumbly.
- Turn the crumbly mixture into the prepared pan. Using your fingertips or a spatula, press and hard-pack the crumbs into an even, flat crust layer. Pierce the crust evenly about a dozen times with a fork to allow steam to escape.
- Bake the crust for 12 to 13 minutes, or until it has just set and is no longer raw-looking. The crust should still be pale (not browned). Remove from the oven and set aside while you make the filling.
- For the peanut butter filling: place 2 tablespoons unsalted butter (melted) in a medium microwave-safe bowl and heat on high about 30–60 seconds until melted. (If your melted butter is already measured as “melted,” proceed to the next step.)
- Add 1 heaping cup creamy peanut butter (not natural), 1/2 cup confectioners’ sugar, 1/2 teaspoon vanilla extract, and 1/4 teaspoon salt (optional and to taste) to the melted butter. Stir until the mixture is smooth and fully combined.
- Spread the peanut butter filling evenly over the warm crust using a spatula or offset knife. It is fine (and helpful) to spread while the crust is still warm.
- For the chocolate layer: place 1 heaping cup (about 8 ounces) semi-sweet chocolate chips and 2 tablespoons vegetable shortening (optional, recommended) in a medium microwave-safe bowl. Heat on high for 1 minute, stop and stir, then continue heating in 15-second bursts, stirring between bursts, until the chocolate is fully melted and smooth.
- Pour the melted chocolate over the peanut butter layer. Gently tilt or shake the pan so the chocolate spreads, then smooth very lightly with an offset spatula or knife to an even layer.
- Cover the pan with a sheet of foil and allow the bars to set at room temperature for at least 4 hours (or overnight) until the chocolate is firm. Alternatively, refrigerate the pan for at least 3 hours to speed setting (refrigeration can make chocolate appear slightly dull but does not affect flavor).
- If refrigerated, let the pan sit at room temperature for a few minutes before slicing to reduce the chance of the chocolate cracking. Use the foil overhang to lift the bars from the pan, then cut into bars. For cleaner slices, use a sharp knife warmed under hot water and wiped dry between cuts.
Why This Recipe Works
The structure here is simple and intentional. The flour, confectioners’ sugar, and cornstarch create a shortbread-like crumb that’s tender but packs together when mixed with soft butter. Cornstarch keeps the crumb delicate rather than tough.
The peanut butter layer relies on melted butter and confectioners’ sugar to achieve a spreadable yet stable filling. Powdered sugar contains a little cornstarch itself, which helps the filling set and hold its shape once chilled. Using a thicker, commercial creamy peanut butter assures the filling won’t weep oily liquid.
The chocolate top is tempered by the optional vegetable shortening. That fat softens the final set so the chocolate doesn’t become rock-hard and crack when you slice the bars. Melt-and-pour chocolate like this is forgiving and produces a glossy, smooth finish when handled gently.
Vegan & Vegetarian Swaps

Vegetarian: This recipe is already vegetarian. If you avoid dairy for vegan needs, you can swap several items to make these vegan-friendly.
- Replace all butter with a vegan stick-style butter (use the same measurements) — this keeps the crust texture.
- Use dairy-free creamy peanut butter (same quantity) — commercial non-natural varieties work best for structure.
- Substitute semi-sweet chocolate chips with dairy-free chocolate chips and use a plant-based shortening or a neutral oil like refined coconut oil in the same amount (2 tablespoons) to maintain sliceable chocolate.
- Check your confectioners’ sugar and chocolate brand for any bone-char processing if that’s a concern.
What You’ll Need (Gear)
- 8-inch square baking pan — the recipe is sized for this pan; a larger pan will make thinner bars.
- Aluminum foil — to line the pan and create an overhang for easy lifting.
- Cooking spray — to prevent sticking.
- Large mixing bowl and medium mixing bowl — for the crust and filling.
- Pastry cutter, two forks, or clean fingertips — to cut butter into the dry crust ingredients.
- Measuring cups and spoons — accuracy matters for the crust texture and filling balance.
- Spatula or offset spatula — for pressing crust and spreading layers.
- Microwave-safe bowls — for melting butter and chocolate safely.
- Sharp knife and hot water for warming between cuts — to get clean slices.
Pitfalls & How to Prevent Them
Crust is too crumbly and falls apart: you either didn’t press it firmly enough or the butter wasn’t soft enough. Make sure the butter is extremely soft before mixing, and hard-pack the crumbs into the pan firmly with your fingertips or a spatula.
Crust browned in the oven: the recipe calls for baking only until the crust is set and still pale (12–13 minutes). If your oven runs hot, check a minute or two earlier; you want set, not golden.
Peanut butter filling separates or is oily: don’t use natural peanut butters that separate (oil on top). Use a commercial creamy peanut butter with stabilizers so the filling stays smooth and sets properly.
Chocolate cracks when slicing: this often happens if the chocolate sets very hard. Use the recommended 2 tablespoons of vegetable shortening. If you chilled the pan, let it sit a few minutes at room temperature before slicing, and warm your knife under hot water between cuts for cleaner slices.
Make It Diet-Friendly
If you want fewer calories per serving, your easiest lever is portion control: cut smaller bars. The flavors remain the same, and you get more servings per batch.
For lower-sugar options: swap the semi-sweet chocolate for a lower-sugar chocolate or a dark chocolate with higher cocoa percentage; reduce the amount of the peanut-butter-layer confectioners’ sugar slightly and taste as you go. Keep in mind the confectioners’ sugar plays a structural role in the filling, so reducing it will change texture.
Gluten-free option: use a 1:1 gluten-free all-purpose flour blend for the crust. Texture may change slightly, and you may need to press the crust a bit firmer, but it will generally work.
Cook’s Notes
Press the crust firmly and evenly. This is what gives you a clean base so the peanut butter layer spreads nicely. A flat-bottomed measuring cup or the back of a spoon can help pack it tightly.
Spread the peanut butter layer while the crust is still warm. The slight warmth helps the layer adhere and creates a thin bond so the bar slices hold together.
If you prefer a smoother chocolate top, strain any unmelted bits and stir until completely glossy before pouring. Stirring frequently while heating prevents scorching.
Storing Tips & Timelines
Room temperature: Store in an airtight container at room temperature for up to 3 days if your kitchen is cool (below 70°F / 21°C). The chocolate may bloom slightly over time but will remain tasty.
Refrigerator: For longer life, refrigerate for up to 2 weeks. Chilling keeps the peanut butter layer firm and the chocolate stable, but it can dull the sheen. Let bars sit a few minutes at room temperature before serving for the best mouthfeel.
Freezer: Wrap bars tightly in plastic wrap and then foil, or store in a freezer-safe container, for up to 3 months. Thaw overnight in the refrigerator before bringing to room temperature and slicing.
Your Questions, Answered
Q: Can I use natural peanut butter? A: The instructions specifically say not to. Natural peanut butter is too thin and oily, which will cause the filling to separate and not set properly.
Q: Can I double the recipe? A: Yes. Double all ingredients and bake in a 9×13-inch pan, but watch baking time for the crust—thinner crust in a larger pan will bake faster. Alternatively, make two separate 8-inch pans for consistent thickness.
Q: Do I have to use vegetable shortening? A: It’s optional. It helps the chocolate set with a more cuttable texture. If you skip it, the chocolate may become firmer and more prone to cracking when sliced.
Q: How do I get clean slices? A: Warm a sharp knife under hot water, dry it, and make a single decisive cut. Wipe and warm the knife between cuts for optimal slices.
Before You Go
These Tagalongs Cookie Bars are a dependable, crowd-pleasing bake—sweet, peanut-buttery, and satisfying. They’re great for gifting, potlucks, or keeping in the freezer for a sweet emergency. Make them once exactly as written to learn the texture and timing, then tweak small things like chocolate type or portion size to suit your taste.
If you try them, I’d love to hear how they turned out for you: did you add a sprinkle of flaky salt on top? Did you make them vegan? Small notes like that help others. Happy baking.
Tagalongs Cookie Bars
Ingredients
Ingredients
- 1/2 cupunsalted butter extremely soft (1 stick)
- 1 cupall-purpose flour
- 1/3 cupconfectioners’ sugar
- 1 tablespooncornstarch
- 1 teaspoonvanilla extract
- 2 tablespoonsunsalted butter melted
- 1 heaping cup creamy peanut butter not homemade or ‘natural’, it’s too thin and runny
- 1/2 cupconfectioners’ sugar
- 1/2 teaspoonvanilla extract
- 1/4 teaspoonsalt optional and to taste
- 1 heaping cup about 8 ounces semi-sweet chocolate chips
- 2 tablespoonsvegetable shortening optional but recommended so chocolate doesn’t set up overly firm and crack upon slicing
Instructions
Instructions
- Preheat oven to 350°F (175°C). Line an 8-inch square baking pan with aluminum foil, leaving some overhang to lift the bars out later, and spray the foil with cooking spray; set the pan aside.
- In a large bowl combine 1 cup all-purpose flour, 1/3 cup confectioners’ sugar, and 1 tablespoon cornstarch. Stir to distribute evenly.
- Add 1/2 cup (1 stick) unsalted butter, extremely soft, and 1 teaspoon vanilla extract. Use a pastry cutter, two forks, or your fingertips to cut the butter into the dry ingredients until the mixture is sandy and crumbly.
- Turn the crumbly mixture into the prepared pan. Using your fingertips or a spatula, press and hard-pack the crumbs into an even, flat crust layer. Pierce the crust evenly about a dozen times with a fork to allow steam to escape.
- Bake the crust for 12 to 13 minutes, or until it has just set and is no longer raw-looking. The crust should still be pale (not browned). Remove from the oven and set aside while you make the filling.
- For the peanut butter filling: place 2 tablespoons unsalted butter (melted) in a medium microwave-safe bowl and heat on high about 30–60 seconds until melted. (If your melted butter is already measured as “melted,” proceed to the next step.)
- Add 1 heaping cup creamy peanut butter (not natural), 1/2 cup confectioners’ sugar, 1/2 teaspoon vanilla extract, and 1/4 teaspoon salt (optional and to taste) to the melted butter. Stir until the mixture is smooth and fully combined.
- Spread the peanut butter filling evenly over the warm crust using a spatula or offset knife. It is fine (and helpful) to spread while the crust is still warm.
- For the chocolate layer: place 1 heaping cup (about 8 ounces) semi-sweet chocolate chips and 2 tablespoons vegetable shortening (optional, recommended) in a medium microwave-safe bowl. Heat on high for 1 minute, stop and stir, then continue heating in 15-second bursts, stirring between bursts, until the chocolate is fully melted and smooth.
- Pour the melted chocolate over the peanut butter layer. Gently tilt or shake the pan so the chocolate spreads, then smooth very lightly with an offset spatula or knife to an even layer.
- Cover the pan with a sheet of foil and allow the bars to set at room temperature for at least 4 hours (or overnight) until the chocolate is firm. Alternatively, refrigerate the pan for at least 3 hours to speed setting (refrigeration can make chocolate appear slightly dull but does not affect flavor).
- If refrigerated, let the pan sit at room temperature for a few minutes before slicing to reduce the chance of the chocolate cracking. Use the foil overhang to lift the bars from the pan, then cut into bars. For cleaner slices, use a sharp knife warmed under hot water and wiped dry between cuts.
Equipment
- 8-inch square baking pan
- Aluminum Foil
- Cooking spray
- pastry cutter or two forks
- Fork
- Spatula
- Offset Spatula
- Microwave-safe Bowl
- Sharp Knife


