

These are the chocolate chip cookies I reach for when I want something reliable: crisp at the edges, soft in the center, and studded with generous chunks of chocolate. No tricks, no strange ingredients — just a classic dough that behaves. I tested the timing and handling until the texture felt right across multiple ovens and pans, and I’m sharing the version that gave the least surprises.
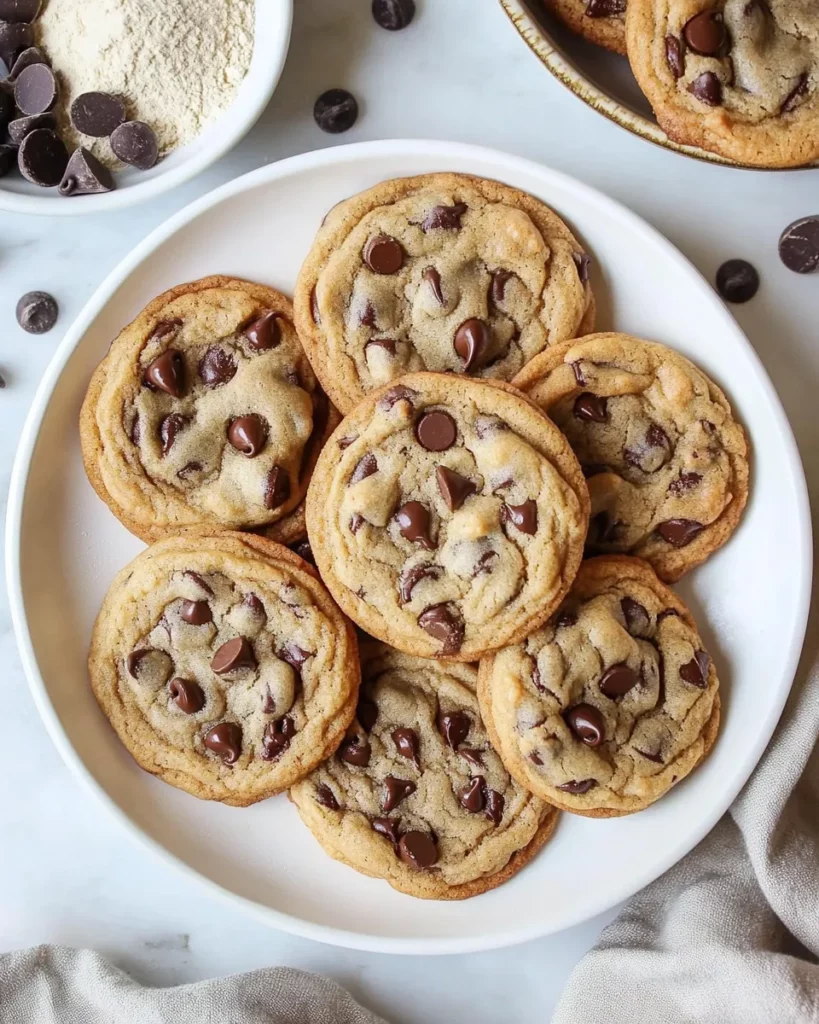
If you want cookies that slice through a glass of milk like a small, comforting ritual, this is it. The method below includes a short chill option that makes a real difference if you want a tender center. Read through before you start; a little prep makes the difference between “good” and “the ones people ask for again.”
I keep the tone practical here: step-by-step instructions, clear ingredient notes, and the troubleshooting I wish I’d had the first time I baked this recipe. Let’s get to it.
The Essentials
Yield and timing vary by how big you scoop the dough, but this recipe uses a 2-tablespoon portion — a good mid-size cookie. Preheat the oven and line your sheet ahead of time. Work with room-temperature eggs and softened butter so the dough creams properly. That creaming step is where the texture begins.
Choose a heavy baking sheet and avoid dark nonstick pans for best color control. If you like a chewier center, refrigerate the dough for an hour before baking; if you like crisper edges, bake right away and use the “slap” trick after baking (details in the method). These small choices shape the outcome.
Ingredients
- 1 cup unsalted butter, softened — provides richness and the base for creaming; softened (not melted) is key for aeration.
- 1 cup brown sugar, packed — adds moisture and chew thanks to the molasses; packing it prevents excess air.
- 1/2 cup granulated sugar — balances sweetness and contributes to browning and structure.
- 2 large eggs, at room temperature — bind the dough and add lift; room temperature eggs incorporate more evenly.
- 1 tablespoon vanilla extract — enhances flavor; use pure vanilla if you have it.
- 2 cups all purpose flour — the structural backbone; measure by spooning into the cup and leveling for accuracy.
- 1 teaspoon baking soda — provides spread and a bit of lift.
- 1/2 tsp baking powder — adds a touch of lift and helps with overall texture.
- 1/2 teaspoon kosher salt — balances sweetness; use kosher for milder salting than table salt.
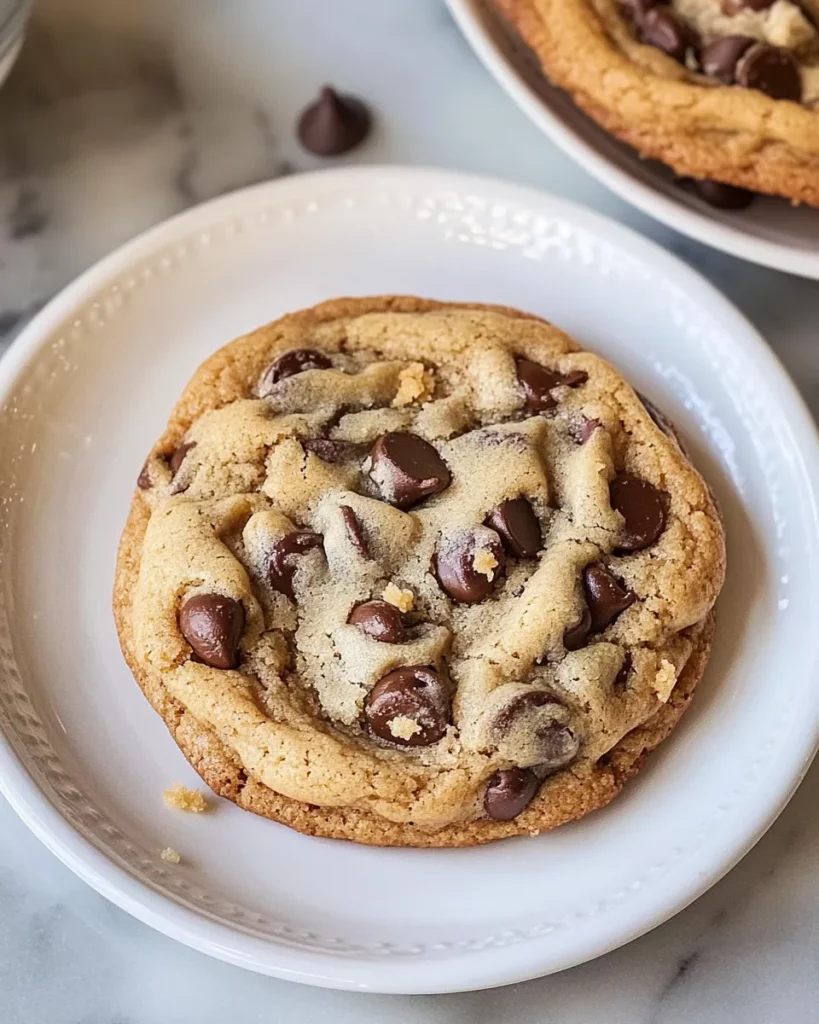
- 2 1/4 cups semi sweet chocolate chunks — the star mix-in; chunks give more dramatic chocolate pockets than chips.
Method: Chocolate Chip Cookies
- Preheat oven to 375 F. Line baking sheets with a Silpat or parchment paper.
- In a standing mixer fitted with the paddle (or in a large bowl with a hand mixer), cream the softened unsalted butter with the packed brown sugar and granulated sugar for 4–5 minutes, until light and fluffy.
- Add the large eggs one at a time, mixing briefly after each addition so each egg is incorporated. Add the vanilla extract and mix for about 1 minute more.
- In a separate bowl, whisk together the all purpose flour, baking soda, baking powder, and kosher salt until evenly combined.
- Gradually add the dry ingredient mixture to the butter–egg mixture and mix just until combined. Do not overmix.
- Fold in the semi sweet chocolate chunks with a spatula until distributed evenly through the dough.
- (Optional — for a softer center) Refrigerate the dough in the bowl for 1 hour, or freeze the dough (in the bowl) for 30 minutes, before portioning.
- Using a 2 tablespoon ice cream scooper or a 2 tablespoon measure, portion the dough onto the prepared baking sheets, spacing cookies about 2 inches apart.
- Bake the cookies for 12 minutes, then remove the baking sheet from the oven.
- If you prefer flatter, crisper cookies, immediately (carefully) give the baking sheet a firm slap against the countertop to deflate any large air pockets. Allow the cookies to cool on the baking sheet for 2 minutes.
- After 2 minutes, transfer the cookies to a cooling rack to finish cooling. Serve when cooled to your liking.
- (To freeze cookie dough balls for storage) Place scooped dough balls on a baking sheet and freeze about 1 hour, then transfer the frozen balls to labeled resealable bags and freeze up to 3 months.
- (To bake from frozen) Bake frozen cookie dough balls as directed, adding about 1 extra minute to the baking time.
Why This Recipe Belongs in Your Rotation
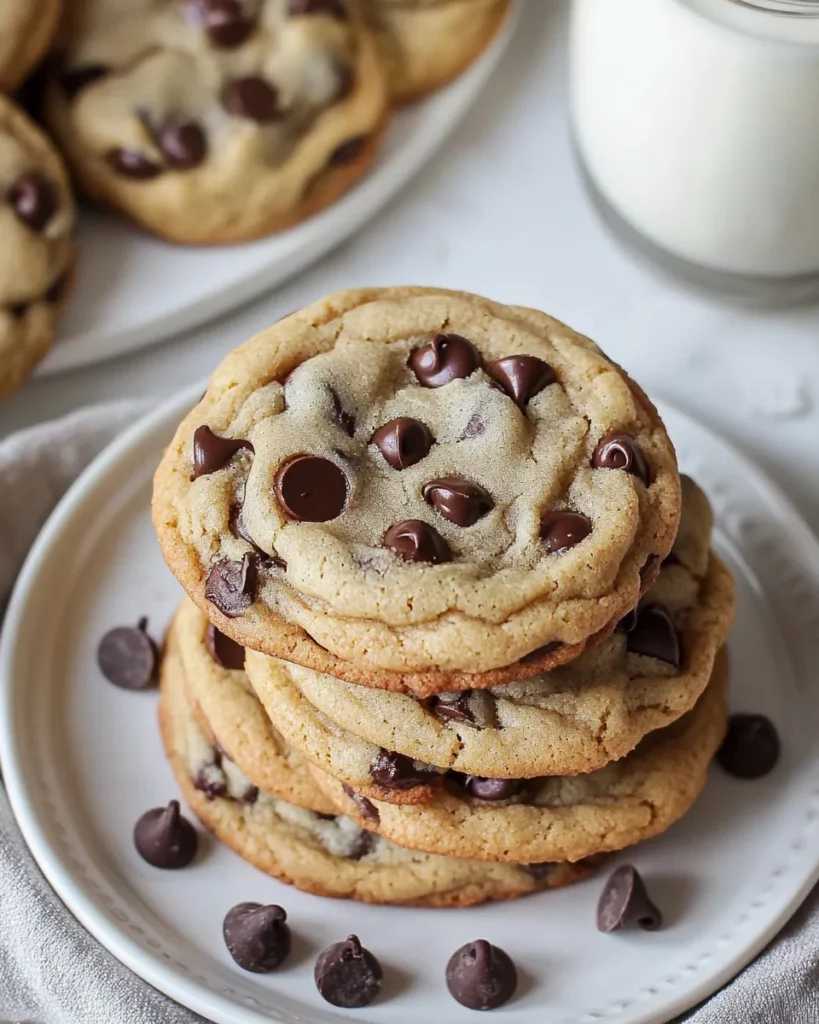
This recipe balances ease with consistently good results. The creaming time gives you light, well-aerated dough that bakes up with slightly crisp edges and tender middles. The inclusion of both baking soda and baking powder is intentional: one encourages spread and browning, and the other supports a gentle lift so the cookie isn’t too dense.
It’s forgiving. Slight variations in oven temperature or a minute more of mixing won’t ruin it. The optional chill step offers control: chill when you need better shape and texture; skip it when you want warm cookies fast. That flexibility makes this my go-to for both weeknight baking and casual hosting.
Texture-Safe Substitutions
If you need to swap something, choose substitutions that preserve the texture:
Fat
Use salted butter if unsalted isn’t available — reduce added salt to 1/4 teaspoon to compensate. Avoid using margarine or spreads; they change the structure and spread of the cookie.
Sugars
If you must replace brown sugar, make a mix of granulated sugar plus a tablespoon of molasses per cup to mimic brown sugar’s moisture and flavor. This keeps the chew.
Chocolate
Different chocolates alter texture and melting. Chunks yield pockets of molten chocolate; chips hold their shape more. Both work, but chunks give the rustic look and gooey bites.
Cook’s Kit
Good tools aren’t fancy, but they help. Here’s what I recommend:
– A stand mixer with a paddle attachment or a sturdy hand mixer for thorough creaming. – A 2-tablespoon cookie scoop for even portions and consistent bake times. – Parchment paper or a Silpat for clean release and even browning. – A cooling rack so cookies finish cooling without steaming on the sheet. – A solid baking sheet; thin sheets heat unevenly.
Common Errors (and Fixes)

Issue: Cookies spread too thin. Fix: Refrigerate the dough before baking for at least 30 minutes. Use a lighter-colored baking sheet. Check your measurements of flour — too little flour can cause excess spread.
Issue: Cookies are cakey or too dense. Fix: Do not overmix once the flour is added. Overmixing develops gluten and tightens the crumb. Also ensure you’re using the suggested amount of baking powder/soda — both play a role in structure.
Issue: Edges burn before centers set. Fix: Lower oven temp by 10–15 degrees or bake on the middle rack. Rotate the sheet halfway through if your oven has hot spots. A thicker sheet can help moderate browning.
Variations for Dietary Needs
Gluten-free: Use a 1:1 gluten-free all-purpose flour that includes xanthan gum. Expect slightly different texture; let the batter rest 10–15 minutes before scooping to hydrate the flour.
Dairy-free: Swap to a solid baking stick vegan butter (not oil). The cookies will be slightly different in flavor, but the creaming method still works. Use dairy-free chocolate chunks.
Lower-sugar: Reduce granulated sugar by up to 1/4 cup, but keep the brown sugar — it contributes moisture and chew. Texture will be a touch less tender if you cut too much sugar.
Notes on Ingredients
Butter: Softened butter should still hold a slight shape when pressed — not oily or melted. This helps trap air during creaming.
Sugars: Brown sugar influences moisture. If yours is hard-packed, break it up before measuring. Granulated sugar helps with spread and crispness.
Flour: Spoon and level the flour into the measuring cup. Too much flour makes dry, overly thick cookies; too little leads to excessive spread.
Chocolate: I use semi-sweet chunks around 1/2-inch to 1-inch in size. They create pockets of chocolate that melt into attractive ribbons when baked. If using chopped bars, vary the chunk sizes for texture contrast.
Salt: Kosher salt measures differently than table salt. If you must use table salt, use about half the volume. Salt is important to balance sweetness and bring out other flavors.
Storing Tips & Timelines
Room temperature: Store completely cooled cookies in an airtight container for up to 3 days. Layer with parchment to prevent sticking.
Refrigerator: Cookies keep for about a week if you like them cold or want to gently firm up very soft cookies.
Freezing dough: Scoop dough balls, freeze 1 hour on a tray, then bag them for up to 3 months. Bake straight from frozen, adding about 1 minute to the bake time.
Reheating: Warm cookies in a 300 F oven for 3–5 minutes or microwave for 8–10 seconds to revive a just-baked texture.
Helpful Q&A
Q: Can I substitute brown sugar entirely with granulated sugar?
A: You can, but the cookies will be less chewy and have a lighter flavor. Brown sugar adds moisture and depth, so I prefer at least half.
Q: Why both baking soda and baking powder?
A: Baking soda encourages spread and browning; baking powder provides a gentler lift. Together they balance texture so the cookies aren’t flat or overly puffy.
Q: My cookies are too flat. What did I do wrong?
A: Likely too warm dough, under-measured flour, or a pan that’s too hot. Chill the dough, check flour measurement, and use a lighter-colored pan next time.
Q: How do I get an even bake across batches?
A: Rotate baking sheets and cool them between batches. If you bake multiple sheets at once, use the oven’s convection setting if you have it, but reduce temperature by 15–20 F.
In Closing
These Chocolate Chip Cookies are dependable, adaptable, and easy to scale. Follow the creaming time, measure carefully, and decide early whether you want soft centers or crisp edges — that choice will determine whether you chill the dough and whether you give the sheet a firm slap after baking. Small rituals make big differences in baking.
Make a batch, share with friends, and notice which adjustments you prefer. Once you find that sweet spot for your oven and tastes, this recipe will be the one you reach for when you want a no-fail cookie that still feels special.
The Best Chocolate Chip Cookies
Ingredients
Ingredients
- ?1 cupunsalted butter softened
- ?1 cupbrown sugar packed
- ?1/2 cupgranulated sugar
- ?2 large eggs at room temperature
- ?1 tablespoonvanilla extract
- ?2 cupsall purpose flour
- ?1 teaspoonbaking soda
- ?1/2 tspbaking powder
- ?1/2 teaspoonkosher salt
- ?2 1/4 cupssemi sweet chocolate chunks
Instructions
Instructions
- Preheat oven to 375 F. Line baking sheets with a Silpat or parchment paper.
- In a standing mixer fitted with the paddle (or in a large bowl with a hand mixer), cream the softened unsalted butter with the packed brown sugar and granulated sugar for 4–5 minutes, until light and fluffy.
- Add the large eggs one at a time, mixing briefly after each addition so each egg is incorporated. Add the vanilla extract and mix for about 1 minute more.
- In a separate bowl, whisk together the all purpose flour, baking soda, baking powder, and kosher salt until evenly combined.
- Gradually add the dry ingredient mixture to the butter–egg mixture and mix just until combined. Do not overmix.
- Fold in the semi sweet chocolate chunks with a spatula until distributed evenly through the dough.
- (Optional — for a softer center) Refrigerate the dough in the bowl for 1 hour, or freeze the dough (in the bowl) for 30 minutes, before portioning.
- Using a 2 tablespoon ice cream scooper or a 2 tablespoon measure, portion the dough onto the prepared baking sheets, spacing cookies about 2 inches apart.
- Bake the cookies for 12 minutes, then remove the baking sheet from the oven.
- If you prefer flatter, crisper cookies, immediately (carefully) give the baking sheet a firm slap against the countertop to deflate any large air pockets. Allow the cookies to cool on the baking sheet for 2 minutes.
- After 2 minutes, transfer the cookies to a cooling rack to finish cooling. Serve when cooled to your liking.
- (To freeze cookie dough balls for storage) Place scooped dough balls on a baking sheet and freeze about 1 hour, then transfer the frozen balls to labeled resealable bags and freeze up to 3 months.
- (To bake from frozen) Bake frozen cookie dough balls as directed, adding about 1 extra minute to the baking time.
Equipment
- Oven
- stand mixer with paddle attachment
- hand mixer (optional)
- Mixing bowls
- Spatula
- Baking Sheets
- parchment paper or Silpat
- 2 tablespoon scoop or measure
- Cooling rack


