

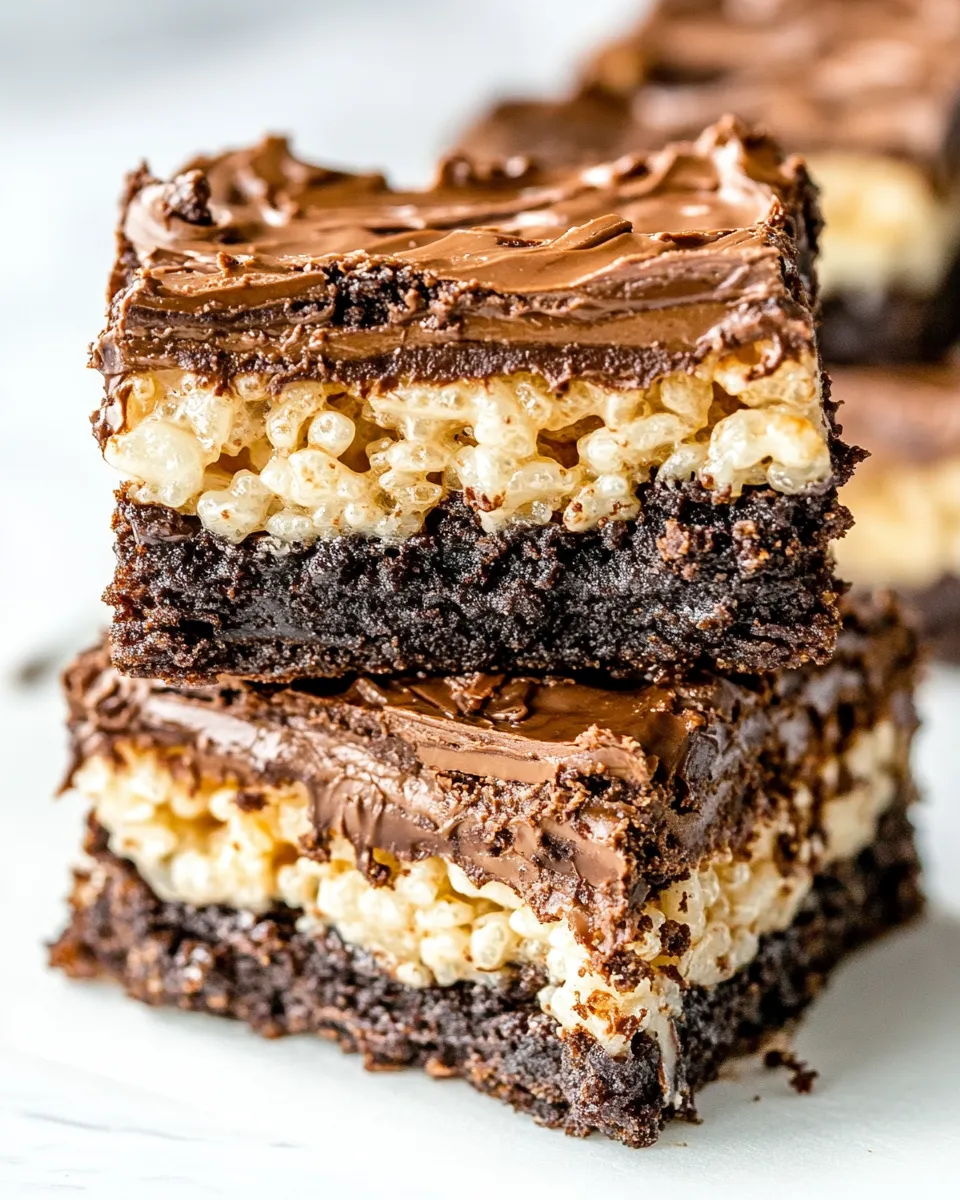
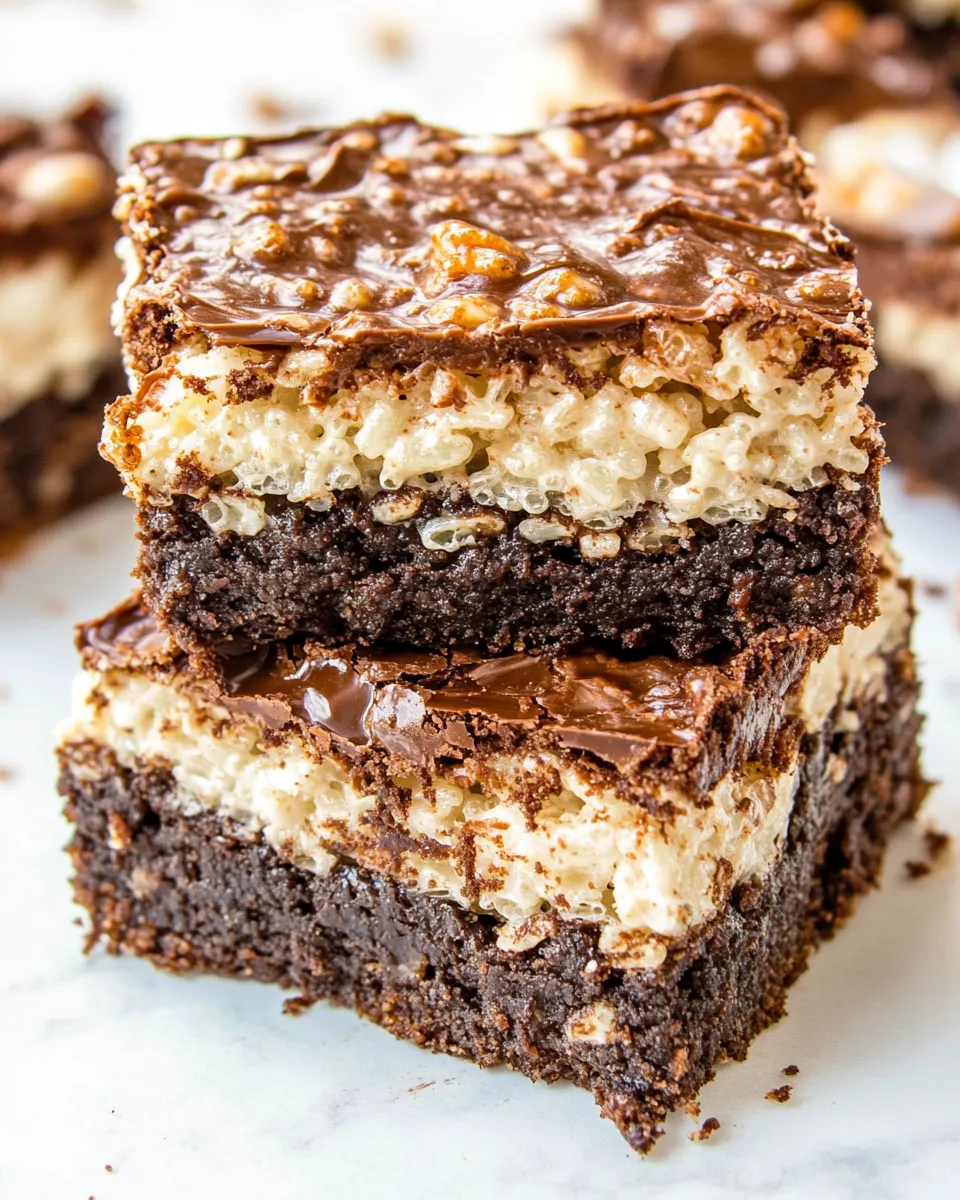
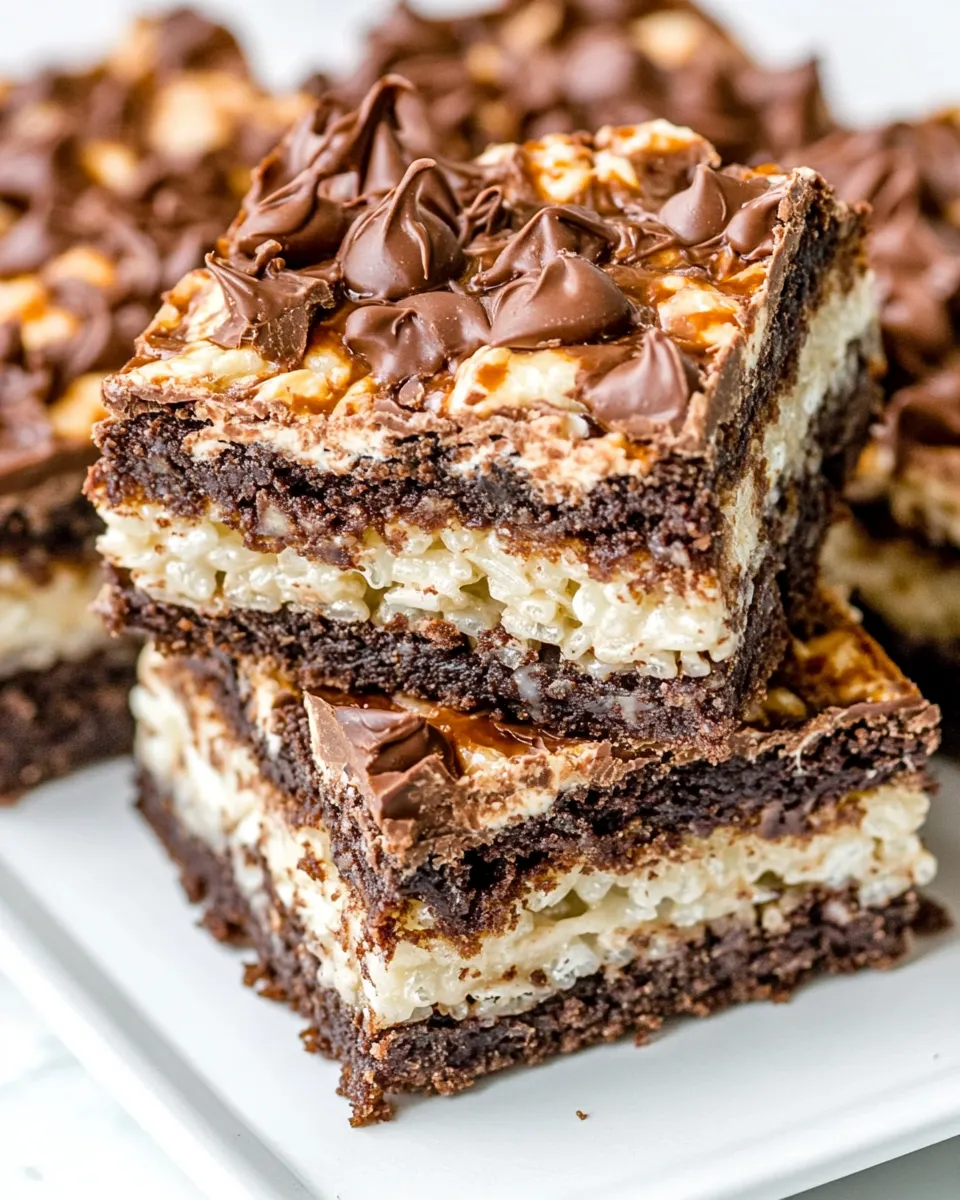
These brownies are the kind of dessert that stops conversations. Dense, fudgy chocolate on the bottom, a tangy cream cheese middle, and a crunchy, chocolate-peanut butter Rice Krispies topping — all in one pan. They’re showstopping but surprisingly straightforward, which is why I make them when I want something impressive without fuss.
I test recipes the way I live: practical and a little impatient. Expect clear timings, gentle shortcuts that don’t change the results, and a few pointers to save you from common slip-ups. If you can melt chocolate, beat a batter, and press a cereal topping, you’ll end up with stunning bars that slice neatly and travel well.
Make these for a potluck, for a week of treats stacked in the fridge, or for an afternoon when you want something wildly satisfying. I walk through the ingredients, the exact step-by-step method, and the troubleshooting I learned so your first pan comes out beautifully.
Ingredient Notes
Ingredients
- 6 tablespoons unsalted butter — melts into the chocolate to give a glossy, fudgy brownie base.
- 6 ounces semisweet chocolate chips — primary chocolate for the brownie base; choose standard semisweet for balance.
- ¼ cup unsweetened cocoa powder — boosts chocolate intensity and deepens color.
- ¾ cup all-purpose flour — provides structure for the brownie layer.
- ¼ teaspoon baking powder — a touch of lift so the brownie isn’t rubbery.
- ¼ teaspoon salt — balances sweetness and enhances chocolate flavor.
- 1 cup sugar — sweetens and helps the brownie base set; this is for the brownie layer.
- 2 large eggs — added to the brownie wet mix for richness and bind.
- 2 teaspoon vanilla extract — rounds flavors in the brownie layer.
- 16 ounce cream cheese (2 packages, softened) — the heart of the cheesecake layer; room temperature ensures smoothness.
- 2 large eggs — separate set of eggs for the cheesecake layer; do not skip or sub in the brownie eggs.
- ¼ cup sugar — sweetens the cheesecake layer; measured separately from the brownie sugar.
- 2 tablespoon all-purpose flour — stabilizes the cheesecake so it sets cleanly.
- 2 tablespoon milk — loosens the cheesecake batter for a silky texture.
- 1 teaspoon vanilla extract — brightens the cheesecake flavor.
- 3 cups Rice Krispies — provides the crunchy top layer; press gently to preserve crispness.
- 1 cup peanut butter — binds and flavors the Rice Krispies topping; smooth or natural both work but natural may be thinner.
- 1 cup semisweet chocolate chips — melted for the Rice Krispies topping; pairs with the peanut butter for a candy-like layer.
- ½ cup Nutella — adds hazelnut-chocolate richness to the Rice Krispies topping and keeps it glossy.
Triple Layer Rice Krispie Brownies: Step-by-Step Guide
- Preheat oven to 350°F. Line a 9″ x 13″ pan with parchment paper, leaving about 2 inches of overhang on opposite sides, and spray the parchment and pan with cooking spray.
- Melt chocolate and butter: place 6 tablespoons unsalted butter and 6 ounces semisweet chocolate chips in a microwave-safe bowl. Microwave in 30-second intervals, stirring after each interval, until the mixture is smooth. Set aside to cool slightly.
- Whisk dry brownie ingredients: in a bowl, whisk together 3/4 cup all-purpose flour, 1/4 teaspoon baking powder, and 1/4 teaspoon salt. Set aside.
- Beat brownie wet ingredients: in the bowl of an electric mixer fitted with the whisk attachment (or with a hand mixer), combine 1 cup sugar, 2 large eggs, and 2 teaspoons vanilla extract. Beat on medium speed until pale and slightly thickened, about 3–4 minutes.
- Combine brownie batter: add the melted chocolate mixture and 1/4 cup unsweetened cocoa powder to the beaten sugar mixture and mix until combined. Add the flour mixture and beat, scraping down the bowl as needed, until just incorporated.
- Bake the brownie base: pour the batter into the prepared pan and smooth the top with a rubber spatula. Bake at 350°F for 15 minutes (the brownie should be partially baked but not fully set).
- Make the cheesecake layer: in a clean bowl, beat 16 ounces softened cream cheese until smooth. Add 2 large eggs, 1/4 cup sugar, 2 tablespoons all-purpose flour, 2 tablespoons milk, and 1 teaspoon vanilla extract. Mix on medium speed until the cheesecake batter is smooth, about 3–5 minutes.
- Add cheesecake layer and bake: pour the cheesecake mixture over the partially baked brownie layer and smooth the top. Return the pan to the oven and bake at 350°F for 15–20 minutes, until the cheesecake layer is set (the center may still have a slight jiggle but should not be liquid).
- Cool completely: remove the pan from the oven and let it cool to room temperature on a wire rack.
- Make the Rice Krispies topping: in a small saucepan over low heat, combine 1 cup semisweet chocolate chips, 1 cup peanut butter, and 1/2 cup Nutella. Cook, stirring occasionally, until the chocolate and peanut butter are completely melted and the mixture is smooth. Remove from heat and stir in 3 cups Rice Krispies until the cereal is fully coated.
- Finish the bars: spread the Rice Krispies mixture evenly over the cooled cheesecake layer and press gently to level.
- Chill to set: refrigerate the assembled pan for at least 2 hours (until the topping is firm).
- Cut and serve: use the parchment overhang to lift the slab from the pan. Cut into squares and serve.
Why This Recipe Works
There are three distinct layers here, and each plays a specific role so the final bar is balanced: the brownie base gives density and chocolate flavor; the cheesecake layer adds tang and a creamy lift so the bar isn’t overwhelmingly fudgy; and the Rice Krispies topping introduces crunch plus a peanut-butter-chocolate candy note.
The partially baked brownie is essential. Baking it only 15 minutes prevents it from overcooking during the second bake with the cheesecake layer; that produces a tender, fudgy bottom rather than a dry, cakey slab. The small bit of flour and baking powder keeps structure without turning these bars into a cake.
Substitutions by Category
Chocolate
Semisweet chocolate chips can be swapped for dark chocolate chips for a slightly less sweet result. If you prefer milk chocolate, the bars will be sweeter and softer.
Nut Ingredients
Peanut butter can be swapped for almond butter or sunflower seed butter if you need a nut-free option, but note the topping texture and flavor will shift. Nutella adds hazelnut-chocolate richness; you can reduce it or omit it and add an extra 1/4 cup chocolate chips if necessary.
Dairy
Cream cheese should be full-fat for the best texture. Lower-fat cream cheese tends to give a looser, slightly grainy cheesecake layer.
Cereal
Rice Krispies are critical to the textural contrast. If you substitute, pick a light, crisp puffed cereal rather than a dense granola.
Tools & Equipment Needed
- 9″ x 13″ baking pan — the recipe’s size and bake times are for this pan.
- Parchment paper — for an easy lift and cleaner edges when slicing.
- Electric mixer (hand or stand) — makes the cheesecake and brownie mixing faster and smoother.
- Microwave-safe bowl or double boiler — to melt chocolate with butter safely.
- Small saucepan — to melt the topping ingredients together over low heat.
- Rubber spatula and wire rack — for smoothing layers and cooling.
Troubleshooting Tips
Brownie base is underbaked after second bake
If the brownie base seems too soft after the cheesecake bakes, it likely needed a few extra minutes in the oven before adding the cheesecake. The recipe calls for partially baking for 15 minutes; ovens vary. Check that your oven actually reaches 350°F with an oven thermometer.
Cheesecake layer cracks or is wobbly
A small jiggle in the center is fine; a liquid center is not. Bake toward the longer end of 15–20 minutes if your cheesecake still looks very loose. Avoid overbeating the cream cheese; work at medium speed and stop when smooth.
Topping is too loose or oily
If your peanut butter is very oily (natural peanut butter), the Rice Krispies topping can be looser. Gently warm the mixture a bit longer until fully combined, then add the cereal. Press lightly onto the cheesecake—do not compact excessively, or the topping becomes dense.
Slices fall apart
Chilling for the full 2 hours is important. The layers need time to set so you can cut clean squares. Use the parchment overhang to lift the slab and a sharp knife warmed under hot water and wiped dry between cuts for neater slices.
Tailor It to Your Diet
Gluten-free: Use a gluten-free all-purpose flour blend in both the brownie and cheesecake flour measurements, and make sure the Rice Krispies are labeled gluten-free (not all puffed rice cereals are certified).
Dairy-free / Vegan: This recipe is tough to adapt cleanly without changing texture. Vegan cream cheese, vegan butter, and vegan chocolate chips exist, but the cheesecake layer’s set and mouthfeel will differ. For a vegan version, test small batch modifications first.
Lower-sugar: You can experiment with reduced sugar in the cheesecake layer, but the brownie relies on sugar for structure and gloss; reducing it will change the texture noticeably.
Notes from the Test Kitchen
I tested these bars multiple times to balance the three layers. A few practical notes: use room-temperature cream cheese; cold cream cheese makes the cheesecake mix lumpy and forces overbeating. Also, don’t skip lining the pan with parchment—these bars cling and are harder to cut neatly without it.
When making the Rice Krispies topping, keep the heat low and stir constantly as the chocolate and Nutella melt together. If you overheat, the chocolate can seize or the peanut butter oil separates slightly. Gentle warmth and patience pay off.
Finally, store the pan covered in the refrigerator. They keep for up to 5 days chilled; the topping remains pleasantly crisp for the first couple of days, then softens slightly but stays very tasty.
Save It for Later
To freeze: After assembling but before chilling, cover the pan tightly with plastic wrap and foil and freeze. Thaw in the refrigerator overnight before slicing and serving. Sliced bars also freeze well—wrap individually for grab-and-go treats.
For make-ahead service, assemble and chill up to 24 hours before serving. Bring to room temperature for 20–30 minutes before slicing if you prefer softer bars.
Questions People Ask
Can I make this in an 8″ x 8″ pan?
You can, but the layers will be thicker and baking times will increase. Watch the cheesec ake for doneness and expect to add more minutes to both bakes. I recommend sticking to 9″ x 13″ for best results.
Why are there two egg additions?
They’re for different layers: two eggs in the brownie wet mix create the texture of the base, and two separate eggs in the cheesecake are needed for lift and structure in that layer. Keep them separate.
Can I skip Nutella?
Yes — you can omit the Nutella and increase chocolate chips a bit to maintain the topping’s chocolate flavor. The hazelnut note is lovely but not strictly necessary.
Let’s Eat
When the pan is chilled and you’re ready to serve, use the parchment to lift the slab, warm a sharp knife under hot water, dry it, then slice. Wipe and rewarm the knife between cuts for polished squares. These bars are rich — a small piece goes a long way.
Share them warm with coffee or cold from the fridge. Either way, expect compliments. They look like effort, but they’re comfortably doable on a weeknight with one thoughtful day of cooling. Enjoy — and if you try any swaps, tell me what worked for you.
Triple Layer Rice Krispie Brownies
Ingredients
Ingredients
- 6 tablespoonunsalted butter
- 6 ouncesemisweet chocolate chips
- 1/4 cupunsweetened cocoa powder
- 3/4 cupall-purpose flour
- 1/4 teaspoonbaking powder
- 1/4 teaspoonsalt
- 1 cupsugar
- 2 largeeggs
- 2 teaspoonvanilla extract
- 16 ouncecream cheese 2 packages, softened
- 2 largeeggs
- 1/4 cupsugar
- 2 tablespoonall-purpose flour
- 2 tablespoonmilk
- 1 teaspoonvanilla extract
- 3 cupsrice krispies
- 1 cuppeanut butter
- 1 cupsemisweet chocolate chips
- 1/2 cupnutella
Instructions
Instructions
- Preheat oven to 350°F. Line a 9" x 13" pan with parchment paper, leaving about 2 inches of overhang on opposite sides, and spray the parchment and pan with cooking spray.
- Melt chocolate and butter: place 6 tablespoons unsalted butter and 6 ounces semisweet chocolate chips in a microwave-safe bowl. Microwave in 30-second intervals, stirring after each interval, until the mixture is smooth. Set aside to cool slightly.
- Whisk dry brownie ingredients: in a bowl, whisk together 3/4 cup all-purpose flour, 1/4 teaspoon baking powder, and 1/4 teaspoon salt. Set aside.
- Beat brownie wet ingredients: in the bowl of an electric mixer fitted with the whisk attachment (or with a hand mixer), combine 1 cup sugar, 2 large eggs, and 2 teaspoons vanilla extract. Beat on medium speed until pale and slightly thickened, about 3–4 minutes.
- Combine brownie batter: add the melted chocolate mixture and 1/4 cup unsweetened cocoa powder to the beaten sugar mixture and mix until combined. Add the flour mixture and beat, scraping down the bowl as needed, until just incorporated.
- Bake the brownie base: pour the batter into the prepared pan and smooth the top with a rubber spatula. Bake at 350°F for 15 minutes (the brownie should be partially baked but not fully set).
- Make the cheesecake layer: in a clean bowl, beat 16 ounces softened cream cheese until smooth. Add 2 large eggs, 1/4 cup sugar, 2 tablespoons all-purpose flour, 2 tablespoons milk, and 1 teaspoon vanilla extract. Mix on medium speed until the cheesecake batter is smooth, about 3–5 minutes.
- Add cheesecake layer and bake: pour the cheesecake mixture over the partially baked brownie layer and smooth the top. Return the pan to the oven and bake at 350°F for 15–20 minutes, until the cheesecake layer is set (the center may still have a slight jiggle but should not be liquid).
- Cool completely: remove the pan from the oven and let it cool to room temperature on a wire rack.
- Make the Rice Krispies topping: in a small saucepan over low heat, combine 1 cup semisweet chocolate chips, 1 cup peanut butter, and 1/2 cup Nutella. Cook, stirring occasionally, until the chocolate and peanut butter are completely melted and the mixture is smooth. Remove from heat and stir in 3 cups Rice Krispies until the cereal is fully coated.
- Finish the bars: spread the Rice Krispies mixture evenly over the cooled cheesecake layer and press gently to level.
- Chill to set: refrigerate the assembled pan for at least 2 hours (until the topping is firm).
- Cut and serve: use the parchment overhang to lift the slab from the pan. Cut into squares and serve.
Equipment
- 9x13 inch Baking Pan
- Glass Mixing Bowl Set (3 piece)
- 1-Quart Saucepan
- Keep Calm And Bake On Spatula


