
This is a straightforward, small-batch cheesecake you can make in an Instant Pot. It’s the kind of recipe I reach for when I want the dense, creamy texture of a classic cheesecake but don’t want to babysit a water bath in the oven. The steam of the Instant Pot gives a reliably tender finish without the cracks that sometimes happen with high oven heat.
There’s nothing fussy here: a compact crust, a wrapped springform pan, and a short high-pressure cook followed by a full natural release. It’s ideal for weeknight desserts, last-minute dinner parties, or when you want a single 6-inch cheesecake that still slices beautifully.
Below you’ll find exactly what to gather, the literal steps to follow, and practical tips from testing so you can skip trial-and-error. Read once, then follow the steps in order — the Instant Pot does the heavy lifting.
What You’ll Gather
Gather ingredients and tools before you start. Mise en place matters with pressure cooking: wrapping the pan, prepping a sling, and packing the crust all happen quickly once you begin.
Plan for a clean workspace and have your trivet and enough foil ready. If you’ll be chilling the cheesecake overnight, clear a space in the refrigerator ahead of time so the cake can rest undisturbed.
Ingredients
- ¾ cup graham cracker crumbs — forms the base and provides that classic, slightly sweet crunch for the crust.
- 1 ½ tablespoons butter, melted (1 tablespoon plus 1 1/2 teaspoons) — binds and flavors the crumbs; use melted so the crumbs pack evenly.
- 1 ½ tablespoons sugar — sweetens the crust and helps it hold together when packed.
Make Vanilla Bean Instant Pot Cheesecake: A Simple Method
- Spray a 6-inch springform pan with non-stick cooking spray. Wrap the outside of the pan in a layer of aluminum foil to prevent steam/water from entering; set the pan aside.
- If you do not have a silicone Instant Pot sling, make a sling from heavy-duty aluminum foil by folding a long strip of foil several times until it is sturdy enough to form two long handles that extend past the pan so you can lift it out of the pot.
- In a small bowl, combine ¾ cup graham cracker crumbs, 1 ½ tablespoons melted butter (1 tablespoon plus 1 1/2 teaspoons), and 1 ½ tablespoons sugar. Stir until the crumbs are evenly moistened.
- Press the crumb mixture firmly and evenly into the bottom of the prepared springform pan and about 1 inch up the sides. Use the bottom of a measuring cup or a flat spatula to pack the crust tightly.
- If you have a prepared cheesecake filling, pour or scrape it into the crust-lined pan and smooth the top with an offset spatula. If you do not have the filling ready, cover and refrigerate the crust until you are ready to fill and cook.
- Pour 1 cup of water into the bottom of the Instant Pot. Place the trivet in the pot, then set the foil or silicone sling over the trivet so the sling handles extend out of the pot. Set the prepared springform pan on the sling.
- Close and seal the Instant Pot lid. Set the cooker to high pressure and cook for 25 minutes. When the cook time ends, allow the pressure to reduce naturally (do not quick-release).
- When the pressure has fully released, carefully lift the cheesecake out of the Instant Pot using the sling handles. Remove the foil from the pan if desired. Gently dab any moisture on the cheesecake surface with a paper towel.
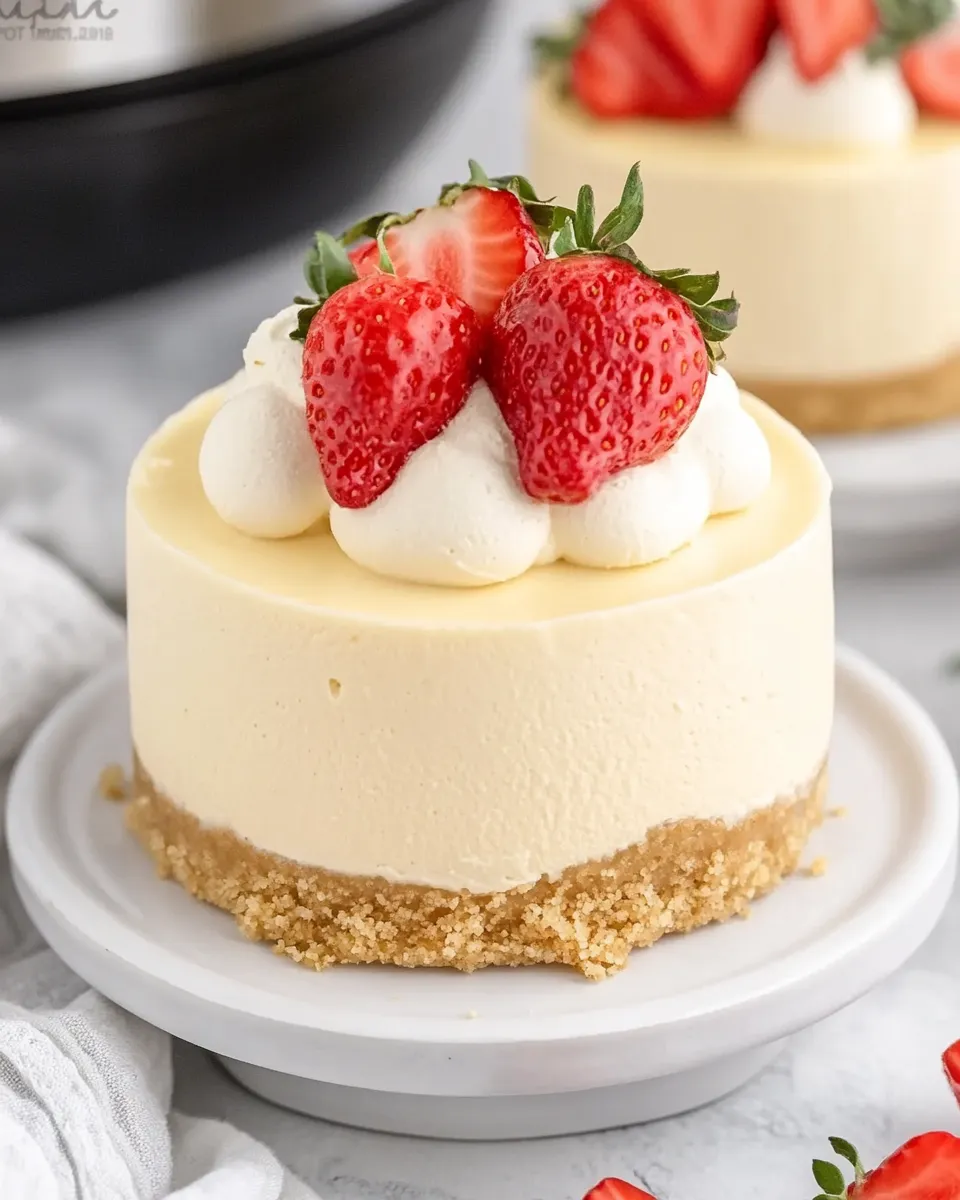
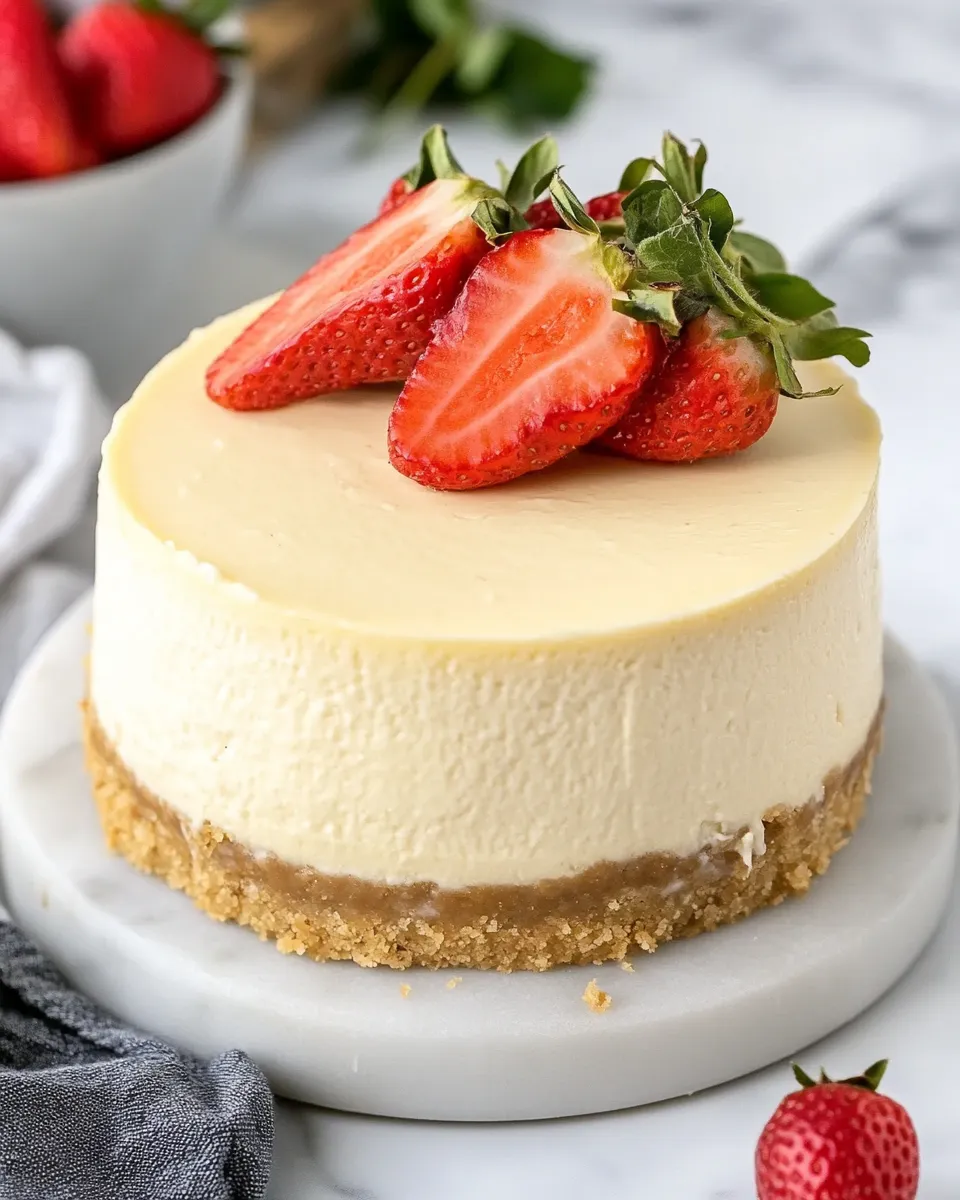
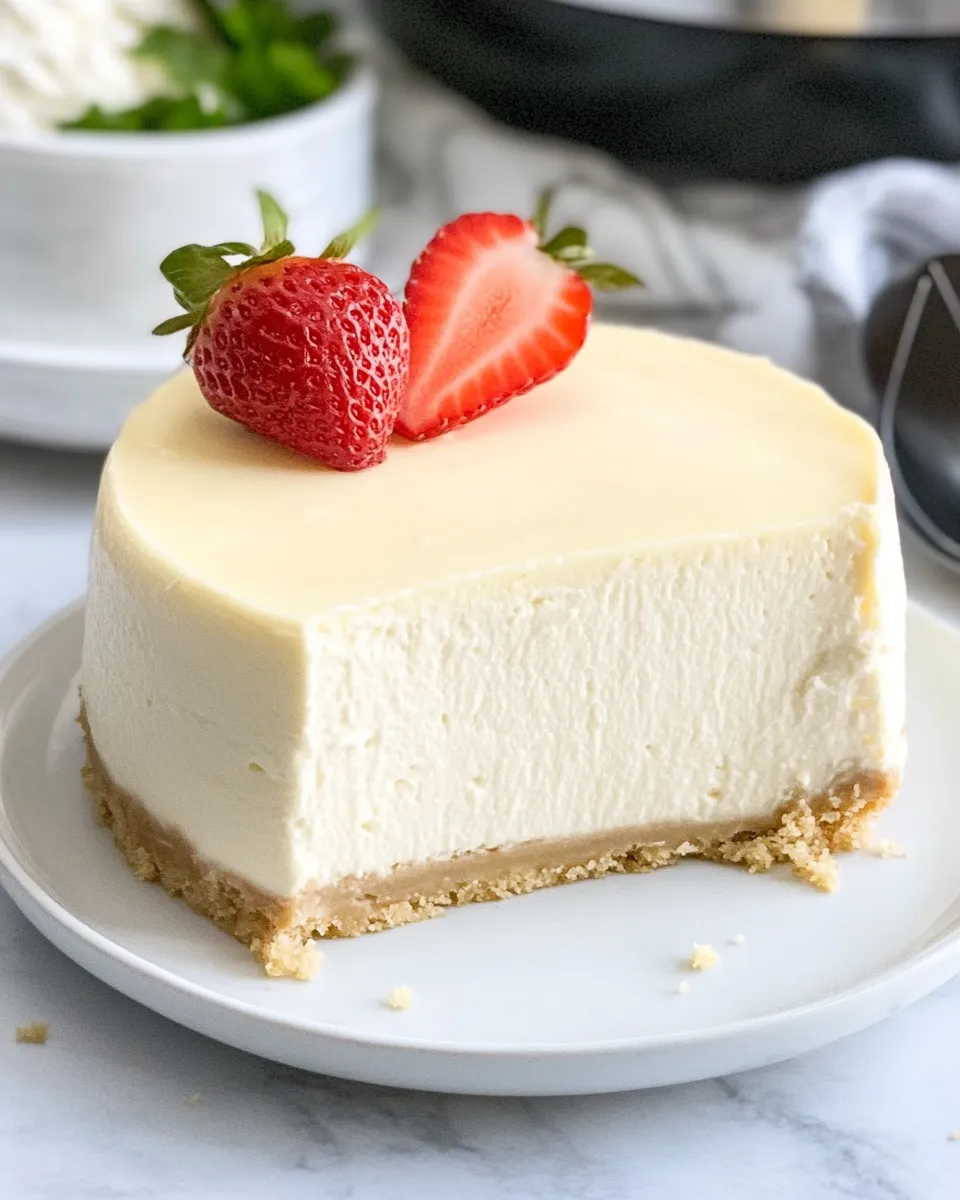
- Let the cheesecake cool to room temperature on a cooling rack. Once cooled, refrigerate the cheesecake and chill overnight for best texture before serving.
What You’ll Love About This Recipe
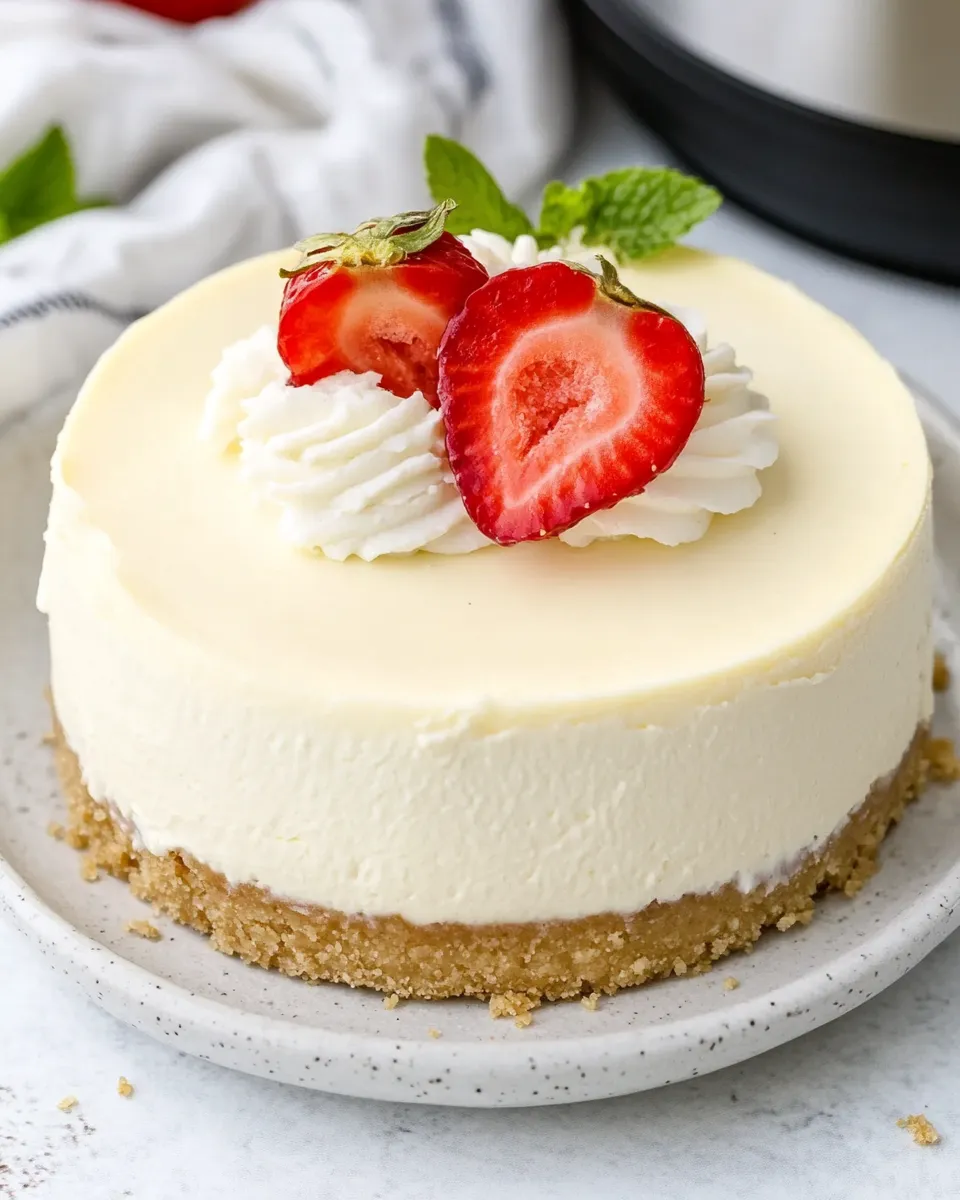
You get a rich, creamy cheesecake without turning on the oven or worrying about a leaky water bath. The Instant Pot’s moist environment reduces the risk of a cracked top and gives you consistent results with a single, short cook. The small 6-inch size also means less waste and an easier dessert for two to four people.
Another win is predictability: once you wrap the pan and secure it on the sling, it’s mostly hands-off. The method also scales in spirit: the steps are the same if you adapt for a different filling — though cook time and pan size will change.
Smart Substitutions
If you’re missing graham crackers, use any finely ground, slightly sweet cookie or cracker crumbs in the same volume and press them the same way. For butter, swap unsalted for salted if that’s what you have — just be mindful when seasoning the filling.
If you don’t have an offset spatula, a flat spatula or the back of a spoon will smooth the filling sufficiently. And if your springform is slightly larger, the crust thickness will thin out; press firmly to preserve structure or add a touch more crumb to match the texture.
Setup & Equipment
Get these items lined up before you start. They make the process clean and predictable.
Must-haves
- 6-inch springform pan — this recipe is written for a 6-inch pan; the crust and cook time assume that size.
- Instant Pot with trivet — the trivet lifts the pan above the water and keeps steam circulation even.
- Heavy-duty aluminum foil or silicone sling — you need strong handles to lift the hot pan safely.
- Measuring tools and a small bowl — for mixing and measuring the crust ingredients.
Helpful extras
- Offset spatula — for smoothing the filling cleanly.
- Cooling rack — for the cheesecake to come down to room temperature before chilling.
Things That Go Wrong
Steam or water seeping into the pan: if the foil wrap isn’t snug, moisture can puddle on the surface. Wrap the springform pan fully and press the foil into the seam to minimize leaks. Dab any surface moisture gently with a paper towel after cooking.
Undercooked center: if the center jiggles excessively after natural release, it may need more time. Make sure you allowed the pressure to release naturally; premature quick release can leave the center unset. If it’s slightly underdone, you can reseal and cook for a few more minutes, but be cautious — overcooking dries it out.
Crust that falls apart: packing the crumbs firmly is essential. Use the base of a measuring cup or a flat-bottomed object to press the crust tight. If your crumbs are too coarse, pulse them finer before mixing with melted butter.
Make It Fit Your Plan
Make-ahead: this cheesecake improves with a rest. Chill it overnight for the best texture and cleanest slices. If you’re short on time, refrigerate it for at least 4 hours, but expect slightly softer slices.
Timing for company: cook the cheesecake the day before. Remove from the fridge 30 minutes before serving so it comes to a pleasant, not-too-cold slice. For a dinner party, serve with a simple sauce or fresh fruit to keep things light.
What I Learned Testing
Wrapping the pan well is non-negotiable. A single layer of thin foil left gaps; heavy-duty foil or multiple layers eliminates surprises. The sling matters: makes extraction safe and prevents spills. When I tried without a sling, handling became awkward and riskier.
Natural pressure release is key to texture. It allows the cheesecake to finish gentle setting from residual heat. Quick release gives a shock to the custard and often leads to a more jiggly, underdone center or surface imperfections.
Finally, chill time changes everything. Even if the cake looks set right off the cooling rack, the interior firms up and the flavors round out after several hours in the fridge.
Keep It Fresh: Storage Guide
Cover the chilled cheesecake lightly with plastic wrap or place it in an airtight container. Properly stored, it will keep in the refrigerator for 3–4 days with minimal texture loss. For longer storage, wrap tightly and freeze for up to one month. Thaw in the refrigerator overnight before serving.
Don’t leave slices at room temperature for more than two hours. Because this is a small-batch dairy-rich dessert, refrigeration is important for safety and texture.
Vanilla Bean Instant Pot Cheesecake Q&A
Q: Can I bake this instead of using the Instant Pot? A: The procedure above is for pressure cooking. If you prefer baking, the crust steps still apply, but you’ll need a different approach for the bake: a water bath in an oven at a moderate temperature and adjusted time. The Instant Pot method is what this recipe is designed around.
Q: I don’t have a springform pan. Can I use a regular pan? A: A springform pan makes it easy to unmold the cheesecake. If you must use another pan, line it with parchment and plan to lift the whole interior out to slice. Be extra careful sealing any seam if using a non-springform pan in the Instant Pot.
Q: My cheesecake had a bit of moisture on top after cooking; is it ruined? A: Not at all. Gently dab the surface with a paper towel. A little surface condensation is common due to the sealed steam environment; it won’t affect flavor.
Final Bite
Vanilla Bean Instant Pot Cheesecake is a dependable small dessert that rewards careful setup and patient chilling. Follow the steps in order, make sure the pan is well wrapped and supported, and give the cake time to finish cooling and firming. You’ll end up with a smooth, creamy cheesecake without the stress of an oven water bath — and the payoff is a neat, elegant dessert ready for any table.

Vanilla Bean Instant Pot Cheesecake
Ingredients
Ingredients
- 3/4 cup graham cracker crumbs
- 1 1/2 tablespoons butter melted (1 tablespoon plus 1 1/2 teaspoons)
- 1 1/2 tablespoons sugar
Instructions
Instructions
- Spray a 6-inch springform pan with non-stick cooking spray. Wrap the outside of the pan in a layer of aluminum foil to prevent steam/water from entering; set the pan aside.
- If you do not have a silicone Instant Pot sling, make a sling from heavy-duty aluminum foil by folding a long strip of foil several times until it is sturdy enough to form two long handles that extend past the pan so you can lift it out of the pot.
- In a small bowl, combine ¾ cup graham cracker crumbs, 1 ½ tablespoons melted butter (1 tablespoon plus 1 1/2 teaspoons), and 1 ½ tablespoons sugar. Stir until the crumbs are evenly moistened.
- Press the crumb mixture firmly and evenly into the bottom of the prepared springform pan and about 1 inch up the sides. Use the bottom of a measuring cup or a flat spatula to pack the crust tightly.
- If you have a prepared cheesecake filling, pour or scrape it into the crust-lined pan and smooth the top with an offset spatula. If you do not have the filling ready, cover and refrigerate the crust until you are ready to fill and cook.
- Pour 1 cup of water into the bottom of the Instant Pot. Place the trivet in the pot, then set the foil or silicone sling over the trivet so the sling handles extend out of the pot. Set the prepared springform pan on the sling.
- Close and seal the Instant Pot lid. Set the cooker to high pressure and cook for 25 minutes. When the cook time ends, allow the pressure to reduce naturally (do not quick-release).
- When the pressure has fully released, carefully lift the cheesecake out of the Instant Pot using the sling handles. Remove the foil from the pan if desired. Gently dab any moisture on the cheesecake surface with a paper towel.
- Let the cheesecake cool to room temperature on a cooling rack. Once cooled, refrigerate the cheesecake and chill overnight for best texture before serving.
Equipment
- 6-inch springform pan
- non-stick cooking spray
- Aluminum Foil
- Instant Pot
- Trivet
- foil or silicone sling
- Measuring Cup
- Offset Spatula
- paper towel
- Cooling rack


