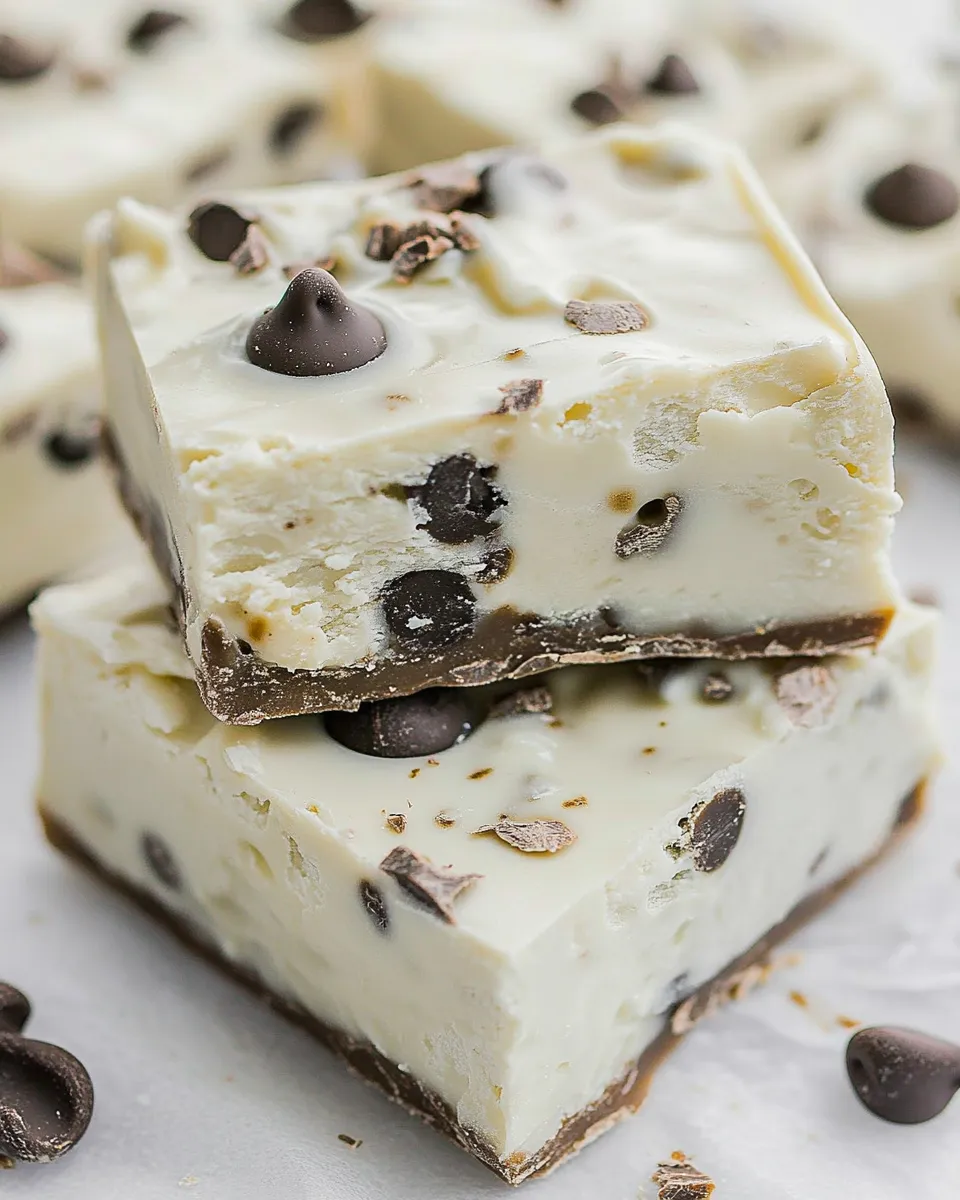
This fudge is exactly what it says on the tin: fast, forgiving, and utterly moreish. No stovetop required, just a microwave, a bowl, and a pan lined with foil. It melts together in minutes and sets into creamy, sliceable squares that travel well and keep for days in the fridge.
I test recipes against real-life conditions: limited time, enthusiastic friends, and a tendency to overwork things. This one survives all of those. It’s also a great base recipe — keep the technique and swap in mix-ins or extracts to suit the season.
Below you’ll find the precise ingredients, the microwave method step-by-step, sensible troubleshooting, and options for riffs like cookies-and-milk, peanut butter, and mint chip. Practical, no-nonsense guidance so your batch comes out right the first time.
The Essentials
Quick take: you need white chocolate chips, sweetened condensed milk, a little vanilla, and a pinch of salt. The technique is melting the chips gently with the condensed milk, stirring in flavor, then pressing the mixture into a prepared pan to chill. That’s it.
Why it works: sweetened condensed milk provides sweetness and body while preventing the chocolate from setting rock-hard. White chocolate chips provide the flavor and fat that give the fudge its creamy texture. A tiny pinch of salt and the vanilla lift the sweetness and round the flavor.
Read the steps once, set up your tools, and you’ll be through the active work in five minutes. Chill time will vary, but the hands-on time is minimal. Keep an eye on the chocolate in the microwave and stir between bursts — that’s the secret to smooth, glossy fudge.
Ingredients
- 3 cups white chocolate chips — the main structure and flavor; use good-quality chips for the best texture and taste.
- 1 can (14 ounces) sweetened condensed milk — adds sweetness and helps the fudge set without needing additional sugar or butter.
- 1 teaspoon vanilla extract — brightens and deepens the sweetness; add at the end so the flavor stays fresh.
- Pinch of salt — balances the sweetness and prevents the fudge from tasting flat.
- Variations — built into the recipe steps below; use them to add cookies, peanut butter, or mint chip flavor.
5 Minute White Chocolate Fudge in Steps
- Line an 8×8″ or 9×9″ pan with foil, leaving some overhang for easy removal, and spray the foil with nonstick cooking spray.
- Place 3 cups white chocolate chips and 1 can (14 ounces) sweetened condensed milk in a large microwave-safe bowl.
- Microwave on HIGH for 1 minute. Stir thoroughly. Continue microwaving in 30-second intervals, stirring well after each interval, until the mixture is just melted together and smooth. (Stop when most chips are melted and stir until completely smooth to avoid overheating.)
- Remove from the microwave and stir in 1 teaspoon vanilla extract and a pinch of salt until evenly combined.
- Pour and spread the fudge mixture into the prepared pan in an even layer. Smooth the top with a spatula.
- Chill in the refrigerator until fully set (it may set at room temperature but will take longer and depends on room temperature).
- Use the foil overhang to lift the fudge from the pan. Slice into 1″ squares and store in an airtight container in the refrigerator for up to 2 weeks.
- Variations:
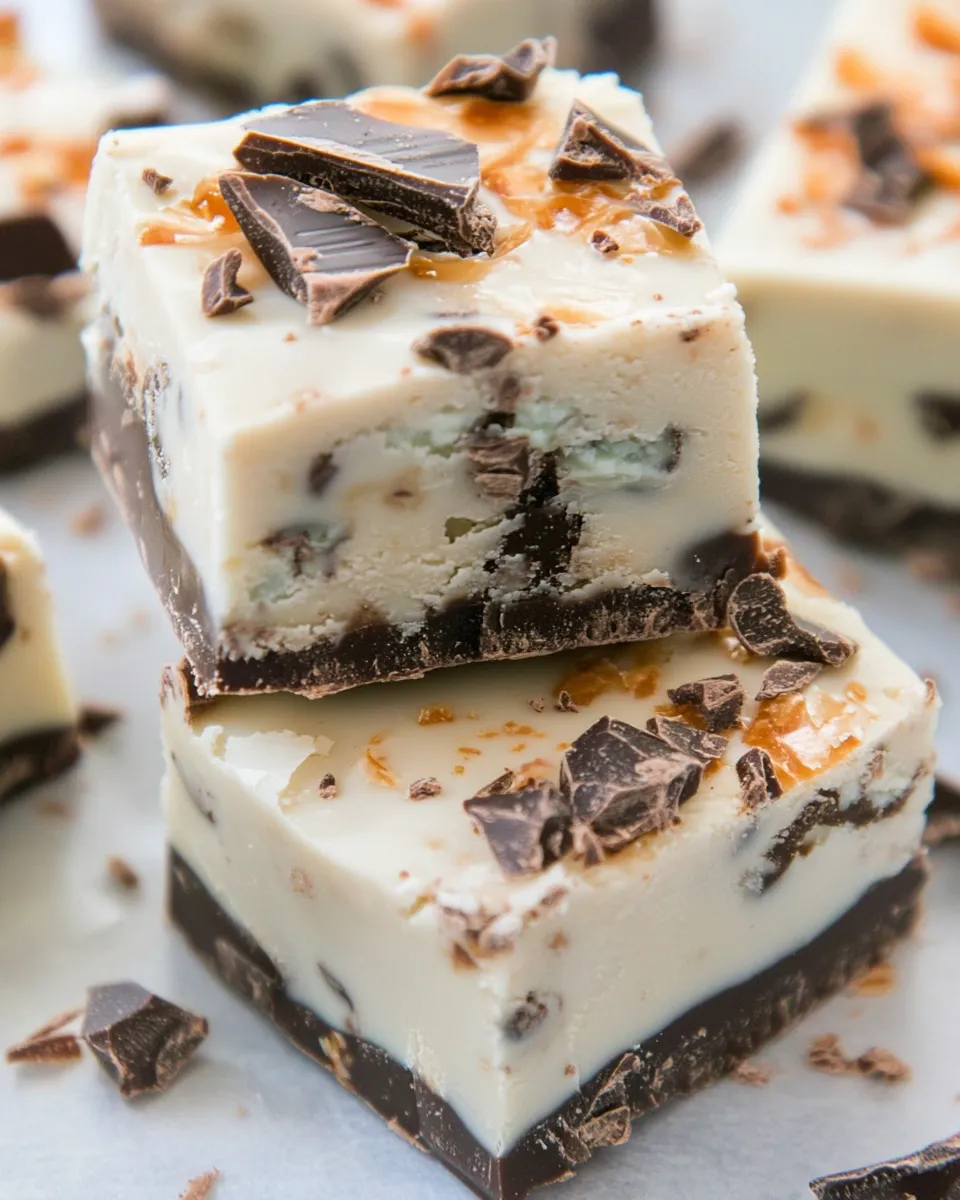
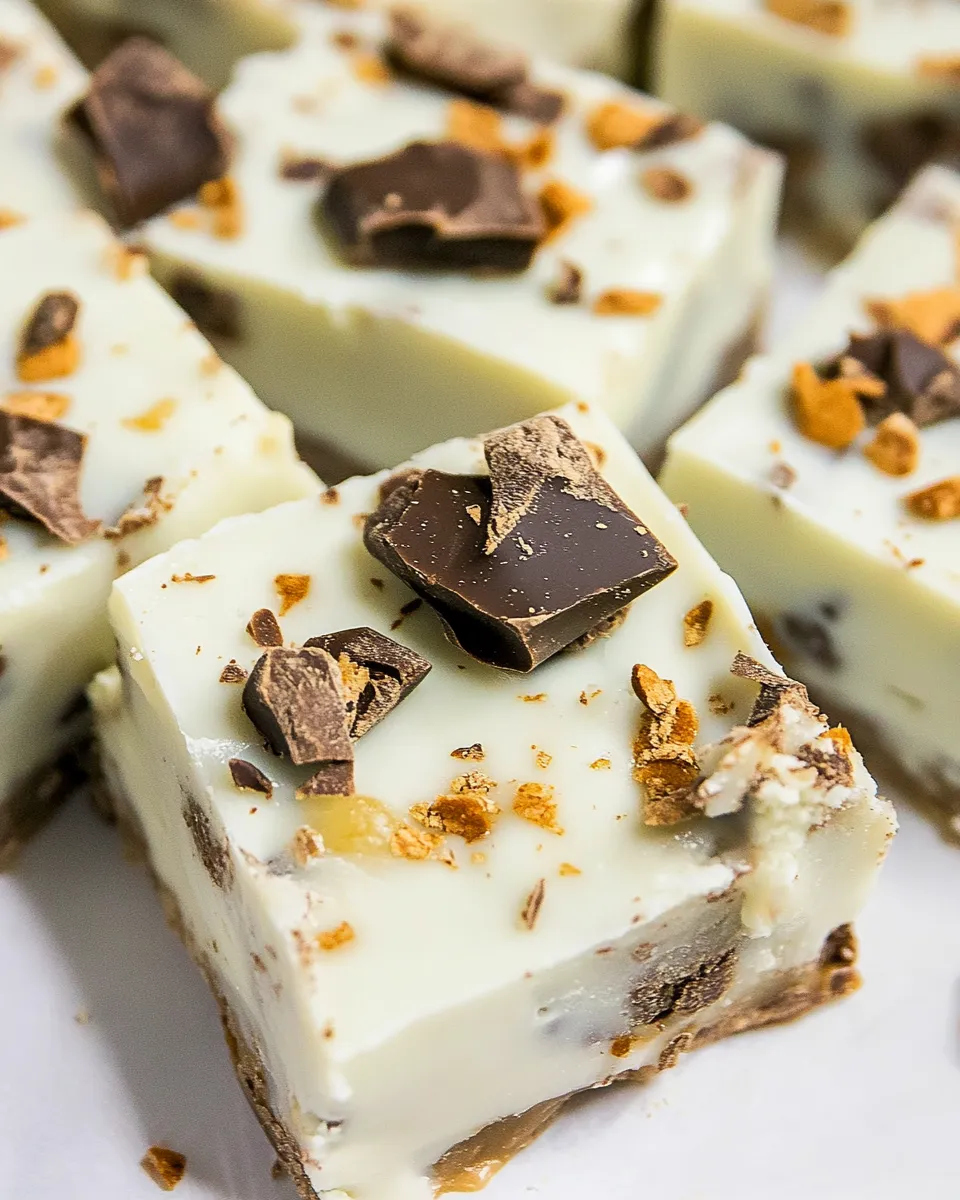
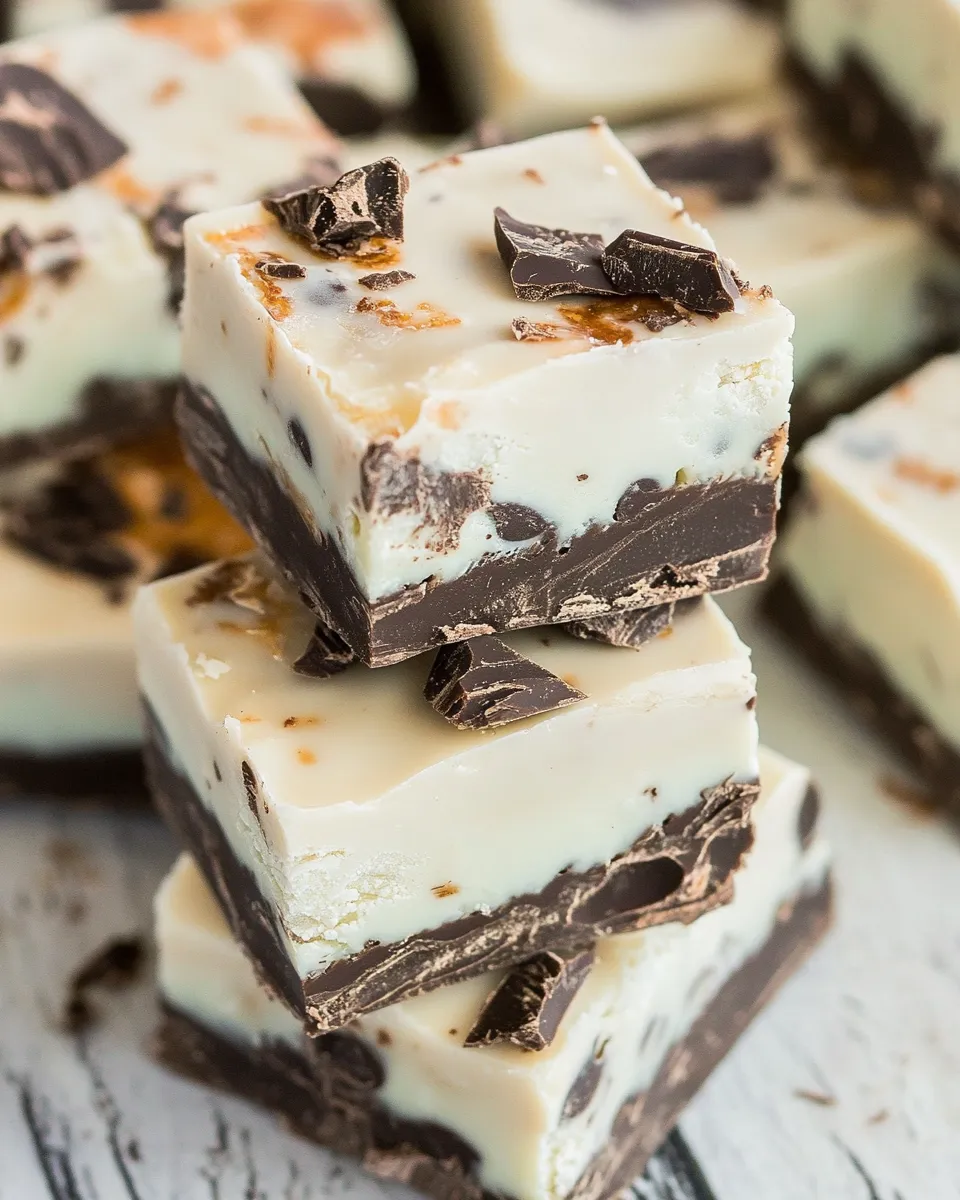
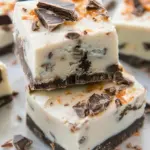
- Cookies & Milk Fudge: after step 4, fold in 1 cup chopped Oreos and 1 cup chopped chocolate chip cookies (or 2 cups of your favorite cookie). Sprinkle additional cookie pieces on top if desired, then proceed with step 5.
- Peanut Butter Fudge: add 1/2 cup peanut butter to the white chocolate chips and sweetened condensed milk in step 2 (before heating). Melt as directed in steps 3–4. The mixture may look slightly seized after melting — stir and spread in the pan as directed in step 5.
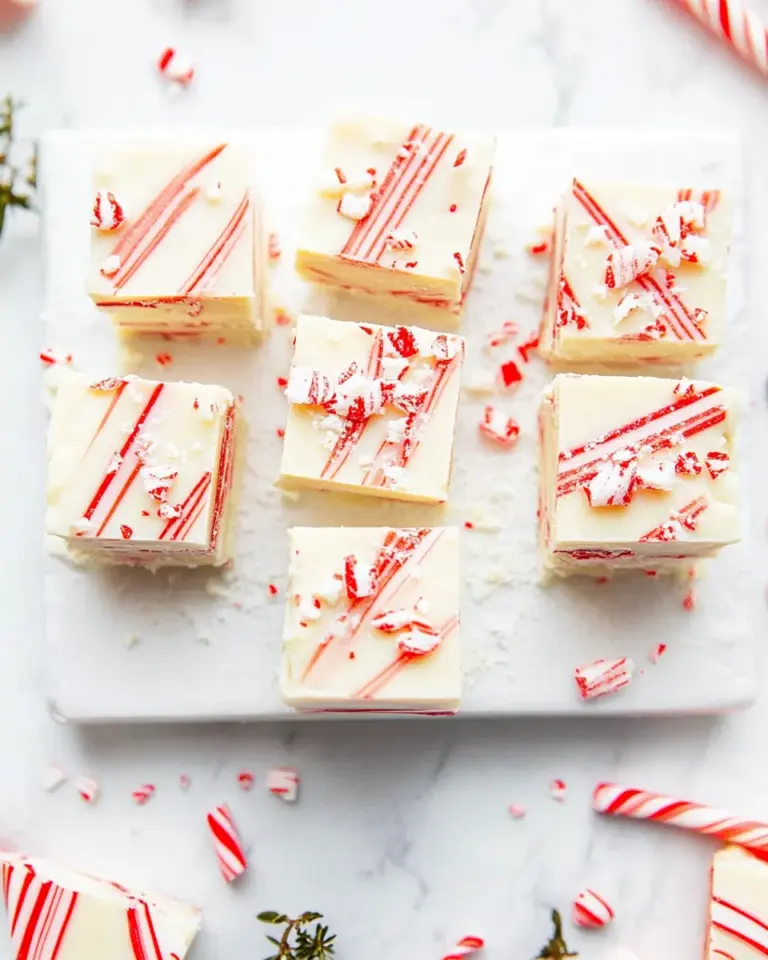
- Mint Chip Fudge: after step 4, stir in 2 teaspoons peppermint extract and 2–3 drops green food coloring, then fold in 1 cup mini or regular-sized chocolate chips. Proceed with step 5.
The Upside of 5 Minute White Chocolate Fudge
Speed is the headline—this recipe minimizes hands-on time so you can focus on finishing touches, like pressing cookie bits on top or arranging pieces for a dessert tray. It’s also extremely kid-friendly for an afternoon project: safe microwave steps and a simple stir-and-press method.
Another upside is adaptability. The base is forgiving; fold-ins tolerate a lot of variation without breaking the texture. Want a sturdier, sliceable treat for gifting? Keep it chilled until firm and cut into neat squares. Want something softer to spread on toast? Let it sit at room temperature a little before serving.
Smart Substitutions
- Swap white chocolate chips for a different chip if you prefer another flavor profile—milk or semi-sweet work, but expect a different color and flavor.
- If you’re avoiding nuts but want a nutty note, use a small amount of tahini or sunflower seed butter in place of peanut butter in the peanut-butter variation.
- Use flavored extracts in place of or alongside vanilla — almond, orange, or coconut extracts can be interesting swaps. Start with a small amount and taste before adding more.
- Cookies in the Cookies & Milk version can be any sturdy cookie—graham, shortbread, or chocolate wafers all hold up well.
Setup & Equipment
- 8×8″ or 9×9″ pan — lined with foil for easy removal.
- Large microwave-safe bowl — roomy enough for stirring without splashes.
- Spatula or spoon — heat-resistant for stirring and smoothing.
- Nonstick cooking spray — prevents sticking to the foil.
- Measuring cups and spoons — to measure chips and vanilla accurately.
- Refrigerator space — allow an hour or more for a firm set, depending on temperature.
Don’t Do This
- Do not overheat the chocolate. White chocolate burns easily and will seize into a grainy mass if overheated. Stop microwaving when most of the chips have melted and finish by stirring.
- Don’t skip the foil or the spray. It makes retrieval simple and prevents stuck bits that ruin clean slices.
- Avoid using low-quality chips with little cocoa butter — the texture and mouthfeel will suffer.
- Don’t rush chilling. Cutting too soon creates ragged edges and sticky squares. Let it fully set.
- Resist the urge to add large amounts of liquid (cream, milk) — that changes the chemistry and may prevent proper setting.
Seasonal Flavor Boosts
Use small, high-impact additions to lean into a season without changing the core technique.
- Winter: stir in a teaspoon of ground ginger and a pinch of cinnamon for a spiced white-chocolate vibe. Add chopped crystallized ginger for texture.
- Spring: fold in chopped freeze-dried strawberries for bright color and concentrated fruit flavor.
- Summer: fold tiny chunks of fresh lemon zest (just a little) and a bit of lemon extract to brighten the sweetness.
- Autumn: a light dusting of pumpkin pie spice or a swirl of brown butter (cooled) in small amounts can add autumnal depth.
Recipe Notes & Chef’s Commentary
Stirring is as important as the heat. Regular, thorough stirring distributes heat and finishes melting without overshooting. When most chips are melted, the residual heat will finish the job. Let the mixture sit for a few seconds after the final stir — it will smooth out.
If the mixture looks slightly seized after adding peanut butter (as the variation notes), don’t panic. Keep stirring; the oil in the peanut butter will reincorporate and the fudge will spreadable into the pan.
Texture expectations: properly done, this fudge is creamy and sliceable but not cake-soft. It should hold its shape at room temperature for a short while, but refrigeration keeps it neat for serving and gifting.
Cooling, Storing & Rewarming
Cool fully in the refrigerator until the fudge is firm. Use the foil overhang to lift it from the pan, then slice into 1″ squares. An offset spatula or a large knife warmed under hot water and wiped dry between cuts gives the cleanest edges.
Store in an airtight container in the refrigerator for up to 2 weeks. Lay parchment or wax paper between layers to prevent sticking. You can freeze the fudge for longer storage; wrap tightly and thaw in the refrigerator before serving.
To soften chilled fudge, let it sit at room temperature for 10–20 minutes before serving so it’s not too firm. Reheating is unnecessary and can cause graininess; instead, gently warm individual pieces for a few seconds in the microwave if you want them softer.
5 Minute White Chocolate Fudge FAQs
- Can I make this without a microwave? Yes. Use a double boiler on low heat, stirring constantly until the chips and condensed milk are melted together. Remove from heat and proceed with the recipe.
- Why did my fudge turn grainy? Usually because the chocolate overheated or was exposed to moisture. Stop microwaving when most chips are melted and finish by stirring. Keep utensils and bowls dry.
- Can I use full-size chocolate instead of chips? Yes; chop into small, even pieces so they melt consistently. Quality matters—better chocolate yields better texture.
- How long does it keep? Stored airtight in the refrigerator, up to 2 weeks. You can freeze it for longer storage.
- Is this a candy or a dessert square? It’s a no-bake fudge—rich and sweet like candy, but sliced like a dessert bar.
Ready, Set, Cook
Gather your 3 cups of white chocolate chips, a can of condensed milk, a teaspoon of vanilla, and a pinch of salt. Line your pan, measure, and heat in controlled bursts, stirring until silky. Pour, level, chill, and slice. It’s simple enough for last-minute gifting and reliable enough for repeating at every holiday.
Make a test batch, try one variation, and note which mix-ins your people gravitate toward. This recipe is fast to assemble and forgiving enough that experimentation is rewarded. Happy pressing and chopping—five active minutes for a treat that keeps giving.
5 Minute White Chocolate Fudge
Ingredients
Ingredients
- 3 cupswhite chocolate chips
- 1 can14 ounces sweetened condensed milk
- 1 teaspoonvanilla extract
- Pinchsalt
- Variationssee below
Instructions
Instructions
- Line an 8×8" or 9×9" pan with foil, leaving some overhang for easy removal, and spray the foil with nonstick cooking spray.
- Place 3 cups white chocolate chips and 1 can (14 ounces) sweetened condensed milk in a large microwave-safe bowl.
- Microwave on HIGH for 1 minute. Stir thoroughly. Continue microwaving in 30-second intervals, stirring well after each interval, until the mixture is just melted together and smooth. (Stop when most chips are melted and stir until completely smooth to avoid overheating.)
- Remove from the microwave and stir in 1 teaspoon vanilla extract and a pinch of salt until evenly combined.
- Pour and spread the fudge mixture into the prepared pan in an even layer. Smooth the top with a spatula.
- Chill in the refrigerator until fully set (it may set at room temperature but will take longer and depends on room temperature).
- Use the foil overhang to lift the fudge from the pan. Slice into 1" squares and store in an airtight container in the refrigerator for up to 2 weeks.
- Variations: - Cookies & Milk Fudge: after step 4, fold in 1 cup chopped Oreos and 1 cup chopped chocolate chip cookies (or 2 cups of your favorite cookie). Sprinkle additional cookie pieces on top if desired, then proceed with step 5. - Peanut Butter Fudge: add 1/2 cup peanut butter to the white chocolate chips and sweetened condensed milk in step 2 (before heating). Melt as directed in steps 3–4. The mixture may look slightly seized after melting — stir and spread in the pan as directed in step 5. - Mint Chip Fudge: after step 4, stir in 2 teaspoons peppermint extract and 2–3 drops green food coloring, then fold in 1 cup mini or regular-sized chocolate chips. Proceed with step 5.
Equipment
- 8x8-inch or 9x9-inch pan
- Foil
- Nonstick Cooking Spray
- large microwave-safe bowl
- Spatula
- Refrigerator