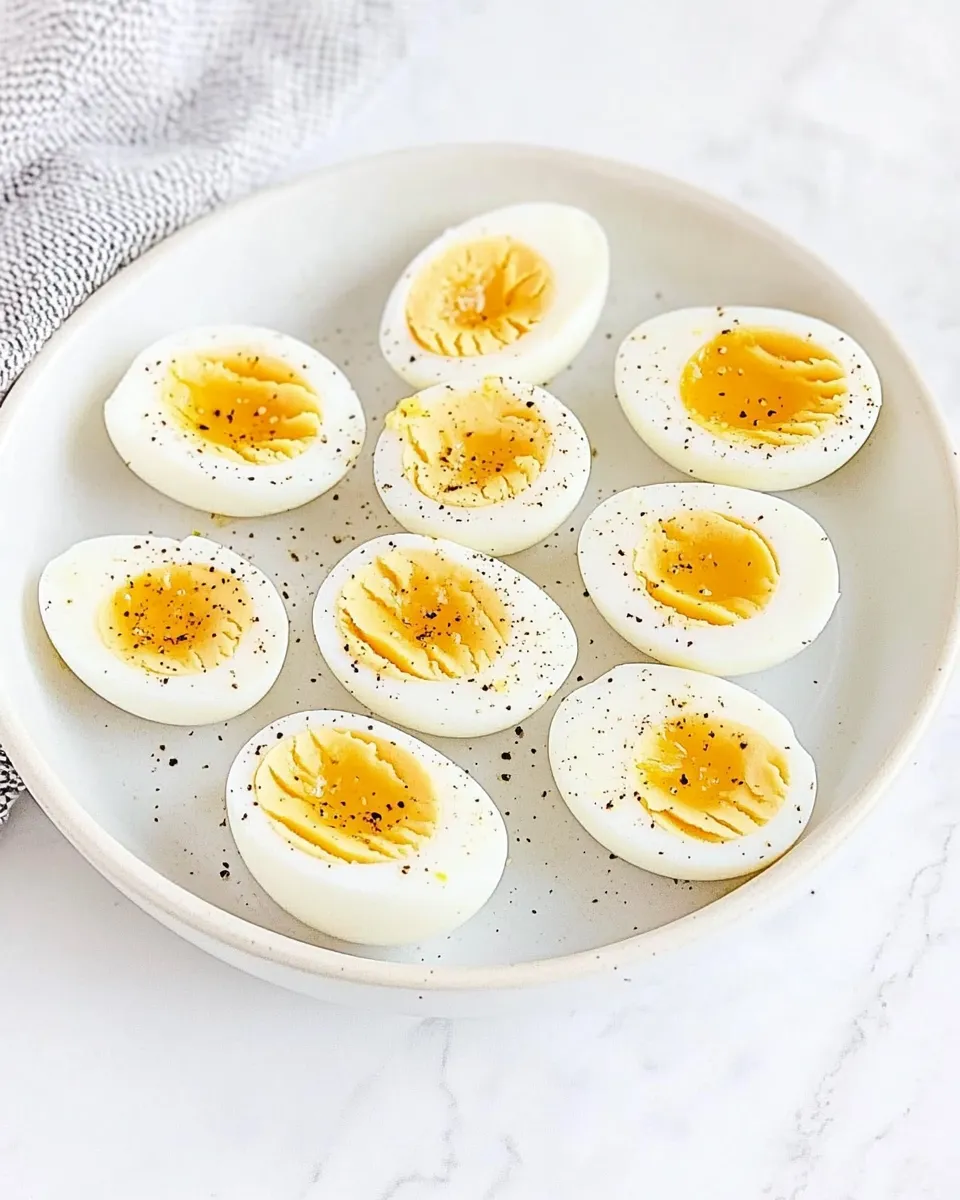
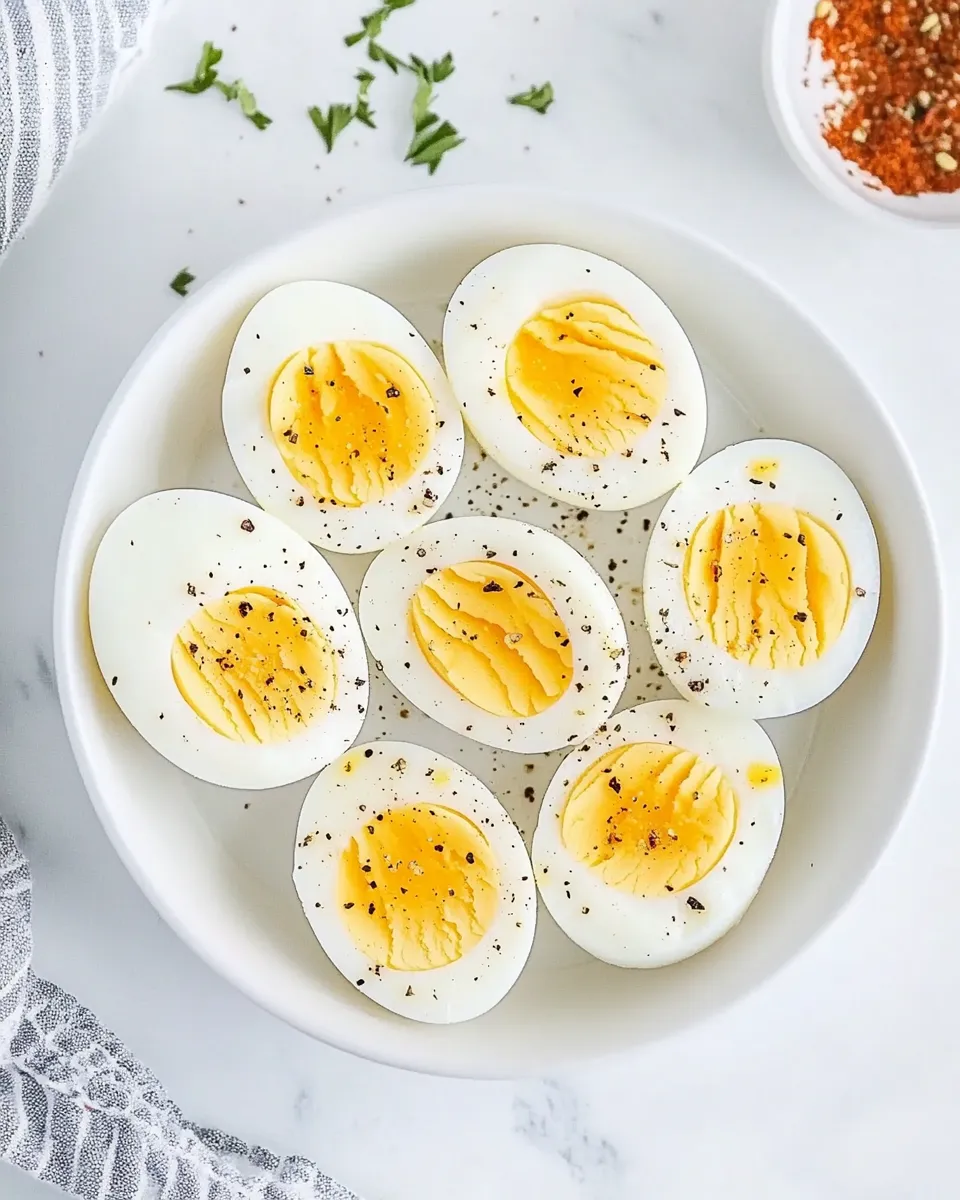
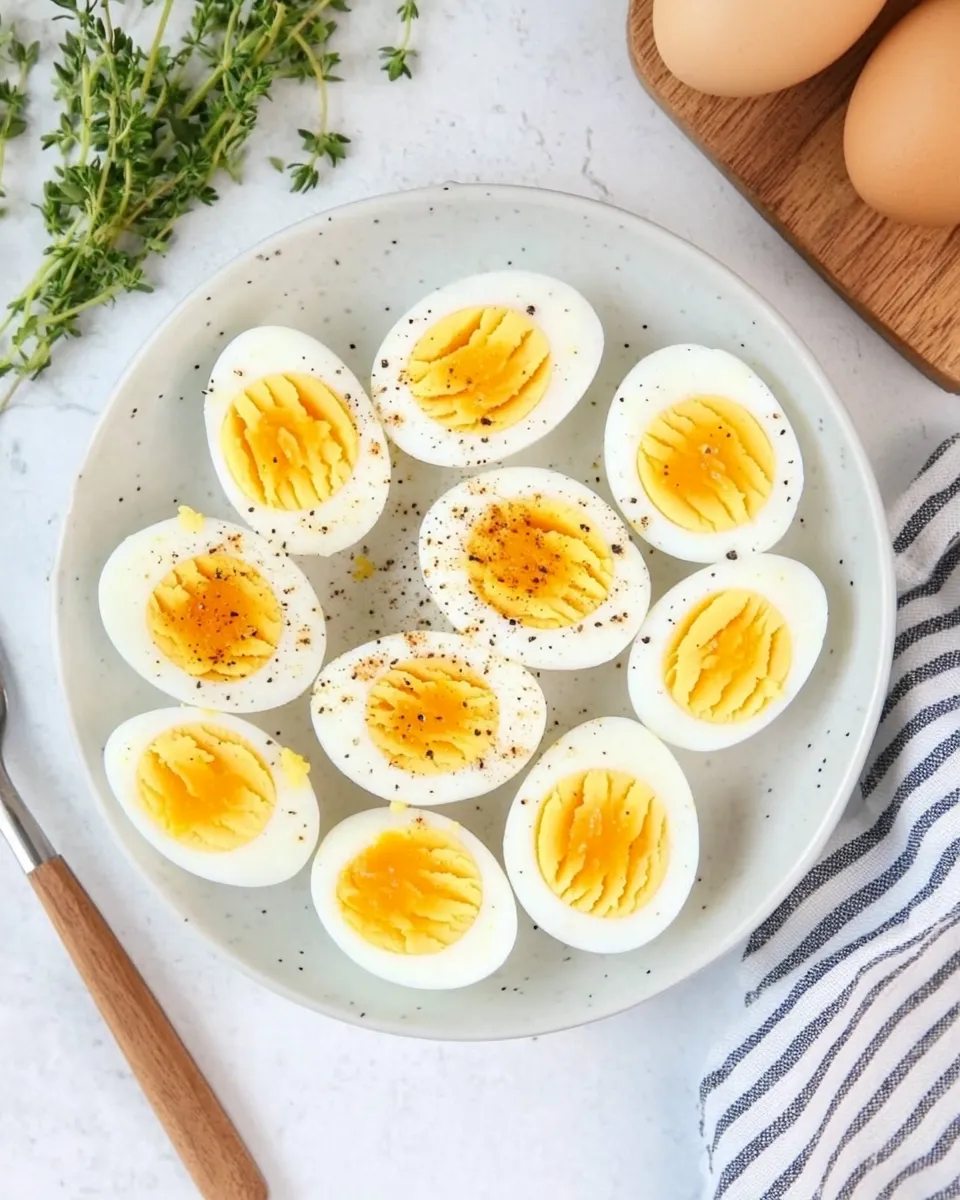
Hard-boiled eggs are kitchen workhorses: breakfast, salad toppers, quick snacks, protein for lunchboxes. The air fryer turns them into a hands-off, reliably peeled treat with minimal fuss. You get set-and-forget timing, consistent results, and shells that slide off without a wrestling match.
I test appliances and tricks so you don’t have to. This method uses low heat and a quick ice bath to stop cooking and firm the white while keeping yolks creamy. No water on the stovetop, no guesswork with boil times—just a precise temperature and a short cooling ritual.
Below you’ll find exactly what to buy, every step to follow (copied word-for-word so nothing gets lost), troubleshooting, and smart tips for storage and seasonal variations. Read the quick how-to, then come back to the tips when you want even better peeling or to scale your batch.
Your Shopping Guide
You don’t need a long shopping list for perfectly cooked eggs. Still, small choices make a difference: egg size, whether eggs are very fresh, and having a solid ice situation. Here’s what to have on hand and why.
Buy eggs that are large (if your recipes expect a large egg) and store them properly in the fridge until you’re ready. If your ice supply is sparse, fill trays in advance or grab a bag of ice from the store. Lastly, keep a medium or large mixing bowl available for the ice bath—too small and the eggs won’t cool evenly.
Ingredients
- 6 large eggs — main ingredient; use large eggs for standard timing and nutritional estimates.
- 3 cups water — used to make the ice bath; enough to fully submerge the eggs so they stop cooking fast.
- 8 to 9 ice cubes — chills the water quickly and firms the eggs for easy peeling.
Mastering Air Fryer Hard-Boiled Eggs: How-To
- Place 6 large eggs in a single layer in the air fryer basket. If the basket can’t hold all 6 without stacking, cook in batches.
- Set the air fryer to 250°F and cook for 17 minutes for each batch.
- During the last 2 minutes of cooking, prepare an ice bath: pour 3 cups water into a medium or large mixing bowl and add 8 to 9 ice cubes.
- When the cooking cycle finishes, use kitchen tongs to transfer the hot eggs immediately into the ice bath.
- Let the eggs sit in the ice bath for 8 to 10 minutes.
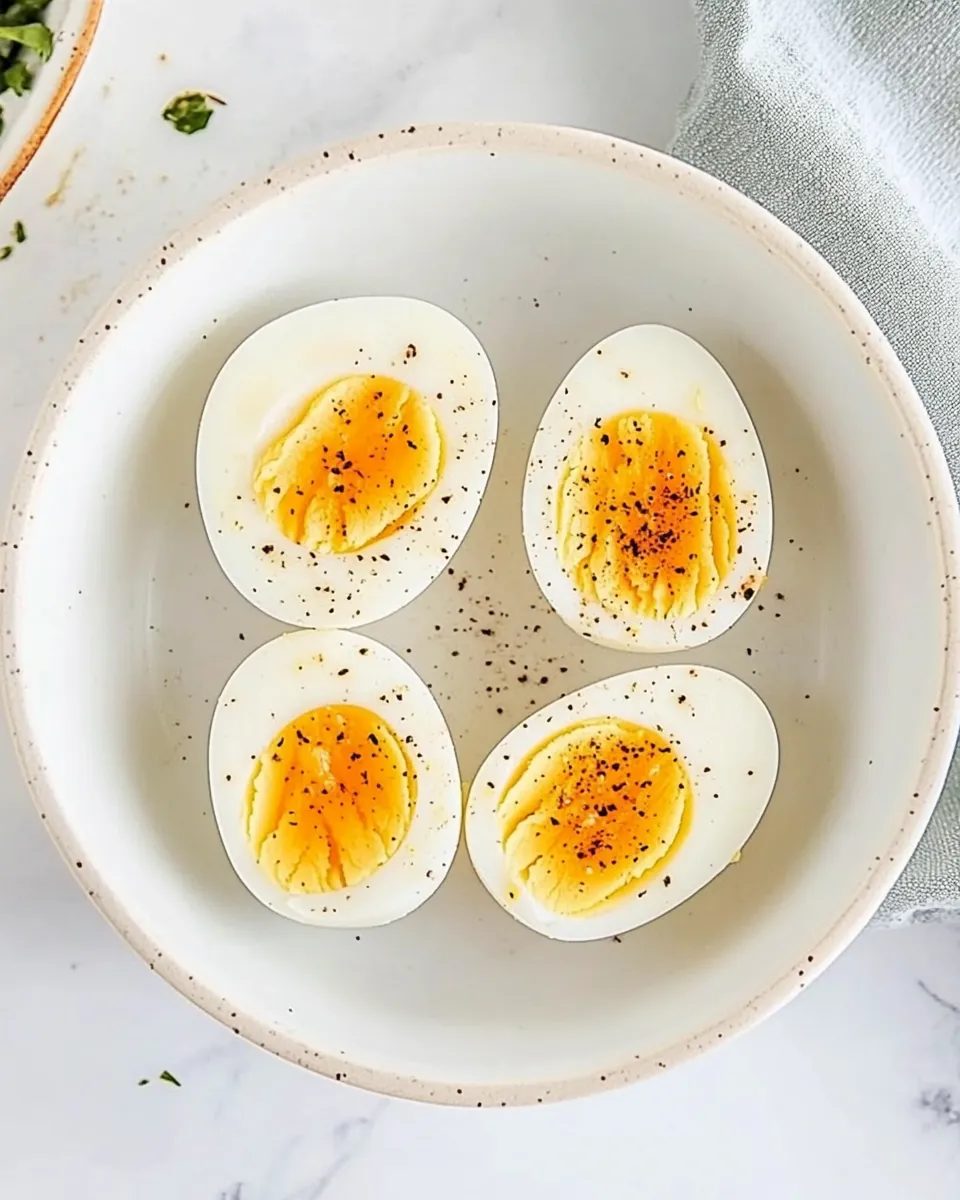
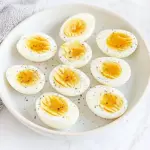
- Remove an egg, gently tap and roll it against the side of the bowl to crack the shell, then peel. Repeat with the remaining eggs—the shells should come off easily.
Why This Recipe Belongs in Your Rotation
This method is consistent. Unlike stovetop boiling where water temperature, pot size, and starting temperature of the eggs vary, the air fryer gives you a controlled environment. You set one temperature, one time, and the results are repeatable.
It’s tidy. No steam, no water spills, no leftover hot pots. The ice bath takes just a few minutes to prepare and guarantees that the yolk stops cooking immediately. You end up with firm whites and yolks that are fully set but not chalky.
It scales in a practical way. If your basket holds more than six without stacking, you can increase batch size. If not, the method is easy to repeat while you prep other parts of a meal.
Texture-Safe Substitutions
When I say “texture-safe,” I mean swaps that won’t break the balance between white and yolk you get from this timing. Here are a few options.
- Use medium or extra-large eggs with a small expected change in texture. Medium eggs may feel slightly firmer; extra-large may need a minute or so more to reach the same yolk firmness.
- If you want a slightly jammy yolk, try reducing cook time by 1–2 minutes, but test one egg first. The 17-minute default produces a fully set yolk that’s not dry.
- Don’t substitute the ice bath. Rapid cooling is what stops carryover cooking; cooling in the refrigerator will continue to cook the yolk and change texture.
Setup & Equipment
Gather these items before you start so the process flows:
- An air fryer with temperature control (model brand doesn’t matter; just confirm it can hit 250°F).
- A single-layer basket or tray so eggs don’t touch or stack.
- Kitchen tongs or a slotted spoon to transfer eggs safely to the ice bath.
- A medium or large mixing bowl for the ice bath that comfortably holds all eggs in a single layer of water.
Set the air fryer where you can work quickly—right next to your prep area—so you can move eggs straight into the ice bath when the cycle ends.
Errors to Dodge
Here are common missteps and how to avoid them.
- Overcrowding the basket. If eggs touch or stack, hot air circulation is uneven. Cook in batches if needed.
- Skipping the ice bath. This is the single biggest cause of overcooked, chalky yolks because the eggs continue to cook from residual heat.
- Using an ice bath that’s too small. If the water temperature spikes when you add hot eggs, it won’t chill the eggs quickly enough. Use a bowl that leaves room for full immersion.
- Not timing from when the air fryer reaches 250°F. Set the basket in, set the temp to 250°F, and run the full 17 minutes—don’t count down from when you press start in a unit that preheats differently. If your unit preheats automatically, still follow the 17-minute cook time for consistency.
Holiday & Seasonal Touches
Hard-boiled eggs are versatile for every season. A few straightforward ideas to make them seasonal:
- Spring/Summer: Turn them into picnic-ready deviled eggs with fresh herbs like chives or dill. Add a sprinkle of smoked paprika or lemon zest for brightness.
- Autumn: Blend the yolk with a smidge of maple syrup and mustard for a sweet-savory deviled filling. Add toasted pumpkin seeds on top for crunch.
- Winter/Holidays: Mix yolks with a touch of horseradish and chopped roasted beets or smoked salmon for a festive spread. Serve on rye or pumpernickel for a seasonal bite.
Pro Tips & Notes
Timing & Consistency
The 17-minute cook at 250°F is calibrated for large eggs straight from the fridge. If your eggs are room temperature, they may finish a bit earlier; consider testing one first. I recommend using a timer and resisting the urge to open the basket during cooking.
Peeling Like a Pro
Tap-and-roll against a bowl or countertop, then peel under running water if shells cling. The air fryer + ice bath combo dramatically reduces cling, but a quick rinse helps remove small shell fragments and keeps the white smooth.
Batch Cooking
Cook in small batches if your basket is tight. You can keep finished eggs in an airtight container in the fridge for up to one week—handy for breakfasts, salads, and snacks.
Safety Notes
Use tongs when moving hot eggs to the ice bath to avoid burns. Let eggs cool fully in the ice bath before handling to make peeling and slicing safer and cleaner.
Freezer-Friendly Notes
Hard-boiled eggs don’t freeze well whole. The whites become rubbery and watery after thawing. If you need longer-term storage for yolks only, you can separate yolks and freeze them mashed with a bit of salt or sugar depending on future use, but keep in mind texture changes.
For practical meal prep, store peeled or unpeeled hard-boiled eggs in the refrigerator for up to one week. Marking the storage date on the container helps avoid keeping them too long.
Top Questions & Answers
Can I cook more or fewer than six eggs at once?
Yes. The instructions are written around six eggs because that’s a common basket fit. If you can place them in a single layer without stacking, increase the count. If they must touch or stack, cook in batches for consistent results.
Will different air fryer brands change the time?
Some models run hotter or cooler. Use the 250°F setting and 17-minute time as your baseline. If your first run yields a slightly softer or firmer yolk than you like, adjust by one minute up or down and note the tweak for that appliance.
Are fresher eggs harder to peel?
Yes. Very fresh eggs can cling more because their pH is lower. If you regularly get very fresh eggs, an older batch typically peels easier. The ice bath still helps a lot with any egg’s peelability.
What about soft-boiled eggs in the air fryer?
This method is for fully set hard-boiled eggs. For soft or jammy yolks, reduce the time and test one egg first—air fryers vary by model, and a small change to minutes dramatically changes yolk texture.
Can I reheat a hard-boiled egg?
Yes. Reheat gently in hot water or slice and microwave covered for short intervals if you’ve removed the shell. Be cautious of steam and bursting; slice before microwaving to avoid pressure build-up.
Before You Go
This air fryer method gives you reliably peelable, consistently cooked eggs with very little active time. Keep the tools ready, respect the ice bath, and you’ll have a week’s worth of versatile protein on hand in under 30 minutes including prep and cooling. Try it once, tweak for your air fryer, and you’ll wonder why you ever boiled on the stovetop.
If you try the method, come back and tell me how your first batch turned out and whether you adjusted the timing for your air fryer model. Small notes from real runs save time for everyone.
Air Fryer Hard-Boiled Eggs
Ingredients
Ingredients
- 6 large eggs
- 3 cupswater
- 8 to 9 ice cubes
Instructions
Instructions
- Place 6 large eggs in a single layer in the air fryer basket. If the basket can't hold all 6 without stacking, cook in batches.
- Set the air fryer to 250°F and cook for 17 minutes for each batch.
- During the last 2 minutes of cooking, prepare an ice bath: pour 3 cups water into a medium or large mixing bowl and add 8 to 9 ice cubes.
- When the cooking cycle finishes, use kitchen tongs to transfer the hot eggs immediately into the ice bath.
- Let the eggs sit in the ice bath for 8 to 10 minutes.
- Remove an egg, gently tap and roll it against the side of the bowl to crack the shell, then peel. Repeat with the remaining eggs—the shells should come off easily.
Equipment
- Air Fryer
- Mixing Bowl
- Kitchen tongs
Notes
You can store hard-boiled eggs in your fridge for up to 1 week.
If your air fryer does not go below 300 degrees F, try different settings than “air fry”. Many times the “bake” setting will let you set the temperature to 250 degrees.
Please note, that the nutrition value can vary depending on what product you use. The information below is an estimate. Always use a calorie counter you are familiar with.