
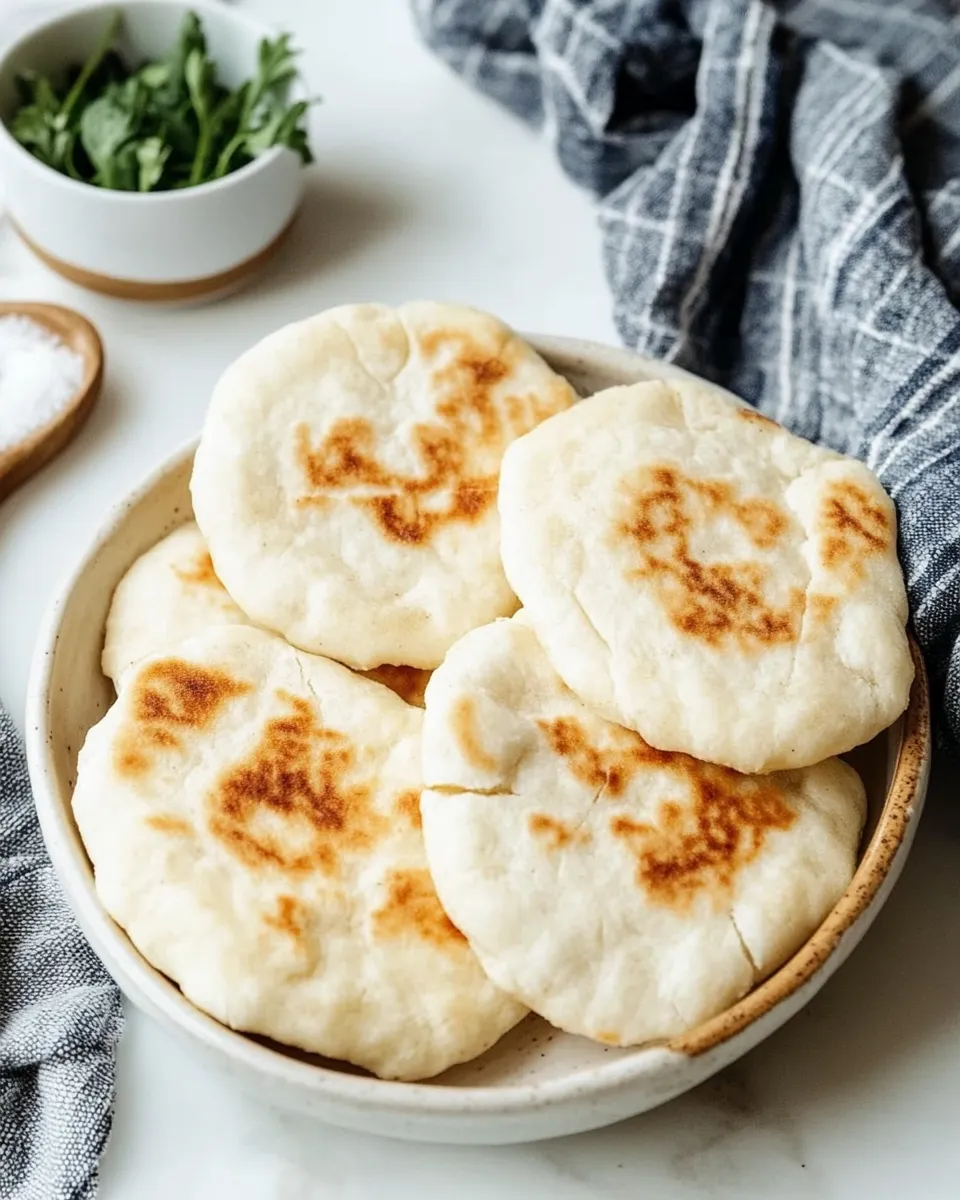
Arepas are one of those simple pleasures that make weeknights feel special and weekends feel indulgent. They’re hands-on, forgiving, and endlessly customizable—crispy outside, soft and cheesy inside when you follow this version. I love how quickly they come together, and how a little bit of cheese turns them into something utterly comforting.
This recipe uses masarepa flour and two kinds of mozzarella to build a tender, cheesy interior and a golden crust. The technique is straightforward: hydrate, mix, shape, a quick sear, then stuff and finish. No complicated equipment. No long rising times. Just a short, satisfying process that yields delicious, portable cakes of corn-and-cheese goodness.
Below I’ll walk you through exactly what I use, step-by-step instructions, troubleshooting tips, sensible substitutes for allergies, and ways to make these tonight. If you want hallmarks: crispy edges, pillowy center, and melted mozzarella inside—this is the method that gets you there consistently.
What We’re Using
- 1 teaspoon kosher salt (15g) — balances flavor; dissolve in water for even distribution.
- 1 2/3 cup warm water (380ml) — hydrates the masarepa; warm (not hot) helps the dough come together smoothly.
- 250 grams masarepa flour — pre-cooked white corn flour (this is the recipe’s base; don’t use regular cornmeal).
- 1 tablespoon unsalted butter, at room temperature — adds richness and a softer crumb; reserve a small piece to brush the skillet.
- 1/4 cup finely shredded mozzarella cheese — folded into the dough to give pockets of melty chew.
- 3 ounces sliced mozzarella — for stuffing inside the cooked arepas before the final melt.
How to Prepare Arepas
- In a medium bowl, stir 1 teaspoon kosher salt into 1 2/3 cups (380 ml) warm water until the salt dissolves.
- Add 250 grams masarepa flour to the salted water and mix with a spoon until the mixture is mostly combined. Transfer to a clean surface or continue in the bowl and knead by hand until the dough comes together in a smooth, cohesive mass.
- From the 1 tablespoon unsalted butter, set aside a small piece to use for brushing the skillet later and add the remaining butter to the dough. Knead the dough again until the butter is fully incorporated.
- Fold the 1/4 cup finely shredded mozzarella cheese into the dough until evenly distributed.
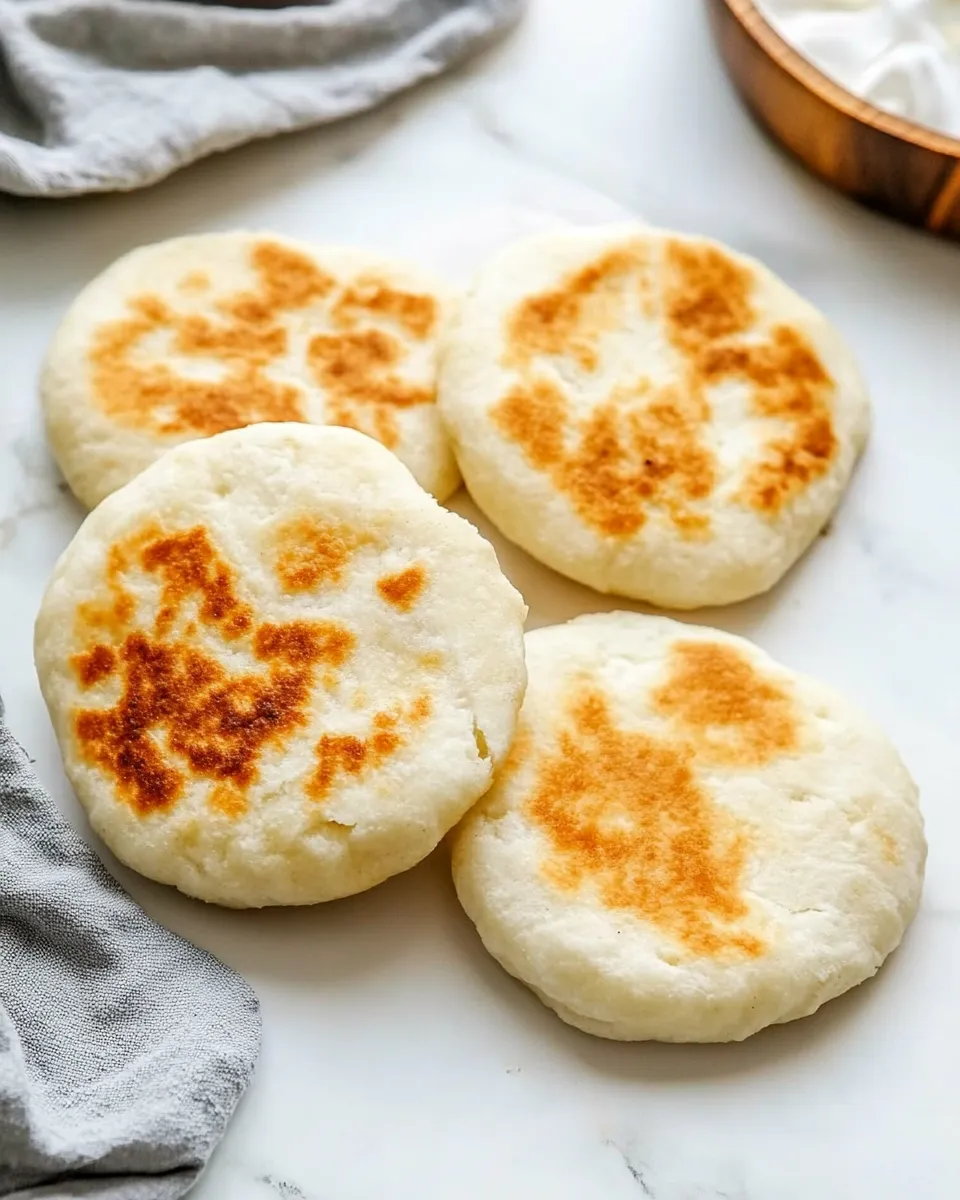
- Divide the dough into portions and shape each portion into a ball, then flatten with your palms into patties about 1/2 inch thick and roughly 3 inches in diameter.
- Preheat a cast-iron or nonstick skillet over medium heat. Brush the skillet with the small piece of reserved butter.
- When the skillet is hot, add the arepa patties (work in batches if needed) and cook until lightly golden brown, about 4 to 5 minutes per side.
- Remove cooked arepas from the skillet, slice each open, place sliced mozzarella (from the 3 ounces sliced mozzarella) inside, then return the filled arepas to the skillet and heat just until the cheese melts.
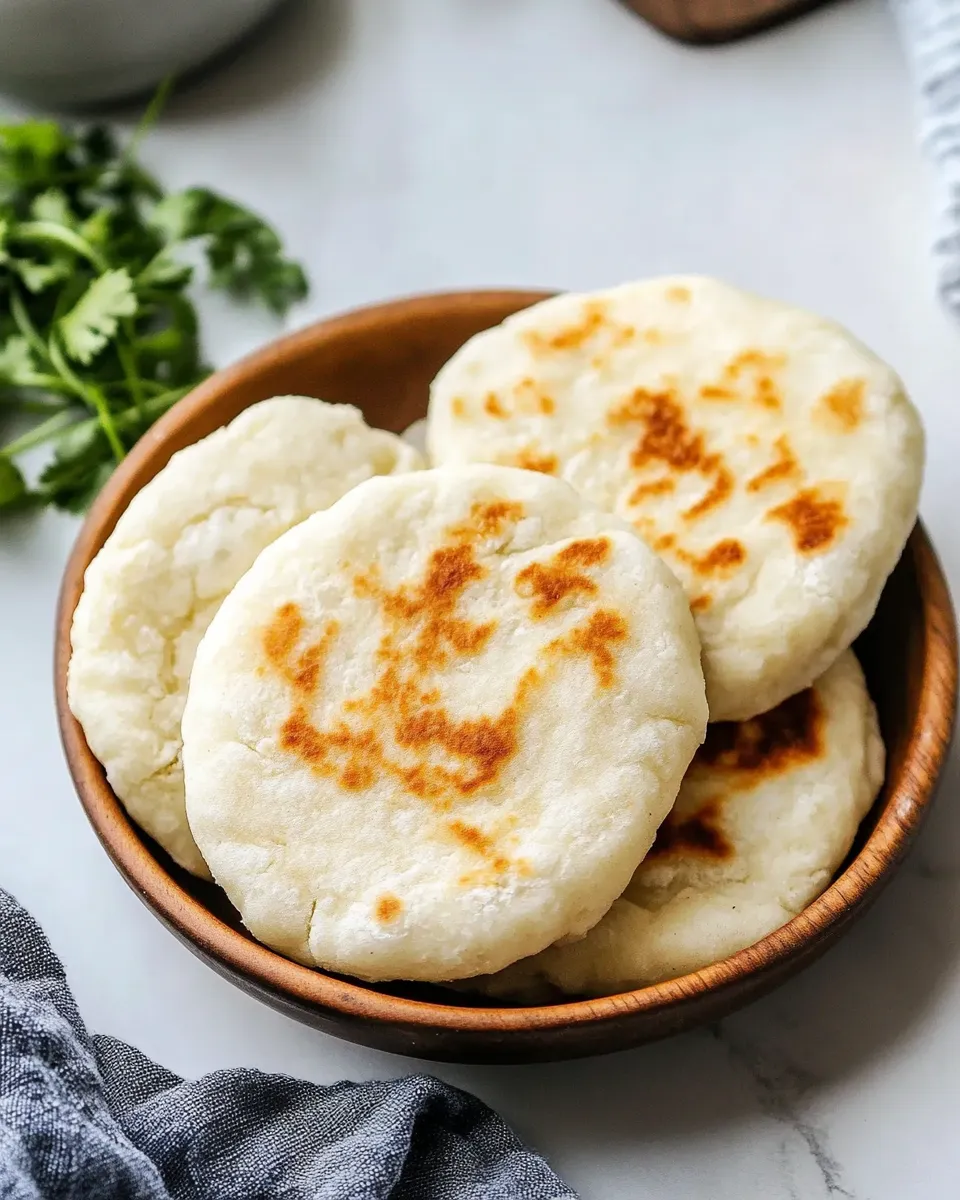
- Serve the arepas warm.
Why It’s Crowd-Pleasing
Texturally, these are adored because they combine a crisp, golden exterior with a soft, cheesy interior. That contrast is gratifying on every bite. The shredded mozzarella worked into the dough gives little pockets of creamy bits, while the sliced mozzarella inside becomes that irresistible molten center when warmed the second time.
They’re also incredibly approachable. People can eat them with their hands, customize fillings on the fly, and share easily. You can make a batch quickly and keep the cooked arepas warm, letting hungry friends or family assemble their own with simple fillings. The result feels both familiar and slightly indulgent—comfort food without fuss.
Finally, flavor-wise they’re mild and inviting. The corn base tastes clean and slightly sweet; the salt brings balance; the butter and cheese provide savory richness. That makes them a crowd-pleasing canvas for many accompaniments, from quick pickles to roasted vegetables, avocado, or savory meats.
Allergy-Friendly Substitutes
Here are practical swaps and considerations if someone has dietary restrictions. Use these thoughtfully—substitutes will change texture and flavor to varying degrees.
Dairy-free / Vegan options
- Butter — swap the 1 tablespoon unsalted butter with a neutral oil (like vegetable or light olive oil) or a vegan butter alternative. The dough will be slightly less rich but still hold together.
- Mozzarella (shredded and sliced) — replace both the shredded and sliced mozzarella with a high-melt dairy-free cheese if you want melty pockets. If a suitable vegan melting cheese isn’t available, omit the cheese in the dough and use a savory filling (smashed beans, seasoned vegetables) instead.
Corn allergy or intolerance
- Masarepa flour is the core ingredient and is made from pre-cooked corn. If someone has a true corn allergy, this exact recipe is not safe. Consider making a different type of flatbread or plantain-based patties (not covered here) instead.
Essential Tools for Success
- Medium mixing bowl — room to dissolve salt and hydrate the flour.
- Spoon and clean surface or bench — for mixing and kneading by hand.
- Kitchen scale or measuring cups — the recipe gives grams and cups; a scale helps accuracy with the 250 g masarepa.
- Cast-iron or nonstick skillet — cast iron gives the best crust, nonstick is forgiving for beginners.
- Small spatula or turner — for flipping without deforming the patties.
- Sharp knife — to slice arepas open for stuffing.
Learn from These Mistakes
- Using water that’s too hot: if the water is scalding, the dough becomes gummy and harder to handle. Warm water is enough to hydrate without denaturing the flour.
- Not dissolving the salt evenly: undissolved salt leads to uneven seasoning. Stir it into the water first as instructed.
- Overworking or under-kneading: knead until a smooth, cohesive mass forms. Too little and the arepas crumble; too much and they tighten up.
- Skipping the reserved butter for the skillet: that small piece helps form a golden, slightly caramelized contact surface. A dry pan can stick and prevent a good crust.
- Crowding the skillet: give each patty space. Crowding lowers the pan temperature and leads to uneven browning.
- Slicing open too early: letting arepas rest for a minute after the first sear keeps them intact. Slicing immediately can cause them to tear.
- Overfilling with sliced cheese: too much sliced mozzarella can prevent the arepa from closing and make cleanup messy. Use the 3 ounces as a guide.
Seasonal Flavor Boosts
- Spring: brighten with quick pickled red onions or a salsa verde. A smear of herby avocado adds freshness.
- Summer: use charred corn, grilled peppers, or a tomato-and-basil relish as fillings for a fresh contrast to the warm corn base.
- Autumn: roasted mushrooms, caramelized onions, and a sprinkle of smoked paprika bring earthier notes that pair well with the corn and cheese.
- Winter: braised chicken or pulled pork with a tangy slaw turns these into hearty, warming handhelds.
Method to the Madness
Why dissolve salt in water first? It ensures even seasoning throughout the dough. Masarepa (pre-cooked corn flour) absorbs water differently from wheat flour; it needs time and gentle kneading to hydrate fully. That first mix with a spoon loosens the flour, then a short knead brings the dough to a smooth, cohesive state.
Adding butter to the dough and reserving a small bit for the skillet serves two purposes: the butter in the dough adds a tender crumb and richness, while brushing the pan with the reserved bit improves browning and flavor on contact. Folding shredded mozzarella into the dough creates small pockets of soft cheese distributed throughout. The final step—slicing and adding sliced mozzarella, then returning the arepas to the pan—melts the cheese into a gooey center without overcooking the arepa exterior.
Cooking time (about 4–5 minutes per side) is long enough to form a golden crust and warm through without burning. A medium heat keeps the exterior from browning too quickly before the interior is heated. The second pass in the skillet after stuffing is quick—just enough to melt the sliced cheese.
Storage & Reheat Guide
- Short-term (refrigerator): store cooked arepas in an airtight container for up to 3 days. Reheat in a skillet over low-medium heat to restore a bit of crispness, or in a 350°F (175°C) oven until warmed through.
- Freezing: cooked arepas freeze well. Let them cool completely, wrap individually or layer with parchment in a freezer container, and freeze up to 2 months. Reheat from frozen in a skillet with a lid to warm through, or in a 350°F (175°C) oven until hot.
- Raw dough: shaped patties can be refrigerated for several hours before cooking. If you need to store longer, freeze shaped patties separated by parchment. Cook from frozen but allow a few extra minutes per side.
- Reheating stuffed arepas: if they were previously filled with cheese, reheat gently to avoid overbrowning while ensuring the cheese melts. A covered skillet over low heat works well.
Ask & Learn
Q: Can I make these without the shredded mozzarella folded into the dough?
A: Yes. The shredded mozzarella contributes to internal texture and pockets of melt. Omit it if you prefer, but expect a slightly different mouthfeel. The sliced mozzarella for stuffing is the key to a melty center.
Q: Will other corn flours work instead of masarepa?
A: This recipe relies on masarepa (pre-cooked corn flour). Other corn products like regular cornmeal or instant polenta behave differently and won’t give the same texture. If you can’t find masarepa, look for brands labeled specifically for arepas or pre-cooked white corn flour.
Q: Can I bake instead of pan-frying?
A: Pan-searing gives the characteristic crust. You can finish in a 375°F (190°C) oven to warm through after a short sear, but fully baking without searing will yield a different texture—less crusty on the outside.
Make It Tonight
Ready for a simple plan: dissolve 1 teaspoon kosher salt in 1 2/3 cups (380 ml) warm water, stir in 250 grams masarepa flour, knead, fold in 1/4 cup finely shredded mozzarella, form patties, give them 4–5 minutes per side in a butter-brushed skillet, slice, tuck in the 3 ounces sliced mozzarella, and heat until melty. That’s it. If you have 30–40 minutes, you can have a batch of warm, cheesy arepas on the table.
Make a double batch if you want ready-to-reheat leftovers. Keep your fillings simple tonight—maybe a quick slaw or sliced avocado—and let the corn-and-cheese foundation shine. Enjoy.
Arepas
Ingredients
Ingredients
- ?1 teaspoonkosher salt (15 g)
- ?1 2/3 cupwarm water (380 ml)
- ?250 gramsmasarepa flour
- ?1 tablespoonunsalted butter at room temperature
- ?1/4 cupfinely shredded mozzarella cheese
- ?3 ouncessliced mozzarella
Instructions
Instructions
- In a medium bowl, stir 1 teaspoon kosher salt into 1 2/3 cups (380 ml) warm water until the salt dissolves.
- Add 250 grams masarepa flour to the salted water and mix with a spoon until the mixture is mostly combined. Transfer to a clean surface or continue in the bowl and knead by hand until the dough comes together in a smooth, cohesive mass.
- From the 1 tablespoon unsalted butter, set aside a small piece to use for brushing the skillet later and add the remaining butter to the dough. Knead the dough again until the butter is fully incorporated.
- Fold the 1/4 cup finely shredded mozzarella cheese into the dough until evenly distributed.
- Divide the dough into portions and shape each portion into a ball, then flatten with your palms into patties about 1/2 inch thick and roughly 3 inches in diameter.
- Preheat a cast-iron or nonstick skillet over medium heat. Brush the skillet with the small piece of reserved butter.
- When the skillet is hot, add the arepa patties (work in batches if needed) and cook until lightly golden brown, about 4 to 5 minutes per side.
- Remove cooked arepas from the skillet, slice each open, place sliced mozzarella (from the 3 ounces sliced mozzarella) inside, then return the filled arepas to the skillet and heat just until the cheese melts.
- Serve the arepas warm.
Equipment
- Mixing Bowl
- Spoon
- clean surface
- Cast-Iron Skillet
- nonstick skillet
Notes
Equipment:
Non-stick Skillet
|
P.A.N. Flour
|
Stainless-Steel Bowls
|


